
How To Make Air Dry Clay At Home

Beginner-friendly templates, step-by-step guides,
and weekly project ideas in your inbox.
Making your own air dry clay is a wonderfully rewarding craft project. It’s a fantastic way to create custom pieces without needing a kiln or special equipment.
I’ve personally experimented with countless recipes over the years, seeking the perfect balance of pliability, smoothness, and durability. This guide distills that experience into a straightforward, reliable method.
You’ll soon discover how simple it is to whip up a batch of versatile clay right in your kitchen, ready for all your creative ideas.

Quick Overview
Creating your own air dry clay at home is a fun and economical alternative to store-bought options. You’ll combine simple pantry staples to form a smooth, workable dough that hardens beautifully as it air dries. This guide will walk you through each step, ensuring a successful batch of clay for your next crafting adventure.
- Time needed: Approximately 20-30 minutes active cooking and kneading, plus cooling time.
- Difficulty: Beginner
- What you’ll need: Cornstarch, baking soda, water, a non-stick pot, and a wooden spoon.
Step-by-Step Instructions
Step 1: Gather Your Ingredients and Tools
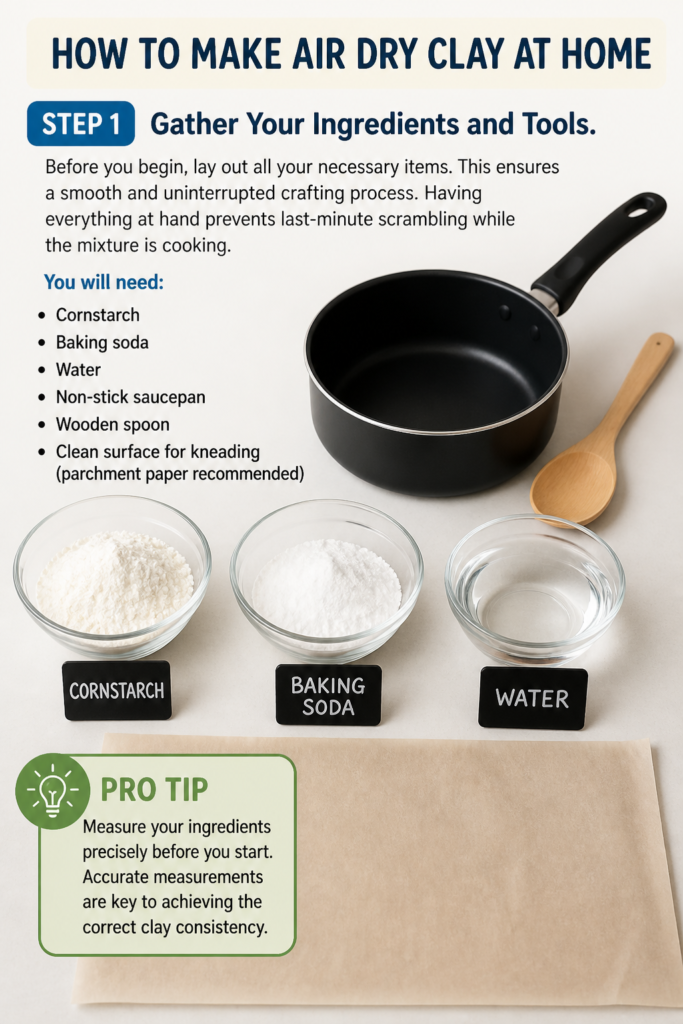
Before you begin, lay out all your necessary items. This ensures a smooth and uninterrupted crafting process. Having everything at hand prevents last-minute scrambling while the mixture is cooking.
You will need cornstarch, baking soda, and water. A non-stick saucepan is ideal for cooking the mixture, along with a sturdy wooden spoon for stirring. Prepare a clean surface for kneading later, perhaps covered with parchment paper.
Pro Tip: Measure your ingredients precisely before you start. Accurate measurements are key to achieving the correct clay consistency.
Step 2: Combine Dry Ingredients in a Pot
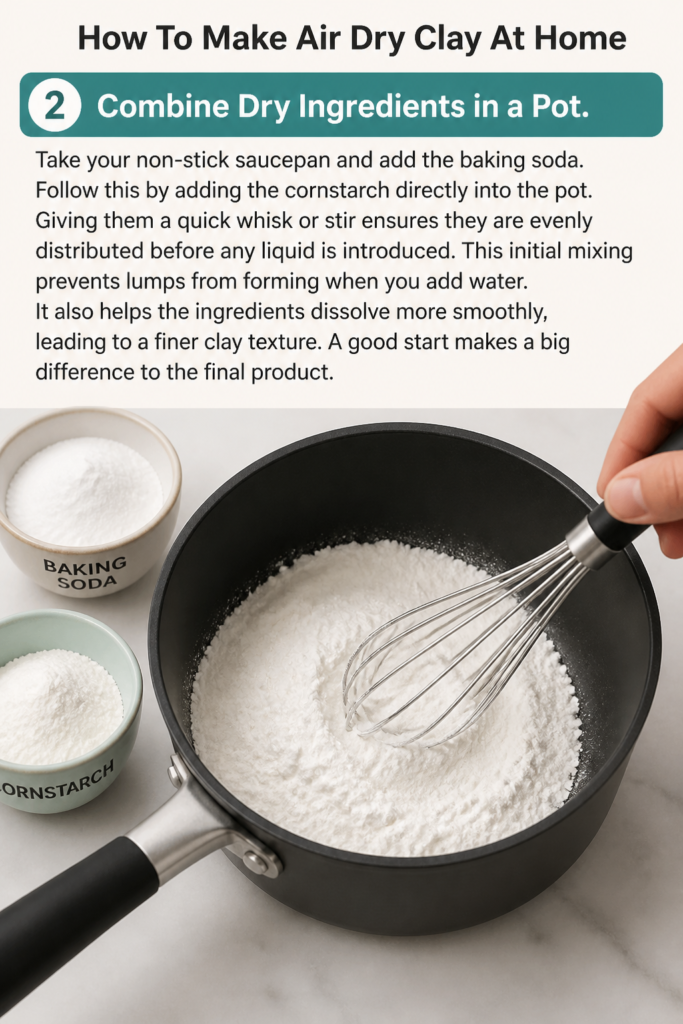
Take your non-stick saucepan and add the baking soda. Follow this by adding the cornstarch directly into the pot. Giving them a quick whisk or stir ensures they are evenly distributed before any liquid is introduced.
This initial mixing prevents lumps from forming when you add water. It also helps the ingredients dissolve more smoothly, leading to a finer clay texture. A good start makes a big difference to the final product.
Step 3: Gradually Add Water and Mix
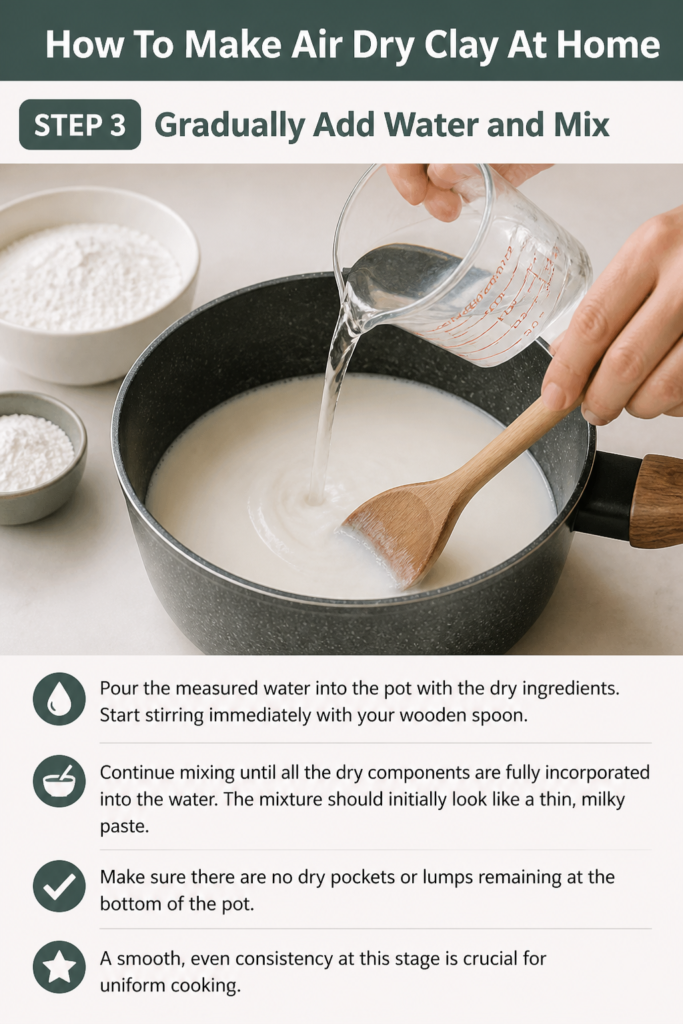
Pour the measured water into the pot with the dry ingredients. Start stirring immediately with your wooden spoon. Continue mixing until all the dry components are fully incorporated into the water.
The mixture should initially look like a thin, milky paste. Make sure there are no dry pockets or lumps remaining at the bottom of the pot. A smooth, even consistency at this stage is crucial for uniform cooking.
Step 4: Cook Over Medium Heat
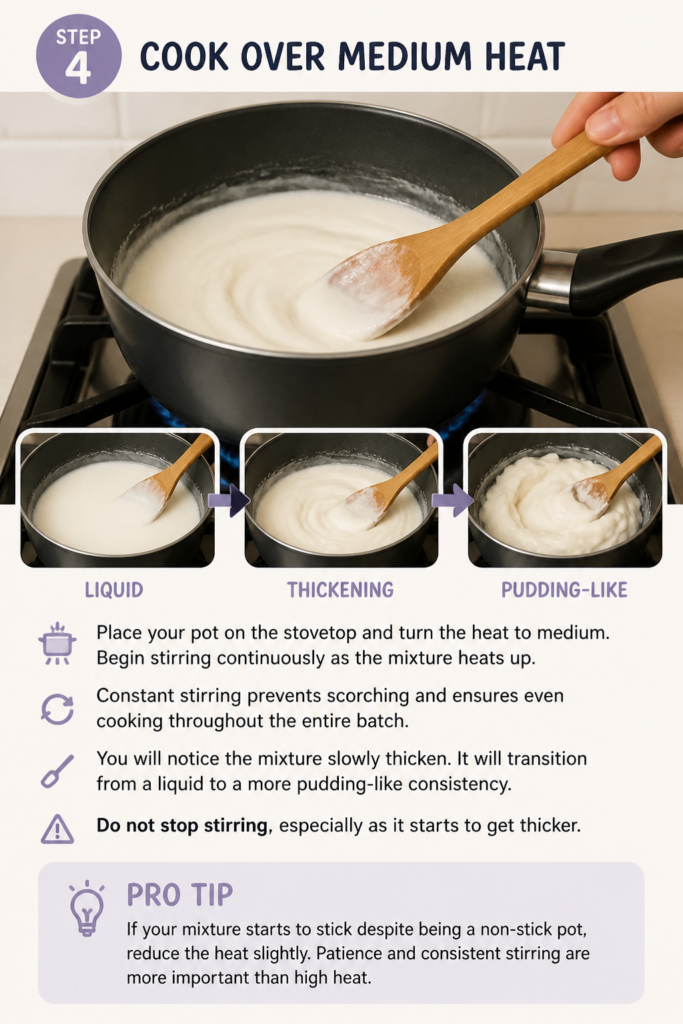
Place your pot on the stovetop and turn the heat to medium. Begin stirring continuously as the mixture heats up. Constant stirring prevents scorching and ensures even cooking throughout the entire batch.
You will notice the mixture slowly thicken. It will transition from a liquid to a more pudding-like consistency. Do not stop stirring, especially as it starts to get thicker.
Pro Tip: If your mixture starts to stick despite being a non-stick pot, reduce the heat slightly. Patience and consistent stirring are more important than high heat.
Step 5: Stir Until a Dough Forms
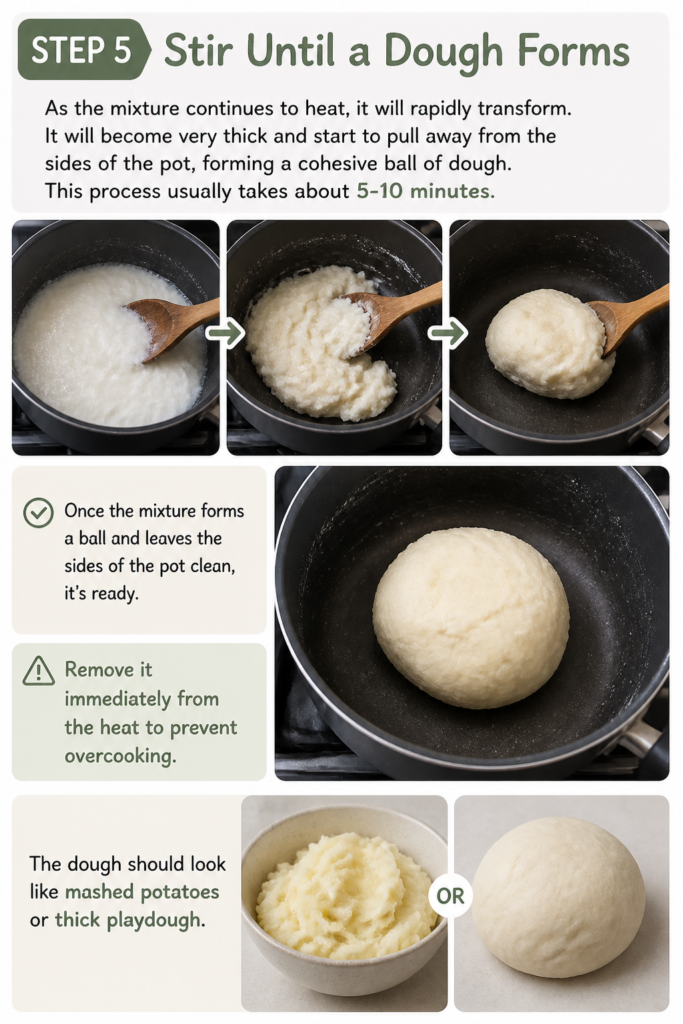
As the mixture continues to heat, it will rapidly transform. It will become very thick and start to pull away from the sides of the pot, forming a cohesive ball of dough. This process usually takes about 5-10 minutes.
Once the mixture forms a ball and leaves the sides of the pot clean, it’s ready. Remove it immediately from the heat to prevent overcooking. The dough should look like mashed potatoes or thick playdough.
Step 6: Cool and Knead the Dough
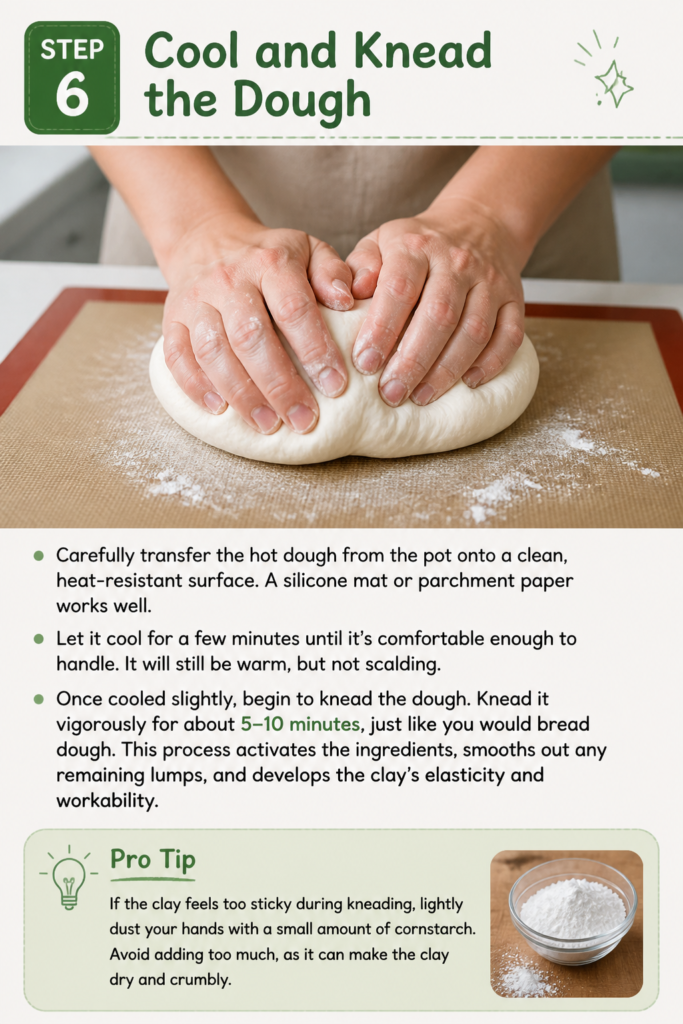
Carefully transfer the hot dough from the pot onto a clean, heat-resistant surface. A silicone mat or parchment paper works well. Let it cool for a few minutes until it’s comfortable enough to handle. It will still be warm, but not scalding.
Once cooled slightly, begin to knead the dough. Knead it vigorously for about 5-10 minutes, just like you would bread dough. This process activates the ingredients, smooths out any remaining lumps, and develops the clay’s elasticity and workability.
Pro Tip: If the clay feels too sticky during kneading, lightly dust your hands with a small amount of cornstarch. Avoid adding too much, as it can make the clay dry and crumbly.
Step 7: Store Your Freshly Made Clay
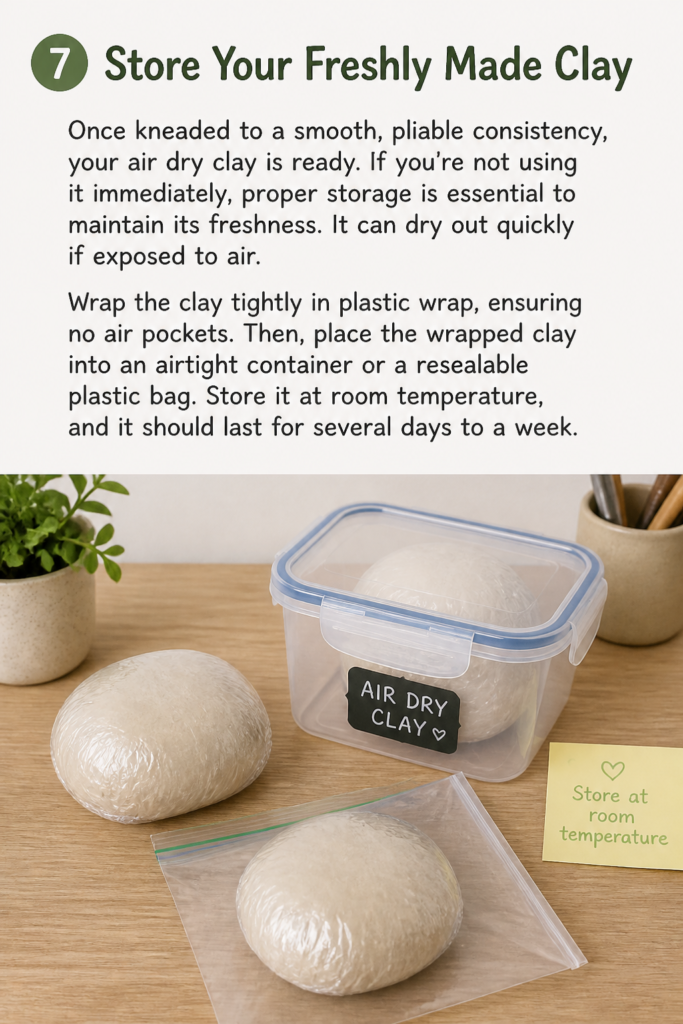
Once kneaded to a smooth, pliable consistency, your air dry clay is ready. If you’re not using it immediately, proper storage is essential to maintain its freshness. It can dry out quickly if exposed to air.
Wrap the clay tightly in plastic wrap, ensuring no air pockets. Then, place the wrapped clay into an airtight container or a resealable plastic bag. Store it at room temperature, and it should last for several days to a week.
Step 8: Get Creative with Your Clay
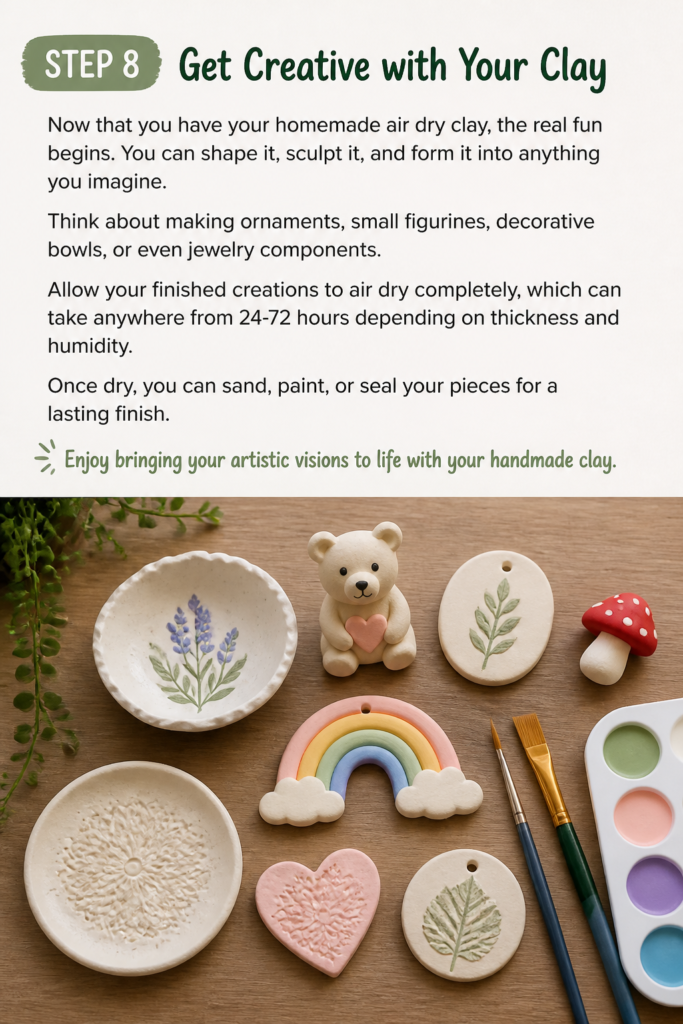
Now that you have your homemade air dry clay, the real fun begins. You can shape it, sculpt it, and form it into anything you imagine. Think about making ornaments, small figurines, decorative bowls, or even jewelry components.
Allow your finished creations to air dry completely, which can take anywhere from 24-72 hours depending on thickness and humidity. Once dry, you can sand, paint, or seal your pieces for a lasting finish. Enjoy bringing your artistic visions to life with your handmade clay.
Common Mistakes to Avoid
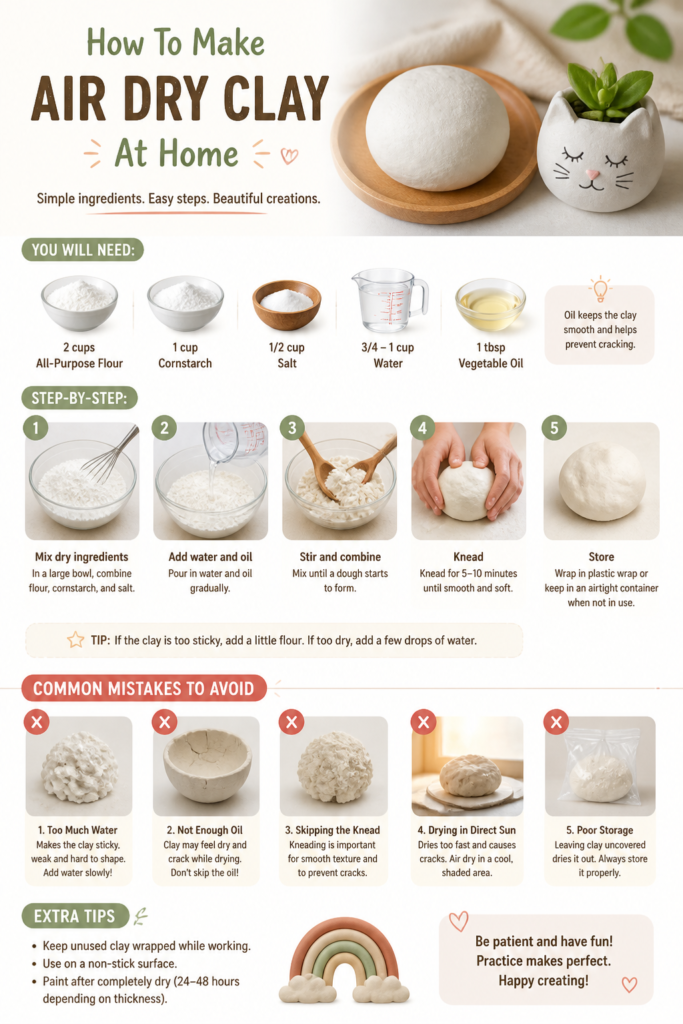
Adding Too Much Water
A common pitfall is adding extra water if the mixture seems too thick initially. This often results in a sticky, unmanageable clay that takes much longer to cook down, if it ever does properly. Stick to the recipe’s water measurement and trust the cooking process to thicken it.
Stopping Stirring During Cooking
Pausing your stirring, especially as the mixture thickens, can lead to scorching on the bottom of the pot. This not only wastes ingredients but also introduces burnt bits into your clay, affecting its texture and appearance. Keep that spoon moving constantly to ensure even cooking and prevent sticking.
Overcooking the Clay
Leaving the clay on the heat for too long after it has formed a ball can make it crumbly and stiff. Overcooked clay loses its pliability and becomes difficult to knead and sculpt. Remove the clay from the heat as soon as it pulls away from the sides of the pot cleanly.
Not Kneading Enough
Skipping or rushing the kneading step will leave you with a less uniform and less elastic clay. Proper kneading is vital for developing the clay’s smooth texture and workability. Dedicate the full 5-10 minutes to thoroughly knead your clay for the best results.
Troubleshooting
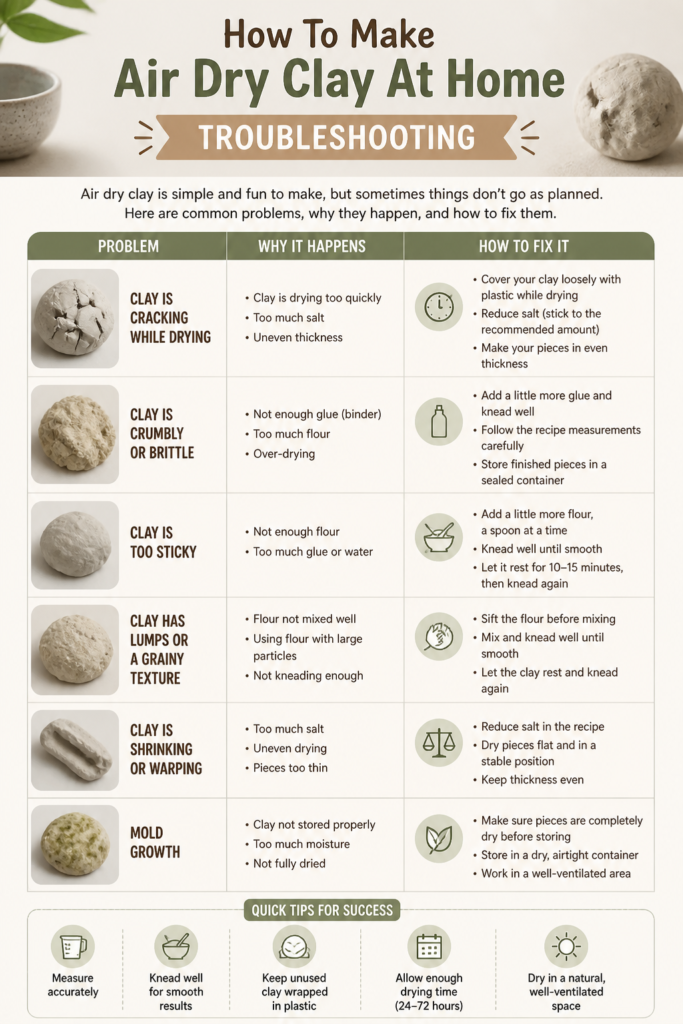
Clay is Too Sticky
If your clay feels excessively sticky even after kneading, it likely has too much moisture. Try kneading in a tiny amount of cornstarch at a time, dusting your hands and the work surface. Be conservative; adding too much cornstarch can quickly make it dry.
Clay is Too Crumbly or Stiff
A crumbly or stiff clay often indicates it was overcooked or didn’t have enough moisture to begin with. You can try to revive it by kneading in a few drops of water at a time. Work the water in slowly and thoroughly until the clay becomes more pliable.
Clay Has Lumps
Lumps usually occur if the dry ingredients weren’t mixed well before adding water, or if stirring was inconsistent during cooking. For minor lumps, extended kneading can often smooth them out. If the lumps are significant, the batch might be best for less detailed projects or a fresh start.
Key Takeaways
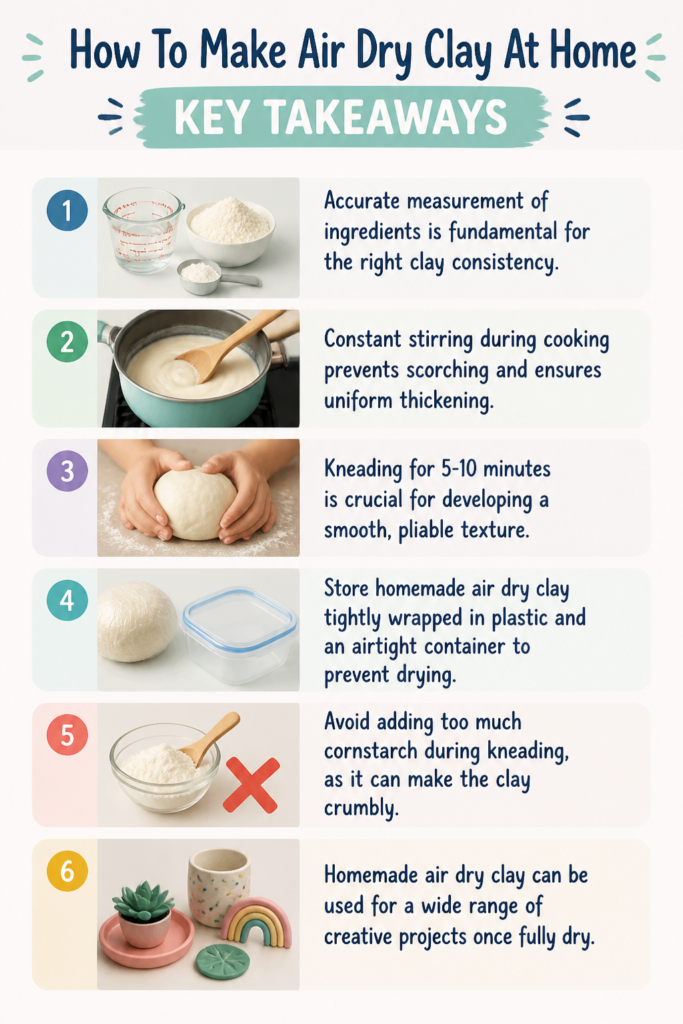
- Accurate measurement of ingredients is fundamental for the right clay consistency.
- Constant stirring during cooking prevents scorching and ensures uniform thickening.
- Kneading for 5-10 minutes is crucial for developing a smooth, pliable texture.
- Store homemade air dry clay tightly wrapped in plastic and an airtight container to prevent drying.
- Avoid adding too much cornstarch during kneading, as it can make the clay crumbly.
- Homemade air dry clay can be used for a wide range of creative projects once fully dry.
Frequently Asked Questions
Can I add color to my homemade air dry clay?
Yes, you absolutely can add color. The best time to do this is during the kneading stage. Add a few drops of food coloring or acrylic paint to the warm clay and knead it in thoroughly until the color is evenly distributed.
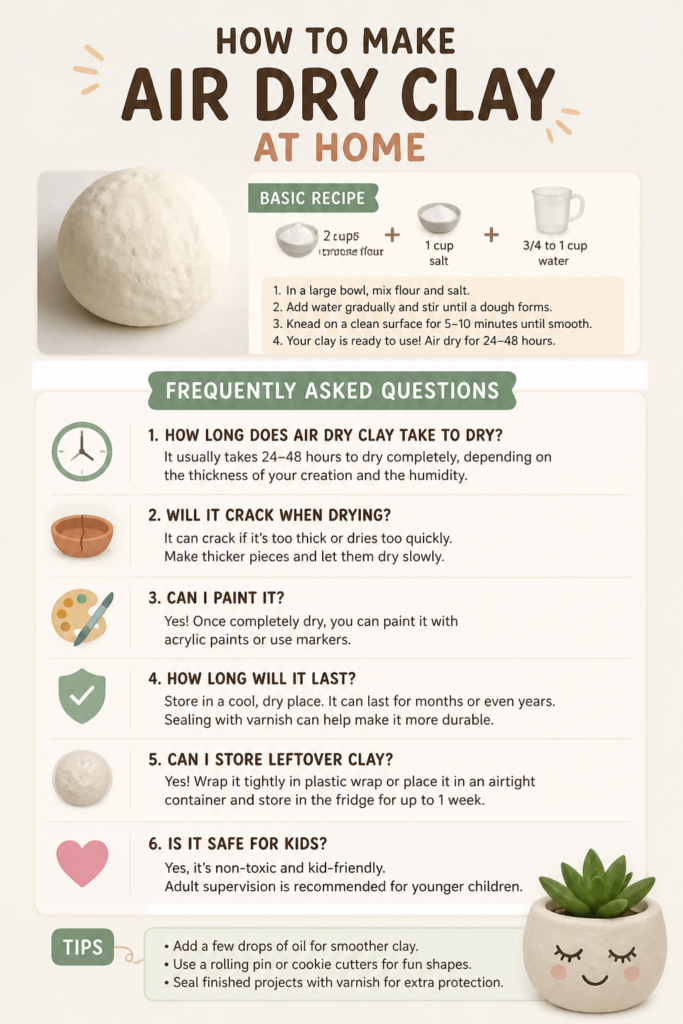
How long does homemade air dry clay take to dry?
Drying time varies significantly based on the thickness of your creation and the humidity in your environment. Thin pieces might dry in 24 hours, while thicker items can take up to 72 hours or even longer. Flip your pieces periodically to ensure even drying.
Is this clay safe for children?
Since this recipe uses food-grade ingredients like cornstarch and baking soda, it is generally considered safe for children. However, supervision is always recommended, especially for very young children. Ensure they understand it’s not for eating.
How long does homemade air dry clay last?
When stored correctly in an airtight container at room temperature, homemade air dry clay typically lasts for about one week. If you notice any signs of mold or a strange odor, it’s best to discard the batch.
Our Top Recommended Finds
- Non-Stick Saucepan: A good quality non-stick pan makes cooking the clay much easier, preventing sticking and burning.
- Silicone Mat: Ideal for kneading the warm clay, a silicone mat provides a non-stick surface and is easy to clean.
- Basic Clay Tool Set: While not strictly necessary, a simple set of sculpting tools can greatly enhance your ability to shape and detail your clay creations.
Embrace Your Inner Sculptor
You now possess the knowledge to create your very own batch of air dry clay. This simple recipe opens up a world of possibilities for crafting and artistic expression. Don’t hesitate to experiment with colors and forms.
Consider trying out different projects, from intricate jewelry to charming home decor. The satisfaction of working with clay you made yourself is truly unmatched. Go ahead, gather your ingredients, and start crafting something beautiful today.
Beginner-friendly templates, step-by-step guides,
and weekly project ideas in your inbox.