🧶 How To Make A Magic Circle In Crochet

Beginner-friendly templates, step-by-step guides,
and weekly project ideas in your inbox.
Starting a new crochet project often begins with a solid foundation.
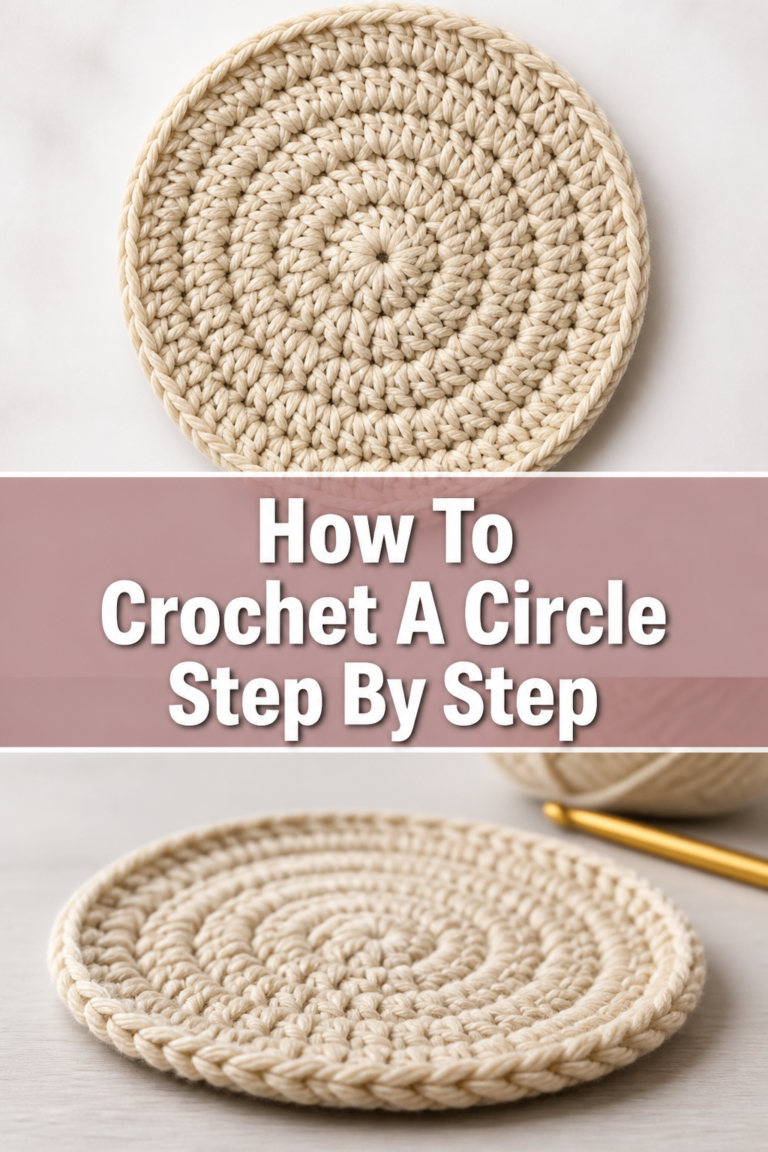
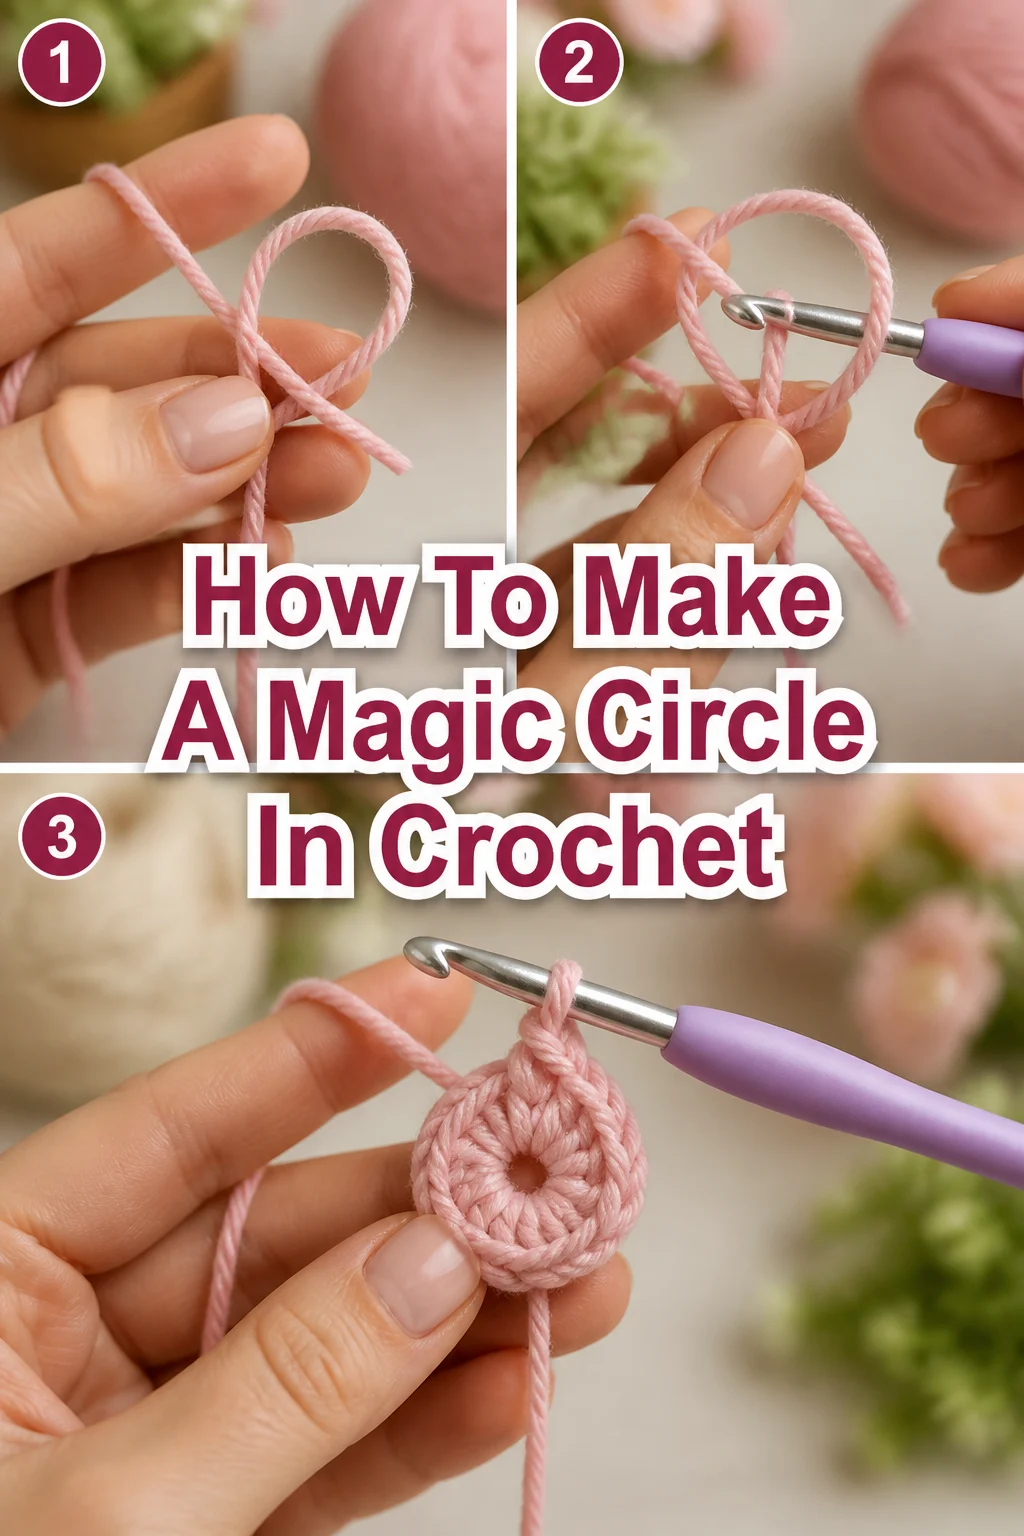
The magic circle, also known as a magic ring or adjustable ring, is key for projects worked in the round.
I’ve used this technique countless times for amigurumi and hats, and I’m excited to share my foolproof method with you.

Quick Overview
This guide will show you how to create a tight, seamless center for any circular crochet project. Mastering this skill opens up a world of possibilities for your crafting.
- Time needed: 10-15 minutes (to learn and practice)
- Difficulty: Beginner (once you get the hang of it)
- What you’ll need: Yarn, crochet hook, scissors
Step-by-Step Instructions
Let’s walk through each action carefully. Take your time with every step.
Step 1: Position Your Yarn
Hold the yarn tail in your non-dominant hand. Let it drape over your palm.
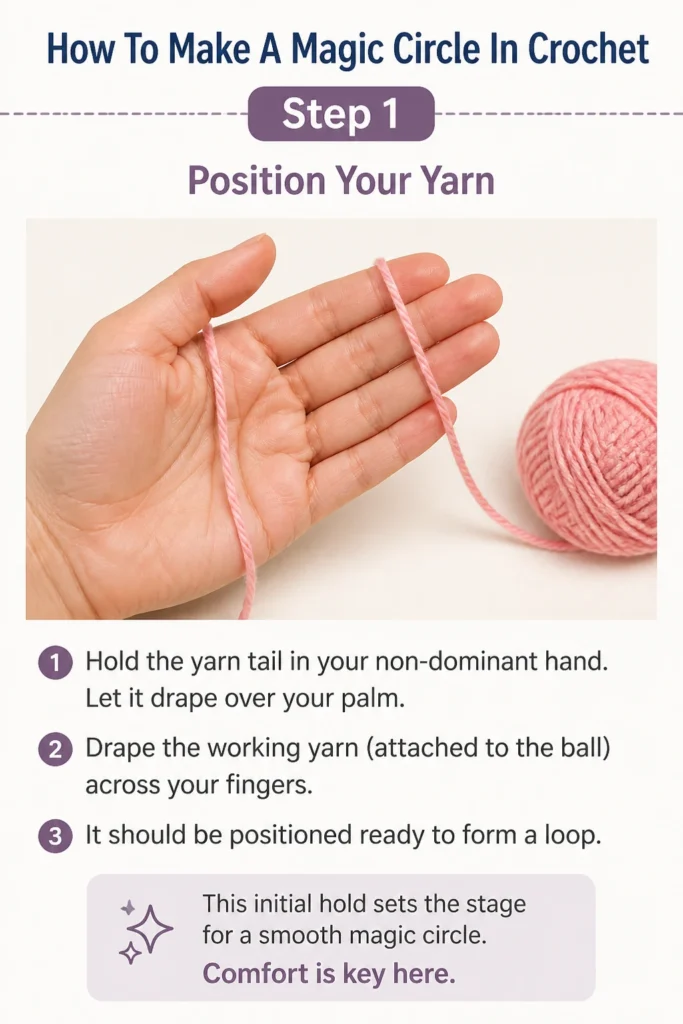
Drape the working yarn (attached to the ball) across your fingers. It should be positioned ready to form a loop.
This initial hold sets the stage for a smooth magic circle. Comfort is key here.
Step 2: Form the Loop
Lay the yarn tail across your palm, letting it hang down.
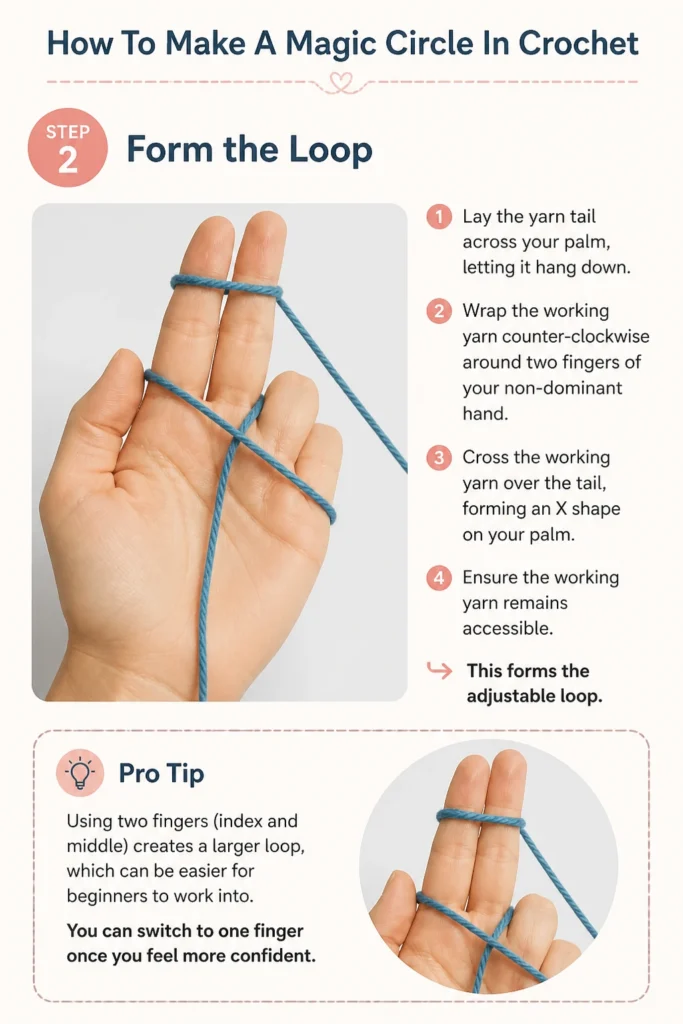
Wrap the working yarn counter-clockwise around two fingers of your non-dominant hand. Cross the working yarn over the tail, forming an “X” shape on your palm.
Ensure the working yarn remains accessible. This forms the adjustable loop.
Pro Tip: Using two fingers (index and middle) creates a larger loop, which can be easier for beginners to work into. You can switch to one finger once you feel more confident.
Step 3: Insert Your Hook
Slide your crochet hook under the first strand of yarn on your palm. This is the strand closest to your fingertips.
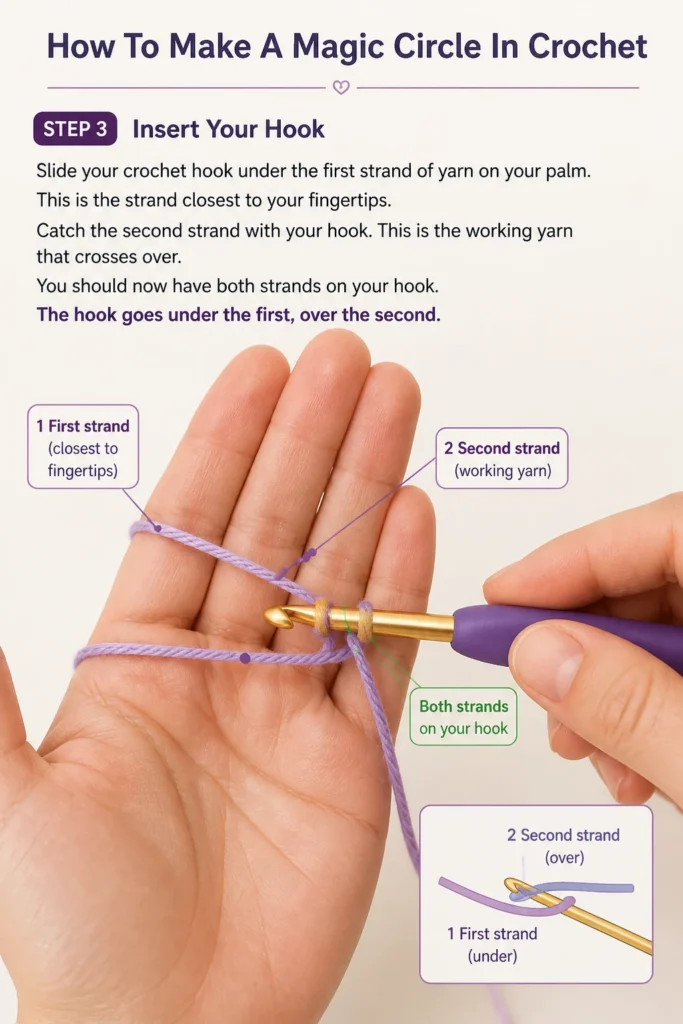
Catch the second strand with your hook. This is the working yarn that crosses over.
You should now have both strands on your hook. The hook goes under the first, over the second.
Step 4: Yarn Over and Pull Up a Loop
Yarn over with the working yarn. This means wrapping the yarn from back to front over your hook.
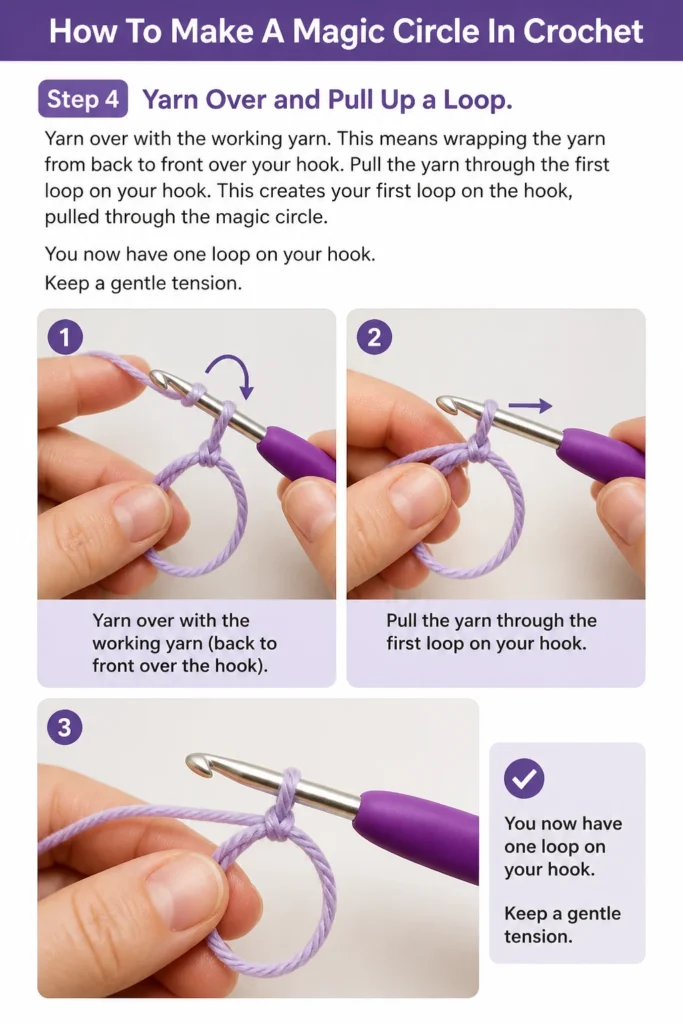
Pull the yarn through the first loop on your hook. This creates your first loop on the hook, pulled through the magic circle.
You now have one loop on your hook. Keep a gentle tension.
Step 5: Chain One (or more)
Yarn over once more.
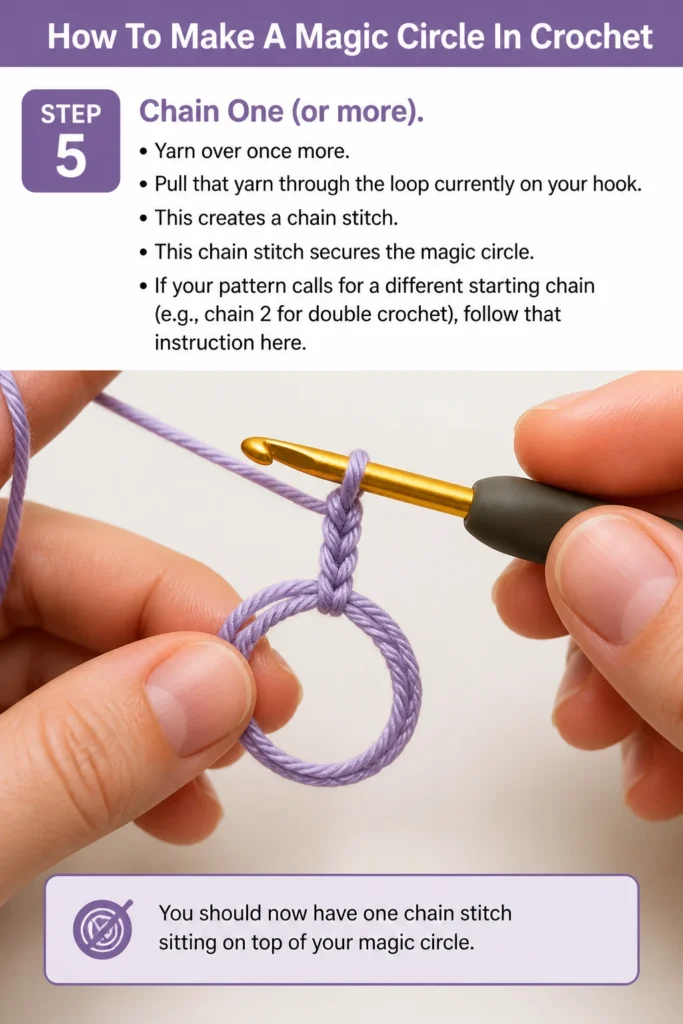
Pull that yarn through the loop currently on your hook. This creates a chain stitch.
This chain stitch secures the magic circle. If your pattern calls for a different starting chain (e.g., chain 2 for double crochet), follow that instruction here.
Step 6: Work Your First Stitches
Insert your hook into the center of the magic circle, under both the loop you created and the yarn tail.
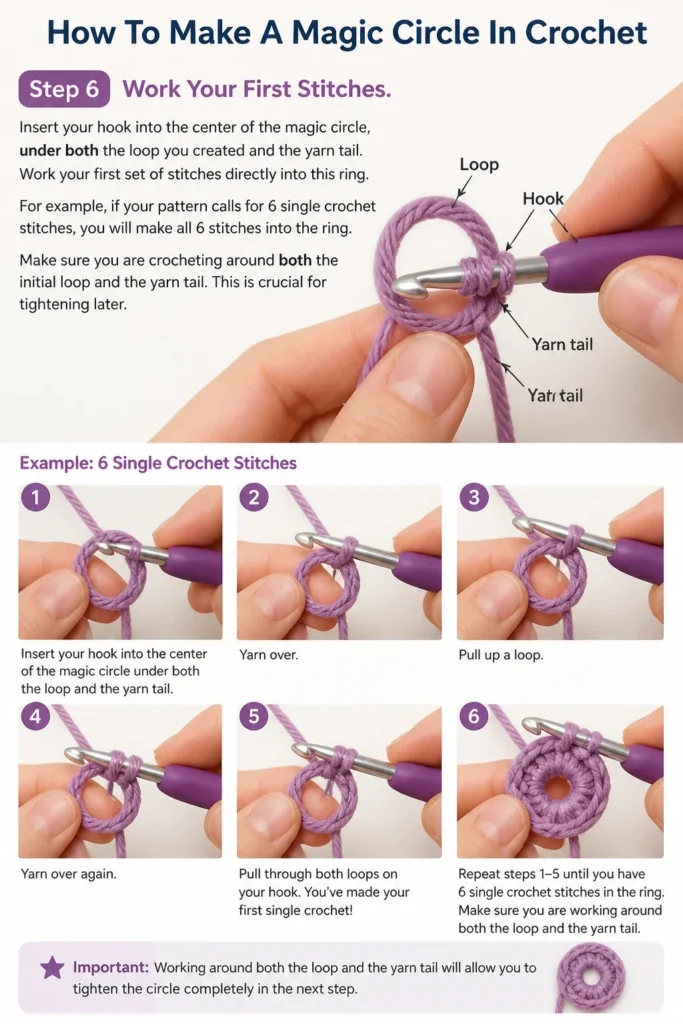
Work your first set of stitches directly into this ring. For example, if your pattern calls for 6 single crochet stitches, you will make all 6 stitches into the ring.
Make sure you are crocheting around both the initial loop and the yarn tail. This is crucial for tightening later.
Step 7: Pull the Ring Tight
Gently pull the yarn tail. You will see the center of your circle begin to close.
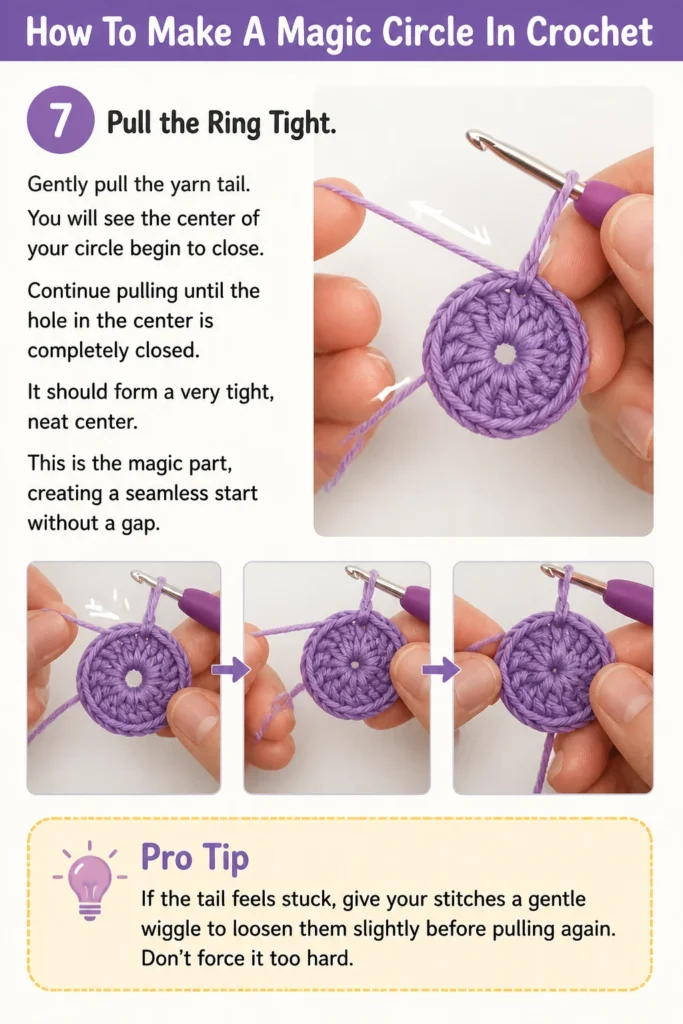
Continue pulling until the hole in the center is completely closed. It should form a very tight, neat center.
This is the “magic” part, creating a seamless start without a gap.
Pro Tip: If the tail feels stuck, give your stitches a gentle wiggle to loosen them slightly before pulling again. Don’t force it too hard.
Step 8: Secure and Continue
Make a slip stitch to join your first and last stitches, if your pattern requires it for the round.
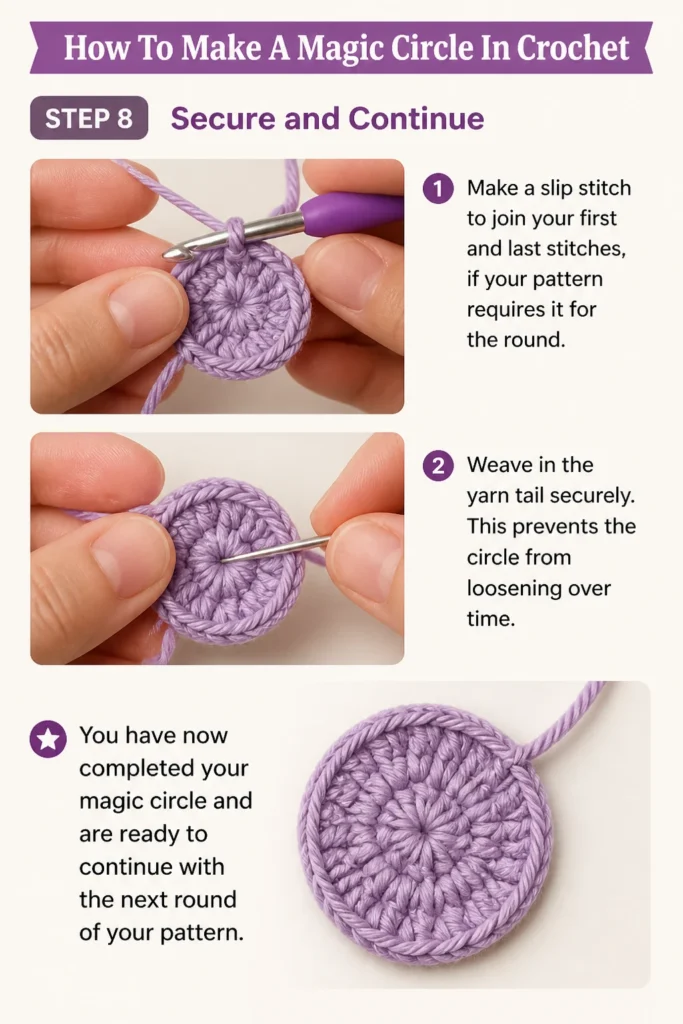
Weave in the yarn tail securely. This prevents the circle from loosening over time.
You have now completed your magic circle and are ready to continue with the next round of your pattern.
Common Mistakes to Avoid
Even experienced crocheters can sometimes slip up. Knowing what to watch for helps a lot.
Making the Loop Too Tight or Loose
If your initial loop is too tight, it will be hard to insert your hook and work stitches into it. Too loose, and the stitches might not close neatly.
Aim for a comfortable tension where the yarn can slide easily but isn’t floppy. Practice will help you find that sweet spot.
Incorrect Hook Insertion
Some beginners only work into the single strand of the initial loop instead of around both the loop and the tail.
This prevents the magic circle from tightening properly. Always ensure your hook goes under both the working loop and the yarn tail when making your stitches.
Forgetting the Starting Chain
The starting chain (usually chain 1 for single crochet) locks the magic circle in place before you begin your main stitches.
Without it, your magic circle can unravel. Always remember to make that initial chain after pulling up your first loop.
Not Pulling the Tail Fully
If your magic circle still has a small hole in the center after pulling, you might not have pulled the tail completely tight.
Ensure you pull the tail until the center is fully closed. Sometimes a slight tug on the working yarn can help free up the tail for a final pull.
Troubleshooting
Don’t worry if your first few attempts aren’t perfect. These tips can help you get back on track.
Ring Won’t Close Tightly
This often happens if you didn’t work your stitches around both the main loop and the yarn tail. Double-check your hook placement in Step 6.
It can also occur if the yarn tail is caught on a stitch. Gently wiggle your stitches and try pulling the tail again. Sometimes a firm but careful tug is needed.
Stitches Are Uneven
Uneven stitches can be a sign of inconsistent tension. Try to maintain a steady grip on both your working yarn and your project.
Practice helps immensely with tension control. Don’t be afraid to unravel and restart to get a feel for it.
Yarn Keeps Slipping Out
If the loop on your fingers keeps slipping, try wrapping the yarn around your fingers a bit more firmly, or even around three fingers instead of two for a more secure base.
Ensure your hook is inserted correctly and you’ve pulled up your first loop before the yarn has a chance to escape.
Key Takeaways
- The magic circle creates a tight, seamless center for circular crochet projects.
- Practice is essential for mastering the technique and achieving consistent tension.
- Always work your stitches around both the main loop and the yarn tail for proper closure.
- The initial chain stitch (e.g., chain 1) is crucial for securing the magic circle.
- Don’t forget to pull the yarn tail completely tight to close the center hole.
- Securing the yarn tail by weaving it in prevents the circle from loosening over time.
Frequently Asked Questions
What’s the difference between a magic circle and chaining 2?
Chaining 2 and working into the first chain creates a small hole in the center of your work. The magic circle allows you to pull the center completely closed, leaving no gap.
Can I use any type of yarn?
Yes, you can use virtually any yarn with a magic circle. Thicker yarns might require a slightly larger initial loop for easier stitching. Very slippery yarns can be a bit more challenging but are still doable.
How many stitches should I put in a magic circle?
The number of stitches depends entirely on your pattern. Most patterns will specify how many stitches to work into the magic circle for the first round (e.g., “6 sc in magic ring”).
What if my circle looks messy?
A messy-looking circle often comes down to tension or inconsistent stitch formation. Keep practicing! Every attempt makes you better. Don’t hesitate to pull out your stitches and try again.
Our Top Recommended Finds
- Ergonomic Crochet Hook Set: These hooks are designed for comfort, making long crochet sessions much more enjoyable.
- Stitch Markers: Essential for keeping track of your first stitch in the round, especially when working in a spiral.
- Yarn Winder: Helps organize your yarn stash and creates neat, center-pull cakes that are easy to work with.
Your Journey Into Circular Crochet Begins Now
You’ve just learned a fundamental crochet technique that will transform your projects. The magic circle is a skill that truly unlocks new creative possibilities.
Take some time to practice this step-by-step method a few times. Repetition builds muscle memory and confidence.
Now that you’ve mastered the magic circle, you’re ready to tackle beautiful amigurumi, seamless hats, or any other project worked in the round. Grab your hook and yarn, and start creating today!
Beginner-friendly templates, step-by-step guides,
and weekly project ideas in your inbox.