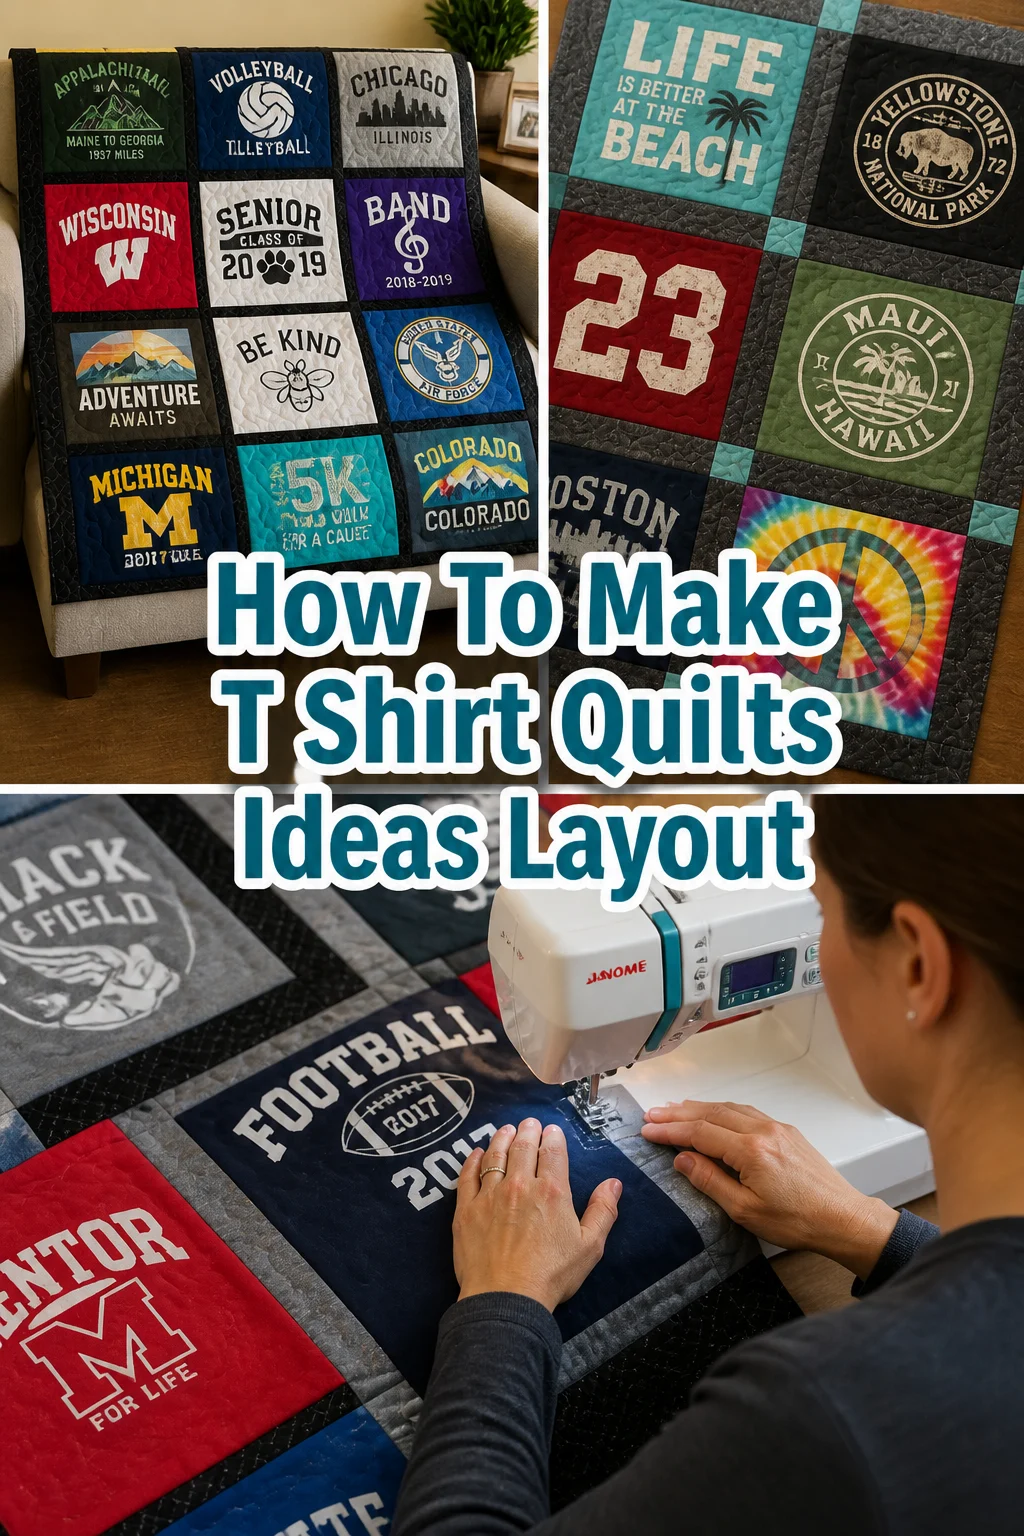
👕 How To Make T Shirt Quilts Ideas Layout

Beginner-friendly templates, step-by-step guides,
and weekly project ideas in your inbox.
Creating a T-shirt quilt is a beautiful way to preserve cherished memories.
I’ve made several of these quilts over the years, transforming stacks of beloved tees into comforting, story-filled heirlooms.
This guide will walk you through designing a layout that truly celebrates your unique collection.

Quick Overview
You’re about to embark on a rewarding journey, transforming sentimental T-shirts into a stunning, personalized quilt. This process will guide you from initial planning to a finished layout, ready for sewing.
- Time needed: 8-16 hours (for planning and layout, not including sewing the entire quilt)
- Difficulty: Intermediate
- What you’ll need: T-shirts, fusible interfacing, rotary cutter, mat, rulers, design wall or floor space, camera, sketchpad.
Step-by-Step Instructions
Step 1: Gather and Prepare Your T-Shirts
Start by collecting all the T-shirts you want to include in your quilt. Wash and dry them thoroughly without fabric softener to ensure they are clean and ready for cutting.
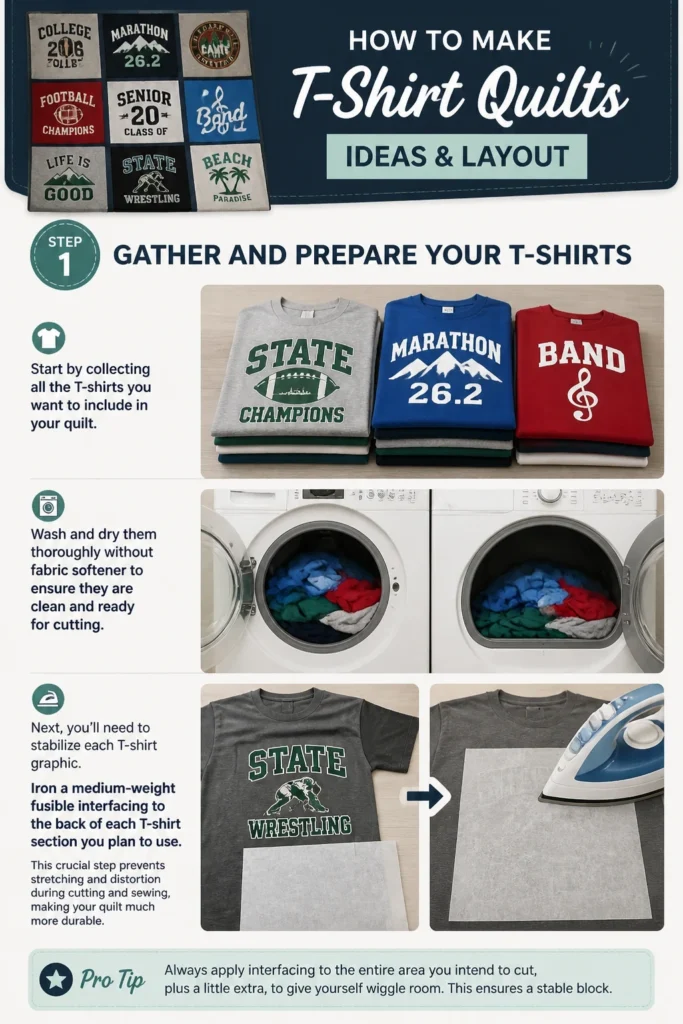
Next, you’ll need to stabilize each T-shirt graphic. Iron a medium-weight fusible interfacing to the back of each T-shirt section you plan to use.
This crucial step prevents stretching and distortion during cutting and sewing, making your quilt much more durable.
Pro Tip: Always apply interfacing to the entire area you intend to cut, plus a little extra, to give yourself wiggle room. This ensures a stable block.
Step 2: Brainstorm Layout Ideas
Before cutting, consider the overall feel you want for your quilt. Do you prefer a uniform, grid-like appearance, or a more eclectic, puzzle-piece look?
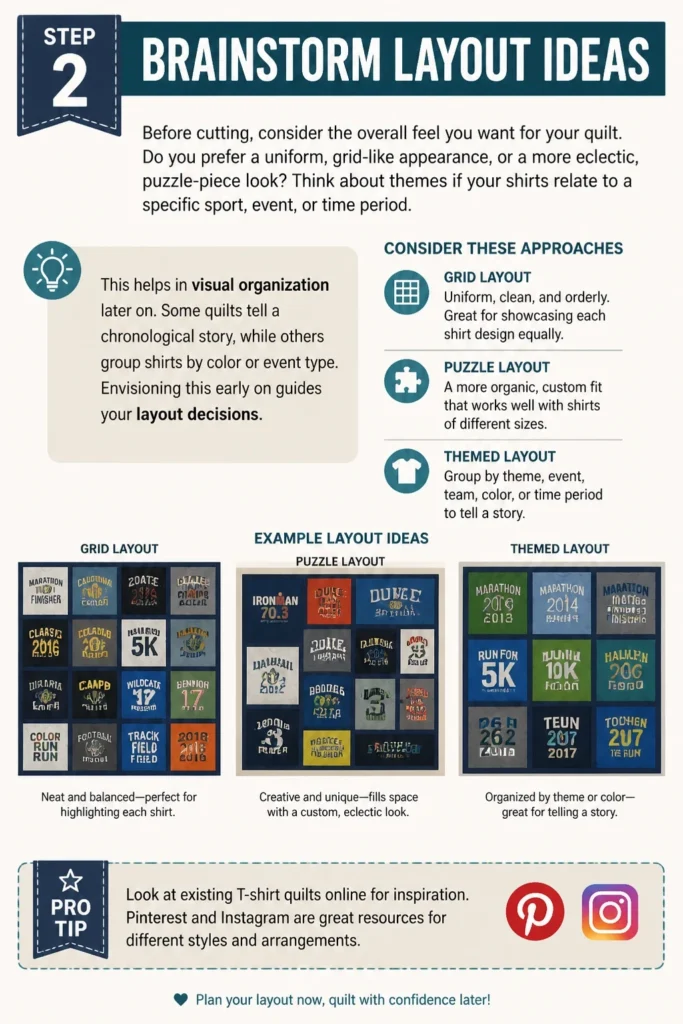
Think about themes if your shirts relate to a specific sport, event, or time period. This helps in visual organization later on.
Some quilts tell a chronological story, while others group shirts by color or event type. Envisioning this early on guides your layout decisions.
Pro Tip: Look at existing T-shirt quilts online for inspiration. Pinterest and Instagram are great resources for different styles and arrangements.
Step 3: Determine Block Sizes
Now, decide on your block sizes. You can choose a uniform block size, where every T-shirt graphic is trimmed to the same dimension, often 10×10 or 12×12 inches.
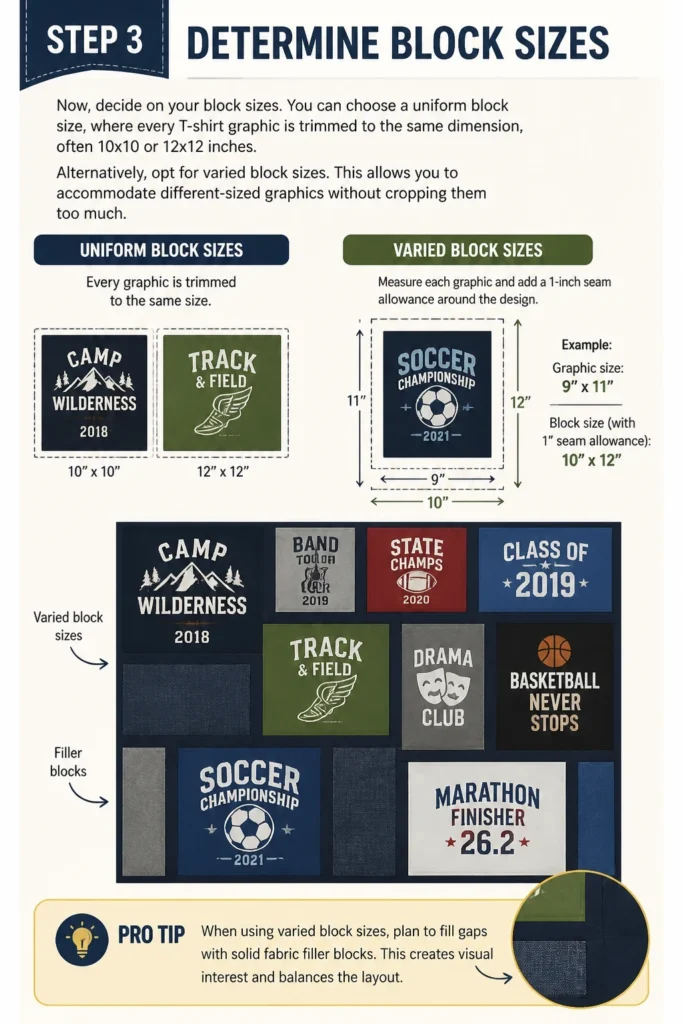
Alternatively, opt for varied block sizes. This allows you to accommodate different-sized graphics without cropping them too much.
If using varied sizes, measure each graphic and add a 1-inch seam allowance around the design. For example, a 9×11-inch graphic would become a 10×12-inch block.
Pro Tip: When using varied block sizes, plan to fill gaps with solid fabric “filler” blocks. This creates visual interest and balances the layout.
Step 4: Sketch and Plan Your Design
Grab a sketchpad or use a digital design tool to map out your initial ideas. Draw a grid representing your quilt’s approximate dimensions.
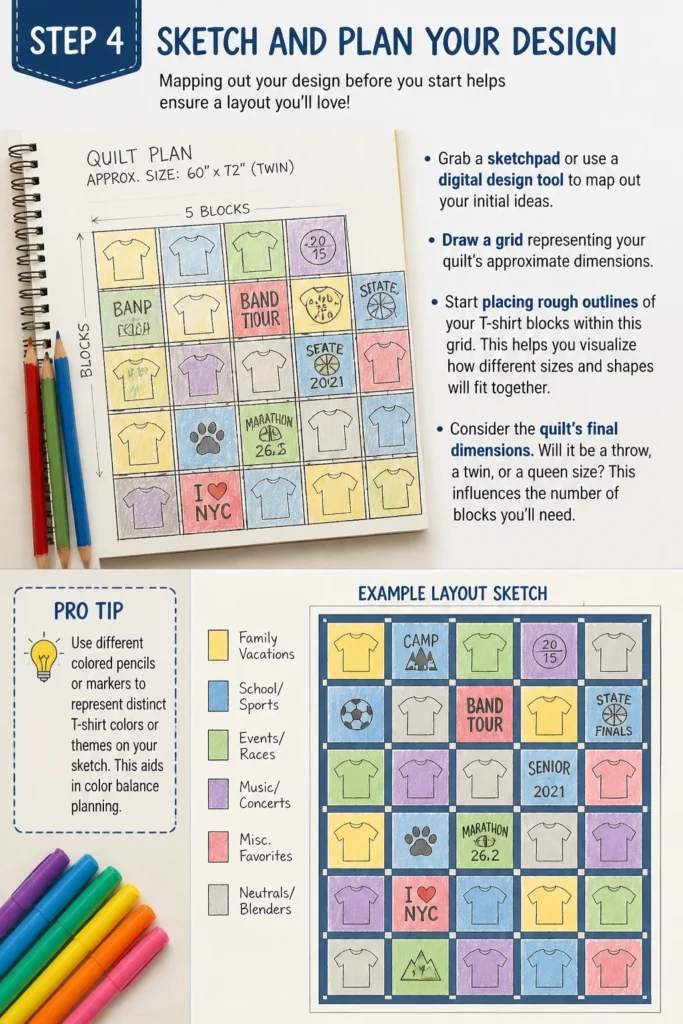
Start placing rough outlines of your T-shirt blocks within this grid. This helps you visualize how different sizes and shapes will fit together.
Consider the quilt’s final dimensions. Will it be a throw, a twin, or a queen size? This influences the number of blocks you’ll need.
Pro Tip: Use different colored pencils or markers to represent distinct T-shirt colors or themes on your sketch. This aids in color balance planning.
Step 5: Cut Your T-Shirt Blocks
With your block sizes determined and shirts stabilized, it’s time to cut. Place your T-shirt on a self-healing mat.
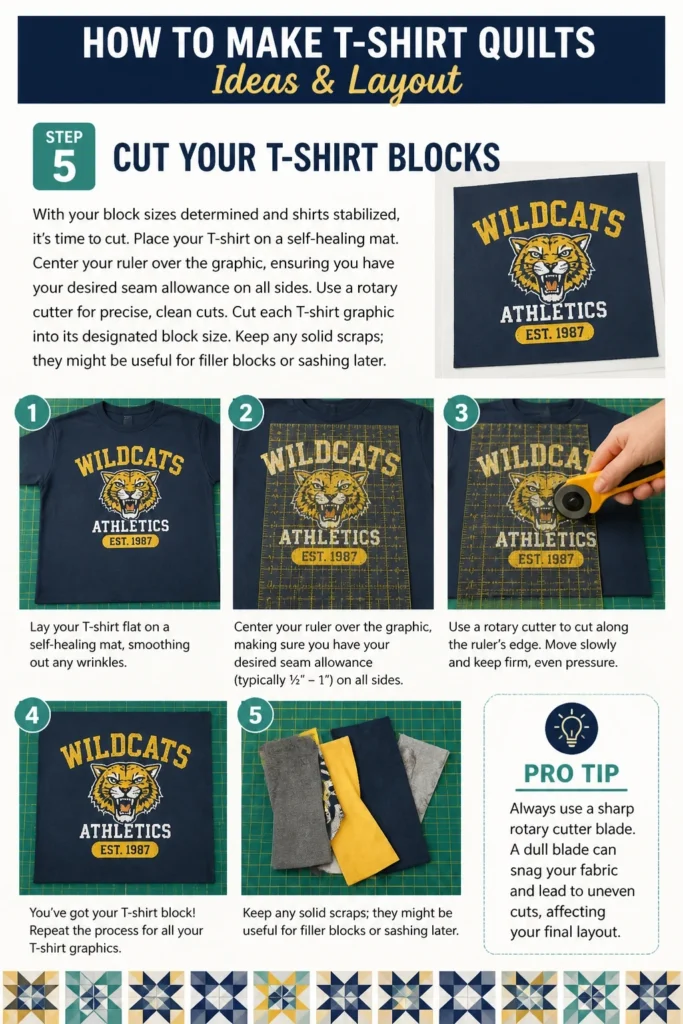
Center your ruler over the graphic, ensuring you have your desired seam allowance on all sides. Use a rotary cutter for precise, clean cuts.
Cut each T-shirt graphic into its designated block size. Keep any solid scraps; they might be useful for filler blocks or sashing later.
Pro Tip: Always use a sharp rotary cutter blade. A dull blade can snag your fabric and lead to uneven cuts, affecting your final layout.
Step 6: Arrange Blocks Visually
This is where your quilt truly begins to take shape. Find a large, flat surface like a design wall, a clean floor, or even a bed.
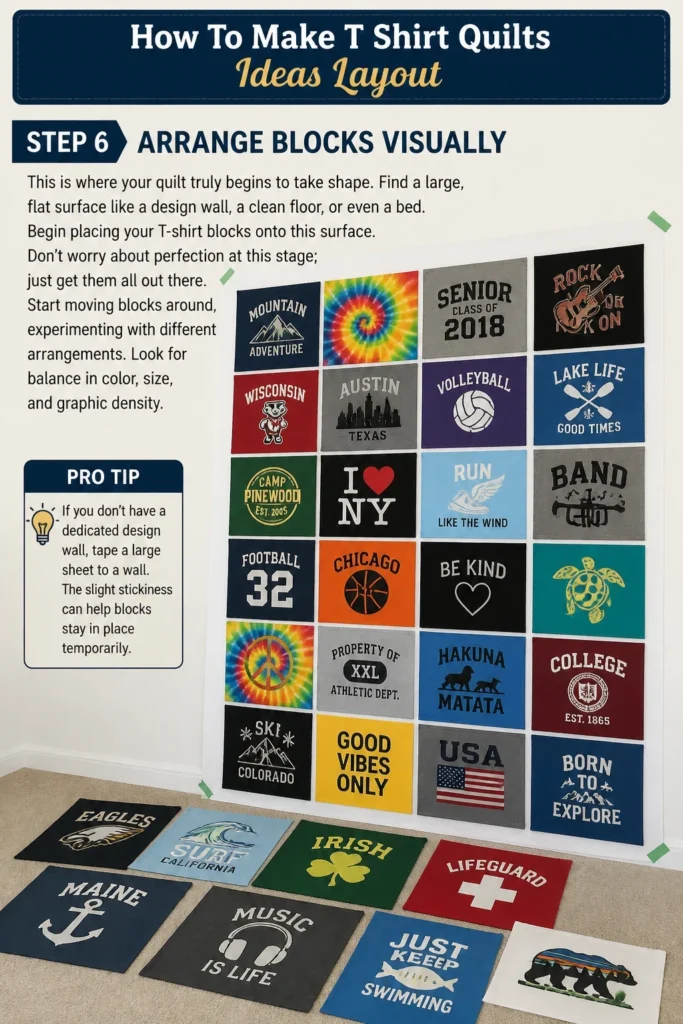
Begin placing your T-shirt blocks onto this surface. Don’t worry about perfection at this stage; just get them all out there.
Start moving blocks around, experimenting with different arrangements. Look for balance in color, size, and graphic density.
Pro Tip: If you don’t have a dedicated design wall, tape a large sheet to a wall. The slight stickiness can help blocks stay in place temporarily.
Step 7: Assess and Refine the Layout
Step back frequently to view your layout from a distance. This perspective helps you spot imbalances or areas that feel too crowded or too sparse.
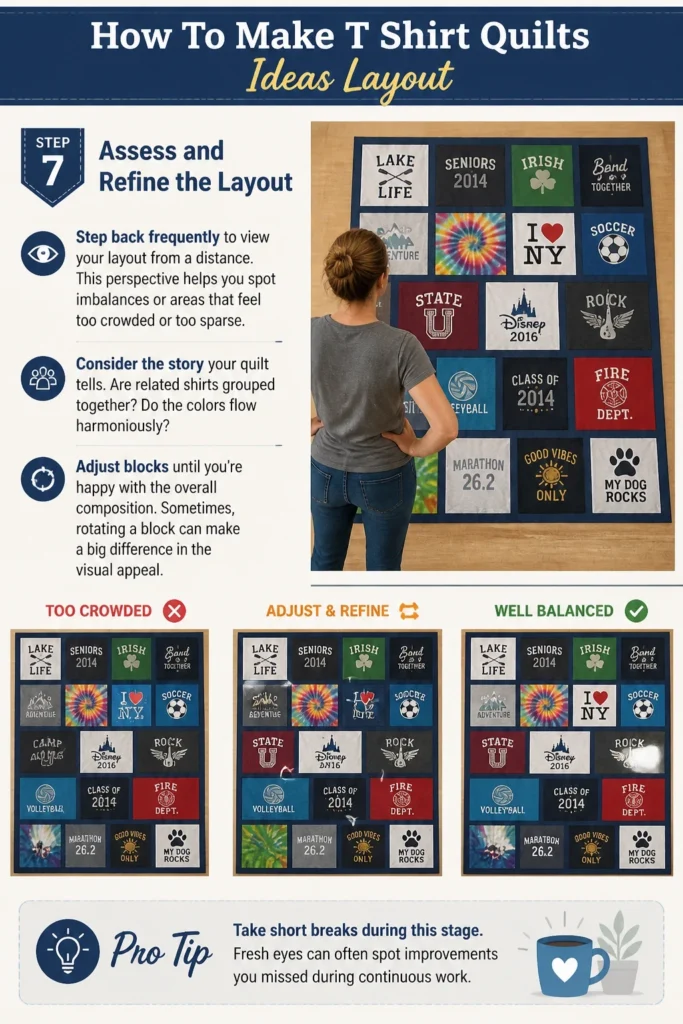
Consider the “story” your quilt tells. Are related shirts grouped together? Do the colors flow harmoniously?
Adjust blocks until you’re happy with the overall composition. Sometimes, rotating a block can make a big difference in the visual appeal.
Pro Tip: Take short breaks during this stage. Fresh eyes can often spot improvements you missed during continuous work.
Step 8: Photograph Your Layout
Once you are satisfied with your arrangement, photograph it! Take multiple pictures from different angles and distances.
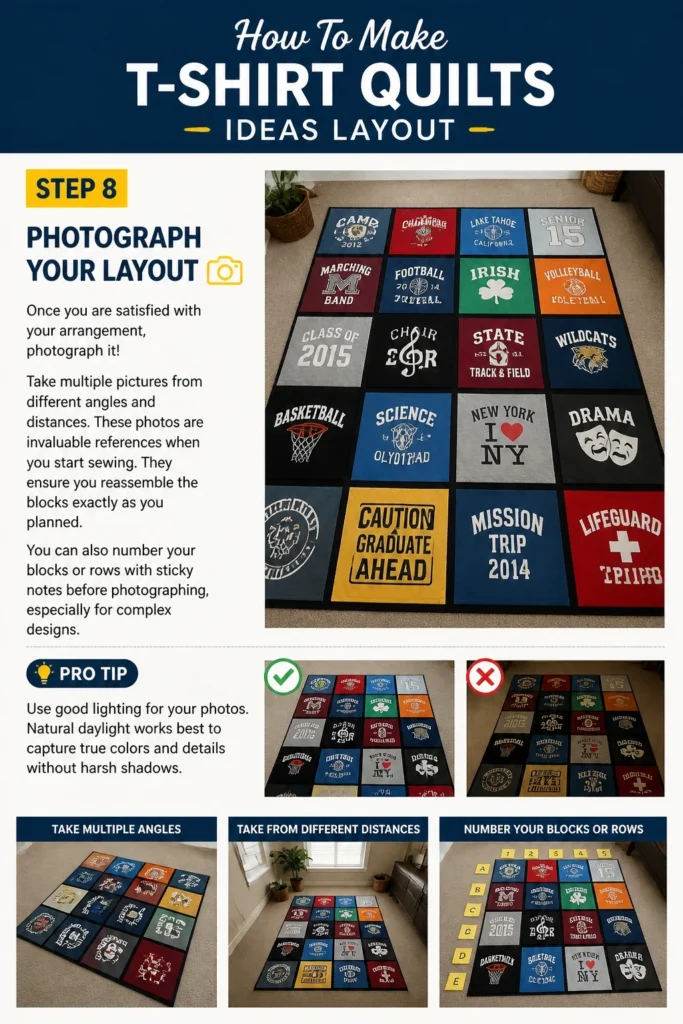
These photos are invaluable references when you start sewing. They ensure you reassemble the blocks exactly as you planned.
You can also number your blocks or rows with sticky notes before photographing, especially for complex designs.
Pro Tip: Use good lighting for your photos. Natural daylight works best to capture true colors and details without harsh shadows.
Step 9: Plan Sashing and Borders
Sashing refers to the fabric strips sewn between blocks or rows. Borders are the fabric strips around the entire perimeter of the quilt.
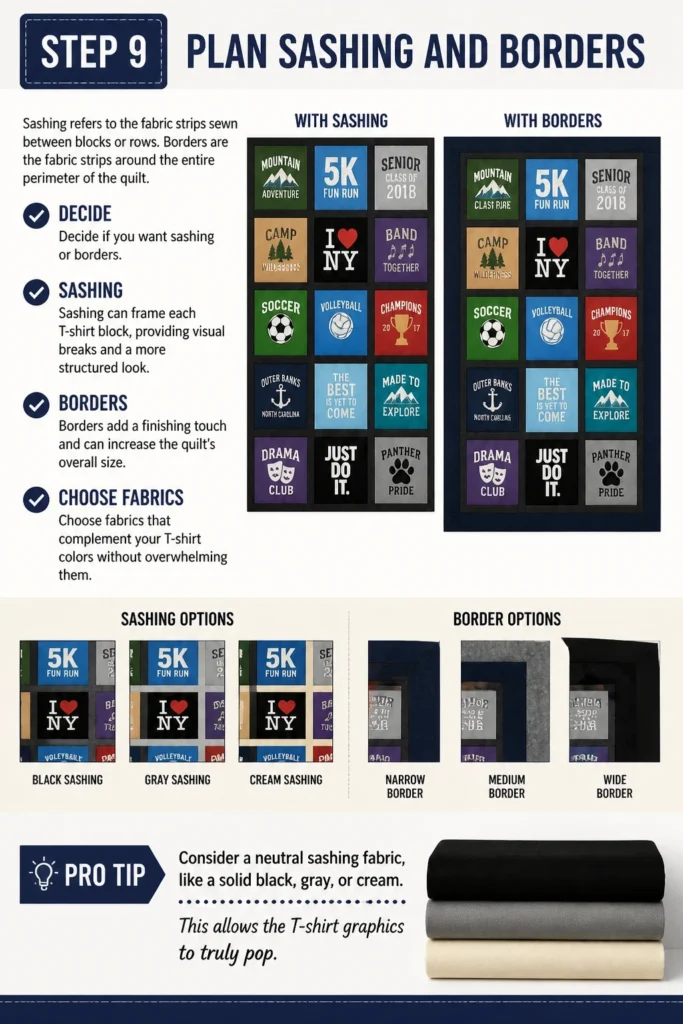
Decide if you want sashing or borders. Sashing can frame each T-shirt block, providing visual breaks and a more structured look.
Borders add a finishing touch and can increase the quilt’s overall size. Choose fabrics that complement your T-shirt colors without overwhelming them.
Pro Tip: Consider a neutral sashing fabric, like a solid black, gray, or cream. This allows the T-shirt graphics to truly pop.
Common Mistakes to Avoid
Skipping Interfacing
Many beginners skip applying fusible interfacing to their T-shirt blocks. This is a critical error because T-shirt fabric is stretchy.
Without stabilization, your blocks will distort and stretch during cutting and sewing, leading to uneven seams and a wavy, misshapen quilt.
Always take the time to iron on that interfacing; it makes all the difference in achieving a professional-looking result.
Inconsistent Seam Allowances
When cutting your T-shirt blocks or sewing them together, failing to maintain a consistent seam allowance is a common pitfall.
Even slight variations can cause blocks and rows to not line up properly, resulting in mismatched corners and a quilt that doesn’t lie flat.
Use a quarter-inch foot on your sewing machine and always check your seam allowance with a ruler before you begin sewing.
Ignoring Color and Balance
Simply throwing T-shirt blocks together without considering color distribution or visual balance can lead to a chaotic and unappealing quilt.
Avoid clumping all the dark shirts in one corner or all the bright ones together. Distribute colors and busy graphics evenly across your layout.
Step back frequently and assess the overall visual weight; rearrange blocks until the quilt feels harmonious and balanced.
Troubleshooting
Blocks Don’t Lie Flat
If your T-shirt blocks appear wavy or don’t lie perfectly flat after cutting and stabilizing, it often indicates inconsistent ironing or inadequate interfacing application.
Re-iron the affected blocks, ensuring the interfacing is firmly adhered across the entire surface. Sometimes, a second layer of lighter interfacing can help if the fabric is particularly thin or stretchy.
Always press, don’t iron, when applying interfacing, lifting and placing the iron rather than sliding it.
Layout Feels Unbalanced
When your arranged blocks just don’t look right, feeling too heavy in one area or too sparse in another, it’s a common design challenge.
Try rotating individual blocks or swapping entire rows. Sometimes, introducing a neutral filler block or sashing in a strategic spot can break up visual monotony.
Take a photo, then view it in black and white; this often highlights areas of uneven visual weight more clearly.
Can’t Decide on a Layout
Feeling overwhelmed by layout choices and unable to commit to a design is a frequent hurdle for quilters.
Take a break from the project entirely for a day or two. When you return, try focusing on one element at a time, such as grouping all similar colors first, or arranging by theme.
Don’t be afraid to try wildly different arrangements, even if they seem unconventional, and always photograph each option to compare later.
Key Takeaways
- Always stabilize T-shirt fabric with fusible interfacing before cutting to prevent stretching.
- Plan your block sizes and overall quilt dimensions early in the process.
- Use a design wall or large flat surface to visually arrange your blocks.
- Step back often to assess color balance, graphic distribution, and overall aesthetic.
- Photograph your final layout meticulously to serve as a guide during assembly.
- Don’t rush the layout phase; it’s the foundation of a beautiful and cohesive T-shirt quilt.
Frequently Asked Questions
How many T-shirts do I need for a quilt?
The number of T-shirts depends entirely on the desired quilt size and the size of your individual blocks. A small throw might use 12-20 shirts, while a queen-sized quilt could require 40-60 or more. Plan your block sizes first, then calculate how many will fit into your target quilt dimensions.
Can I mix different T-shirt fabric types?
Yes, you can mix different T-shirt fabric types like cotton, blends, and performance fabrics, as long as they are all properly stabilized with fusible interfacing. The interfacing helps to equalize their stretch and drape, making them easier to sew together consistently.
What if some graphics are too small or too large?
For graphics that are too small, you can center them on a larger piece of T-shirt fabric (or a coordinating solid fabric) before stabilizing and cutting to your desired block size. For graphics that are too large, you might need to trim them down, or consider a “fussy cut” technique where you only use the most important part of the design, or create an oversized block for that particular shirt and adjust the surrounding layout.
Do I need to wash my T-shirts before starting?
Yes, it’s highly recommended to wash and dry all your T-shirts before you begin. This removes any sizing, dirt, or residues that could interfere with the interfacing adhesion or future washing. Avoid using fabric softener, as it can make the fabric less receptive to the fusible interfacing.
Our Top Recommended Finds
- Self-Healing Rotary Cutting Mat: An essential tool for protecting your work surface and ensuring clean, precise cuts with your rotary cutter.
- Quilting Rulers (various sizes): Clear acrylic rulers, especially a large square and a long rectangular one, are crucial for accurate measuring and cutting of your T-shirt blocks.
- Fusible Interfacing (medium-weight): A good quality, medium-weight fusible interfacing is non-negotiable for stabilizing stretchy T-shirt fabric, making it sewable like regular cotton.
Craft Your Memory Masterpiece Today
You now have the tools and knowledge to design a truly memorable T-shirt quilt layout. It’s a project that combines creativity with sentiment, resulting in a unique piece of art.
Don’t let those cherished T-shirts sit in a box any longer. Begin the exciting process of transforming them into a warm, comforting story.
Gather your supplies and start planning your layout today; your future self will thank you for preserving these precious memories.
Beginner-friendly templates, step-by-step guides,
and weekly project ideas in your inbox.