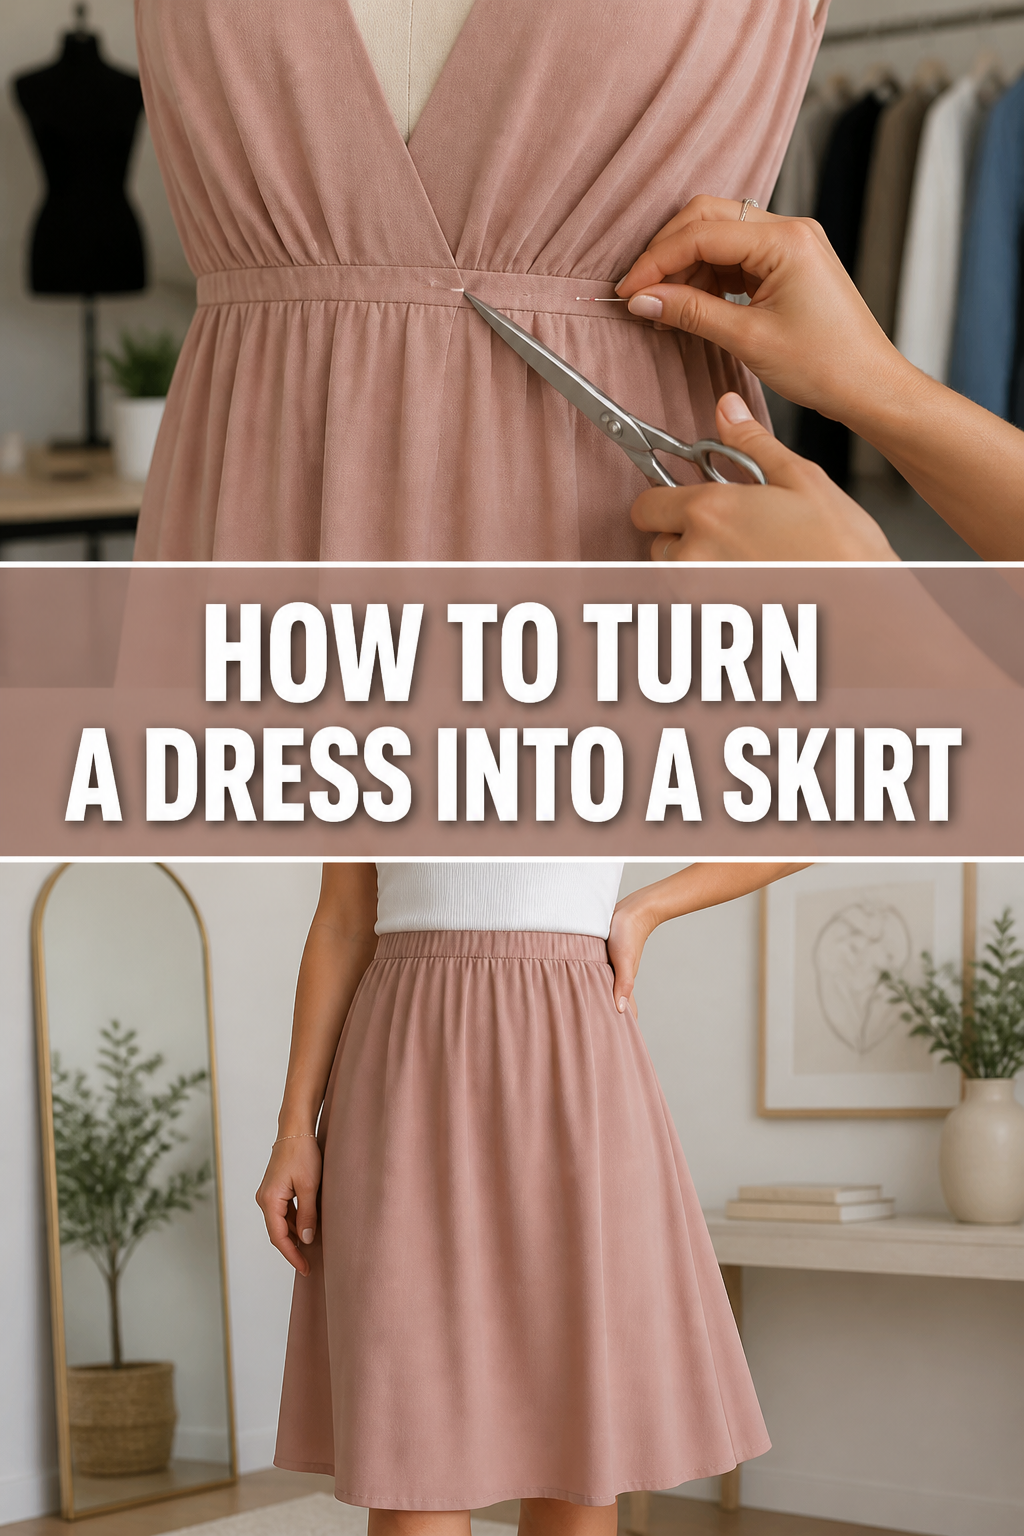
👗 How To Turn A Dress Into A Skirt

Beginner-friendly templates, step-by-step guides,
and weekly project ideas in your inbox.
I remember standing in my bedroom with a vintage floral dress that fit perfectly everywhere except the shoulders, which were comically large.
Instead of letting that beautiful fabric gather dust, I grabbed my fabric shears and decided to give it a second life as a high-waisted midi skirt.
After years of upcycling thrift store finds, I have refined this process into a simple, foolproof method that works for almost any dress in your closet.
Quick Overview
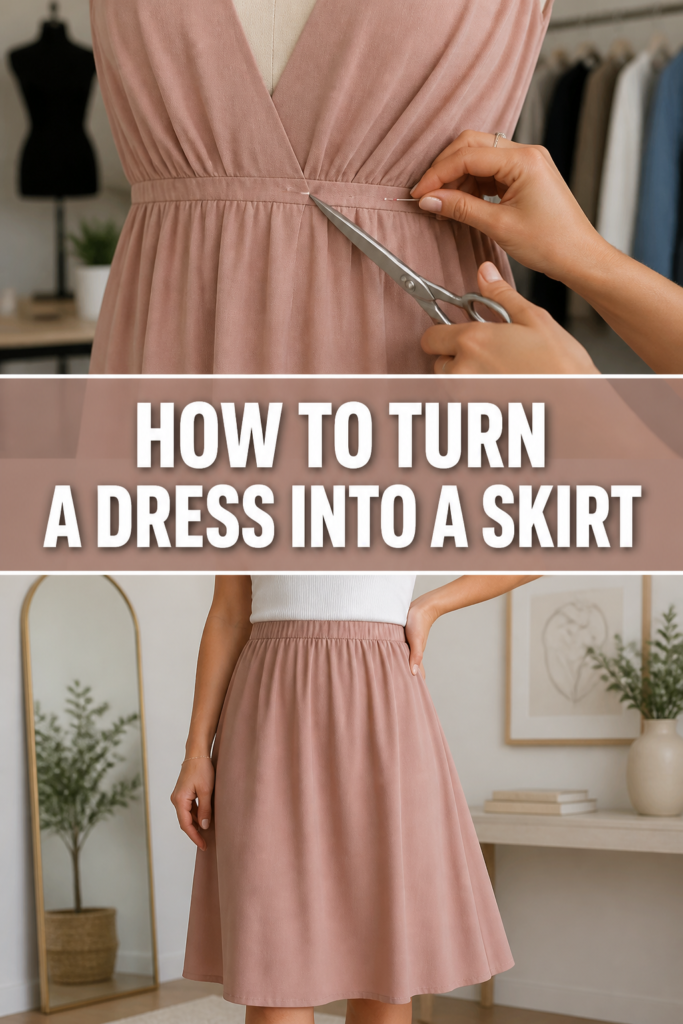
This project allows you to salvage dresses with damaged bodices, outdated necklines, or ill-fitting tops by focusing on the skirt portion of the garment.
- Time needed: 45 to 90 minutes depending on your experience level.
- Difficulty: Beginner – basic sewing machine knowledge is helpful but not strictly required.
- What you’ll need: An old dress, fabric scissors, elastic (1-inch width is best), a safety pin, matching thread, and an iron.
Step 1: Evaluate Your Fabric and Fit
Examine the dress to ensure the skirt portion has enough volume to accommodate your hips once the bodice is removed.
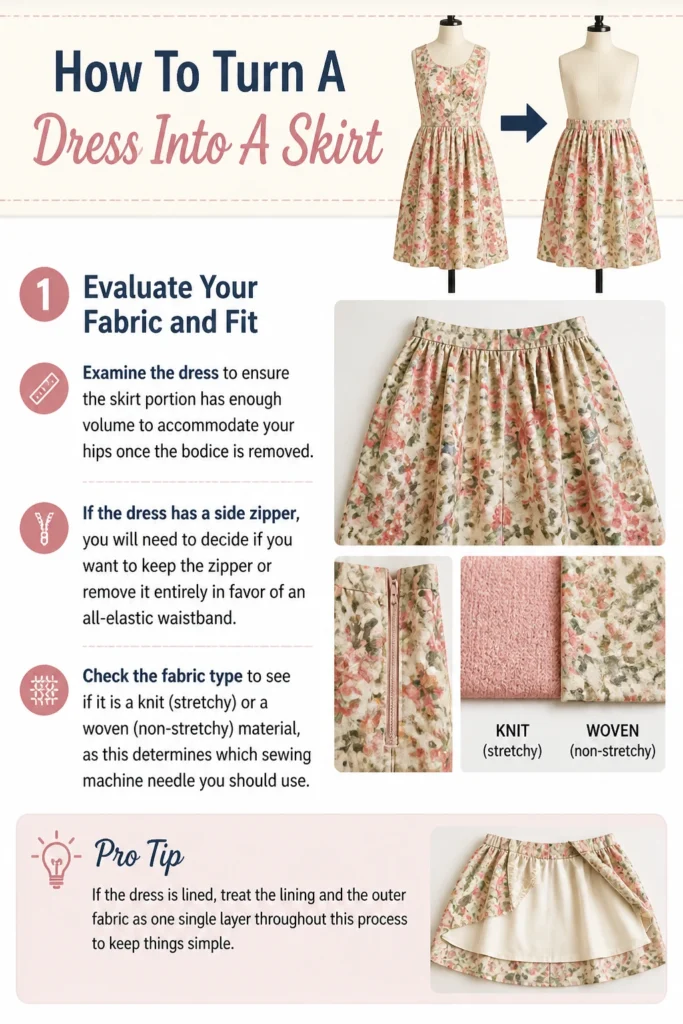
If the dress has a side zipper, you will need to decide if you want to keep the zipper or remove it entirely in favor of an all-elastic waistband.
Check the fabric type to see if it is a knit (stretchy) or a woven (non-stretchy) material, as this determines which sewing machine needle you should use.
Pro Tip: If the dress is lined, treat the lining and the outer fabric as one single layer throughout this process to keep things simple.
Step 2: Determine Your New Waistline
Put the dress on and stand in front of a full-length mirror to visualize where you want the skirt to sit on your torso.
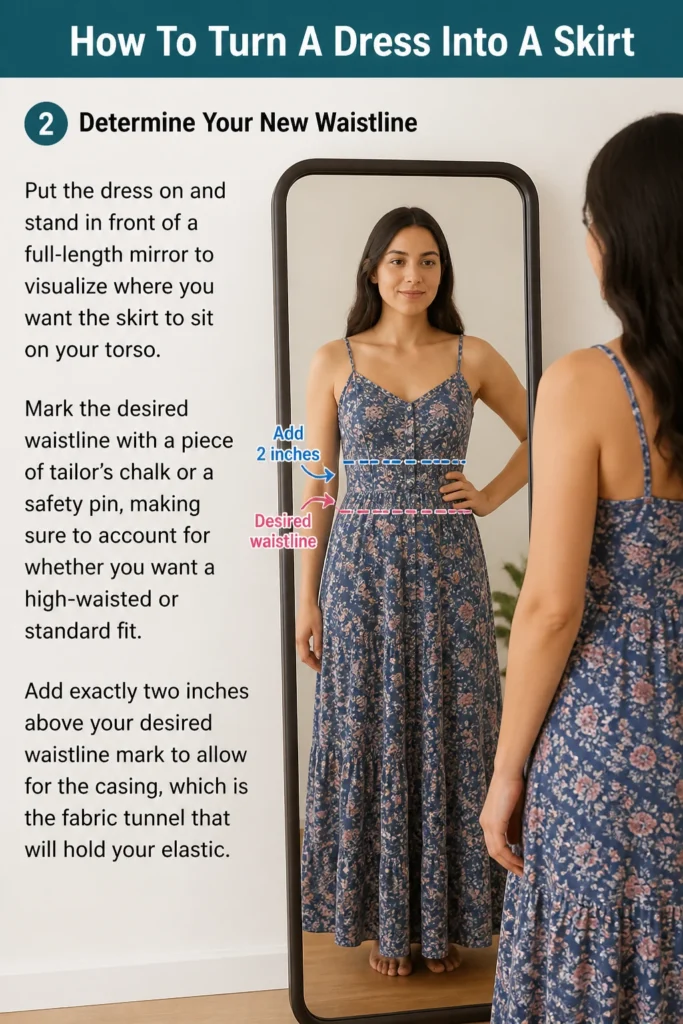
Mark the desired waistline with a piece of tailor’s chalk or a safety pin, making sure to account for whether you want a high-waisted or standard fit.
Add exactly two inches above your desired waistline mark to allow for the “casing,” which is the fabric tunnel that will hold your elastic.
Step 3: Measure and Mark the Cut Line
Lay the dress flat on a hard surface like a table or a clean floor rather than a carpeted area to ensure the fabric stays level.
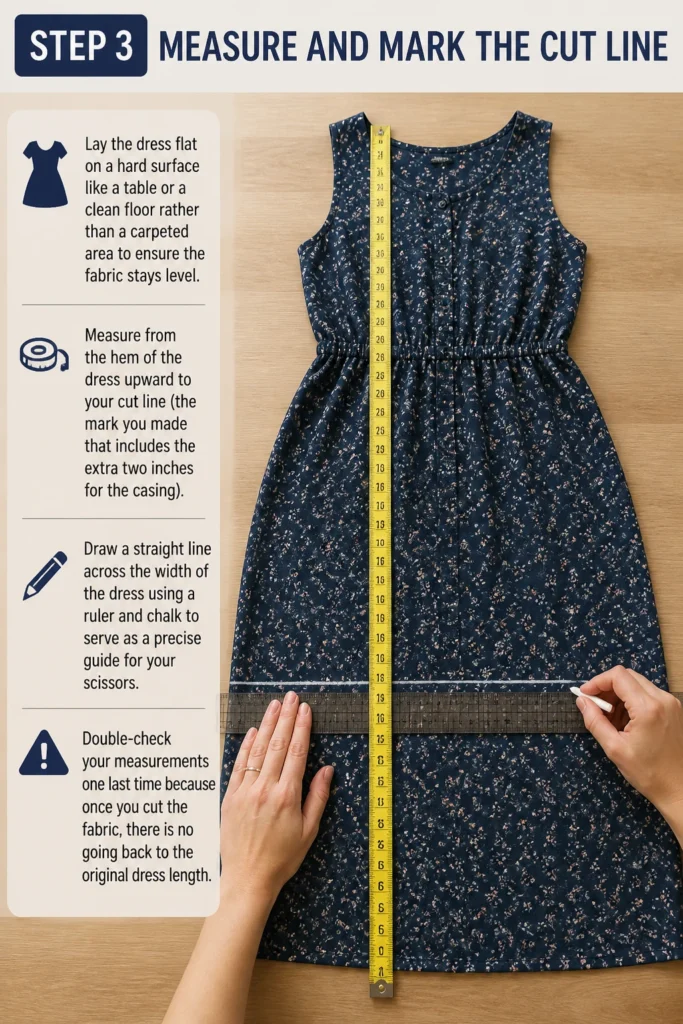
Measure from the hem of the dress upward to your “cut line” (the mark you made that includes the extra two inches for the casing).
Draw a straight line across the width of the dress using a ruler and chalk to serve as a precise guide for your scissors.
Double-check your measurements one last time because once you cut the fabric, there is no going back to the original dress length.
Step 4: Make the Big Cut
Slide your fabric shears carefully through the fabric, following the chalk line you just drew across the front and back of the dress.
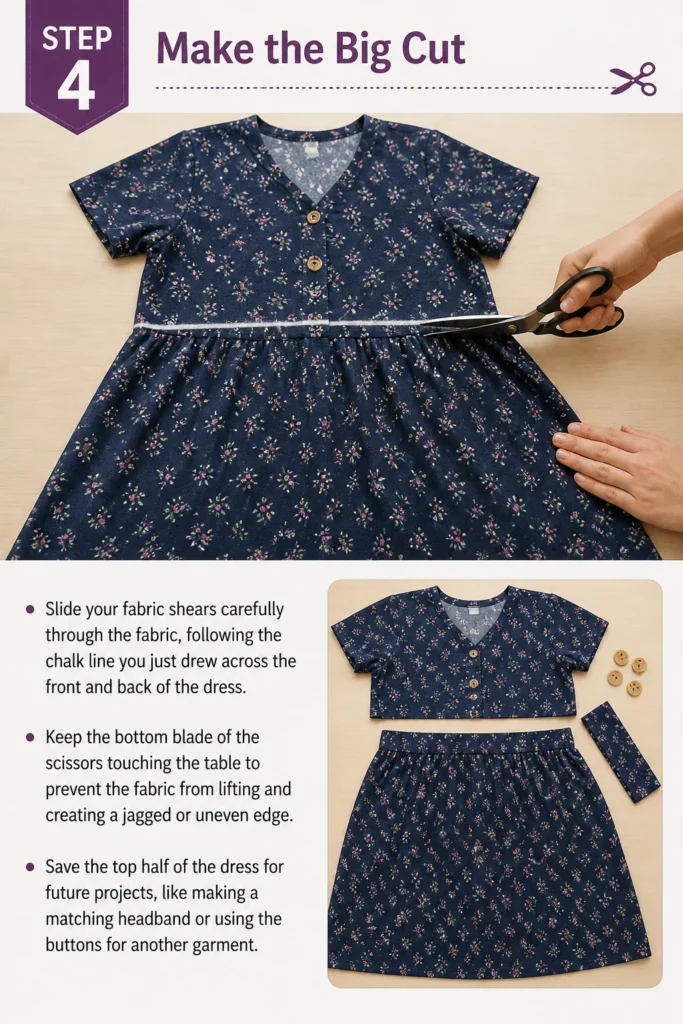
Keep the bottom blade of the scissors touching the table to prevent the fabric from lifting and creating a jagged or uneven edge.
Save the top half of the dress for future projects, like making a matching headband or using the buttons for another garment.
Step 5: Finish the Raw Edge
Prevent the fabric from fraying by finishing the top raw edge of your new skirt before you start folding the waistband.
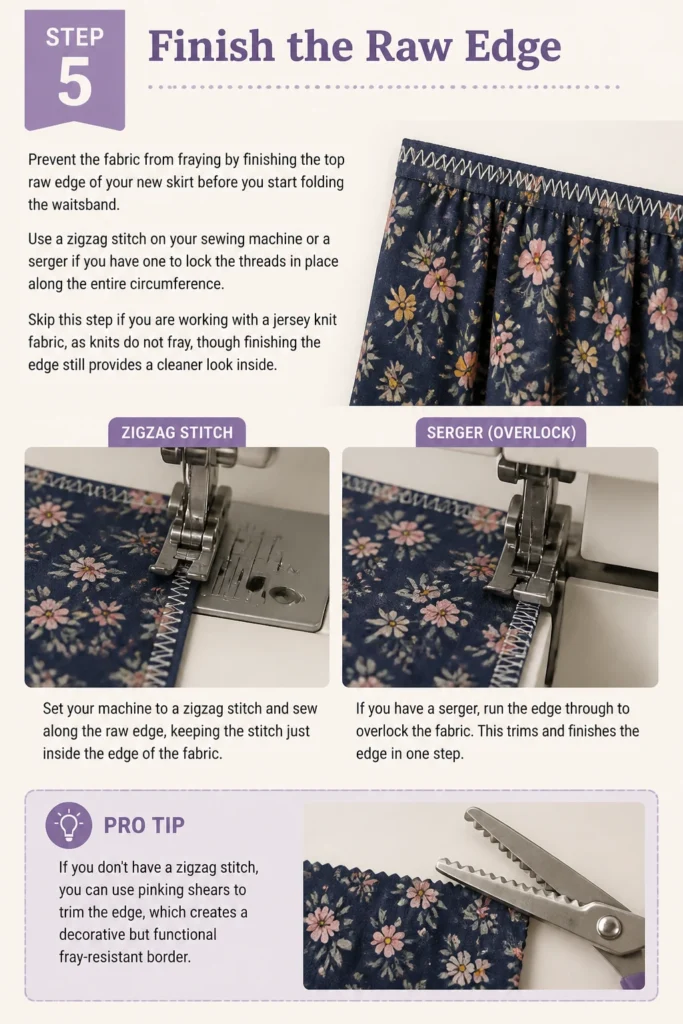
Use a zigzag stitch on your sewing machine or a serger if you have one to lock the threads in place along the entire circumference.
Skip this step if you are working with a jersey knit fabric, as knits do not fray, though finishing the edge still provides a cleaner look inside.
Pro Tip: If you don’t have a zigzag stitch, you can use pinking shears to trim the edge, which creates a decorative but functional fray-resistant border.
Step 6: Create the Elastic Casing
Fold the top edge of the skirt down toward the inside (the “wrong side”) of the fabric by about half an inch and press it flat with an iron.
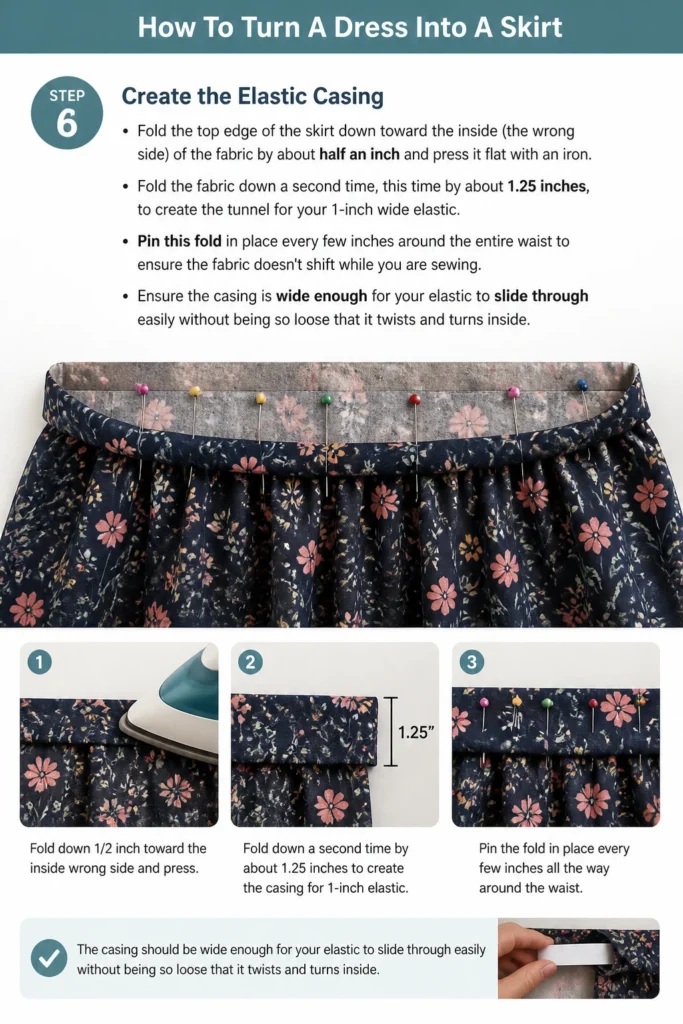
Fold the fabric down a second time, this time by about 1.25 inches, to create the tunnel for your 1-inch wide elastic.
Pin this fold in place every few inches around the entire waist to ensure the fabric doesn’t shift while you are sewing.
Ensure the casing is wide enough for your elastic to slide through easily without being so loose that it twists and turns inside.
Step 7: Sew the Waistband
Stitch close to the bottom folded edge of the casing, removing the pins as you go to avoid breaking your sewing machine needle.
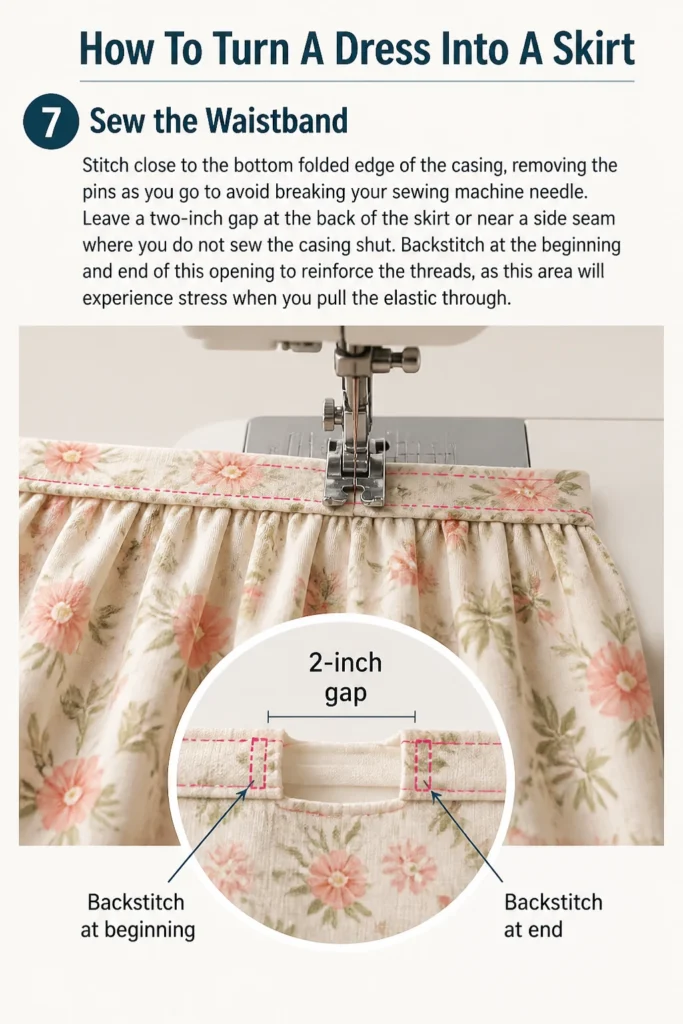
Leave a two-inch gap at the back of the skirt or near a side seam where you do not sew the casing shut.
Backstitch at the beginning and end of this opening to reinforce the threads, as this area will experience stress when you pull the elastic through.
Step 8: Thread the Elastic
Measure your waist with the elastic band, pulling it slightly snug so the skirt stays up, and cut it to that length plus one inch for overlap.
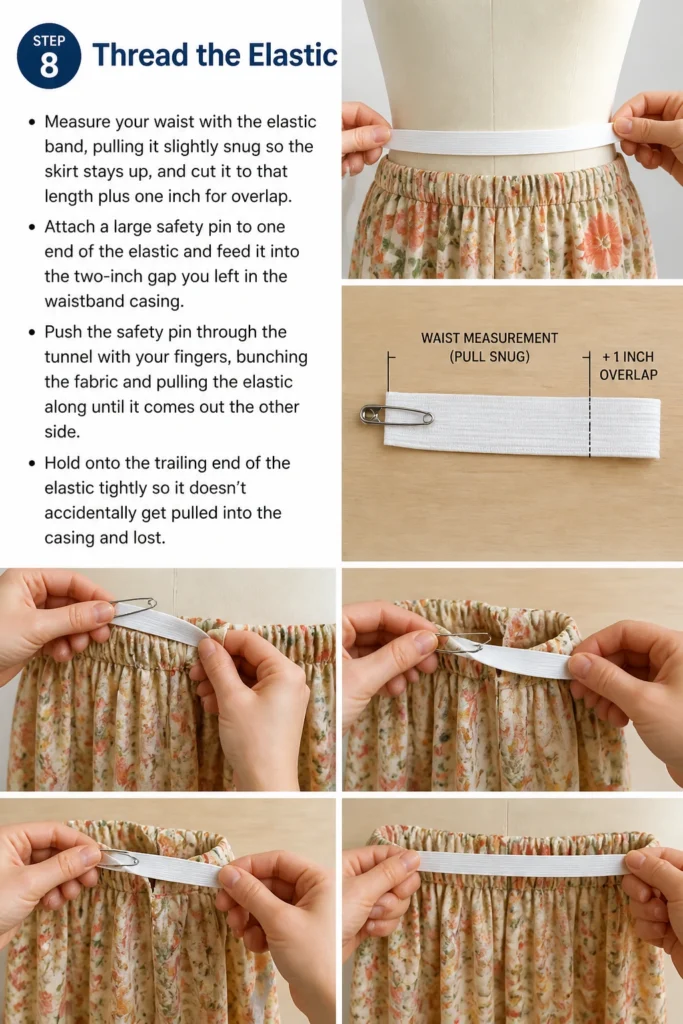
Attach a large safety pin to one end of the elastic and feed it into the two-inch gap you left in the waistband casing.
Push the safety pin through the tunnel with your fingers, bunching the fabric and pulling the elastic along until it comes out the other side.
Hold onto the trailing end of the elastic tightly so it doesn’t accidentally get pulled into the casing and lost.
Step 9: Secure the Elastic
Overlap the two ends of the elastic by about an inch once they are both hanging out of the gap in your waistband.
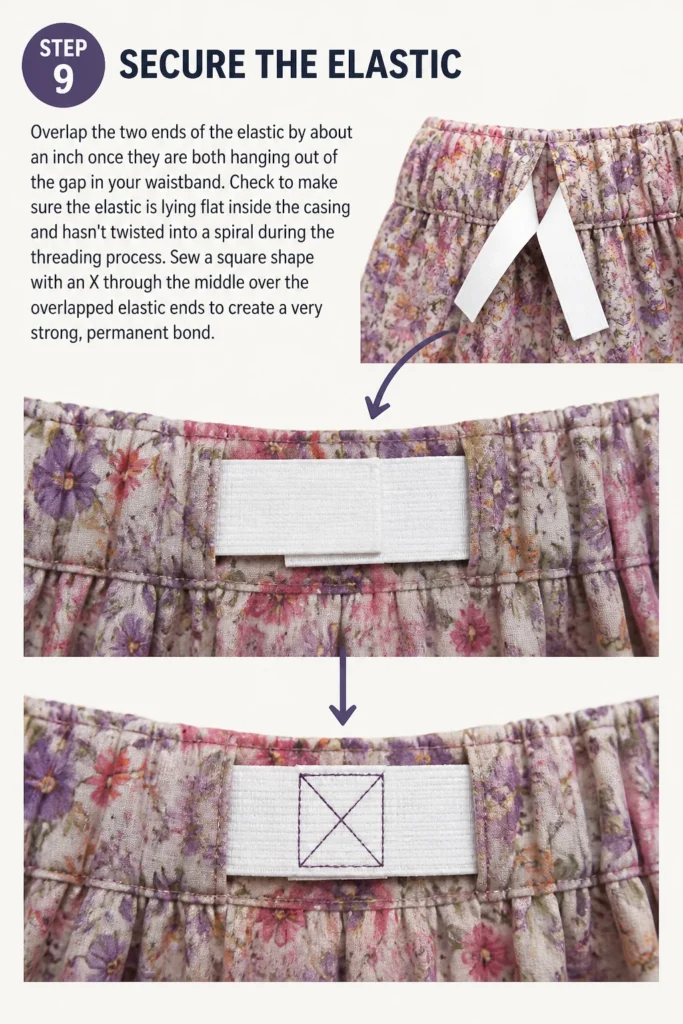
Check to make sure the elastic is lying flat inside the casing and hasn’t twisted into a spiral during the threading process.
Sew a square shape with an “X” through the middle over the overlapped elastic ends to create a very strong, permanent bond.
Step 10: Close the Gap and Finish
Pull the skirt fabric taut so the elastic disappears into the casing and the gap in the fabric lays flat against the machine.
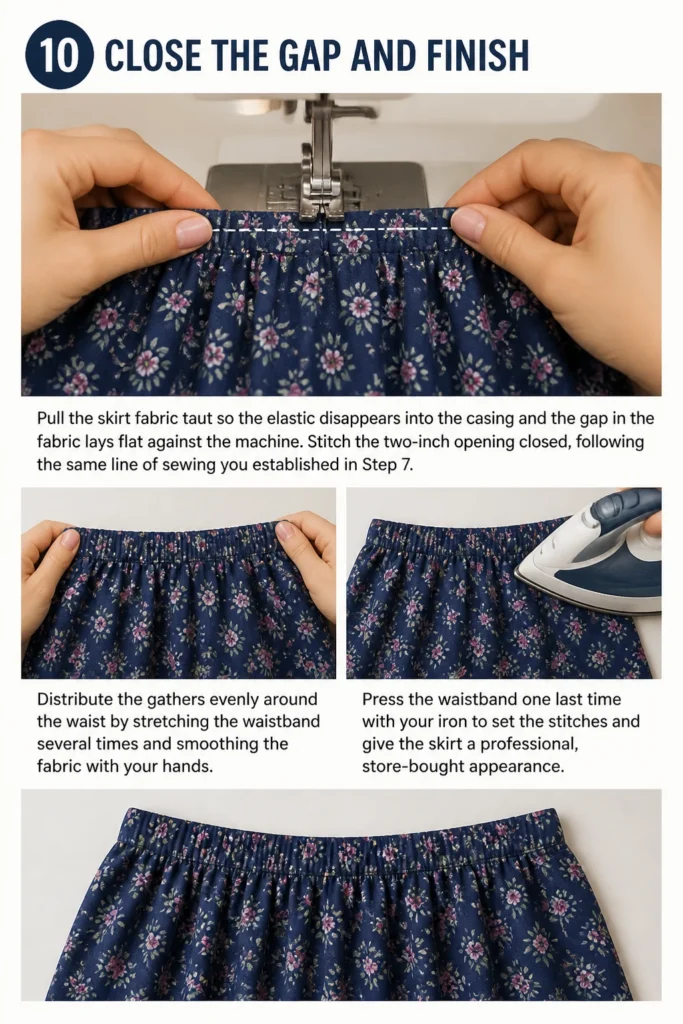
Stitch the two-inch opening closed, following the same line of sewing you established in Step 7.
Distribute the gathers evenly around the waist by stretching the waistband several times and smoothing the fabric with your hands.
Press the waistband one last time with your iron to set the stitches and give the skirt a professional, store-bought appearance.
Common Mistakes to Avoid
Forgetting the Seam Allowance
One of the most frequent errors is cutting the dress exactly where you want the waist to sit. This doesn’t leave any fabric to fold over for the elastic casing. If you make this mistake, your skirt will end up being two inches shorter than you intended, which can drastically change the look of a mini or midi skirt.
Ignoring the Hip Measurement
If you are turning a very fitted sheath dress into a skirt, you must ensure the fabric is wide enough to be pulled over your hips. Elastic waistbands require the fabric at the top to be at least as wide as your widest point. If the dress is too narrow at the waist, you may need to add a zipper or side panels to make it wearable.
Using the Wrong Elastic Width
Using elastic that is too thin (like 1/4 inch) for a heavy fabric skirt will cause the waistband to roll and dig into your skin uncomfortably. Conversely, using 2-inch elastic on a very lightweight silk dress can look bulky and stiff. Match the weight of your elastic to the weight of your fabric for the most flattering silhouette.
Troubleshooting
The Elastic Keeps Twisting Inside the Waistband
If your elastic is flipping over inside the casing, it usually means the casing is too wide or the elastic is too thin. You can fix this by sewing a vertical line of “stitch-in-the-ditch” at the side seams through both the fabric and the elastic. This anchors the elastic in place and prevents it from rolling during wear or washing.
The Fabric is Bunching Unevenly
Uneven bunching often happens when the sewing machine tension is too high or the fabric wasn’t fed through the machine straight. Try stretching the waistband to its full capacity a few times to help the elastic settle. If it remains uneven, you may need to unpick the closing seam and redistribute the fabric gathers manually before re-sewing.
The Skirt is Too Long or Short
If the skirt ended up too long, you can easily trim the hem and re-sew a new hemline. If it is too short, consider adding a ruffle, a lace trim, or a contrasting fabric band to the bottom. These “mistakes” often lead to the most creative design choices in upcycling.
Key Takeaways
- Always add at least two inches to your desired length for the waistband casing.
- Finish your raw edges with a zigzag stitch to prevent the skirt from falling apart in the wash.
- Use an iron at every stage to ensure crisp folds and a professional finish.
- Test the elastic tension around your waist before sewing the ends together.
- Upcycling is a great way to save money and create a one-of-a-kind wardrobe.
Frequently Asked Questions
Can I turn a dress with a zipper into an elastic waist skirt?
Yes, you can. You will need to remove the top part of the zipper when you cut the dress. If the remaining zipper teeth are in the way of your casing, you may need to carefully remove that section of the zipper with a seam ripper and sew the seam shut before creating your waistband.
What if my dress has a lining?
Treat the lining and the main fabric as a single piece of cloth. When you fold the casing, fold both layers together. This ensures the lining stays attached to the skirt and moves with you comfortably. Just make sure the lining isn’t pulled tighter than the outer fabric, or it will cause the skirt to pucker.
Do I need a sewing machine for this project?
While a sewing machine makes the process much faster and more durable, you can certainly do this by hand. Use a backstitch for the casing and the elastic join to ensure the skirt is strong enough to handle the movement of your body. It will take longer, but the results can be just as beautiful.
What is the best fabric for this upcycle?
Cotton, linen, and stable knits like jersey are the easiest fabrics for beginners to work with. Very slippery fabrics like silk or heavy fabrics like denim can be a bit more challenging. If you are new to sewing, start with a simple cotton sundress to build your confidence.
Our Top Recommended Finds
- Fabric Shears: High-quality, sharp scissors specifically for fabric will prevent jagged edges and hand fatigue during the cutting phase.
- Magnetic Seam Guide: This small tool attaches to your sewing machine and helps you maintain a perfectly straight line when sewing your waistband casing.
- Tailor’s Chalk Set: Using chalk instead of regular pens ensures your marks disappear after the first wash and won’t ruin your garment.
Give Your Wardrobe A Second Chance
Now that you know how simple it is to transform a dress, take a look through your closet for items you no longer wear.
You might find a hidden gem that just needs a quick modification to become your new favorite outfit.
Once you master the basic elastic waistband, you can experiment with adding pockets, decorative drawstrings, or even tiered ruffles to your designs.
Grab your scissors today and start creating something unique that fits your style perfectly.
Beginner-friendly templates, step-by-step guides,
and weekly project ideas in your inbox.