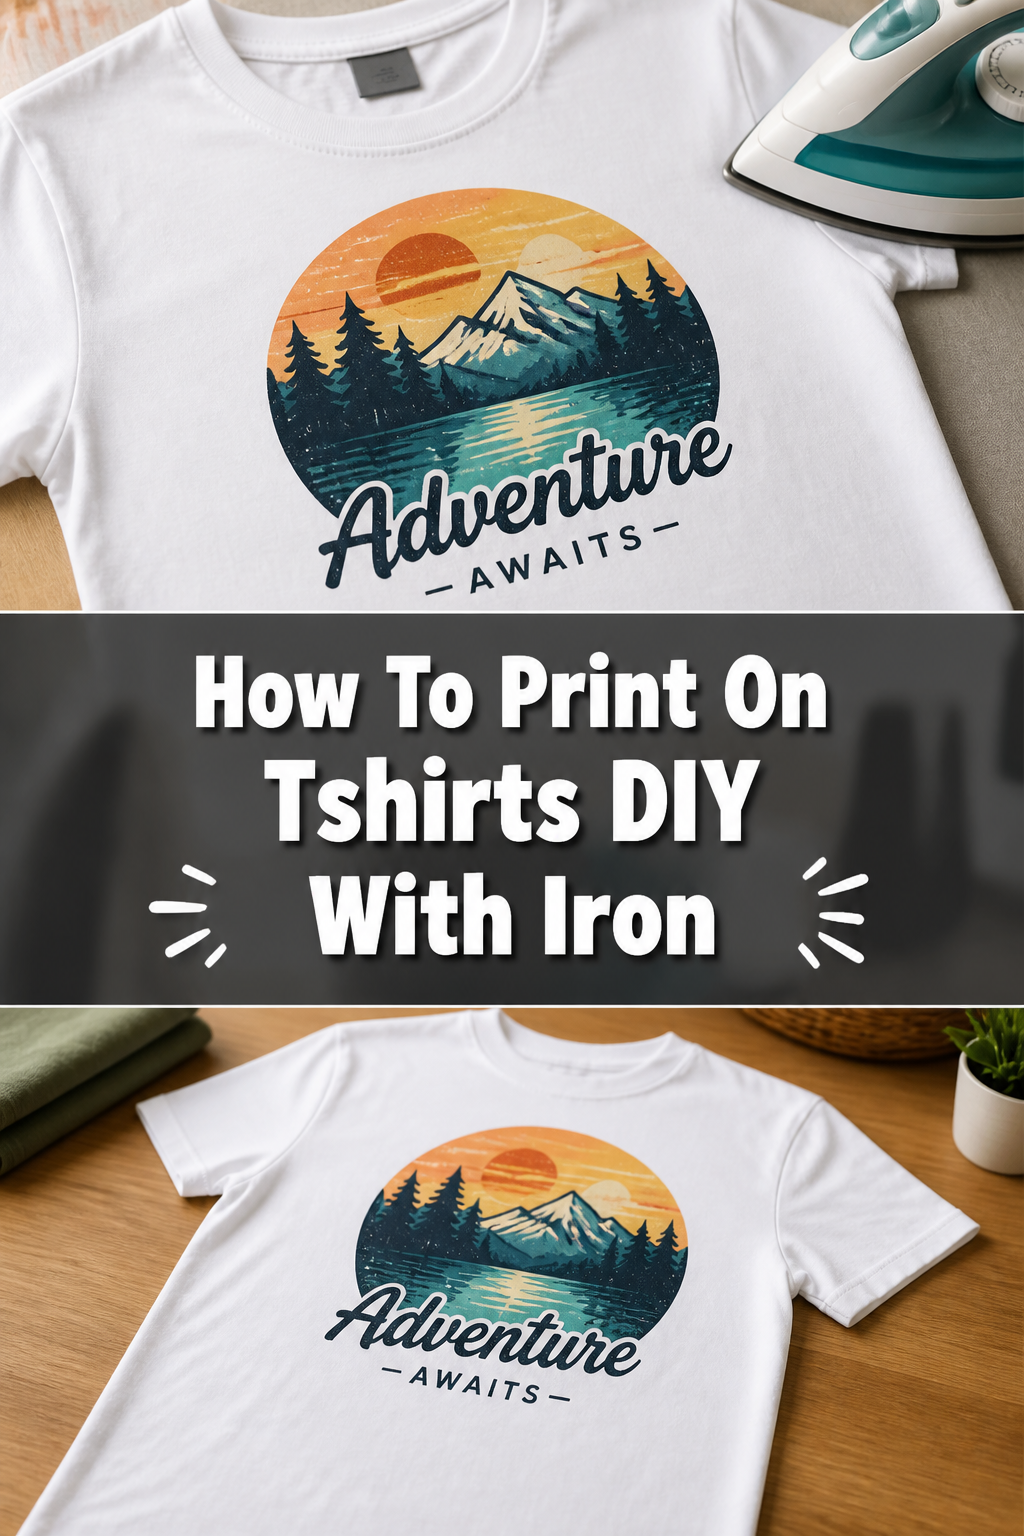
👕 How To Print On Tshirts DIY With Iron

Beginner-friendly templates, step-by-step guides,
and weekly project ideas in your inbox.
Creating custom t-shirts at home is a fun and rewarding project.
I’ve printed countless shirts for gifts and personal wear, learning the best methods through hands-on experience.
This guide shares my practical approach to achieve professional-looking results with just an iron.
Quick Overview
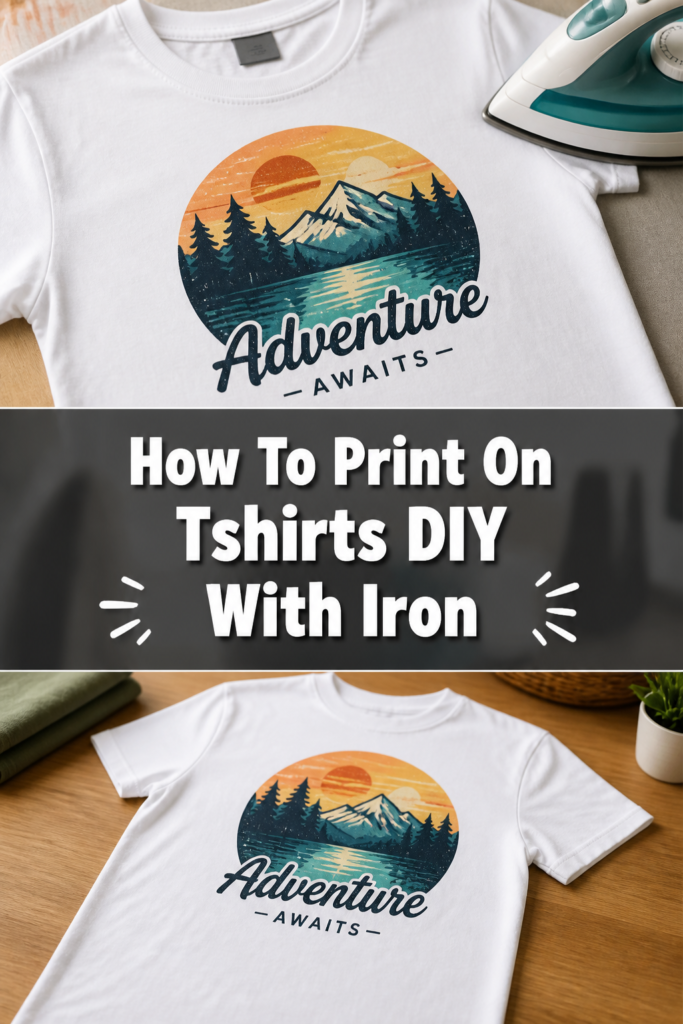
You’re about to transform a plain tee into a personalized masterpiece using a common household iron. It’s simpler than you might think and incredibly satisfying.
- Time needed: 1-2 hours (including design and printing)
- Difficulty: Beginner
- What you’ll need: T-shirt transfer paper, an iron, a t-shirt, scissors, and a printer.
Step-by-Step Instructions
Step 1: Choose Your Design and Transfer Paper
The journey to your custom t-shirt begins with selecting the perfect image. Think about what message or graphic you want to convey on your fabric.
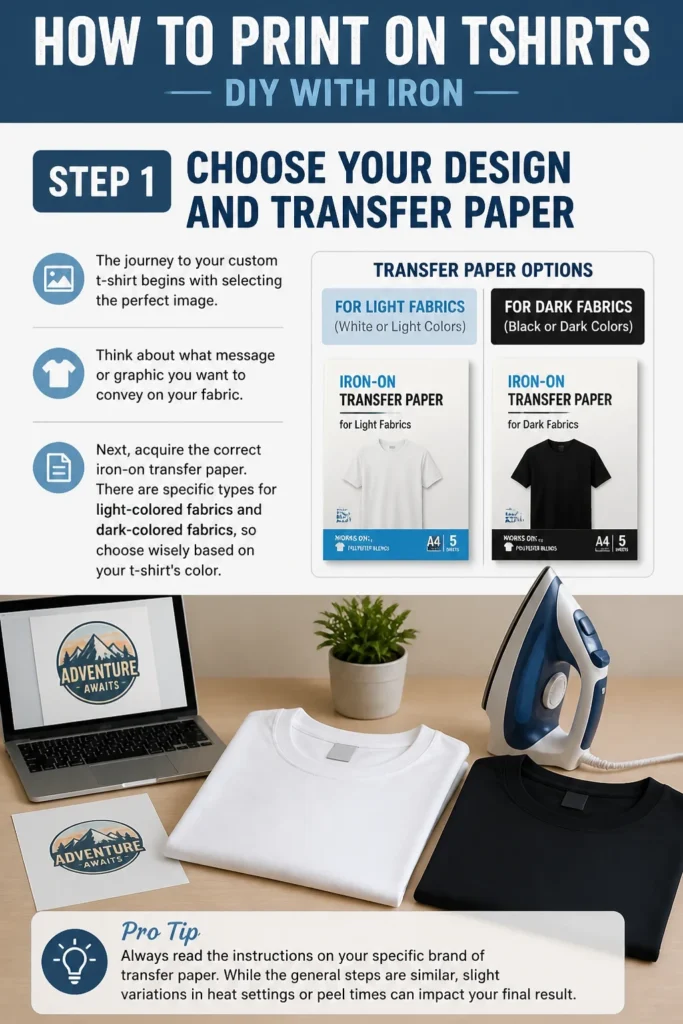
Next, acquire the correct iron-on transfer paper. There are specific types for light-colored fabrics and dark-colored fabrics, so choose wisely based on your t-shirt’s color.
Pro Tip: Always read the instructions on your specific brand of transfer paper. While the general steps are similar, slight variations in heat settings or peel times can impact your final result.
Step 2: Print Your Design
Once your design is ready, it’s time to send it to the printer. This step is crucial for how your image will appear on the shirt.
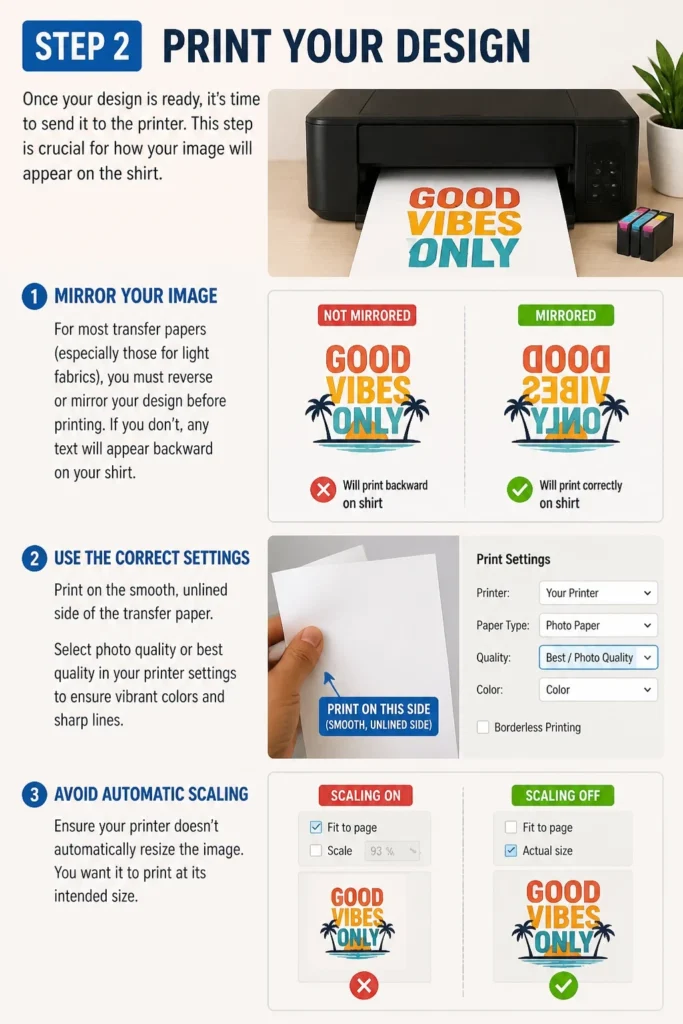
- Mirror your image: For most transfer papers (especially those for light fabrics), you must reverse or “mirror” your design before printing. If you don’t, any text will appear backward on your shirt.
- Use the correct settings: Print on the smooth, unlined side of the transfer paper. Select “photo quality” or “best quality” in your printer settings to ensure vibrant colors and sharp lines.
- Avoid automatic scaling: Ensure your printer doesn’t automatically resize the image. You want it to print at its intended size.
Step 3: Prepare Your Workspace
A stable, heat-resistant surface is essential for successful iron-on transfers. Your kitchen counter or a sturdy table works well.
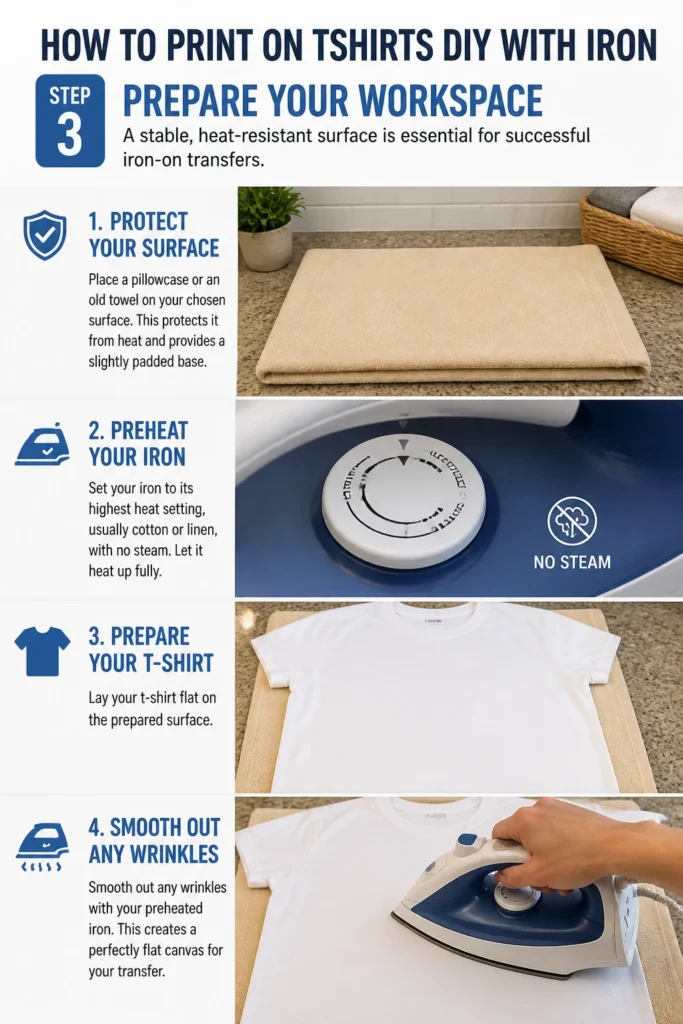
- Protect your surface: Place a pillowcase or an old towel on your chosen surface. This protects it from heat and provides a slightly padded base.
- Preheat your iron: Set your iron to its highest heat setting, usually “cotton” or “linen,” with no steam. Let it heat up fully.
- Prepare your t-shirt: Lay your t-shirt flat on the prepared surface. Smooth out any wrinkles with your preheated iron. This creates a perfectly flat canvas for your transfer.
Step 4: Cut and Position Your Design
Careful trimming and precise placement make a big difference in the final look. Take your time with these steps.
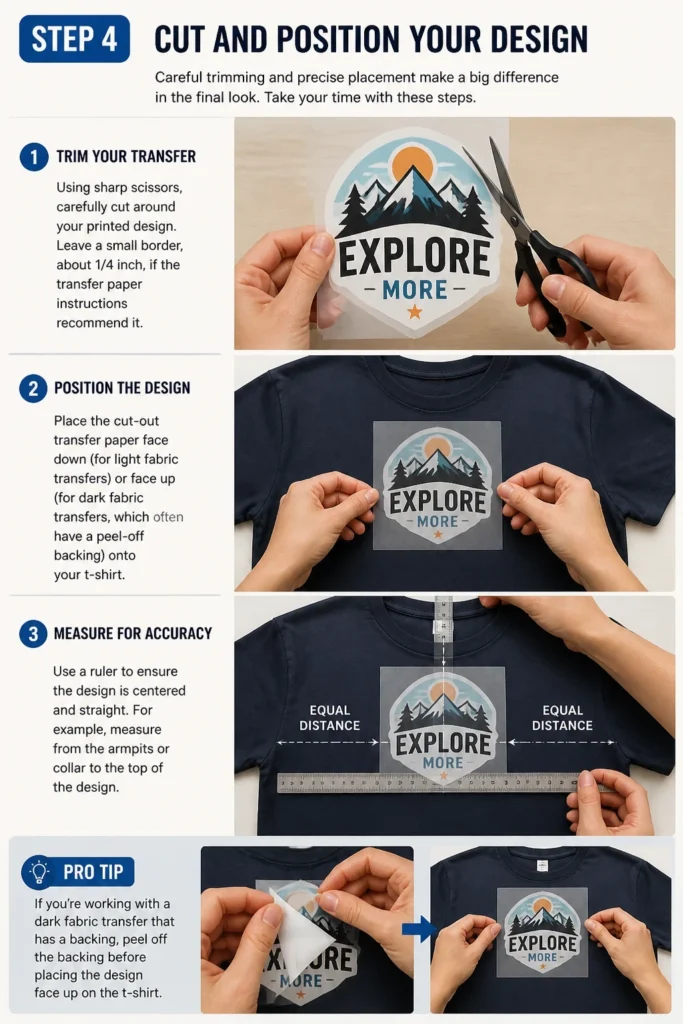
- Trim your transfer: Using sharp scissors, carefully cut around your printed design. Leave a small border, about 1/4 inch, if the transfer paper instructions recommend it.
- Position the design: Place the cut-out transfer paper face down (for light fabric transfers) or face up (for dark fabric transfers, which often have a peel-off backing) onto your t-shirt. Ensure it’s exactly where you want it.
- Measure for accuracy: Use a ruler to ensure the design is centered and straight. For example, measure from the armpits or collar to the top of the design.
Pro Tip: If you’re working with a dark fabric transfer that has a backing, peel off the backing before placing the design face up on the shirt. This creates a softer feel on the fabric.
Step 5: Iron the Transfer Onto the T-Shirt
This is the moment of truth where the magic happens. Consistent heat and pressure are your best friends here.
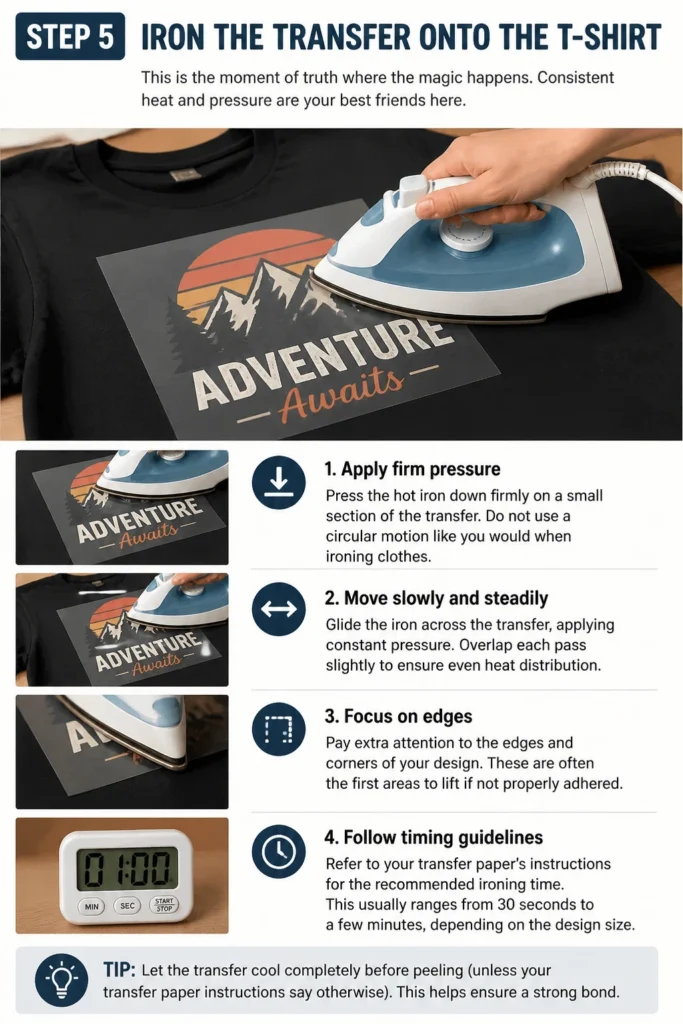
- Apply firm pressure: Press the hot iron down firmly on a small section of the transfer. Do not use a circular motion like you would when ironing clothes.
- Move slowly and steadily: Glide the iron across the transfer, applying constant pressure. Overlap each pass slightly to ensure even heat distribution.
- Focus on edges: Pay extra attention to the edges and corners of your design. These are often the first areas to lift if not properly adhered.
- Follow timing guidelines: Refer to your transfer paper’s instructions for the recommended ironing time. This usually ranges from 30 seconds to a few minutes, depending on the design size.
Step 6: Allow to Cool (or Peel Hot)
The peeling process is critical and depends entirely on your transfer paper type. Check your specific product’s instructions.
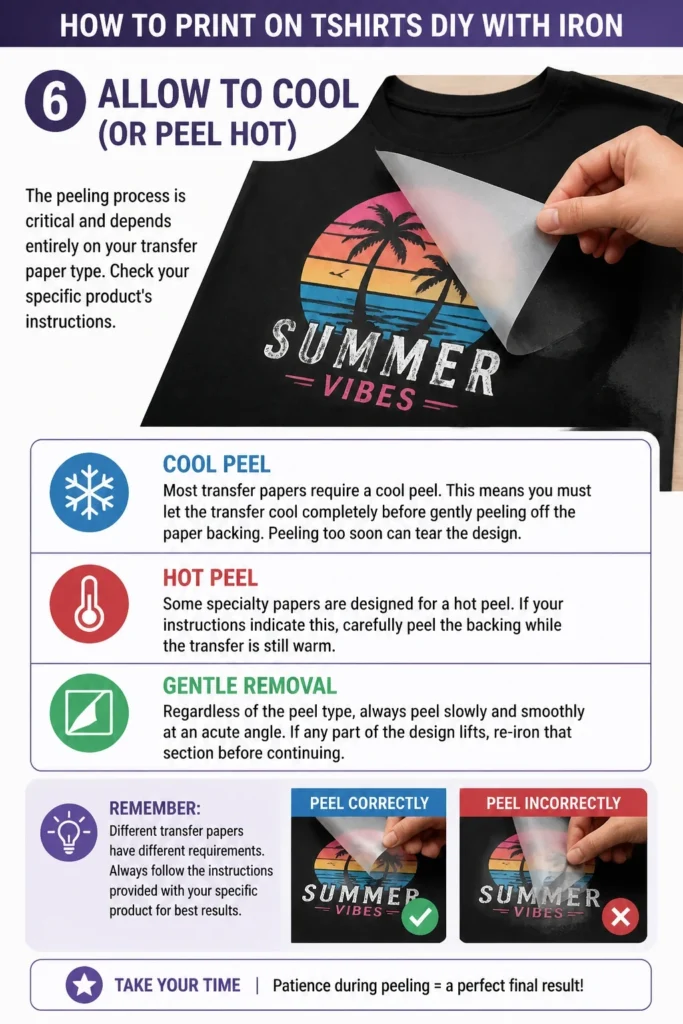
- Cool peel: Most transfer papers require a “cool peel.” This means you must let the transfer cool completely before gently peeling off the paper backing. Peeling too soon can tear the design.
- Hot peel: Some specialty papers are designed for a “hot peel.” If your instructions indicate this, carefully peel the backing while the transfer is still warm.
- Gentle removal: Regardless of the peel type, always peel slowly and smoothly at an acute angle. If any part of the design lifts, re-iron that section before continuing.
Step 7: Finish and Cure Your Design
After peeling, your shirt is almost ready. A final touch can help set the design and ensure longevity.
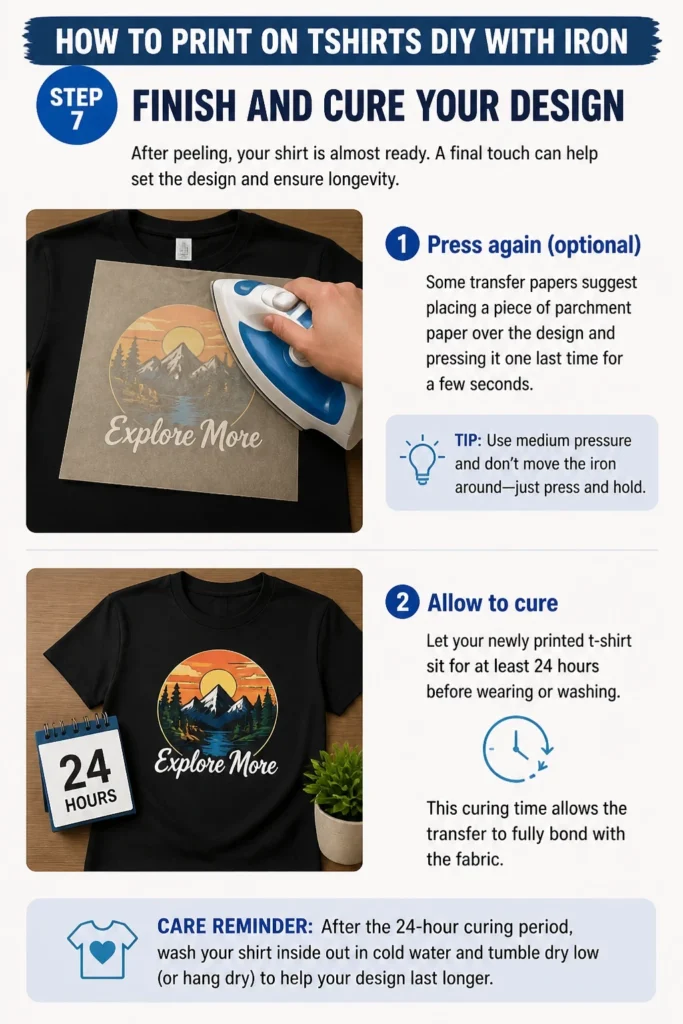
- Press again (optional): Some transfer papers suggest placing a piece of parchment paper over the design and pressing it one last time for a few seconds. This can help set the ink further.
- Allow to cure: Let your newly printed t-shirt sit for at least 24 hours before wearing or washing. This “curing” time allows the transfer to fully bond with the fabric.
Step 8: Care for Your Custom T-Shirt
Proper care will significantly extend the life of your iron-on creation. Treat it gently for lasting vibrancy.
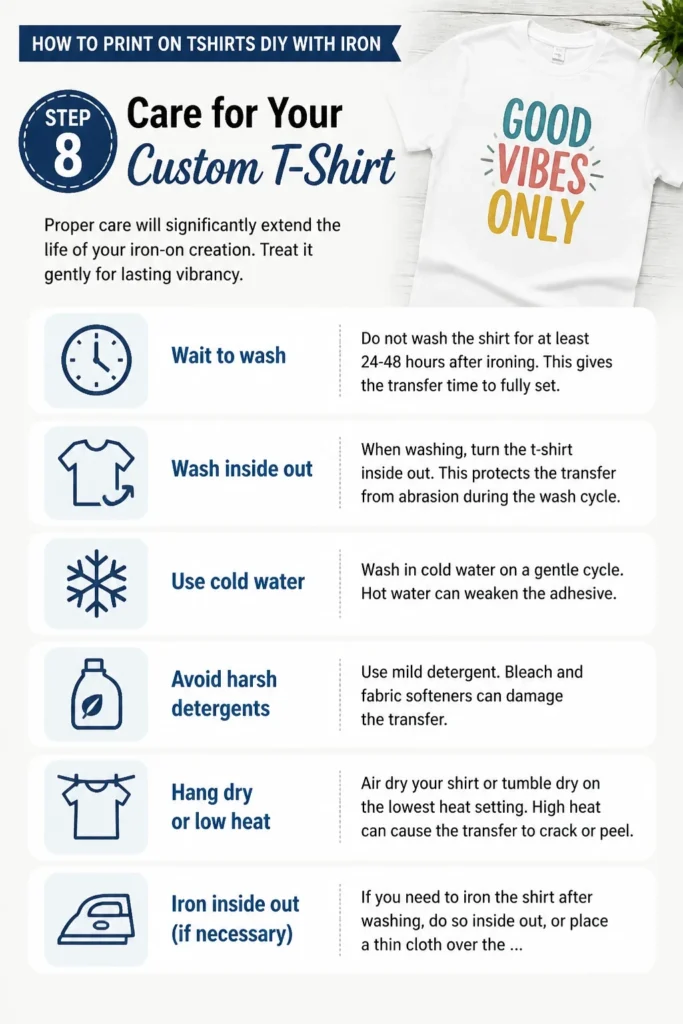
- Wait to wash: Do not wash the shirt for at least 24-48 hours after ironing. This gives the transfer time to fully set.
- Wash inside out: When washing, turn the t-shirt inside out. This protects the transfer from abrasion during the wash cycle.
- Use cold water: Wash in cold water on a gentle cycle. Hot water can weaken the adhesive.
- Avoid harsh detergents: Use mild detergent. Bleach and fabric softeners can damage the transfer.
- Hang dry or low heat: Air dry your shirt or tumble dry on the lowest heat setting. High heat can cause the transfer to crack or peel.
- Iron inside out (if necessary): If you need to iron the shirt after washing, do so inside out, or place a thin cloth over the design to protect it.
Common Mistakes to Avoid
Not Mirroring the Image
This is perhaps the most common beginner’s mistake, especially when working with text. If you forget to flip your design horizontally in your printer settings, any words will appear backward on your finished t-shirt.
Always double-check your printer preview to ensure the image is mirrored for standard light fabric transfers. Dark fabric transfers often don’t require mirroring, but always confirm with your specific product’s instructions.
Uneven Heat and Pressure
Applying inconsistent heat or pressure is a primary reason transfers peel or crack prematurely. Areas that don’t receive enough heat won’t bond properly to the fabric.
Ensure your iron is fully heated and maintain firm, even pressure across the entire design. Overlap your passes slightly to eliminate cold spots, and spend extra time on edges and corners.
Peeling Too Soon or Too Late
The timing of peeling the paper backing is crucial and depends on whether your transfer paper is a “hot peel” or “cool peel” type. Peeling a cool peel transfer while it’s still warm will likely tear the design.
Conversely, waiting too long to peel a hot peel transfer can make it stick to the backing. Always consult your transfer paper’s instructions for the precise peeling temperature.
Using Steam or an Unprotected Surface
Steam is the enemy of iron-on transfers, as moisture can prevent proper adhesion. Additionally, ironing directly on a hard surface without padding can lead to uneven pressure and poor transfer quality.
Always turn off the steam function on your iron. Use a firm, flat, heat-resistant surface, and place a pillowcase or old towel beneath your t-shirt to provide a slightly cushioned and protected base.
Troubleshooting
Design is Peeling or Cracking
If your design starts to lift or crack shortly after application or washing, it often indicates insufficient heat or pressure during the initial transfer process. The transfer did not fully bond with the fabric fibers.
To fix this, try re-ironing the affected areas. Place parchment paper over the design, then press firmly with your hot, steam-free iron for 10-15 seconds. Ensure even heat and pressure. For future projects, extend your ironing time slightly and apply more consistent pressure.
Colors Appear Dull or Faded
Dull colors can be frustrating, especially after putting in the effort. This usually happens if your printer settings weren’t optimized or if the transfer paper wasn’t designed for vibrant color output on your specific fabric type.
When printing, always select “best quality” or “photo paper” settings on your printer. Also, ensure you’re using transfer paper specifically formulated for your fabric color (light or dark) as this significantly impacts color vibrancy. Some papers inherently offer better color saturation than others.
Transfer Feels Stiff or Plastic-like
A stiff, thick feel often occurs with certain types of transfer paper, particularly those for dark fabrics which lay a white base layer. It can also happen if too much transfer paper border is left around the design.
While some stiffness is inherent to transfers, you can minimize it by trimming your design as close to the image as possible. For dark fabric transfers, consider brands known for a softer feel. Washing the shirt after the recommended curing period can also help soften the transfer slightly.
Key Takeaways
- Always mirror your image for light fabric transfers to prevent backward text.
- Use consistent, firm pressure and high, dry heat from your iron for proper adhesion.
- Follow the specific “hot peel” or “cool peel” instructions for your transfer paper.
- Trim your design carefully, leaving a small border or cutting close to the image as directed.
- Wash your custom t-shirt inside out in cold water and air dry to prolong its life.
- Practice on an old piece of fabric or a spare t-shirt before your main project.
Frequently Asked Questions
Can I use any inkjet printer for this?
Yes, most standard inkjet printers are suitable for printing on iron-on transfer paper. You don’t need a specialized printer.
Just make sure your printer is functioning correctly and has sufficient ink for a quality print. Laser printers typically require specific laser-compatible transfer paper.
How long do these iron-on transfers last?
The longevity of an iron-on transfer varies greatly depending on the quality of the transfer paper, the application process, and how the shirt is cared for.
With proper application and care, many transfers can last 20-30 washes or even longer before showing significant signs of wear, cracking, or fading.
Can I iron over the design after it’s applied?
It’s generally not recommended to iron directly over the applied design without protection. Direct, high heat can damage the transfer, causing it to melt, crack, or stick to the iron.
If you need to iron the t-shirt after the transfer is applied, turn the shirt inside out. Alternatively, place a piece of parchment paper or a thin cloth over the design before ironing.
What’s the difference between light and dark fabric transfer paper?
Light fabric transfer paper is usually translucent. The ink from your design shows through the paper, and the fabric color becomes part of the design, which is why mirroring is needed.
Dark fabric transfer paper is opaque, often having a white base that allows the colors to pop against dark backgrounds. It typically doesn’t require mirroring and is peeled after application, leaving only the design on the shirt.
Our Top Recommended Finds
- Quality Inkjet Transfer Paper: Look for brands with strong reviews for both light and dark fabrics. Good paper makes a huge difference in durability and vibrancy.
- Sharp Craft Scissors: Precision cutting around your design ensures a clean, professional edge. A dedicated pair for paper crafts is ideal.
- Parchment Paper: Essential for protecting your iron if you need to re-press or for that final setting step. It prevents sticking and adds an extra layer of protection.
Unleash Your Inner Designer Today
You now have all the knowledge to create fantastic custom t-shirts right from your home. This DIY method is perfect for personalizing gifts, making team shirts, or simply expressing your unique style.
Don’t let a plain t-shirt sit idle any longer. Grab your materials, fire up that iron, and start creating something truly original today.
The possibilities for custom apparel are endless once you master this simple technique.
Beginner-friendly templates, step-by-step guides,
and weekly project ideas in your inbox.