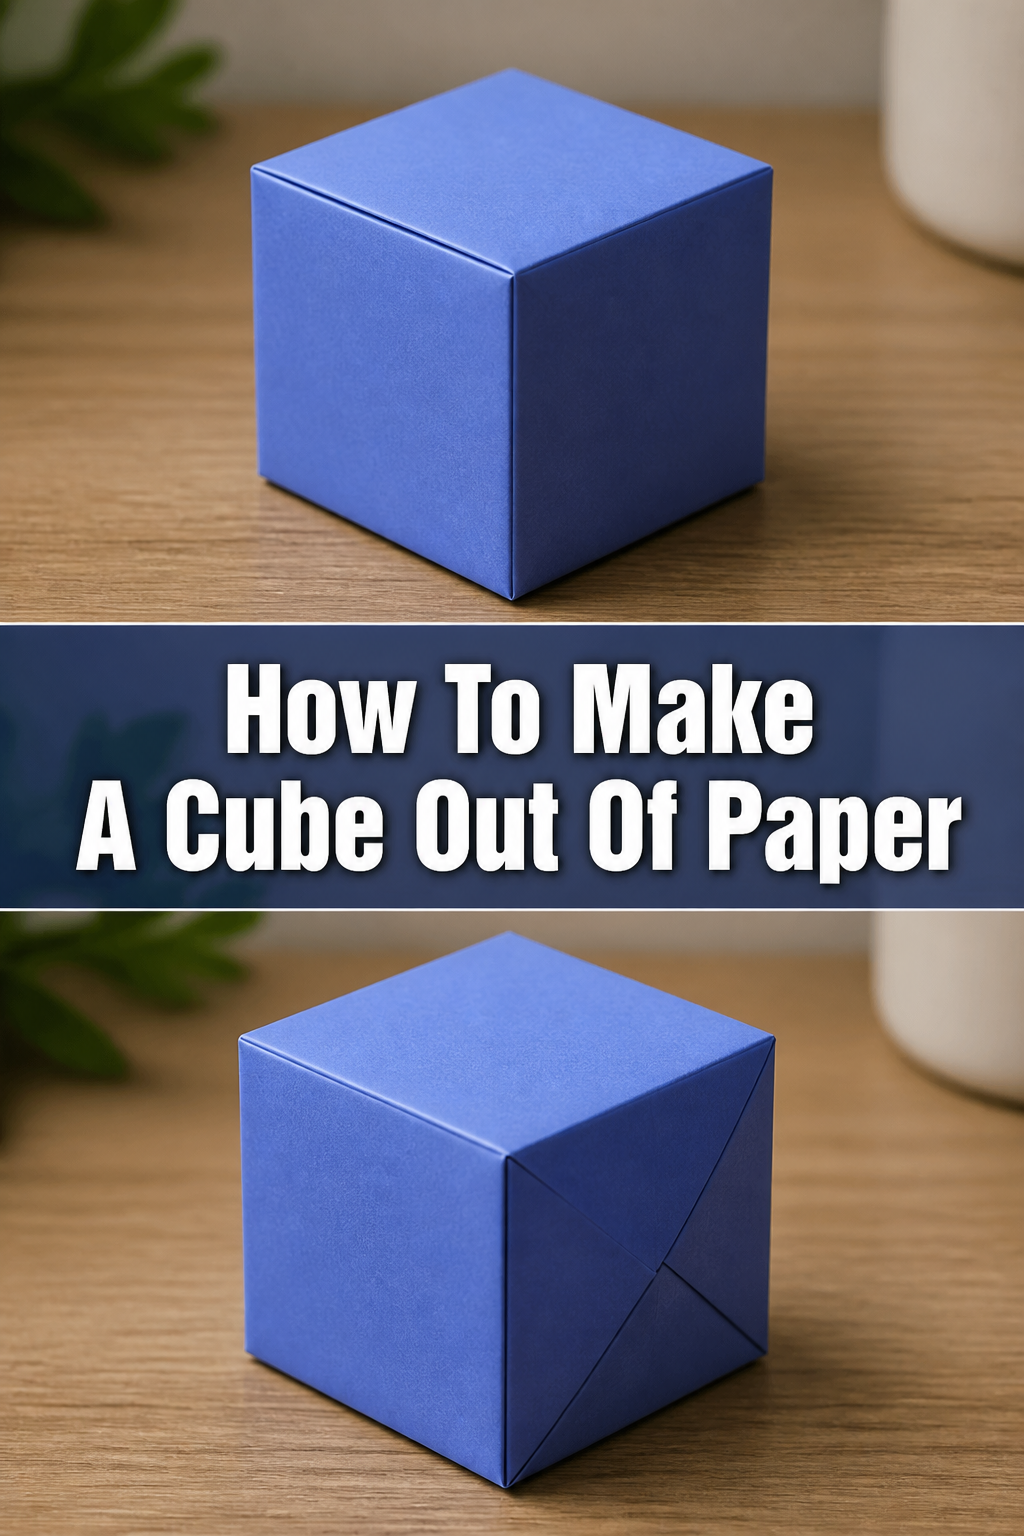
📦 How To Make A Cube Out Of Paper

Beginner-friendly templates, step-by-step guides,
and weekly project ideas in your inbox.
I remember sitting at my kitchen table as a child trying to build a tiny paper village for my toy cars.
My first dozen attempts at making a cube resulted in lopsided, squashed boxes that wouldn’t stand upright.
After years of crafting and professional design work, I have mastered the geometry and folding techniques that make a paper cube structurally perfect every single time.
Quick Overview
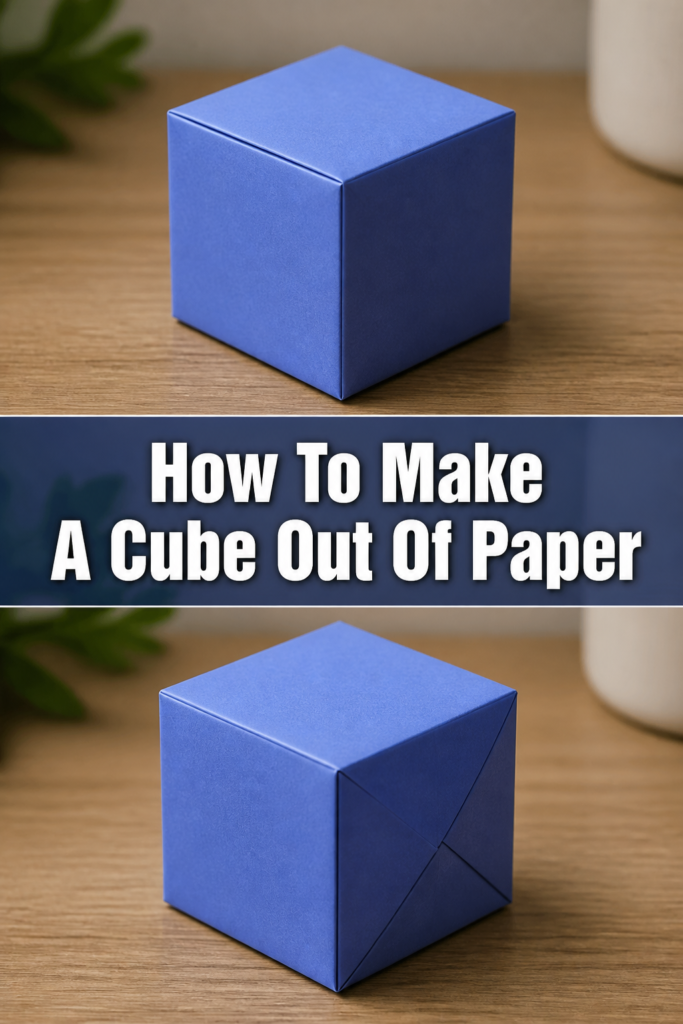
This guide will teach you how to transform a flat sheet of paper into a sturdy, symmetrical 3D cube using the “net” method.
- Time needed: 15 to 20 minutes
- Difficulty: Beginner
- What you’ll need: Paper or cardstock, a ruler, a pencil, scissors, and adhesive.
Step-by-Step Instructions
Step 1: Choose Your Paper Wisely
Select a piece of paper that matches the intended use of your cube.
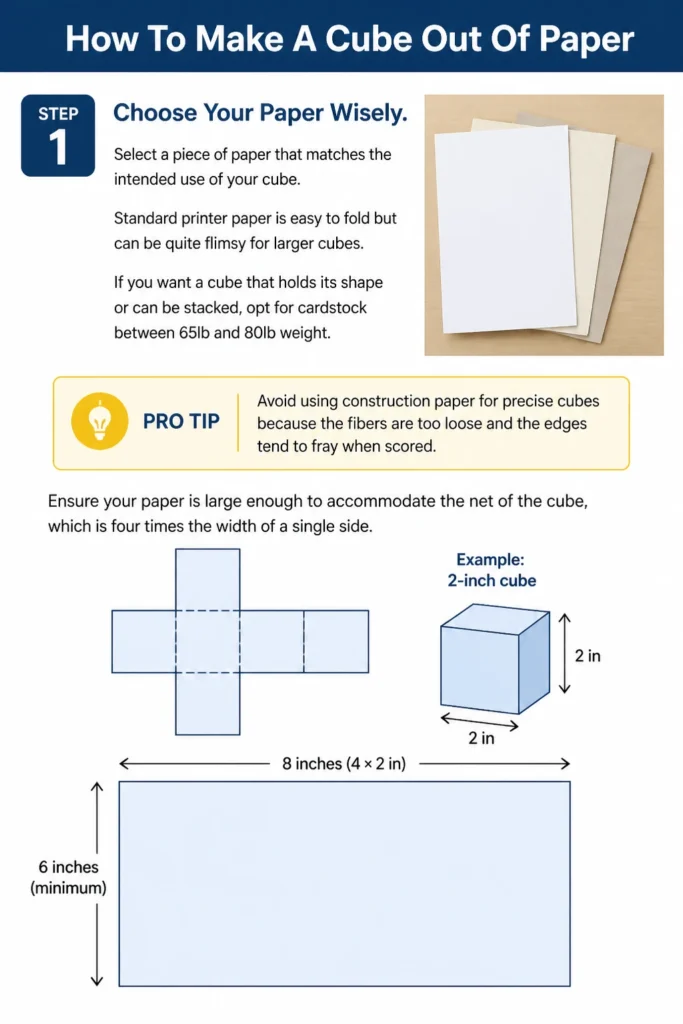
Standard printer paper is easy to fold but can be quite flimsy for larger cubes.
If you want a cube that holds its shape or can be stacked, opt for cardstock between 65lb and 80lb weight.
Pro Tip: Avoid using construction paper for precise cubes because the fibers are too loose and the edges tend to fray when scored.
Ensure your paper is large enough to accommodate the “net” of the cube, which is four times the width of a single side.
If you want a 2-inch cube, your paper needs to be at least 8 inches wide and 6 inches tall.
Step 2: Measure and Draw the Central Row
Place your paper horizontally on a flat, hard surface.
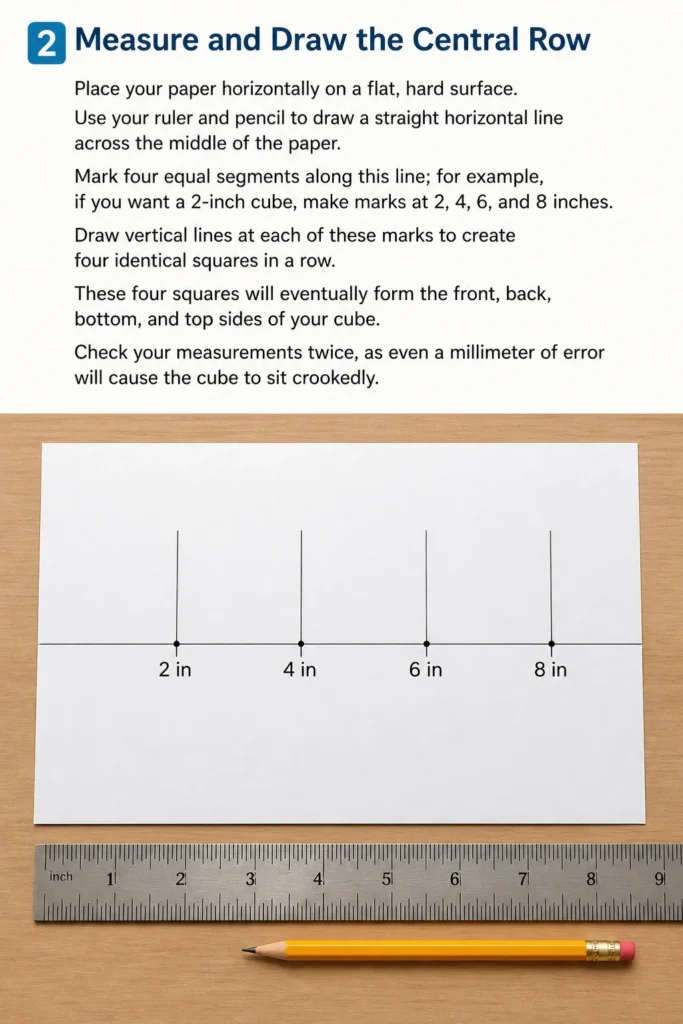
Use your ruler and pencil to draw a straight horizontal line across the middle of the paper.
Mark four equal segments along this line; for example, if you want a 2-inch cube, make marks at 2, 4, 6, and 8 inches.
Draw vertical lines at each of these marks to create four identical squares in a row.
These four squares will eventually form the front, back, bottom, and top sides of your cube.
Check your measurements twice, as even a millimeter of error will cause the cube to sit crookedly.
Step 3: Add the Side Wings
Identify the second square in your horizontal row of four.
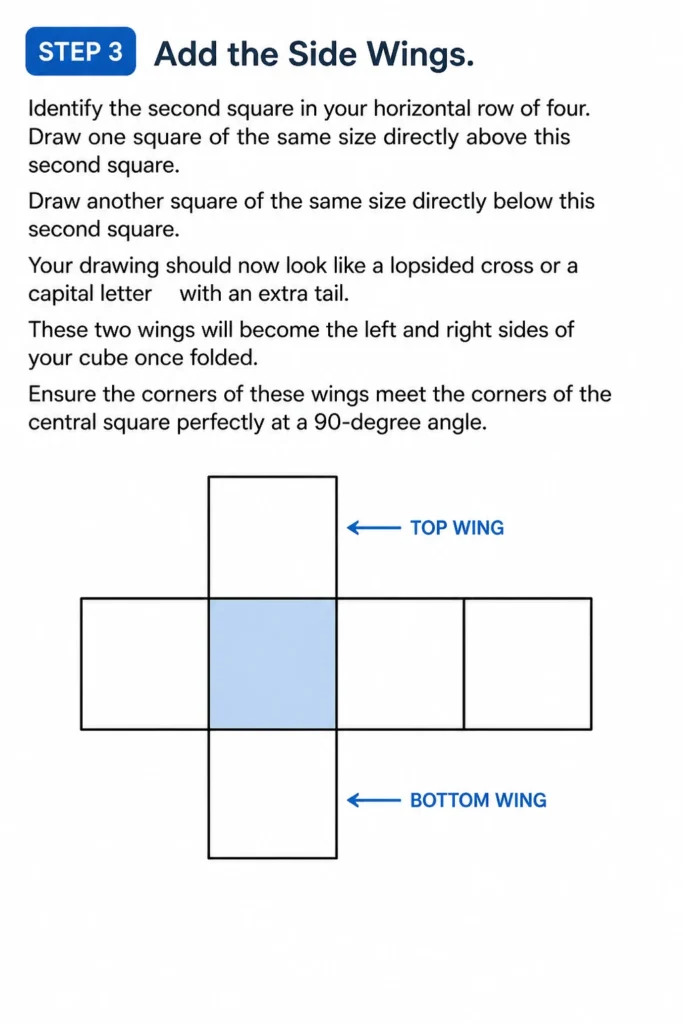
Draw one square of the same size directly above this second square.
Draw another square of the same size directly below this second square.
Your drawing should now look like a lopsided cross or a capital letter “T” with an extra tail.
These two “wings” will become the left and right sides of your cube once folded.
Ensure the corners of these wings meet the corners of the central square perfectly at a 90-degree angle.
Step 4: Sketch the Attachment Flaps
Create small trapezoidal tabs on the edges of your squares to provide a surface for the glue.
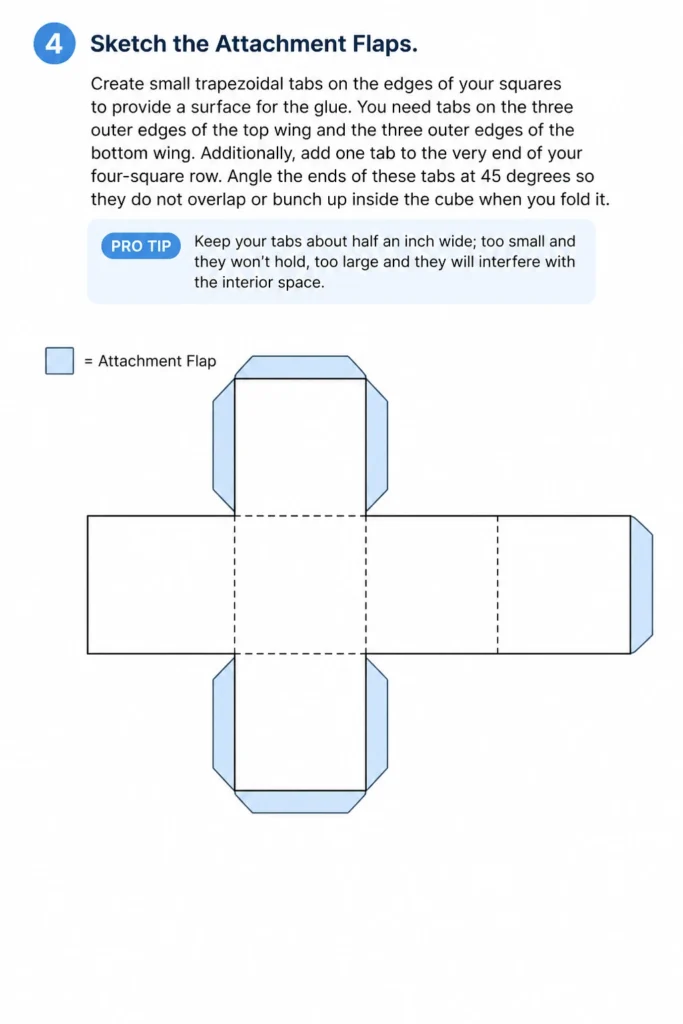
You need tabs on the three outer edges of the top “wing” and the three outer edges of the bottom “wing.”
Additionally, add one tab to the very end of your four-square row.
Angle the ends of these tabs at 45 degrees so they do not overlap or bunch up inside the cube when you fold it.
Pro Tip: Keep your tabs about half an inch wide; too small and they won’t hold, too large and they will interfere with the interior space.
Without these flaps, you would have to use messy tape on the outside of the cube, which ruins the clean aesthetic.
Step 5: Cut Out the Template
Follow the outermost lines of your drawing with sharp scissors.
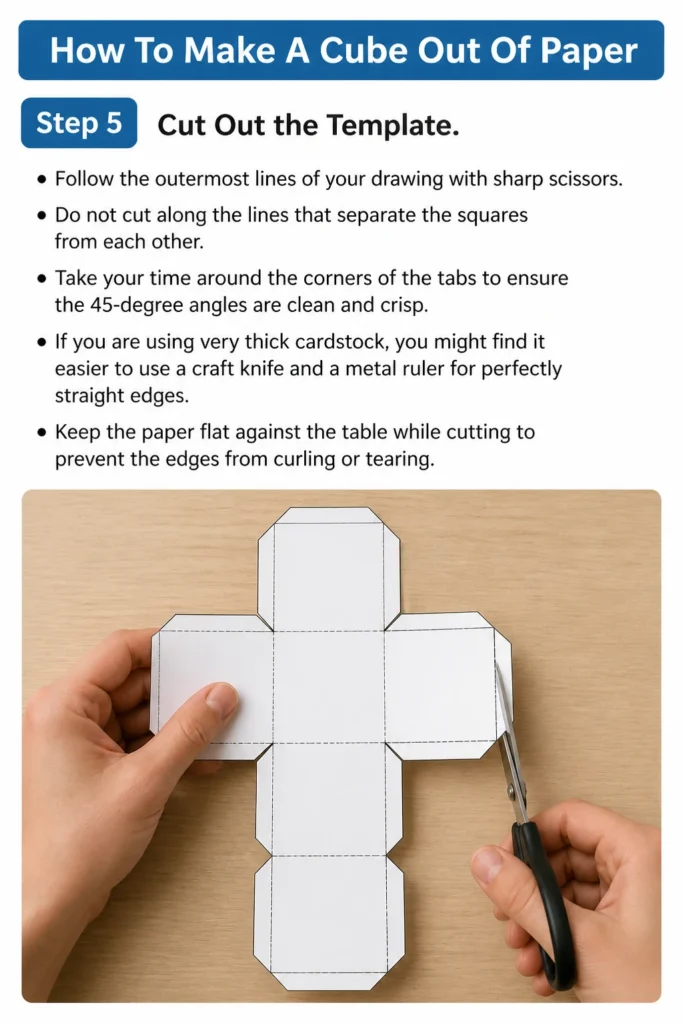
Do not cut along the lines that separate the squares from each other.
Take your time around the corners of the tabs to ensure the 45-degree angles are clean and crisp.
If you are using very thick cardstock, you might find it easier to use a craft knife and a metal ruler for perfectly straight edges.
Keep the paper flat against the table while cutting to prevent the edges from curling or tearing.
Step 6: Score the Fold Lines
Align your ruler with each of the internal lines where the squares and tabs meet.
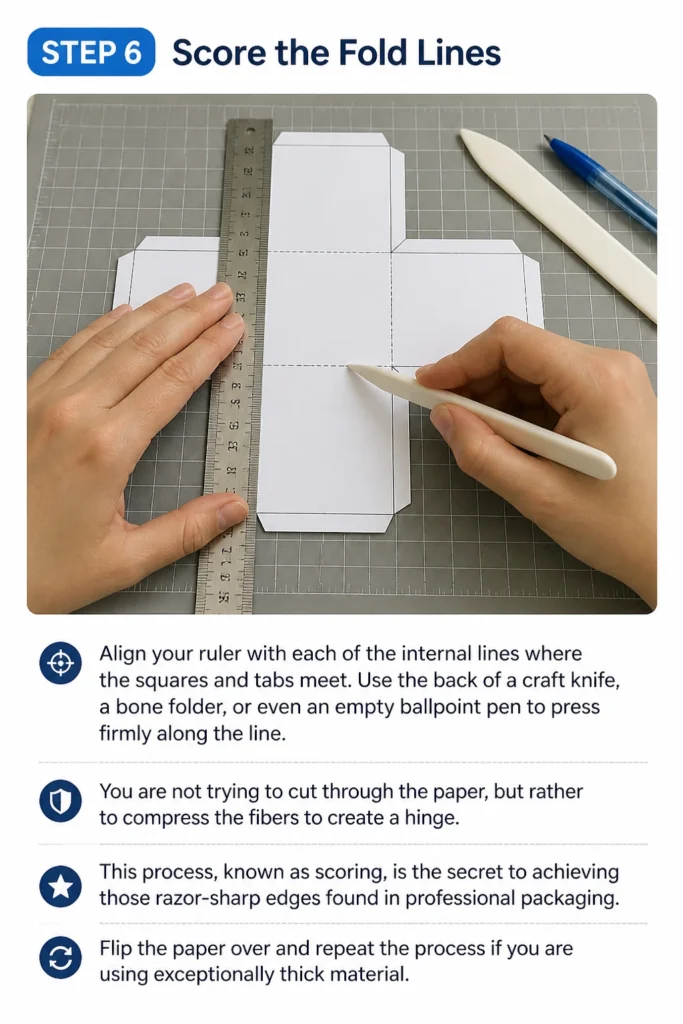
Use the back of a craft knife, a bone folder, or even an empty ballpoint pen to press firmly along the line.
You are not trying to cut through the paper, but rather to compress the fibers to create a “hinge.”
This process, known as scoring, is the secret to achieving those razor-sharp edges found in professional packaging.
Flip the paper over and repeat the process if you are using exceptionally thick material.
Step 7: Pre-Fold Every Crease
Bend each square and tab inward toward the center of the template.
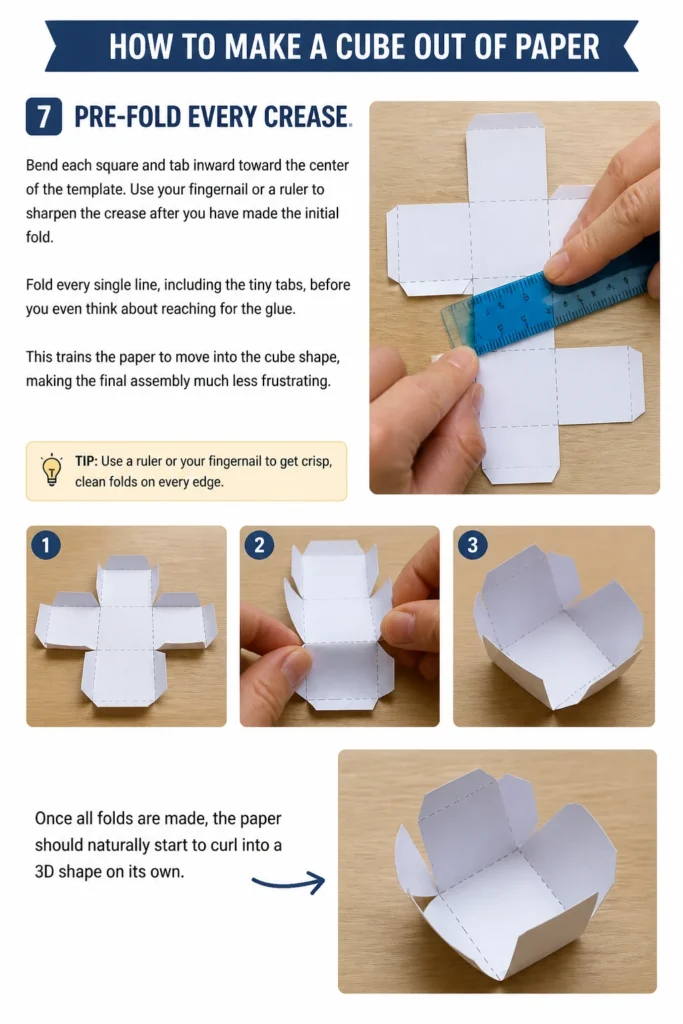
Use your fingernail or a ruler to sharpen the crease after you have made the initial fold.
Fold every single line, including the tiny tabs, before you even think about reaching for the glue.
This “trains” the paper to move into the cube shape, making the final assembly much less frustrating.
Once all folds are made, the paper should naturally start to curl into a 3D shape on its own.
Step 8: Apply Adhesive and Assemble
Spread a thin, even layer of glue onto the outer side of your tabs.
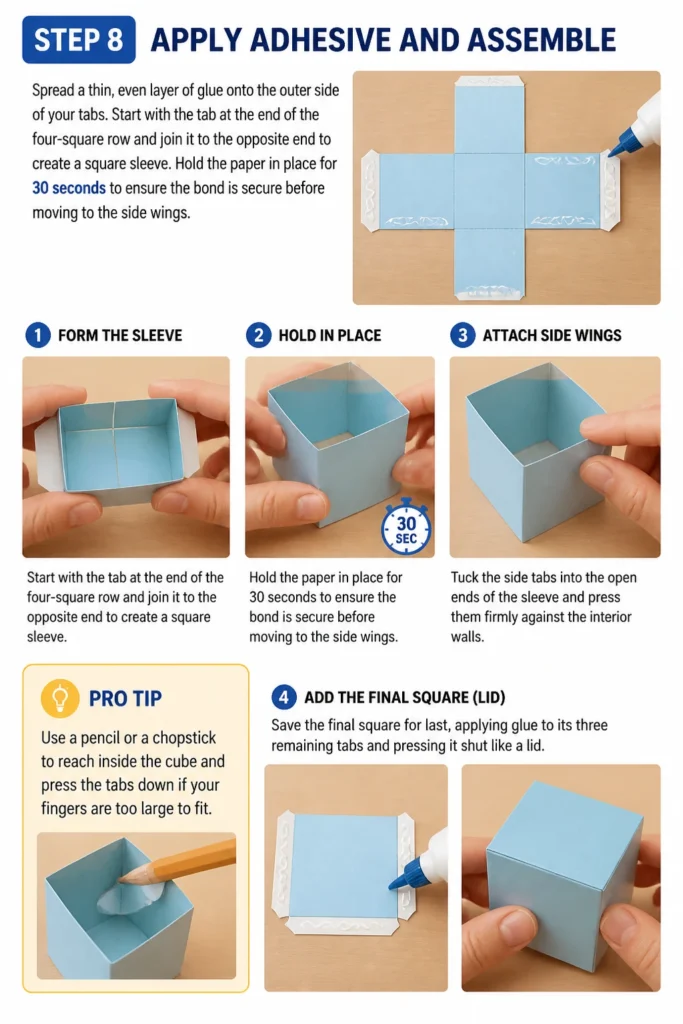
Start with the tab at the end of the four-square row and join it to the opposite end to create a square “sleeve.”
Hold the paper in place for 30 seconds to ensure the bond is secure before moving to the side wings.
Tuck the side tabs into the open ends of the sleeve and press them firmly against the interior walls.
Pro Tip: Use a pencil or a chopstick to reach inside the cube and press the tabs down if your fingers are too large to fit.
Save the final square for last, applying glue to its three remaining tabs and pressing it shut like a lid.
Common Mistakes to Avoid
Using Too Much Glue
Applying a thick glob of liquid glue is a recipe for disaster when working with paper.
The moisture in the glue will saturate the paper fibers, causing the cube to warp, wrinkle, or even tear.
A thin, translucent layer of glue stick or specialized paper glue is all you need for a permanent bond.
Ignoring the Scoring Process
Many beginners try to fold cardstock by hand without scoring the lines first.
This usually results in “cracked” edges where the paper fibers break unevenly, leaving the cube looking messy.
Scoring ensures the fold happens exactly where you want it, maintaining the geometric integrity of the shape.
Inaccurate Measurements
If one square is even 1/16th of an inch larger than the others, the cube will not close properly.
The “lid” will either overlap the edges or leave a visible gap that reveals the interior tabs.
Always use a sharp pencil and a high-quality ruler to ensure every side is mathematically identical.
Troubleshooting
The Cube Is Wobbly or Lopsided
This usually happens when the initial “net” drawing was not perfectly square or the folds weren’t straight.
Check if any of your tabs are bunching up in the corners, which can push the sides outward.
You can sometimes fix this by gently squishing the cube diagonally to realign the paper memory, but prevention is better than the cure.
The Glue Isn’t Holding
If your tabs keep popping open, you might be using a paper with a glossy or coated finish.
Standard glue sticks often struggle to bond with shiny surfaces like photo paper or metallic cardstock.
Try using double-sided scrapbooking tape or a specialized “tacky” glue for a stronger, faster-setting hold.
Key Takeaways
- Precision is paramount: Use a ruler for every single line to ensure the sides are equal.
- Scoring is the secret: Always pre-crease your lines with a blunt edge for professional results.
- Tab geometry matters: Cut your tabs at 45-degree angles to prevent internal crowding.
- Paper weight dictates strength: Choose cardstock for structural cubes and thin paper for decorative ones.
- Adhesive control: Use minimal glue to prevent the paper from warping or becoming soggy.
- Order of operations: Fold the main body into a sleeve before closing the side “wings.”
Frequently Asked Questions
Can I make a cube without using any glue or tape?
Yes, you can use the “origami” method which involves folding six separate pieces of paper into “Sonobe units” and interlocking them. This method relies on friction and tension rather than adhesive, but it requires much more folding and a higher level of patience. The net method described in this guide is generally faster for creating a single, solid-colored cube.
What is the best way to decorate my paper cube?
It is much easier to draw or paint on your cube while the paper is still flat, right after you have cut out the template. If you use markers or paint after the cube is assembled, the pressure of your pen might cause the sides to cave in. Always let your decorations dry completely before you begin the scoring and folding process to avoid smearing your hard work.
How do I make a cube that is perfectly transparent?
You can follow this exact same guide using clear acetate sheets or overhead projector film instead of paper. Since you cannot “score” plastic in the same way, you will need to use a specialized scoring tool or the edge of a ruler to create a very firm crease. Use clear double-sided tape for the tabs, as liquid glue will leave visible, messy marks on transparent materials.
What size paper do I need for a 4-inch cube?
A 4-inch cube requires a template that is four squares wide (16 inches) and three squares tall (12 inches). This means you will need a large format sheet of paper, as standard 8.5 x 11-inch paper will only accommodate a cube that is roughly 2.5 inches per side. Always calculate your total dimensions before you start drawing to ensure your template doesn’t run off the edge of the page.
Our Top Recommended Finds
- Self-Healing Cutting Mat: This protects your table and provides a grid for easier measurement and alignment.
- Metal Ruler with Cork Backing: Metal edges are better for cutting against, and the cork prevents the ruler from slipping mid-line.
- Bone Folder Tool: A traditional tool used by bookbinders to create perfect, polished creases without damaging the paper surface.
Take Your Paper Crafting To The Next Level
Now that you have mastered the basic cube, the world of 3D paper geometry is open to you.
You can apply these same principles of nets and tabs to create pyramids, hexagonal prisms, or even complex polyhedrons.
Try experimenting with different textures of paper or scaling your measurements to create a set of nesting boxes.
The more you practice these precise folds, the more intuitive the relationship between 2D shapes and 3D objects will become.
Grab a fresh sheet of cardstock and start your next project today.
Beginner-friendly templates, step-by-step guides,
and weekly project ideas in your inbox.