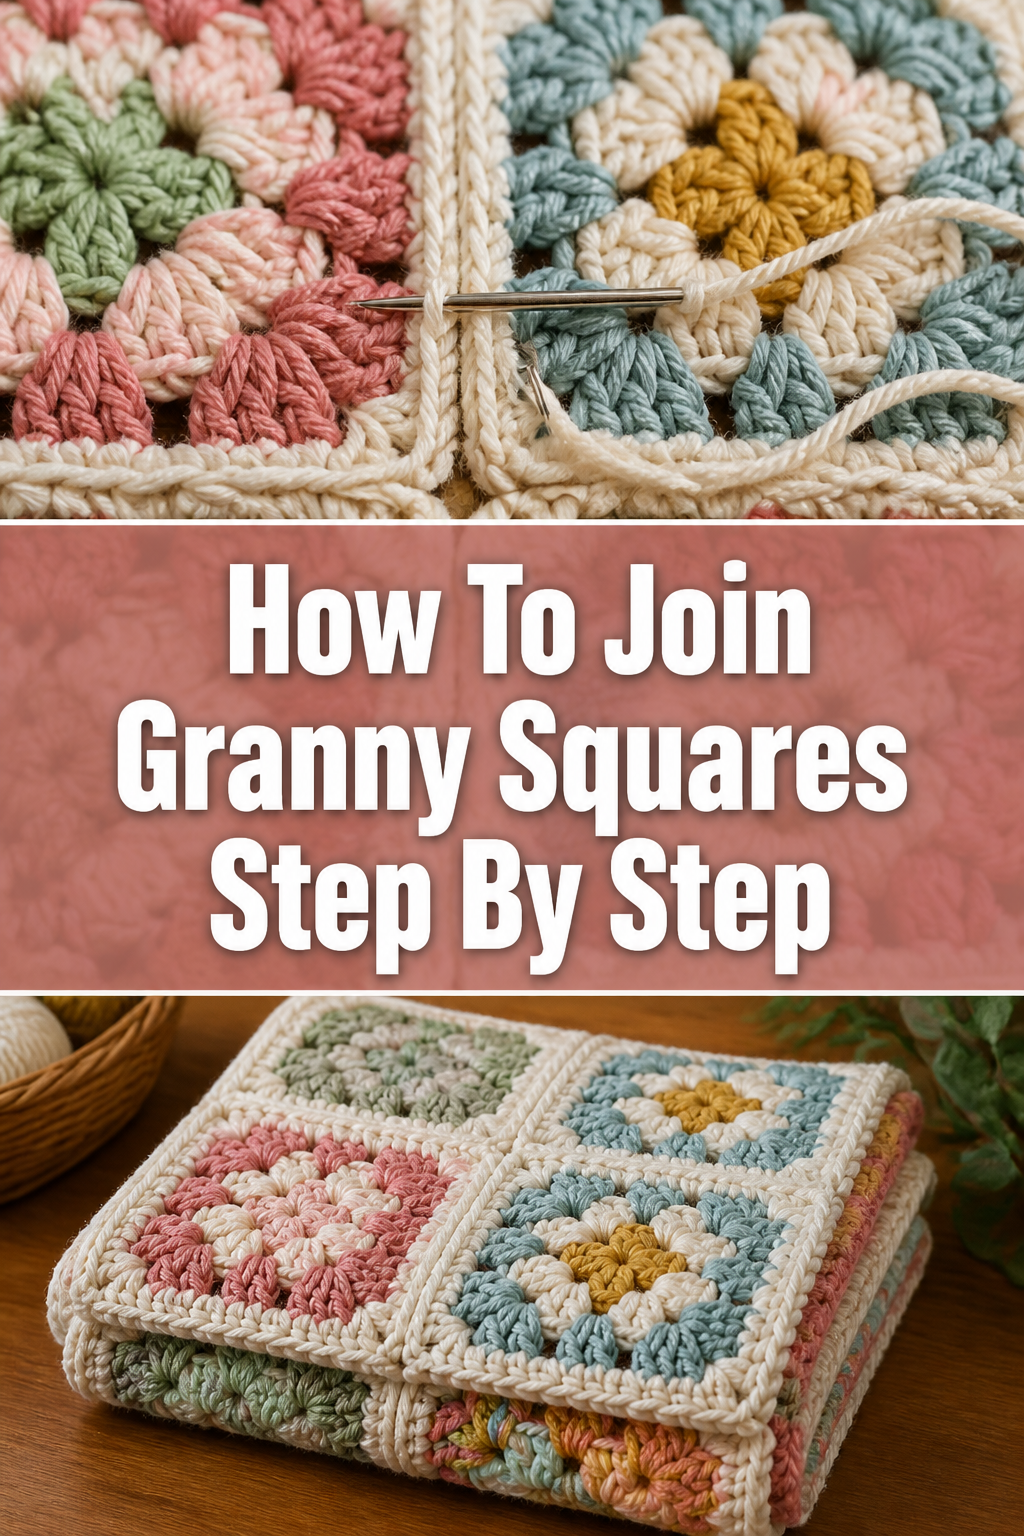
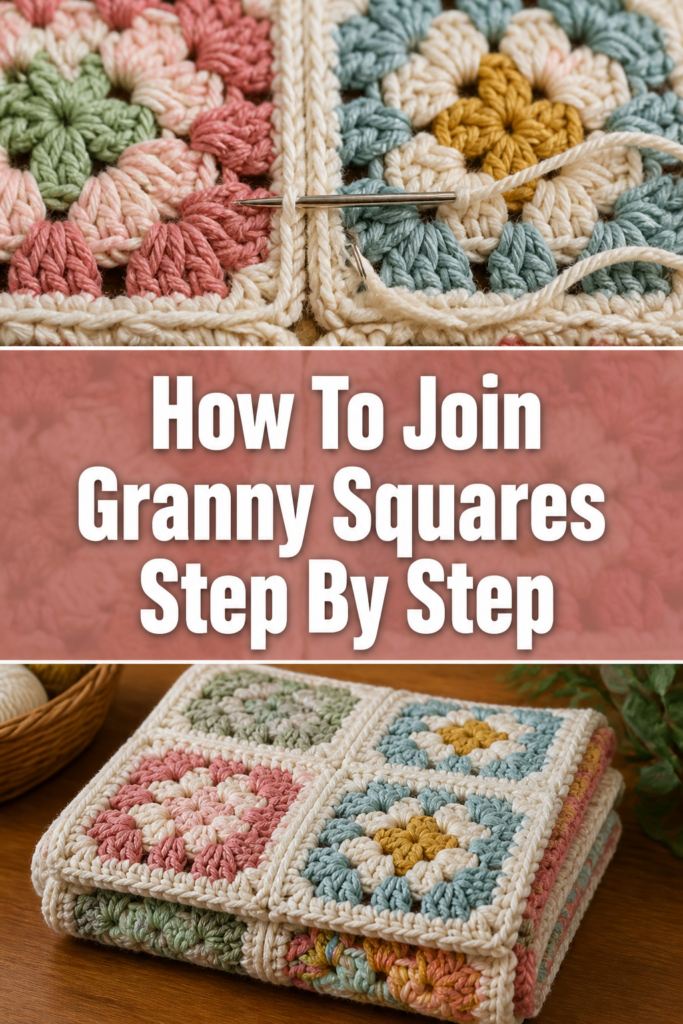
🧶 How To Join Granny Squares Step By Step

Beginner-friendly templates, step-by-step guides,
and weekly project ideas in your inbox.
I remember the excitement of finishing my first pile of granny squares, only to realize I then had to connect them all. It felt like a daunting task at first, a final hurdle before the project was truly complete. This guide shares the straightforward, practical methods I’ve learned and used over the years, making the joining process simple and satisfying.
You’ll discover how to transform individual squares into a cohesive, beautiful fabric with confidence.
Quick Overview
This guide will walk you through the process of connecting your granny squares, turning a collection of pieces into a finished masterpiece. You’ll learn various techniques to achieve different looks, from subtle seams to decorative ridges.
- Time needed: 1-3 hours (depending on project size and chosen method)
- Difficulty: Beginner
- What you’ll need: Your finished granny squares, a crochet hook (same size or one size smaller than used for squares), scissors, and a yarn needle.
Step-by-Step Instructions
Step 1: Prepare Your Granny Squares
Before you begin joining, it’s crucial to prepare your squares. This step ensures a professional, even finish for your entire project.
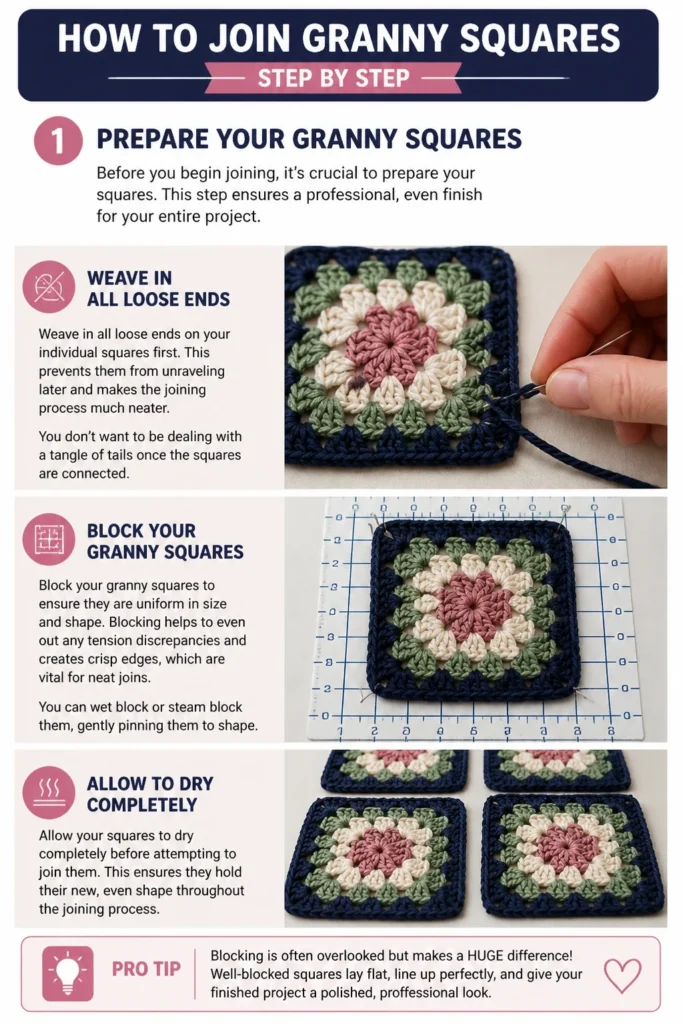
Weave in all loose ends on your individual squares first. This prevents them from unraveling later and makes the joining process much neater. You don’t want to be dealing with a tangle of tails once the squares are connected.
Block your granny squares to ensure they are uniform in size and shape. Blocking helps to even out any tension discrepancies and creates crisp edges, which are vital for neat joins. You can wet block or steam block them, gently pinning them to shape.
Allow your squares to dry completely before attempting to join them. This ensures they hold their new, even shape throughout the joining process.
Pro Tip: Blocking is often overlooked but it’s a game-changer. It makes a huge difference in how professional and polished your finished item looks. Don’t skip this step.
Step 2: Plan Your Layout
Arrange your granny squares on a flat surface in the desired pattern. This visual step helps you identify any color or design repeats and ensures you’re happy with the overall aesthetic before you start joining.
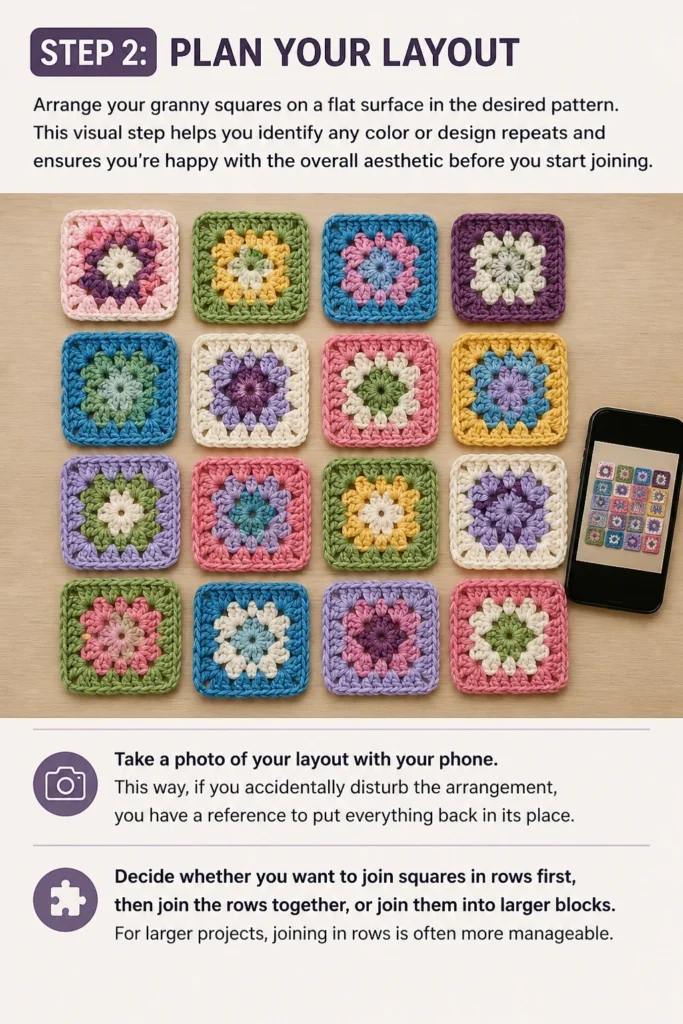
Take a photo of your layout with your phone. This way, if you accidentally disturb the arrangement, you have a reference to put everything back in its place.
Decide whether you want to join squares in rows first, then join the rows together, or join them into larger blocks. For larger projects, joining in rows is often more manageable.
Step 3: Choose Your Joining Method
There are several popular ways to join granny squares, each offering a different look and feel. Your choice will depend on the aesthetic you want for your finished piece.
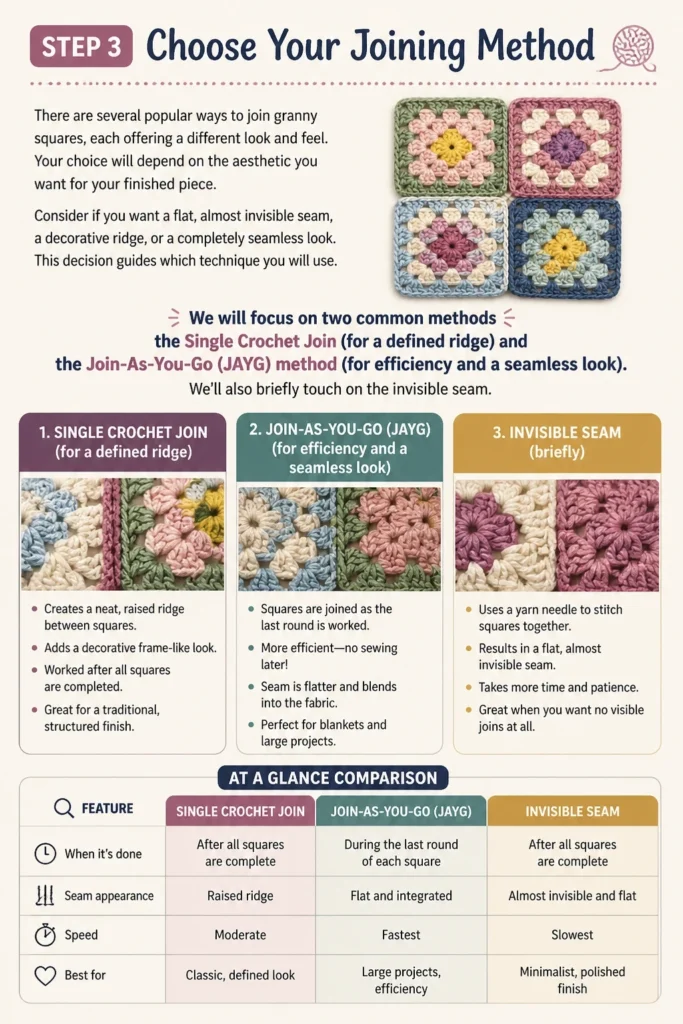
Consider if you want a flat, almost invisible seam, a decorative ridge, or a completely seamless look. This decision guides which technique you will use.
We will focus on two common methods: the Single Crochet Join (for a defined ridge) and the Join-As-You-Go (JAYG) method (for efficiency and a seamless look). We’ll also briefly touch on the invisible seam.
Step 4: Master the Single Crochet Join
The single crochet join creates a sturdy, slightly raised seam that can add a nice decorative element to your project. It’s a popular choice for blankets and garments.
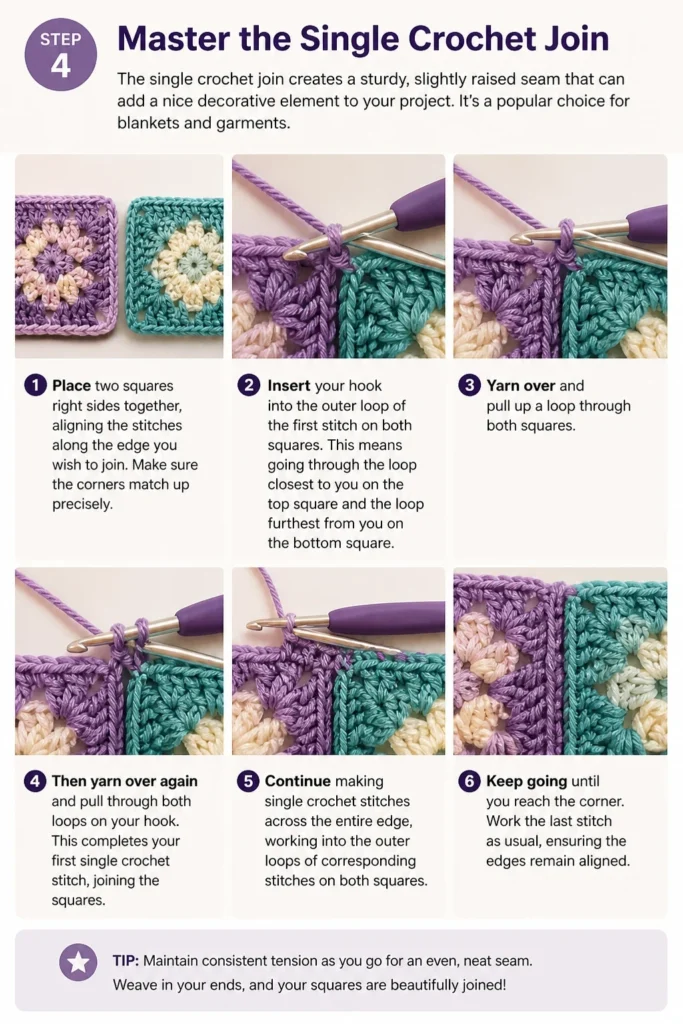
Place two squares right sides together, aligning the stitches along the edge you wish to join. Make sure the corners match up precisely.
Insert your hook into the outer loop of the first stitch on both squares. This means going through the loop closest to you on the top square and the loop furthest from you on the bottom square.
Yarn over and pull up a loop through both squares. Then yarn over again and pull through both loops on your hook. This completes your first single crochet stitch, joining the squares.
Continue making single crochet stitches across the entire edge, working into the outer loops of corresponding stitches on both squares. Maintain consistent tension for an even seam.
When you reach the end of the edge, secure your yarn with a slip stitch or by cutting the yarn and pulling through the loop. You can then repeat this process for all other seams.
Pro Tip: If you want a more subtle raised seam, work through the back loops only of both squares. This creates a slightly flatter ridge compared to working through the outer loops.
Step 5: Explore the Join-As-You-Go (JAYG) Method
The Join-As-You-Go method is incredibly efficient as it allows you to connect squares as you crochet the final round of each new square. This eliminates the need for a separate joining step and reduces the number of ends to weave in.
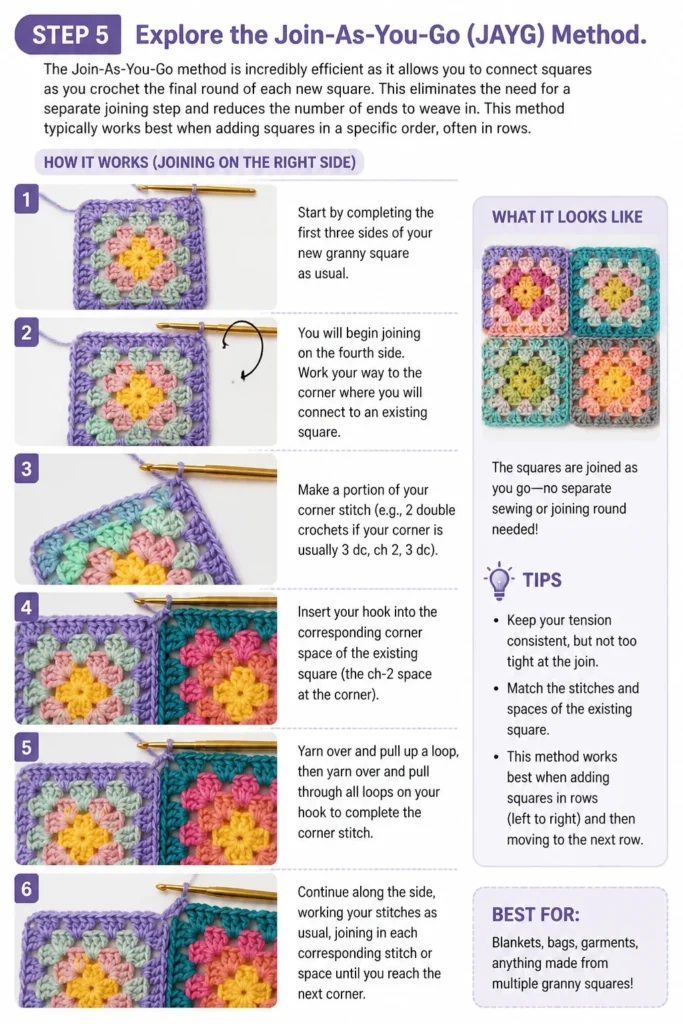
This method typically works best when adding squares in a specific order, often in rows. You’ll be crocheting the last round of a new square and connecting it to existing squares simultaneously.
Start by completing the first three sides of your new granny square as usual. You will begin joining on the fourth side.
Work your way to the corner where you will connect to an existing square. Make a portion of your corner stitch (e.g., 2 double crochets if your corner is usually 3 dc, ch 2, 3 dc).
Insert your hook into the corresponding corner space of the existing square, then make a slip stitch. This creates the ‘chain 2’ space of your corner and connects the two squares.
Continue crocheting along the side of your new square, but instead of chaining between clusters, make a slip stitch into the corresponding chain space or stitch of the existing square. This effectively ‘zips’ them together.
Finish the side by making the remaining part of your corner stitch, slip stitching into the existing square’s corner, and then completing the final side of your new square. This method creates a flat, almost invisible join.
Step 6: Finish All Seams
Once you have joined all your squares using your chosen method, take a moment to inspect every seam. Check for any missed stitches or areas where the tension might be uneven.
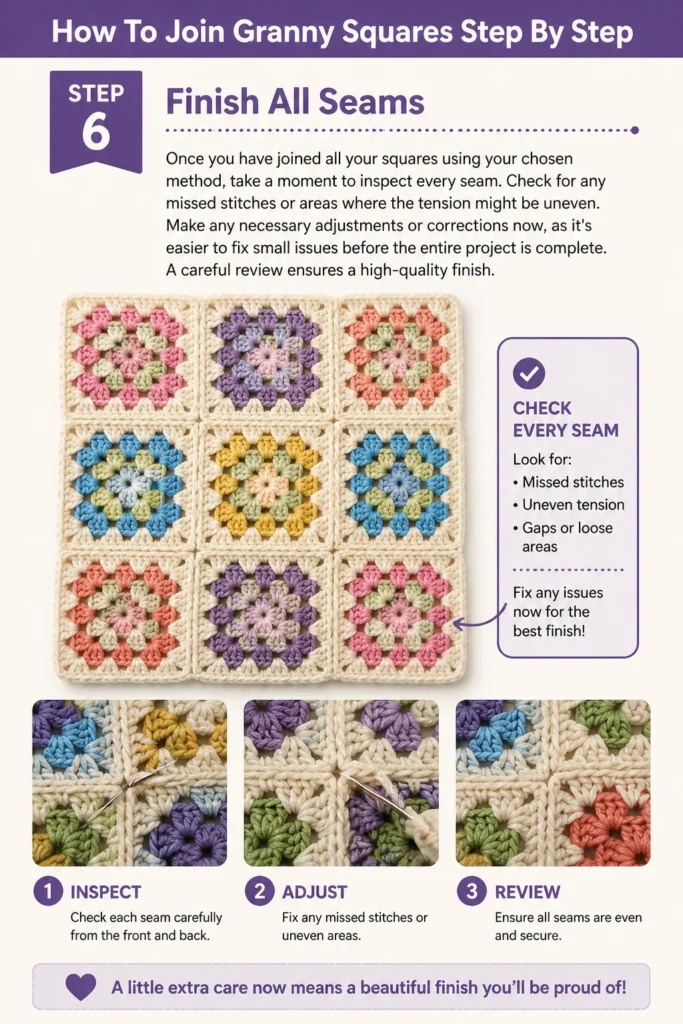
Make any necessary adjustments or corrections now, as it’s easier to fix small issues before the entire project is complete. A careful review ensures a high-quality finish.
Step 7: Weave in Remaining Ends
Even with JAYG, you’ll likely have a few ends from where you started and finished your joining yarn. Use your yarn needle to weave these ends securely into the stitches.
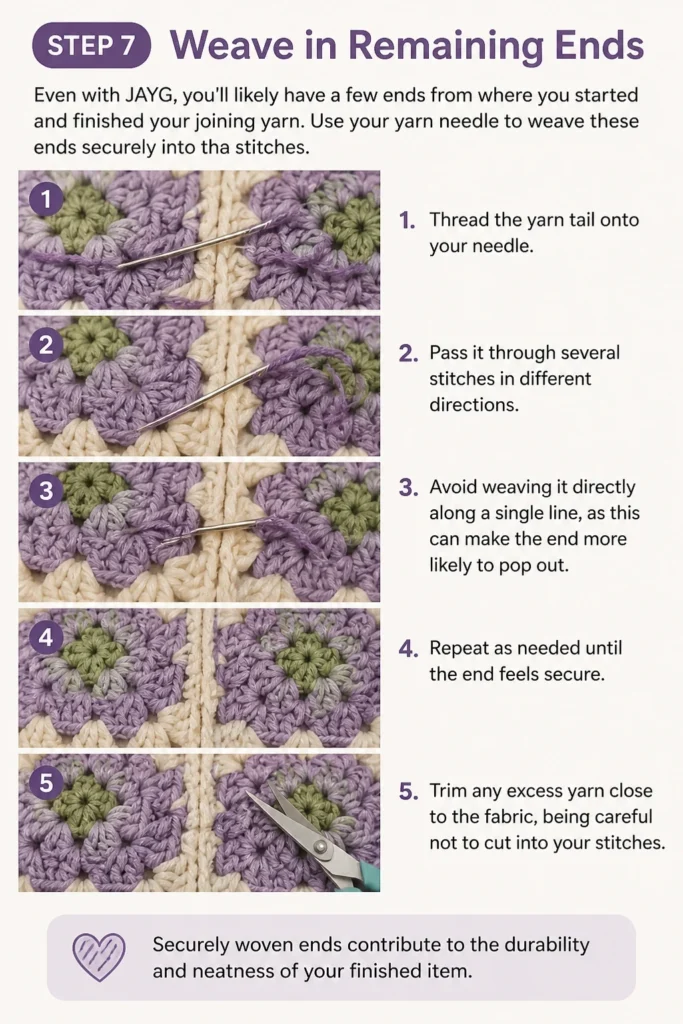
Thread the yarn tail onto your needle and pass it through several stitches in different directions. Avoid weaving it directly along a single line, as this can make the end more likely to pop out.
Trim any excess yarn close to the fabric, being careful not to cut into your stitches. Securely woven ends contribute to the durability and neatness of your finished item.
Step 8: Give Your Project a Final Block (Optional)
After all the joining is complete, you can choose to give your entire project a final block. This helps to even out any remaining tension issues from joining and gives the whole piece a cohesive look.
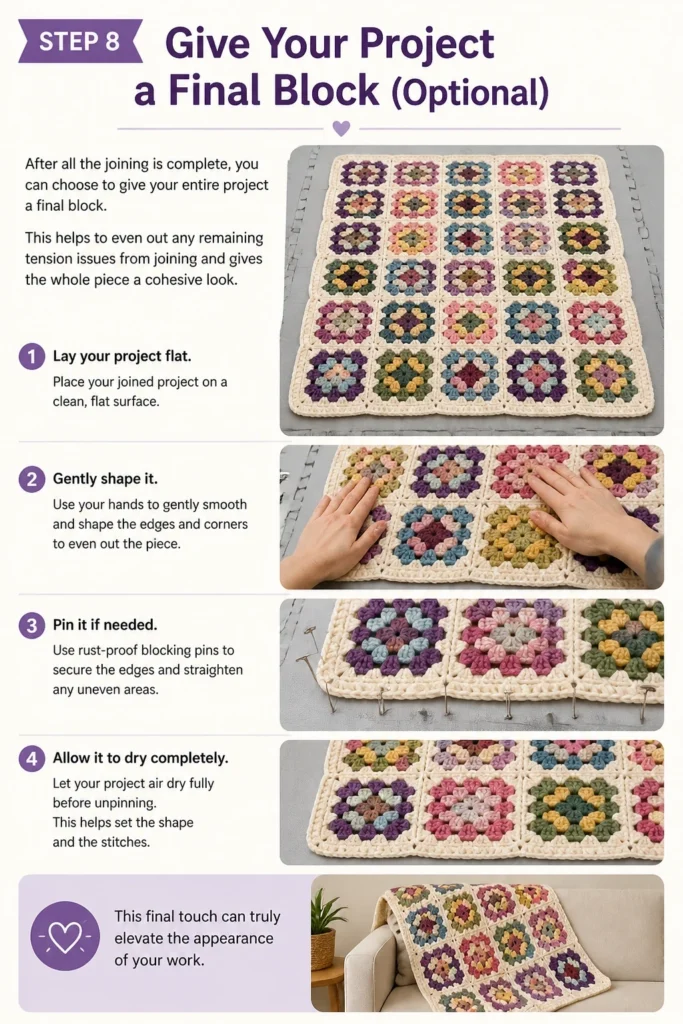
Lay your joined project flat, gently shape it, and pin it if needed. Allow it to dry completely. This final touch can truly elevate the appearance of your work.
Common Mistakes to Avoid
Uneven Tension
One of the most common pitfalls is inconsistent tension while joining squares. If your stitches are too tight, the seam will pucker and pull; if they are too loose, it will create gaps.
This can result in a wavy or uneven finished product. Practice your chosen joining stitch on a few scrap squares first to get a feel for the right tension. Aim for a consistent, relaxed hold on your yarn.
Not Blocking Squares
Skipping the blocking step before joining can lead to frustration. Unblocked squares might be slightly different sizes or have wavy edges, making it incredibly difficult to align them neatly.
This often results in a lumpy or misaligned final project. Taking the time to block your squares ensures they are uniform, making the joining process much smoother and the outcome far more professional.
Choosing the Wrong Yarn or Hook Size
Using a joining yarn that is significantly different in weight or fiber type from your squares can create an undesirable effect. A thicker yarn will result in a bulky seam, while a thinner yarn might create gaps.
Similarly, using a hook that is too large or too small can impact tension and seam appearance. Generally, use the same hook size or one size smaller than what you used for your squares for the best results.
Forgetting to Weave in Ends Securely
Leaving loose ends or weaving them in poorly is a common mistake that can compromise the integrity and appearance of your project. Ends can unravel, creating holes or messy spots.
Always weave your ends through several stitches in different directions. This “locks” the yarn in place, preventing it from coming undone and ensuring your hard work lasts.
Troubleshooting
Seams Look Bulky or Uneven
If your seams appear too thick or are not lying flat, it’s often due to inconsistent tension or using a hook that’s too large for the joining yarn. Too many stitches in a single area can also cause bulk.
Try using a slightly smaller hook for your joining stitches to create a tighter, flatter seam. Ensure you are only working into the specified loops or spaces and not adding extra stitches. Practicing on a few squares can help you find the right rhythm.
Squares Don’t Line Up Properly
When squares don’t align, it usually means your blocking wasn’t effective enough, or you’re not matching the stitches correctly as you join. Misaligned squares can lead to a crooked final piece.
Re-block your squares to ensure they are all the same size and have straight edges. As you join, count your stitches and spaces carefully to ensure you’re working into corresponding points on both squares. Pinning squares together before joining can also help maintain alignment.
Gaps Appearing in the Join
If you notice small holes or gaps along your joined seams, your tension might be too loose, or you might be skipping stitches. Gaps can make your project look unfinished and less durable.
Focus on maintaining a consistent, firm tension as you crochet your joining stitches. Make sure you are inserting your hook into every corresponding stitch or chain space. If using a slip stitch join, ensure your slip stitches are snug, not loose.
Key Takeaways
- Blocking is essential: Always block your granny squares before joining to ensure uniform size and neat edges.
- Plan your layout: Arrange your squares beforehand to visualize your design and prevent mistakes.
- Choose your method wisely: Select a joining technique (e.g., single crochet, JAYG, invisible seam) that aligns with your desired aesthetic.
- Maintain consistent tension: Even tension is crucial for smooth, attractive seams that lay flat.
- Weave ends securely: Properly weaving in all yarn tails ensures durability and a professional finish.
- Don’t rush the process: Take your time with each step for the best possible outcome.
Frequently Asked Questions
What’s the easiest joining method for beginners?
The slip stitch join or single crochet join are generally considered the easiest for beginners. They are straightforward, involve basic crochet stitches, and allow you to join squares individually, making it less overwhelming than methods like Join-As-You-Go.
Can I join squares made with different yarn weights?
While technically possible, it’s generally not recommended to join squares of significantly different yarn weights. This can lead to uneven tension, puckering, or a lumpy appearance in your finished project. If you must, ensure the joining yarn complements the heavier yarn, and be prepared for potential inconsistencies.
How do I hide my joins completely?
For an almost invisible join, consider using the mattress stitch or a slip stitch join worked through the back loops only. These methods create very flat, subtle seams that blend seamlessly into your fabric, making the join barely noticeable.
Should I block before or after joining?
You should always block your individual granny squares before joining them. This ensures they are uniform in size and shape, making the joining process much easier and neater. A final blocking after joining can then help to even out any remaining tension and give the entire project a polished look.
Our Top Recommended Finds
- Ergonomic Crochet Hook Set: A comfortable hook reduces hand fatigue, making long joining sessions more enjoyable and helping maintain consistent tension.
- Blocking Mats with Grid: These foam mats with grid lines are perfect for pinning your squares to exact dimensions, ensuring perfect uniformity before joining.
- Quality Yarn Needles: A sturdy set of metal yarn needles with large eyes makes weaving in all those ends a much quicker and less frustrating task.
Your Connected Creation Awaits
You now have all the tools and knowledge to confidently join your granny squares. No more piles of beautiful but unconnected pieces; your next project will be a cohesive masterpiece.
Take these steps, choose a method you love, and watch your collection of squares transform into a cherished item. Start connecting those squares today and enjoy the satisfaction of seeing your vision come to life.
Beginner-friendly templates, step-by-step guides,
and weekly project ideas in your inbox.