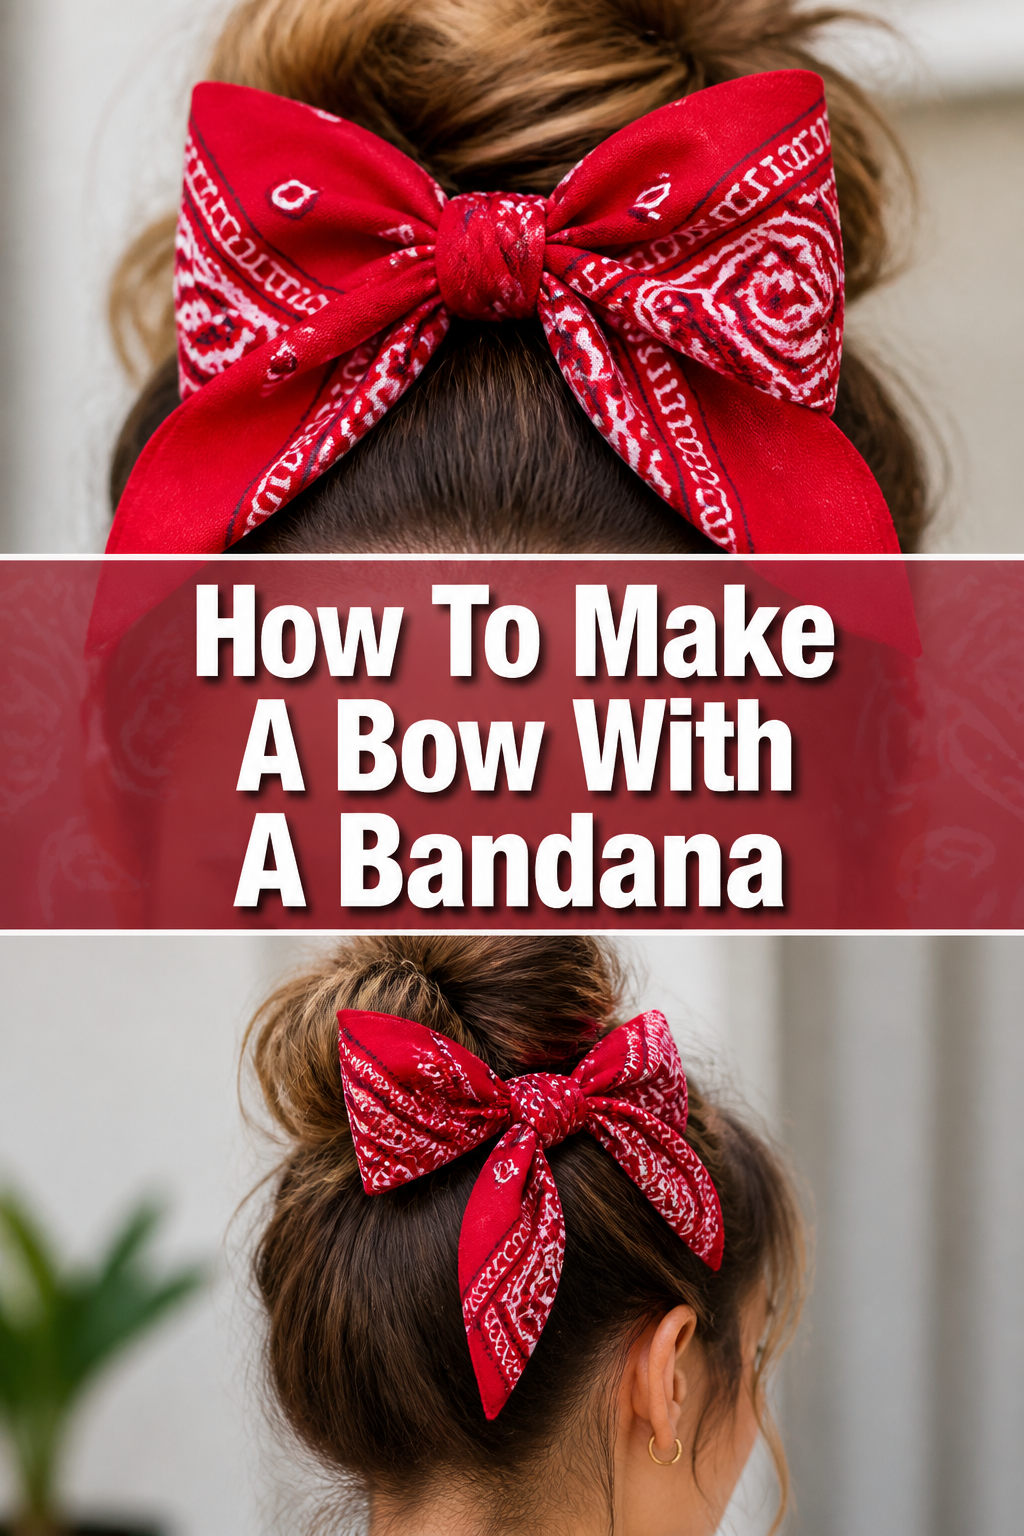
🎀 How To Make A Bow With A Bandana

Beginner-friendly templates, step-by-step guides,
and weekly project ideas in your inbox.
I remember trying to find the perfect hair accessory for a last-minute event, feeling frustrated by limited options. That’s when I discovered the magic of a simple bandana, transforming it into a chic bow right at home. This guide shares that exact process, making it easy for you to craft your own beautiful bows.
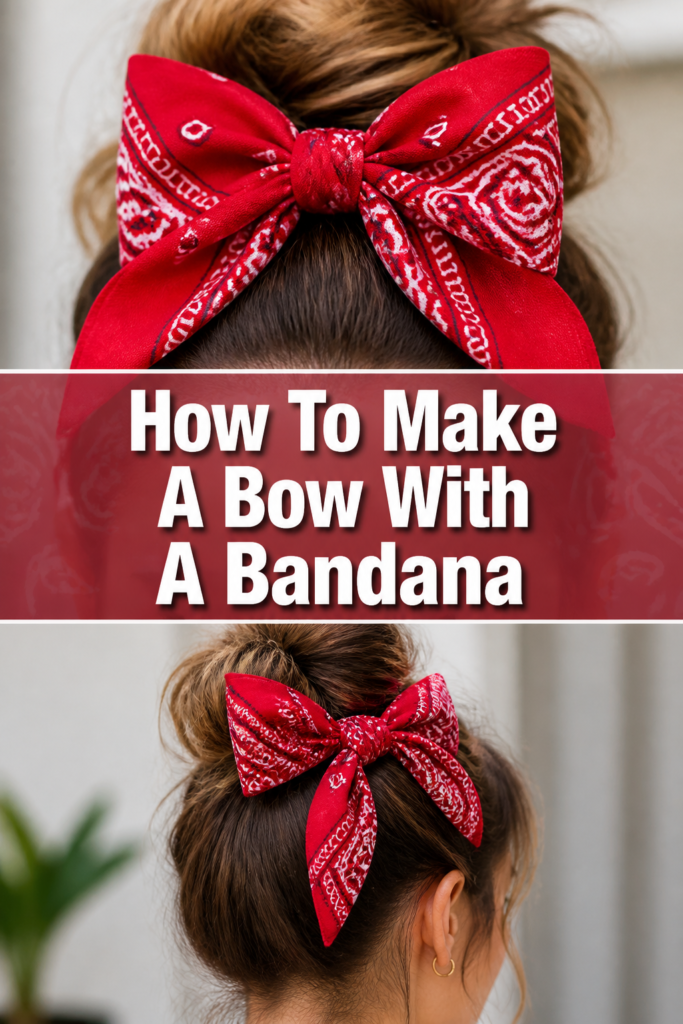
Quick Overview
You’re about to create a versatile and stylish bow using just a bandana. This project is perfect for adding a personal touch to your hair, an outfit, or even a gift. Get ready to transform a simple piece of fabric into something special.
- Time needed: 5-10 minutes
- Difficulty: Beginner
- What you’ll need: One square bandana (cotton works best), optional: a hair tie or elastic band.
Step-by-Step Instructions
Step 1: Choose Your Bandana
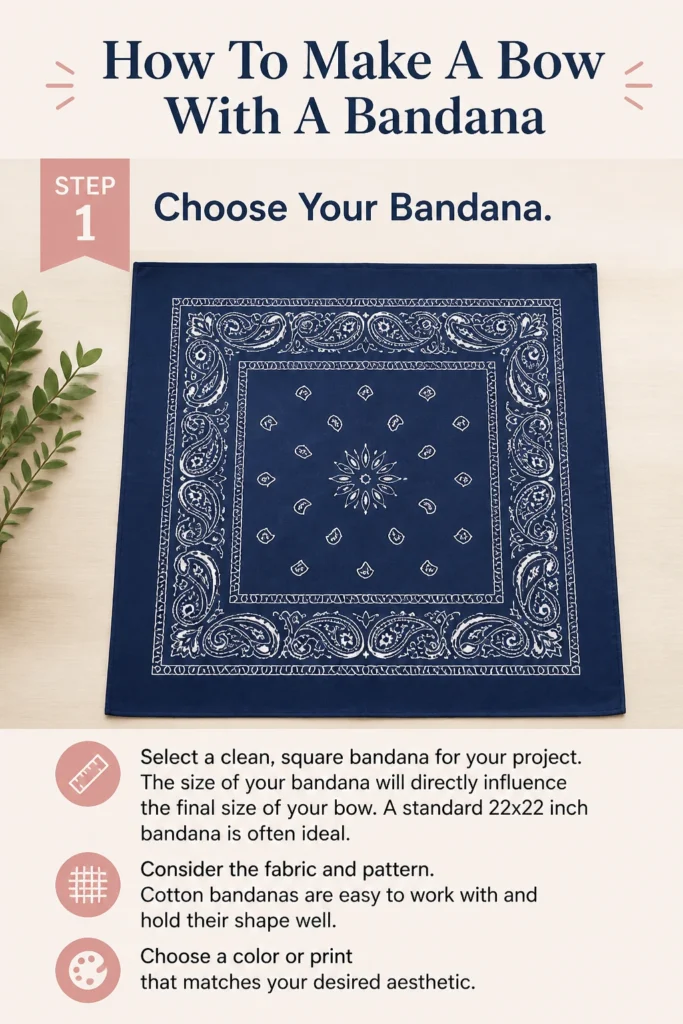
Select a clean, square bandana for your project. The size of your bandana will directly influence the final size of your bow. A standard 22×22 inch bandana is often ideal.
Consider the fabric and pattern. Cotton bandanas are easy to work with and hold their shape well. Choose a color or print that matches your desired aesthetic.
Step 2: Lay It Flat
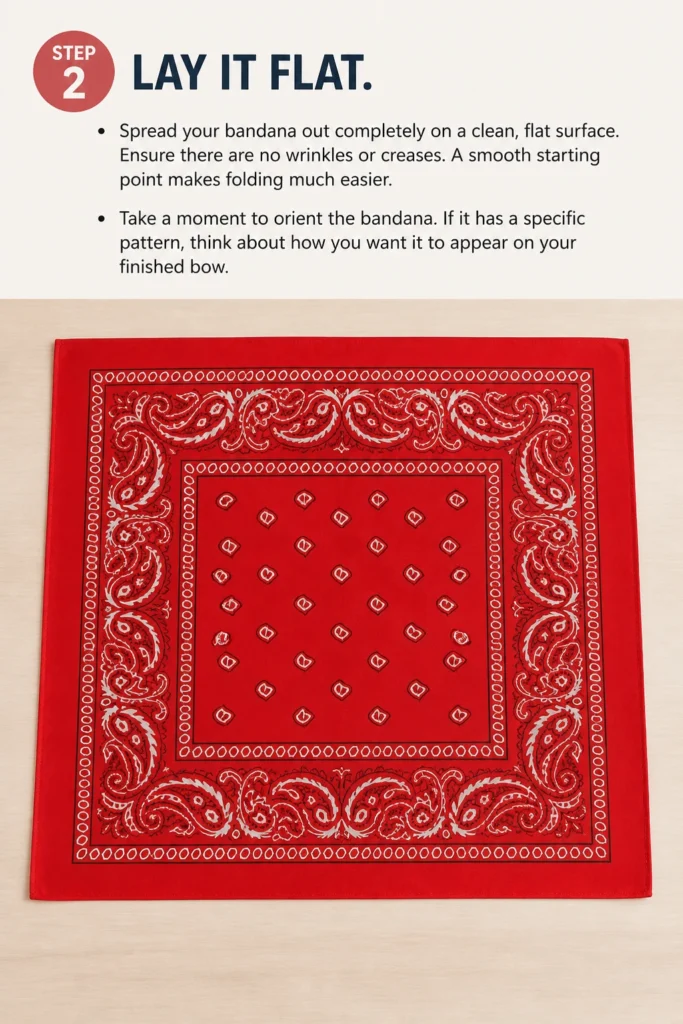
Spread your bandana out completely on a clean, flat surface. Ensure there are no wrinkles or creases. A smooth starting point makes folding much easier.
Take a moment to orient the bandana. If it has a specific pattern, think about how you want it to appear on your finished bow.
Step 3: Fold into a Strip
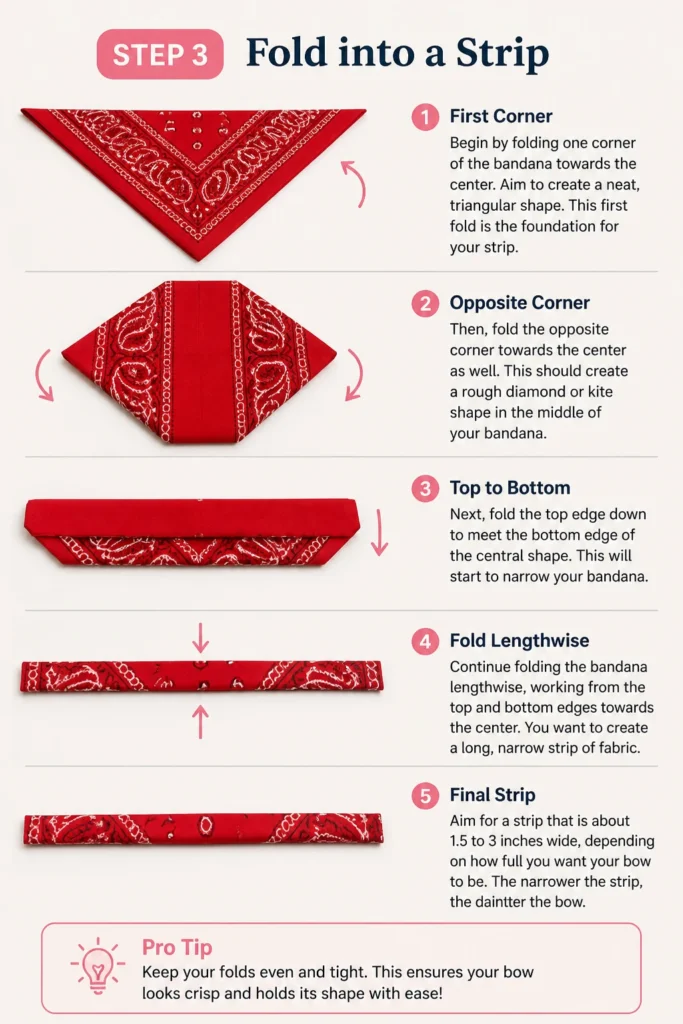
Begin by folding one corner of the bandana towards the center. Aim to create a neat, triangular shape. This first fold is the foundation for your strip.
Then, fold the opposite corner towards the center as well. This should create a rough diamond or kite shape in the middle of your bandana.
Next, fold the top edge down to meet the bottom edge of the central shape. This will start to narrow your bandana.
Continue folding the bandana lengthwise, working from the top and bottom edges towards the center. You want to create a long, narrow strip of fabric.
Aim for a strip that is about 1.5 to 3 inches wide, depending on how full you want your bow to be. The narrower the strip, the daintier the bow.
Pro Tip: Keep your folds even and tight. This ensures your bow looks crisp and holds its shape without unraveling. Ironing the bandana beforehand can also help achieve sharper folds.
Step 4: Create the Loops
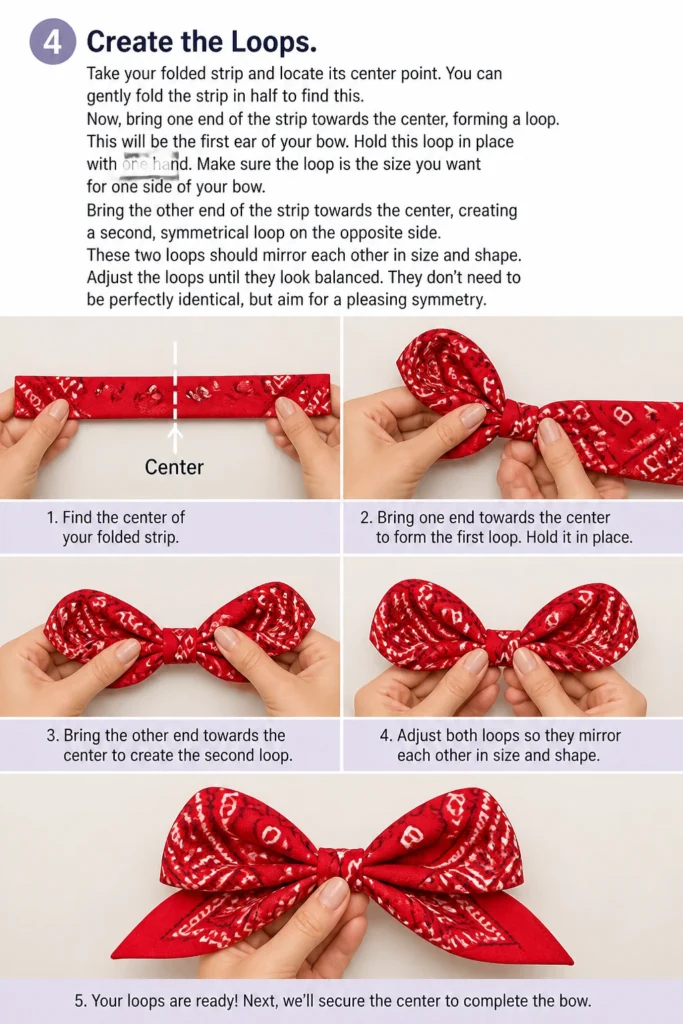
Take your folded strip and locate its center point. You can gently fold the strip in half to find this.
Now, bring one end of the strip towards the center, forming a loop. This will be the first “ear” of your bow.
Hold this loop in place with one hand. Make sure the loop is the size you want for one side of your bow.
Bring the other end of the strip towards the center, creating a second, symmetrical loop on the opposite side. These two loops should mirror each other in size and shape.
Adjust the loops until they look balanced. They don’t need to be perfectly identical, but aim for a pleasing symmetry.
Step 5: Secure the Center
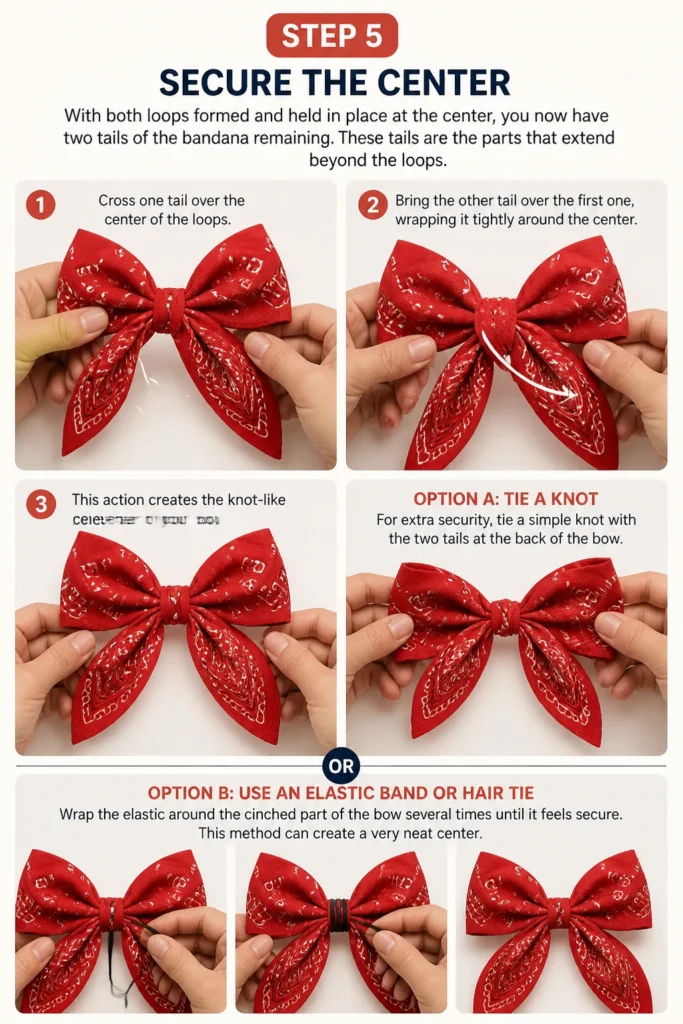
With both loops formed and held in place at the center, you now have two “tails” of the bandana remaining. These tails are the parts that extend beyond the loops.
Cross one tail over the center of the loops. This will start to cinch the middle of your bow.
Then, bring the other tail over the first one, wrapping it tightly around the center. This action creates the knot-like center of your bow.
For extra security, you can tie a simple knot with the two tails at the back of the bow. This helps hold everything firmly in place.
Alternatively, you can use a small elastic band or a hair tie to secure the center. Wrap the elastic around the cinched part of the bow several times until it feels secure. This method can create a very neat center.
Step 6: Adjust and Fluff
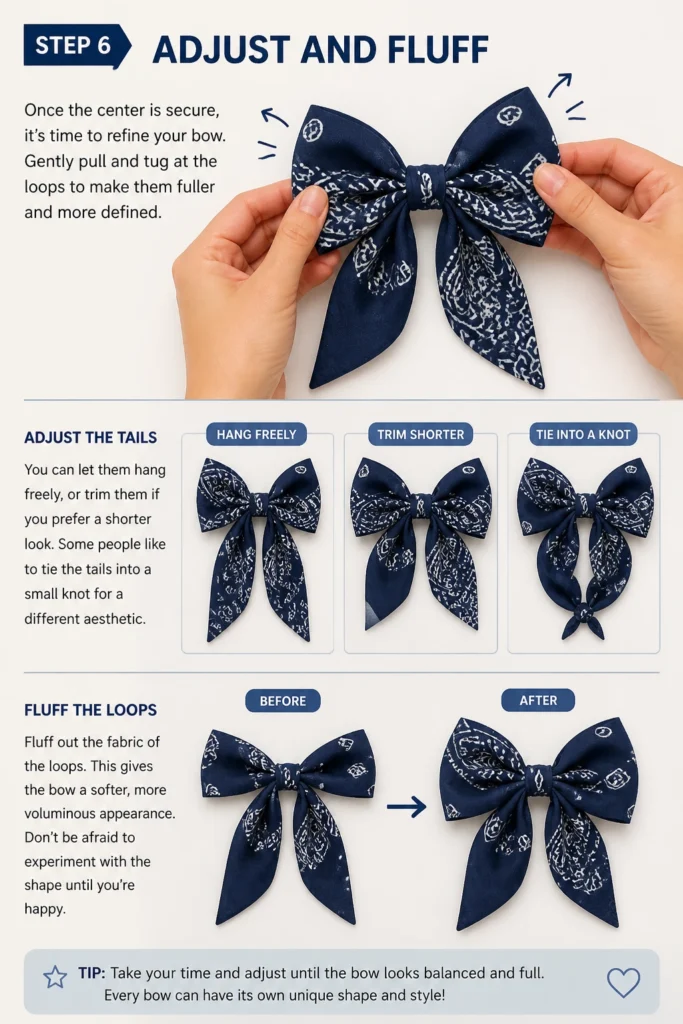
Once the center is secure, it’s time to refine your bow. Gently pull and tug at the loops to make them fuller and more defined.
Adjust the tails as well. You can let them hang freely, or trim them if you prefer a shorter look. Some people like to tie the tails into a small knot for a different aesthetic.
Fluff out the fabric of the loops. This gives the bow a softer, more voluminous appearance. Don’t be afraid to experiment with the shape until you’re happy.
Step 7: Attach Your Bow
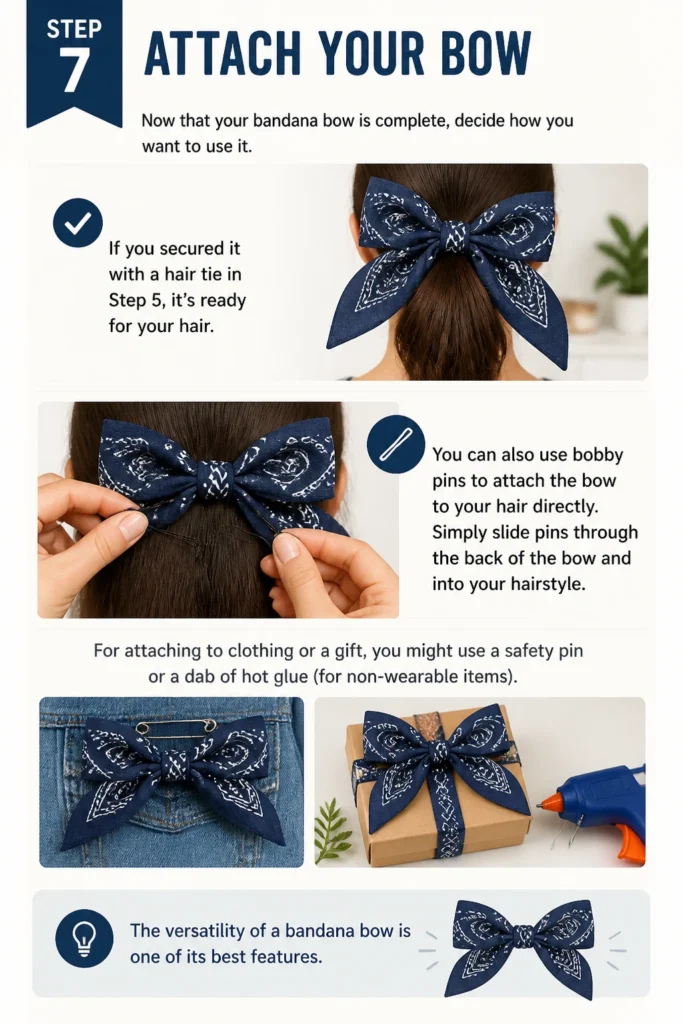
Now that your bandana bow is complete, decide how you want to use it. If you secured it with a hair tie in Step 5, it’s ready for your hair.
You can also use bobby pins to attach the bow to your hair directly. Simply slide pins through the back of the bow and into your hairstyle.
For attaching to clothing or a gift, you might use a safety pin or a dab of hot glue (for non-wearable items). The versatility of a bandana bow is one of its best features.
Common Mistakes to Avoid
Uneven Folds
Starting with uneven folds in Step 3 can lead to a lopsided or messy-looking bow. The strip of fabric won’t be consistent, making it hard to form symmetrical loops. Always take your time to create crisp, even folds from the very beginning, ensuring each side of the strip is roughly the same width.
Loose Center Knot
If the center knot or tie isn’t tight enough, your bow will quickly lose its shape. The loops might sag, or the entire bow could unravel. Make sure to pull the tails firmly when securing the center, or wrap the elastic band enough times to create a strong cinch. A secure center is crucial for durability.
Rushing the Fluffing
Skipping or rushing the adjustment and fluffing phase in Step 6 means your bow won’t reach its full potential. It might look flat or stiff. Take a few extra moments to gently pull and shape the loops and tails. This step truly brings the bow to life, adding volume and a handmade charm.
Incorrect Bandana Size
Using a bandana that’s too small might result in a tiny, insignificant bow, while one that’s too large could create an overly bulky accessory. Consider the intended use of the bow before you start. A standard square bandana (around 22×22 inches) is usually a safe bet for a versatile, medium-sized bow.
Troubleshooting
Bow Looks Flat
If your bow appears flat and lacks volume, the issue often lies in how the loops were formed or fluffed. First, ensure your initial strip was not too narrow; a slightly wider strip can give more material to work with. Then, gently pull the edges of the loops outwards and upwards. Don’t be afraid to really “puff” the fabric to give it dimension.
You can also try using a slightly stiffer cotton bandana for more inherent body. A light mist of hairspray on the finished bow can sometimes help it hold its shape, especially if it’s for a special occasion.
Loops Keep Slipping Apart
When your bow loops refuse to stay together, it usually points to an insecure center. Revisit Step 5 and make sure you’re wrapping the tails tightly around the middle. If using an elastic band, ensure it’s wrapped multiple times until the center feels very firm.
For a more permanent fix, a tiny stitch with a needle and thread through the center of the bow where the loops meet can provide extra security. This is particularly useful if you plan to wear the bow frequently.
Tails Are Too Long/Short
The length of your bow tails is a matter of personal preference, but if they feel disproportionate, there are solutions. If the tails are too long, you can simply trim them with a sharp pair of scissors. Cut them at an angle for a more polished look.
If the tails are too short, it means you used too much fabric for the loops in Step 4. You’ll need to undo the bow and restart, making the loops slightly smaller to leave more length for the tails. Practice helps in judging the right proportions.
Key Takeaways
- Always start with a clean, flat bandana for the best results.
- Folding the bandana into an even strip is crucial for a symmetrical bow.
- Creating balanced loops sets the foundation for your bow’s shape.
- A tight and secure center is essential for the bow to hold its form.
- Don’t skip the fluffing and adjusting step; it brings the bow to life.
- Bandana bows are incredibly versatile and can be used in many ways.
Frequently Asked Questions
Can I use any type of fabric for this bow?
While you can technically try various fabrics, cotton bandanas work best. Their crispness holds folds well, and they aren’t too slippery, making them easy to manipulate. Silk or satin might be too slippery, and very thick fabrics might be hard to cinch into a tight bow.
How do I make a larger or smaller bow?
The size of your bow is primarily determined by the size of your bandana. Use a larger bandana for a bigger bow and a smaller one for a daintier version. You can also adjust the width of your initial folded strip; a wider strip creates a fuller bow, while a narrower one results in a more delicate look.
Can I wash the bandana bow once it’s made?
Yes, you can wash your bandana bow. If you’ve just tied it, you can simply untie it and wash the bandana as usual. If you’ve used an elastic band or a few stitches to secure it, it’s best to hand wash the bow gently and then lay it flat to dry to help maintain its shape.
What are some creative ways to use a bandana bow?
Bandana bows are incredibly versatile! Besides wearing them in your hair as a ponytail accent or headband, you can tie them around the handle of a purse for a pop of color, use them to decorate a gift package, or even loop them around your wrist as a unique bracelet. They also look charming tied around the collar of a pet.
Our Top Recommended Finds
- Soft Cotton Bandana Set: Perfect for starting your collection, these sets offer a variety of colors and patterns, ensuring you always have a fresh option.
- Hair Tie Assortment: A good set of sturdy, snag-free hair ties is invaluable for securing your bow’s center neatly and durably.
- Fabric Scissors: Investing in sharp fabric scissors makes trimming tails clean and easy, preventing fraying and giving a professional finish.
Unleash Your Inner Crafter Today
Creating a bandana bow is a wonderfully simple project, perfect for adding a touch of handmade charm to your everyday. This quick craft lets you express your style without needing specialized tools or skills. You now have all the steps to make your own.
Why not grab a bandana and try it right now? Experiment with different patterns and sizes. You might be surprised at how many beautiful bows you can create. This skill opens up a world of personalized accessories, ready for any occasion.
Beginner-friendly templates, step-by-step guides,
and weekly project ideas in your inbox.