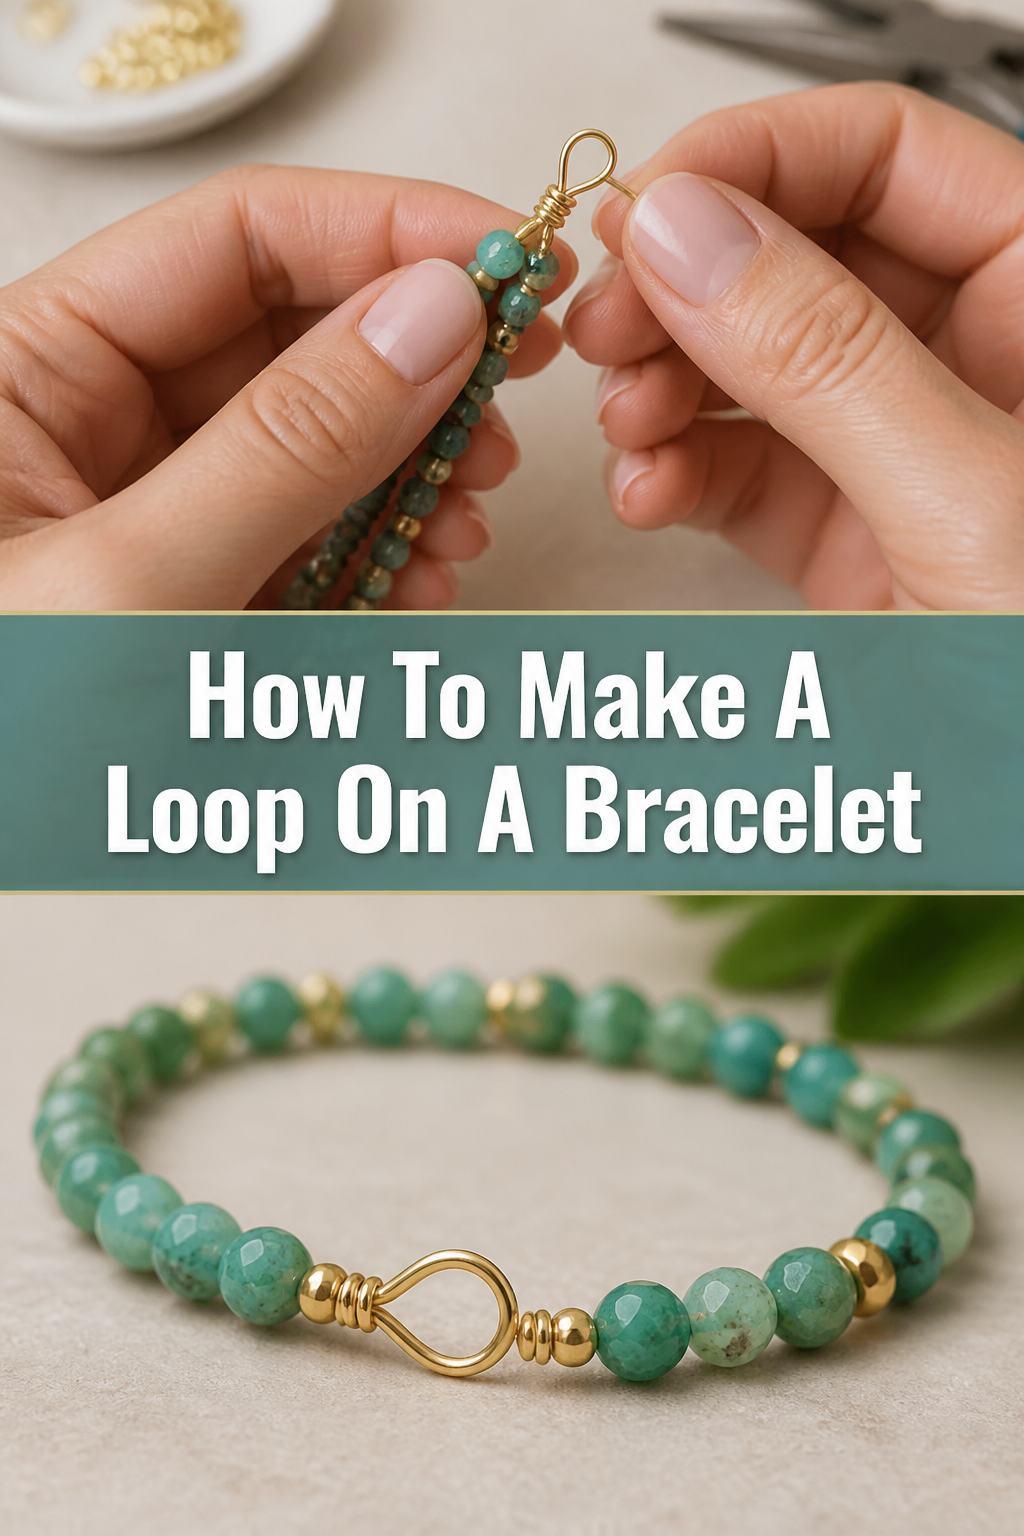
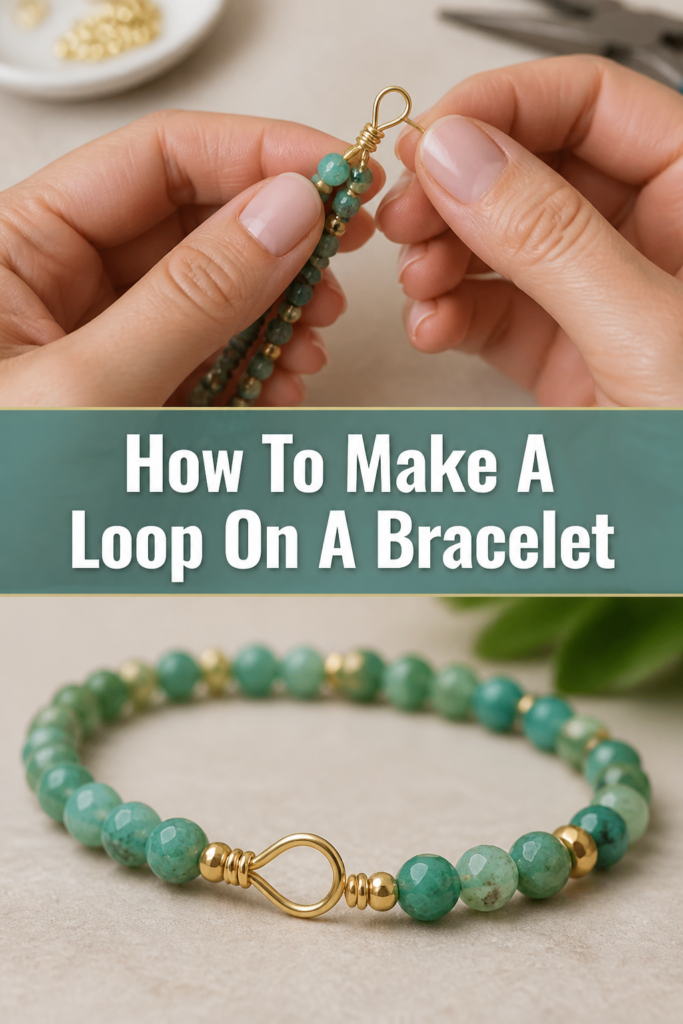
🔗 How To Make A Loop On A Bracelet

Beginner-friendly templates, step-by-step guides,
and weekly project ideas in your inbox.
Creating a secure loop on a bracelet can seem tricky, but it’s a fundamental skill for any jewelry maker. I’ve personally spent countless hours perfecting these techniques, ensuring every clasp and connection is just right. This guide will walk you through the process with clarity and confidence.
Quick Overview
This guide will empower you to craft professional-looking wire loops, essential for connecting components and adding clasps to your bracelets. You’ll master the foundational technique that elevates your handmade jewelry.
- Time needed: 15-30 minutes (per loop, once proficient)
- Difficulty: Beginner to Intermediate
- What you’ll need: Jewelry wire, round-nose pliers, chain-nose pliers, flush cutters
Step-by-Step Instructions
Step 1: Gather Your Tools and Materials
To begin, collect all necessary items before you start. This includes your chosen jewelry wire, round-nose pliers, chain-nose pliers, and flush cutters. Having everything within reach streamlines the process.
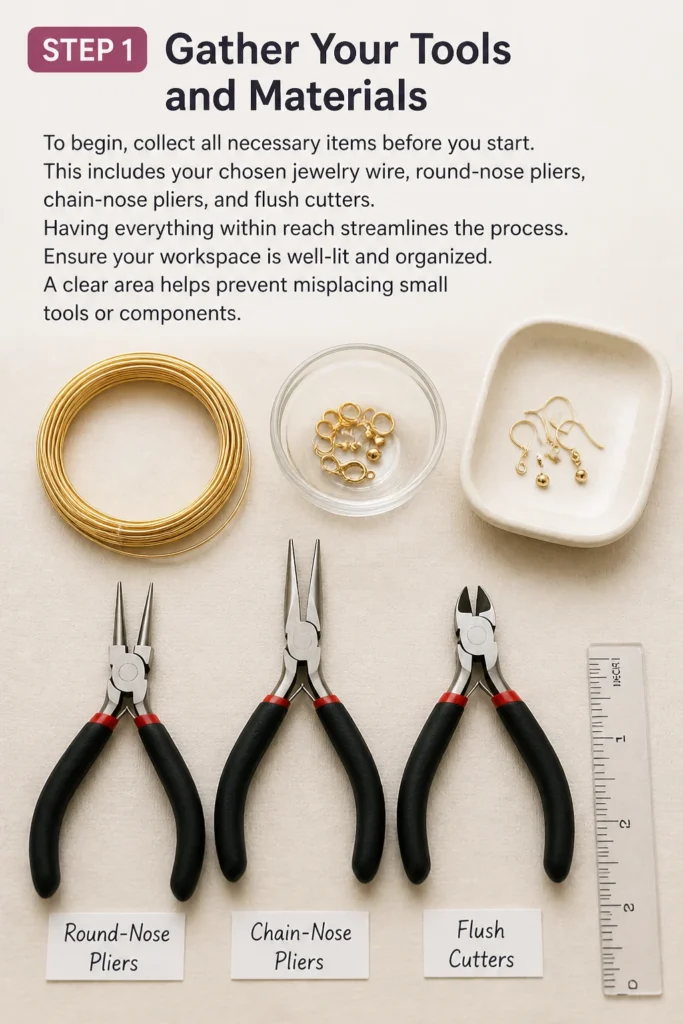
Ensure your workspace is well-lit and organized. A clear area helps prevent misplacing small tools or components.
Step 2: Cut Your Jewelry Wire
Cut a section of jewelry wire, typically 3-4 inches long, using your flush cutters. The exact length depends on the size of the loop you intend to make and whether it will be a simple or wrapped loop. Always err on the side of slightly longer wire; you can trim excess, but you can’t add more.
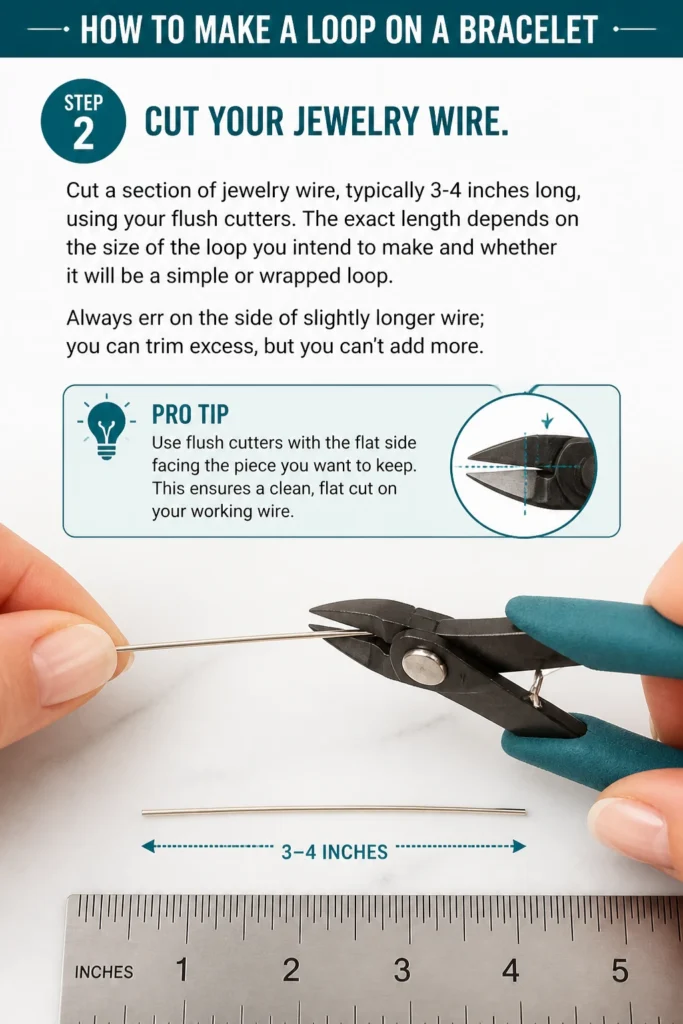
Pro Tip: Use flush cutters with the flat side facing the piece you want to keep. This ensures a clean, flat cut on your working wire.
Step 3: Create the Initial Bend
Grasp the very end of your wire with the tips of your round-nose pliers. Position the wire about 1/4 to 1/2 inch from the end, depending on how large you want your loop to be. The thinner part of the round-nose pliers will create a smaller loop, while a thicker part will yield a larger one.
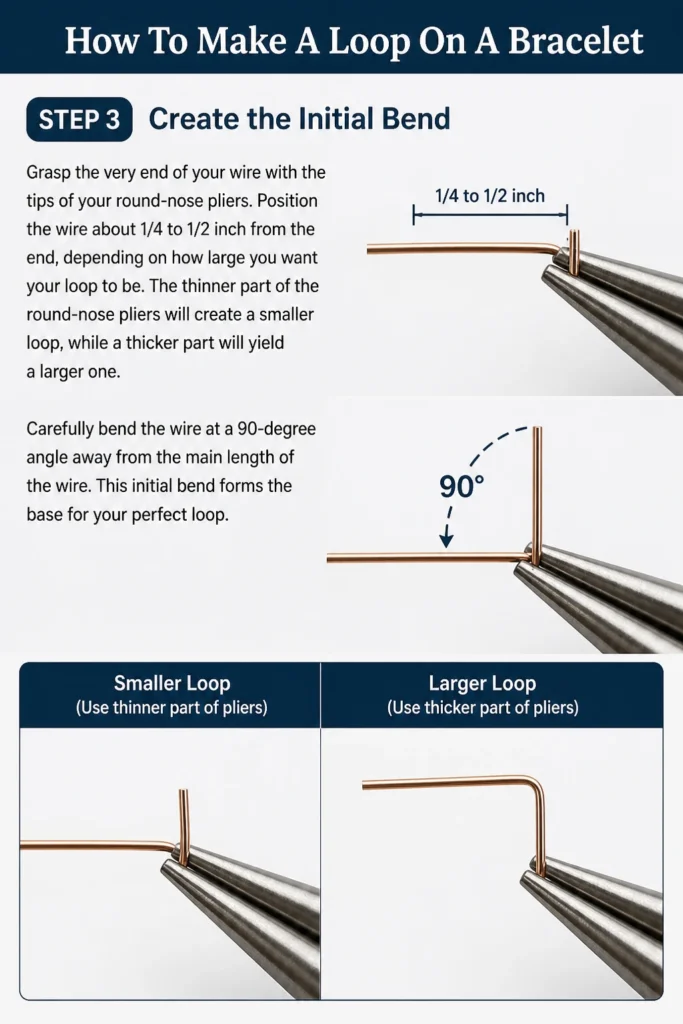
Carefully bend the wire at a 90-degree angle away from the main length of the wire. This initial bend forms the base for your perfect loop.
Step 4: Form the Full Loop
Still holding the wire firmly with your round-nose pliers at the bend, rotate your wrist and the pliers. You want to wrap the wire around the jaw of the pliers. Continue wrapping until the wire crosses over itself and forms a full circle.
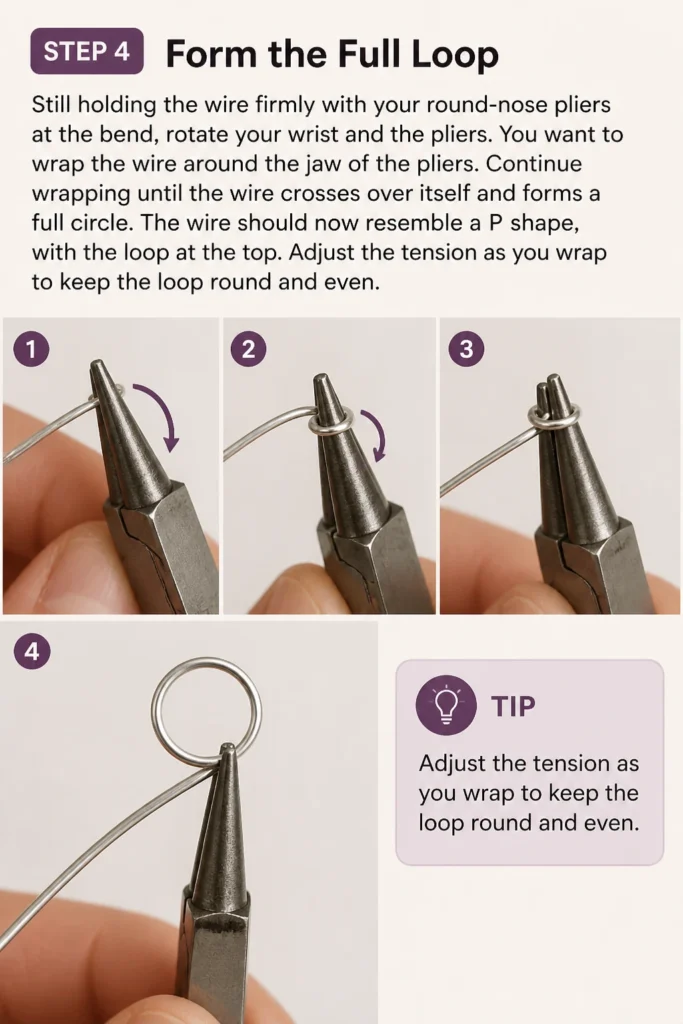
The wire should now resemble a “P” shape, with the loop at the top. Adjust the tension as you wrap to keep the loop round and even.
Step 5: Position for Wrapping (for a Wrapped Loop)
If you are making a simple loop, you can skip to Step 8. For a wrapped loop, reposition your round-nose pliers so one jaw is inside the newly formed loop. Use your chain-nose pliers to grasp the wire just below the loop. This provides stability for the next step.
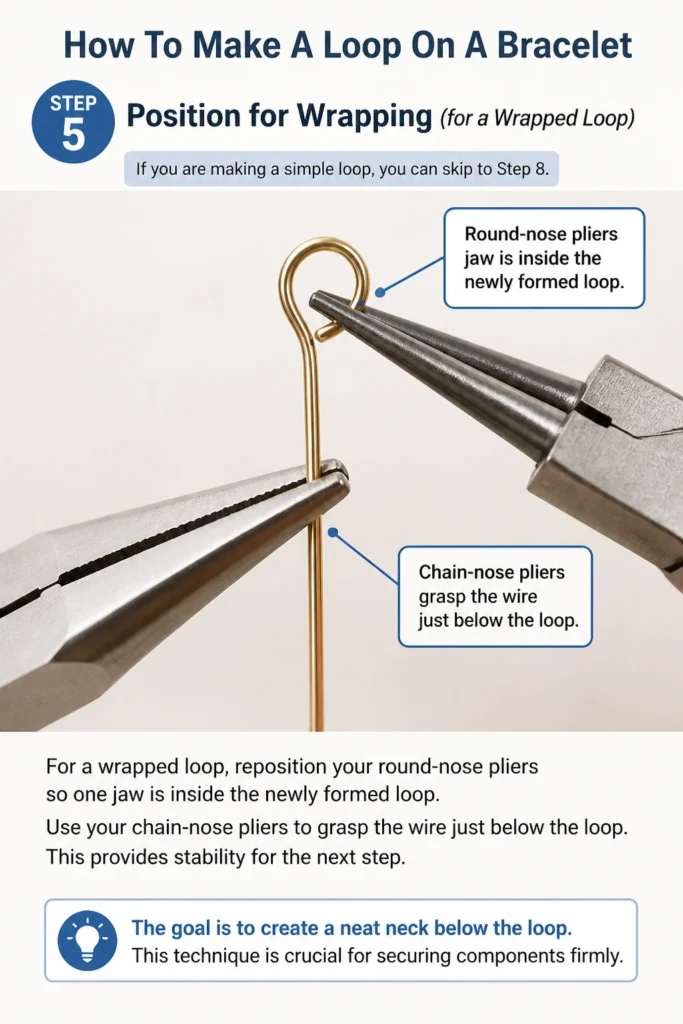
The goal is to create a neat “neck” below the loop. This technique is crucial for securing components firmly.
Step 6: Wrap the Wire Securely
With your chain-nose pliers holding the wire firmly below the loop, begin to wrap the tail end of the wire around the main stem. Make 2-4 tight, neat wraps directly below the loop. Each wrap should sit flush against the previous one.
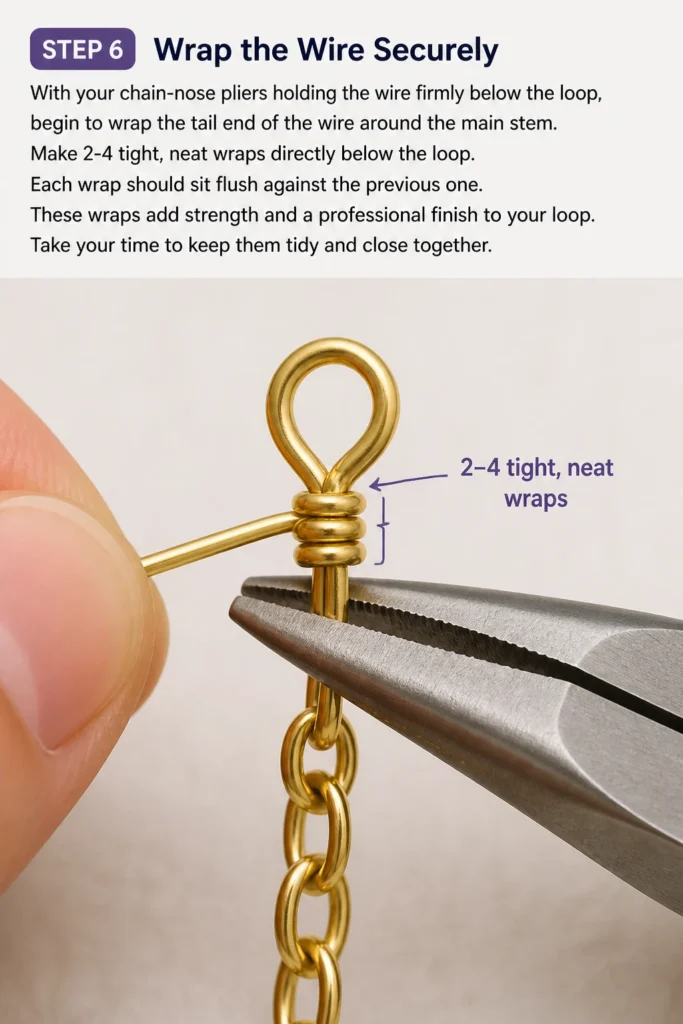
These wraps add strength and a professional finish to your loop. Take your time to keep them tidy and close together.
Step 7: Trim Excess Wire
Once you have completed your desired number of wraps, use your flush cutters to carefully trim the excess wire tail. Position the cutters as close as possible to the wraps, ensuring a clean cut. The flat side of the cutters should again face the wraps.
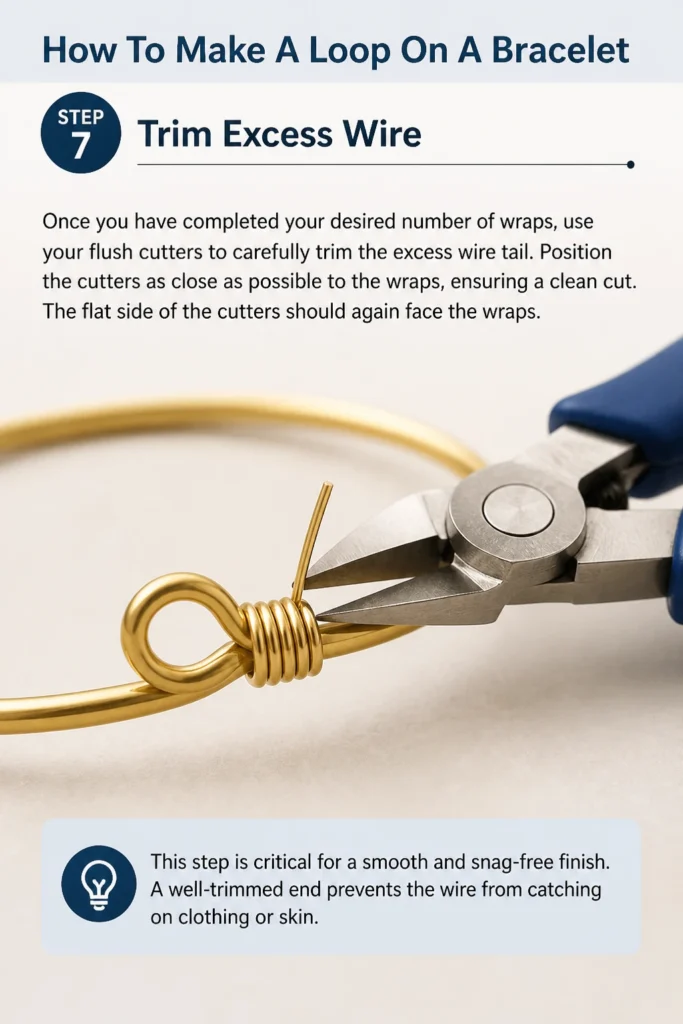
This step is critical for a smooth and snag-free finish. A well-trimmed end prevents the wire from catching on clothing or skin.
Step 8: Tuck the Wire End
After trimming, inspect the cut end of your wire. It might be slightly sharp or protrude a little. Use your chain-nose pliers to gently press and tuck the tiny wire end flush against the wraps. This ensures the loop is smooth and safe to wear.
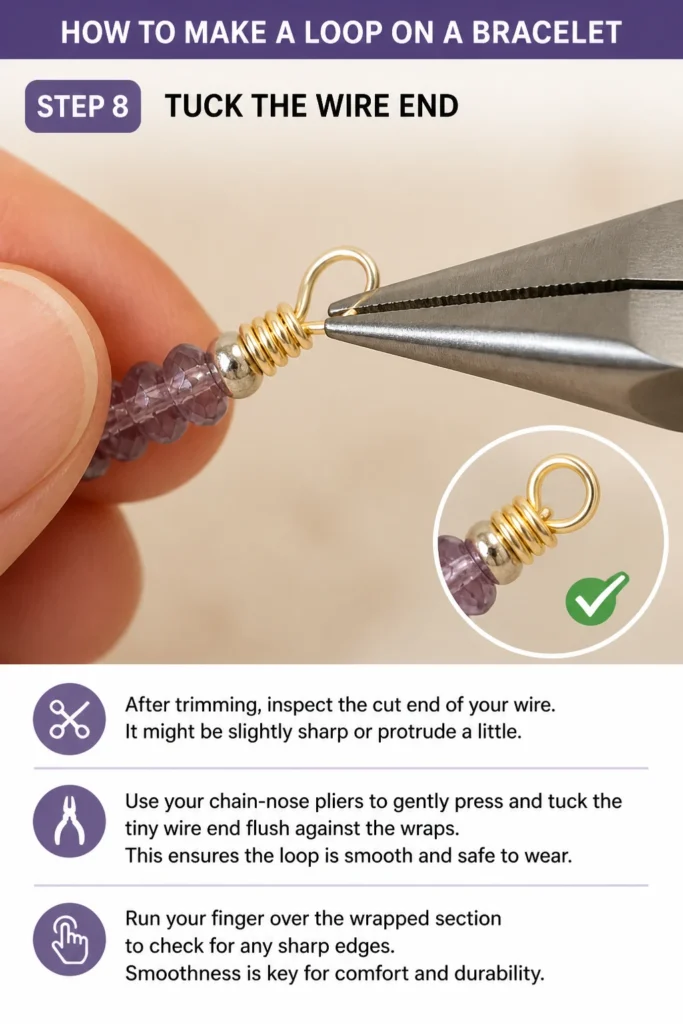
Run your finger over the wrapped section to check for any sharp edges. Smoothness is key for comfort and durability.
Step 9: Check for Security and Smoothness
Finally, examine your finished loop. Is it perfectly round? Are the wraps tight and even? Is the trimmed end tucked away securely? Gently tug on the loop to ensure it’s firmly attached and won’t unravel.
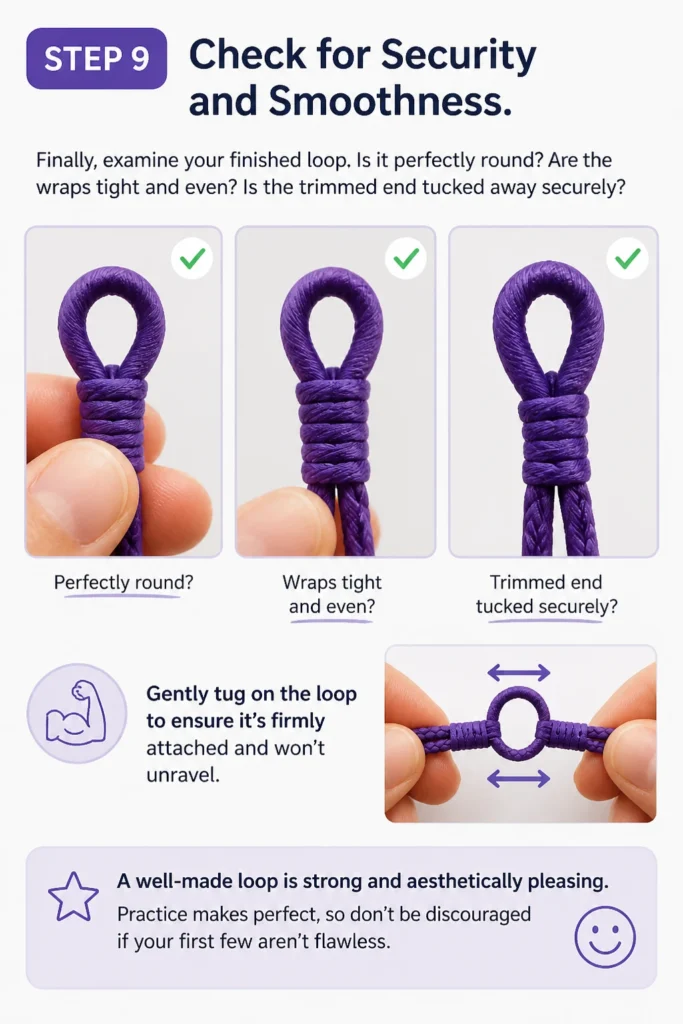
A well-made loop is strong and aesthetically pleasing. Practice makes perfect, so don’t be discouraged if your first few aren’t flawless.
Common Mistakes to Avoid
Uneven Loop Shape
One common pitfall is creating loops that aren’t perfectly round or are inconsistent in size. This often happens from not keeping even pressure or rotating the pliers smoothly during the forming stage. Always try to keep the wire centered on the plier jaw and maintain a steady, continuous motion for a uniform curve.
Loose Wire Wraps
If your wrapped loops appear messy or components feel wobbly, it’s likely due to loose wrapping. The key is to keep tension on the wire as you wrap it around the stem. Use your chain-nose pliers to gently pull the wire taut with each pass, ensuring a tight, secure coil that prevents movement.
Sharp Wire Ends
Failing to properly trim and tuck the wire end can result in sharp, protruding pieces that snag clothing or scratch skin. After cutting, always use your chain-nose pliers to press the cut end firmly against the wrapped section. Run your finger over it to confirm it’s completely smooth and safe.
Using the Wrong Wire Gauge
Attempting to make loops with wire that is too thick or too thin for the application is another frequent mistake. Wire that’s too thick can be difficult to manipulate and may not fit through beads, while wire that’s too thin can easily bend or break. Always choose a gauge appropriate for the jewelry’s strength requirements and aesthetic.
Troubleshooting
Loop is Not Round
If your loop appears oval or misshapen, it’s usually because you didn’t keep the wire centered on the round-nose pliers’ jaw, or you didn’t rotate your wrist smoothly. To fix this, gently reopen the loop slightly with your round-nose pliers and try to reshape it by carefully pressing the wire against the plier jaw. Practice maintaining consistent pressure and a fluid motion for better results.
Wire Keeps Breaking
Wire breaking during the looping process often indicates that you are overworking the wire or using a gauge that is too brittle for the manipulation. Avoid bending the wire back and forth excessively, as this fatigues the metal. Consider switching to a slightly thicker gauge or a softer temper wire, especially if you are new to wire wrapping.
Difficulty Tucking the Wire End
Struggling to tuck the trimmed wire end flush can be frustrating, especially with very short cuts. This usually happens if the cut is not perfectly flush or if the wire is stiff. Try using the very tip of your chain-nose pliers to gently push the end down. If it’s still sharp, you might need to make a slightly longer wrap on your next attempt to give you more material to work with.
Key Takeaways
- Always gather all your tools and materials before starting to ensure a smooth workflow.
- Use flush cutters with the flat side towards your working piece for clean, precise cuts.
- Master the initial 90-degree bend as it forms the foundation for a perfect loop.
- Maintain consistent pressure and a smooth rotation with round-nose pliers for perfectly round loops.
- For wrapped loops, ensure wraps are tight and close together for strength and a professional finish.
- Always trim excess wire closely and tuck the end securely to prevent snags and ensure comfort.
Frequently Asked Questions
What wire gauge is best for bracelet loops?
For most bracelet loops, a 20-gauge or 22-gauge wire is ideal. This thickness offers a good balance of strength and flexibility, making it easy to form loops while still being sturdy enough to hold components securely. Thinner gauges (like 24-gauge) might be too delicate, and thicker ones (like 18-gauge) can be harder to manipulate.
Can I make loops with any type of pliers?
While you can make a rudimentary bend with other pliers, round-nose pliers are specifically designed for creating perfectly rounded loops. Their tapered jaws allow you to control the loop size with precision. Using flat-nose or chain-nose pliers for forming the main loop will result in squared or uneven shapes.
How do I open and close a finished loop without distorting it?
To open a finished loop, grasp one side of the loop with chain-nose pliers and the other side with another pair of pliers (or your fingers). Twist one side sideways, away from the center of the loop, like opening a gate. Never pull the loop apart. To close it, reverse the motion, twisting it back until the ends meet perfectly.
Is it possible to make loops without special jewelry wire?
While you can experiment with other wires, dedicated jewelry wire is recommended for its specific properties. It’s designed to be malleable enough for shaping but strong enough to hold its form. Craft wire or household wire might be too soft, too brittle, or contain coatings that aren’t skin-safe or durable for jewelry.
Our Top Recommended Finds
- Good Quality Round-Nose Pliers: Essential for consistent, perfectly round loops every time. Look for comfortable grips and smooth, tapered jaws.
- Fine-Tip Flush Cutters: These provide precise cuts, crucial for neat wire ends and intricate work without leaving sharp burrs.
- 20-Gauge Artistic Wire (Copper or Silver-Plated): A versatile and beginner-friendly wire that’s easy to shape and comes in various colors.
Unlock Your Bracelet Making Potential
Mastering the art of making a secure loop is more than just a technique; it’s a gateway to endless creative possibilities in bracelet design. This foundational skill will empower you to confidently connect beads, charms, and clasps, transforming simple components into stunning wearable art.
Now that you have the knowledge, it’s time to put it into practice. Grab your tools and some wire, and start creating your first perfect loop today. Soon, you’ll be crafting intricate designs and exploring advanced wire-wrapping techniques with ease.
Beginner-friendly templates, step-by-step guides,
and weekly project ideas in your inbox.