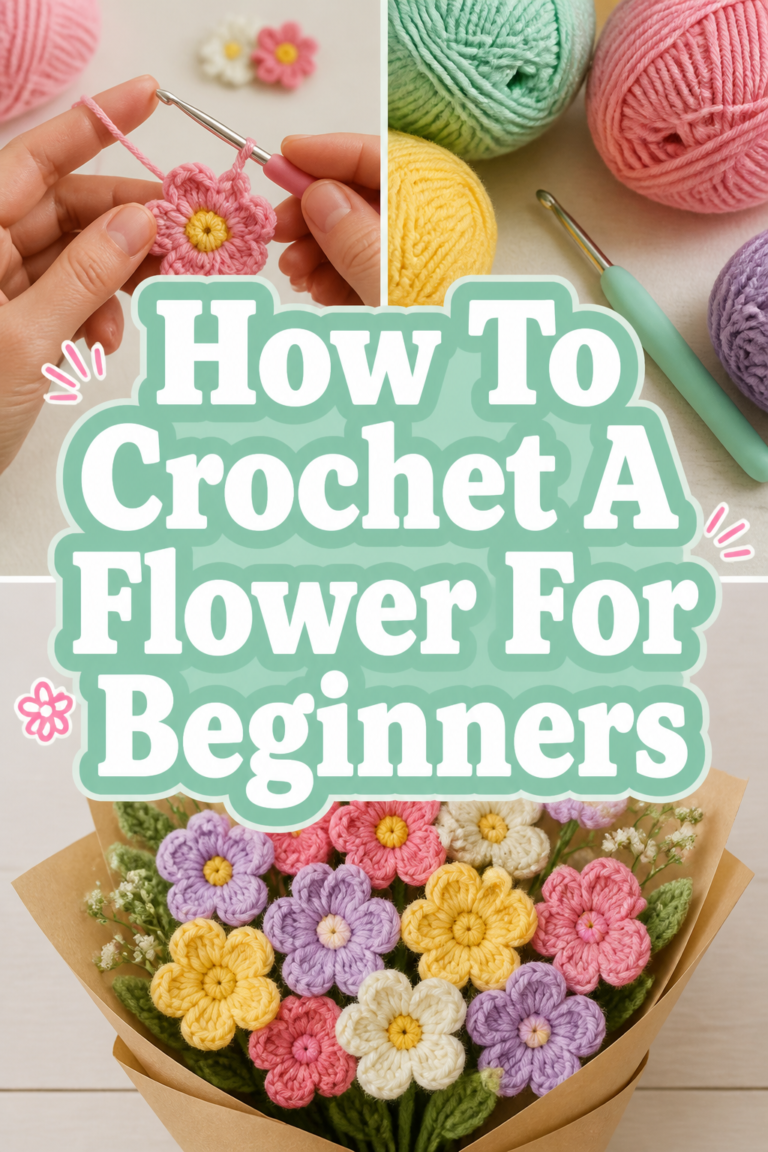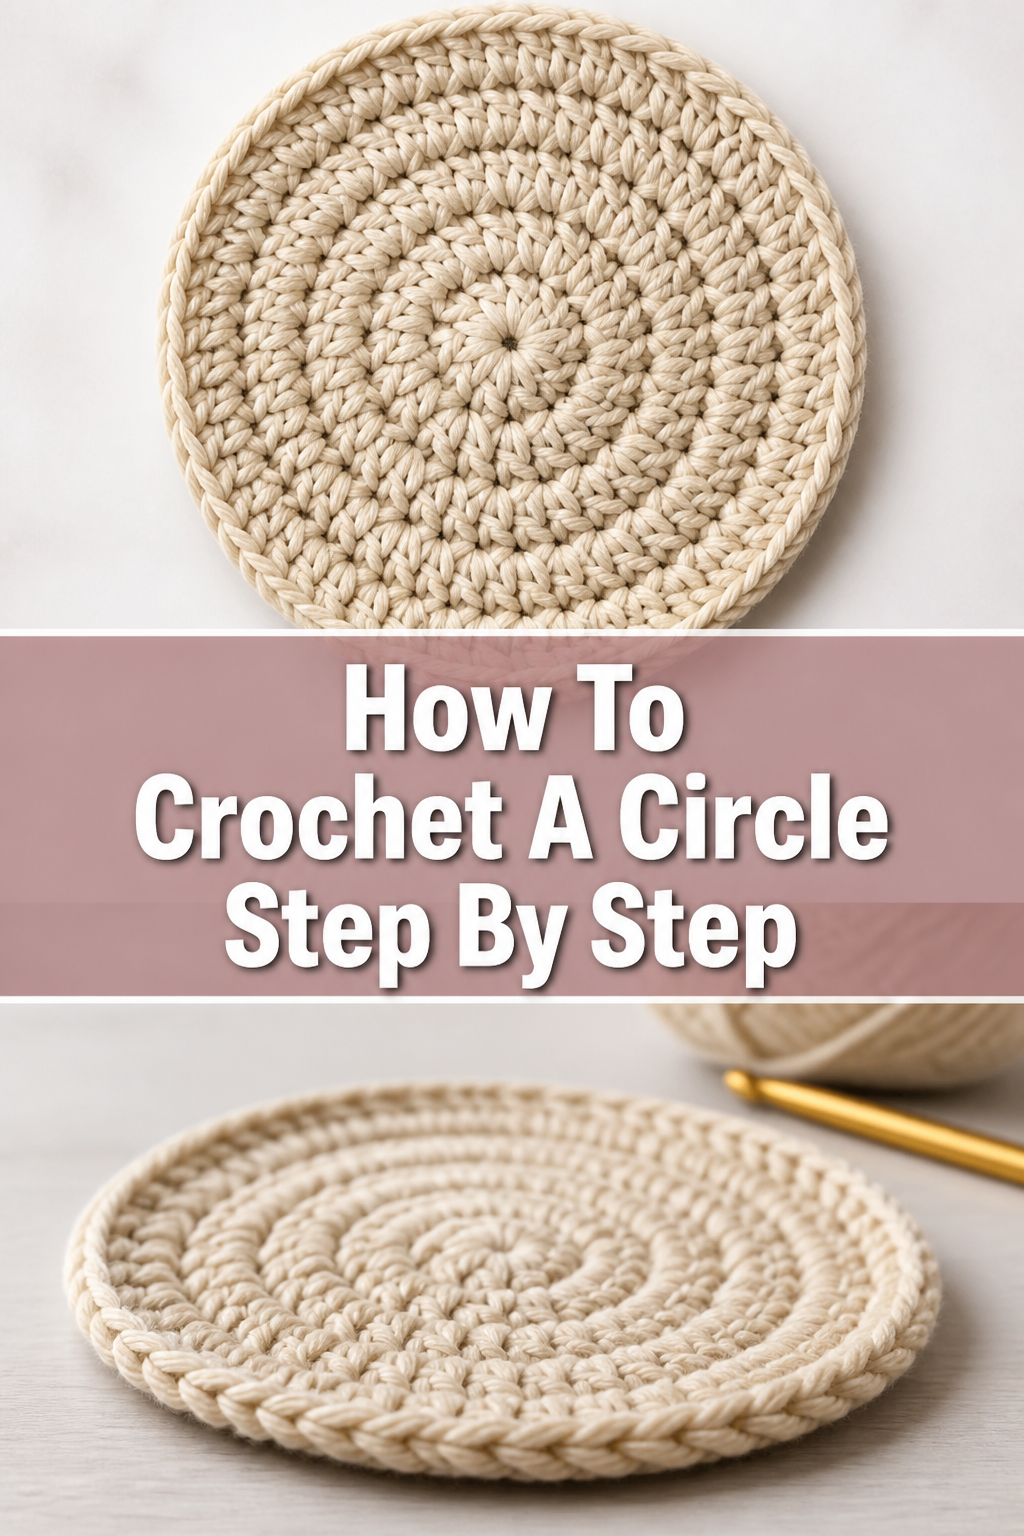
🧶 How To Crochet A Circle Step By Step
Learning to crochet a circle opens up a world of possibilities in your crafting journey.
I remember the first time I managed a perfectly flat circle; it felt like magic, and I knew I could make anything from a coaster to a hat.
This guide will share those foundational steps, drawing on years of personal experience to help you master this essential skill.
Quick Overview
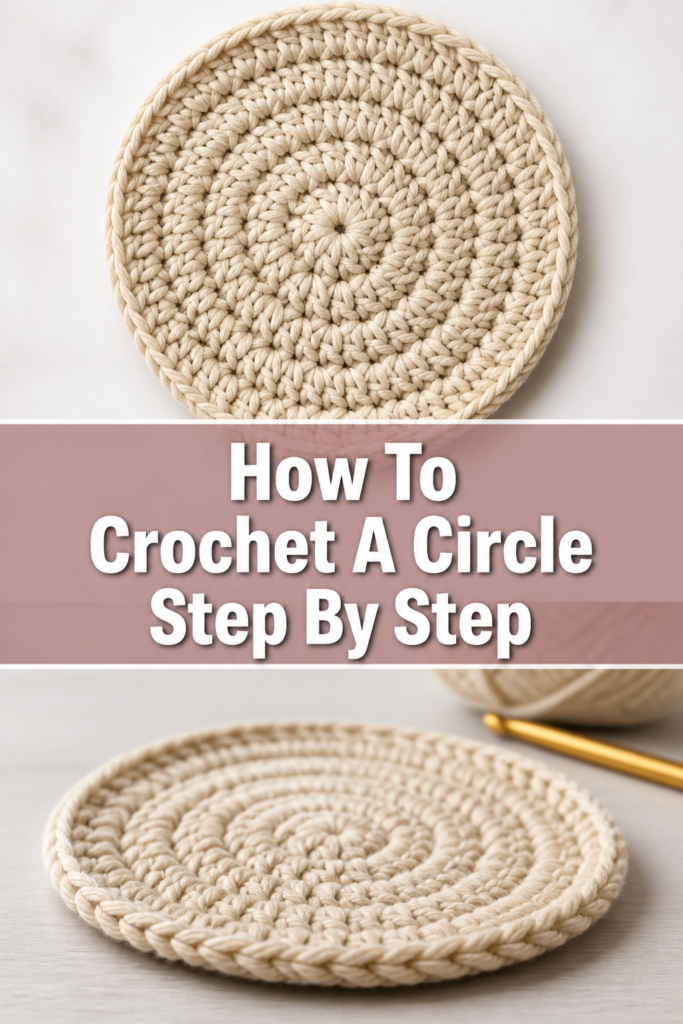
This guide will walk you through the process of crocheting a foundational circle, perfect for countless projects.
You’ll learn how to start your circle and consistently increase stitches to maintain a flat shape.
- Time needed: 1-2 hours (for beginners, including practice)
- Difficulty: Beginner
- What you’ll need: Yarn, crochet hook, scissors, tapestry needle, stitch marker
Step-by-Step Instructions
Step 1: Gather Your Essential Supplies
Before you begin, make sure all your tools are within easy reach. Having everything organized saves time and prevents frustration.
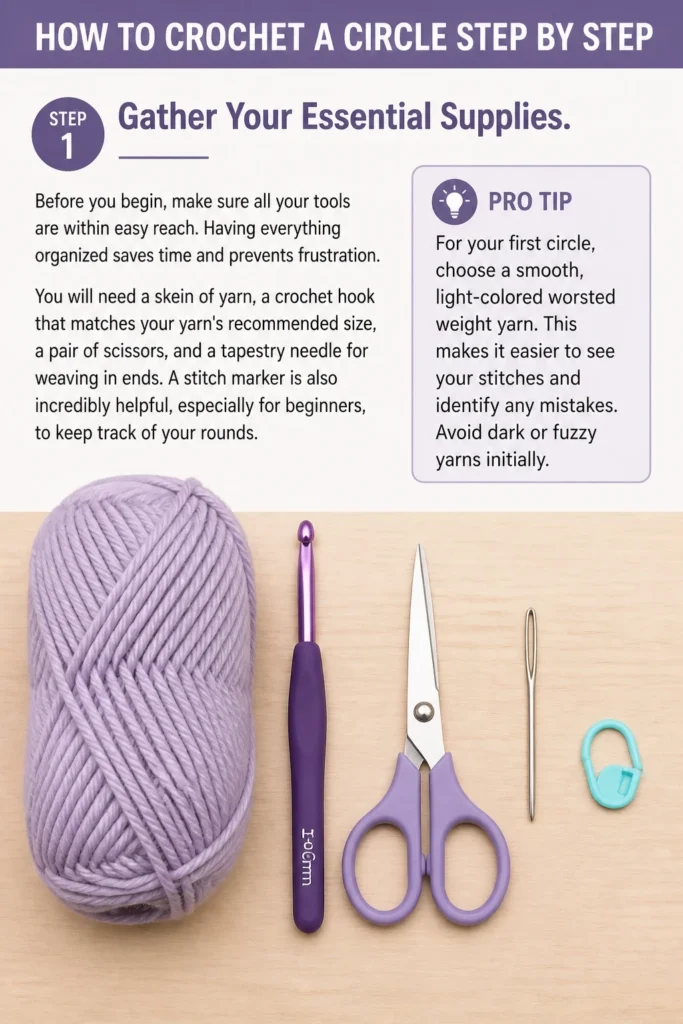
You will need a skein of yarn, a crochet hook that matches your yarn’s recommended size, a pair of scissors, and a tapestry needle for weaving in ends.
A stitch marker is also incredibly helpful, especially for beginners, to keep track of your rounds.
Pro Tip: For your first circle, choose a smooth, light-colored worsted weight yarn. This makes it easier to see your stitches and identify any mistakes. Avoid dark or fuzzy yarns initially.
Step 2: Choose Your Starting Method
There are two primary ways to begin a crochet circle: the magic ring (also called a magic circle or adjustable ring) or the chain 2 method.
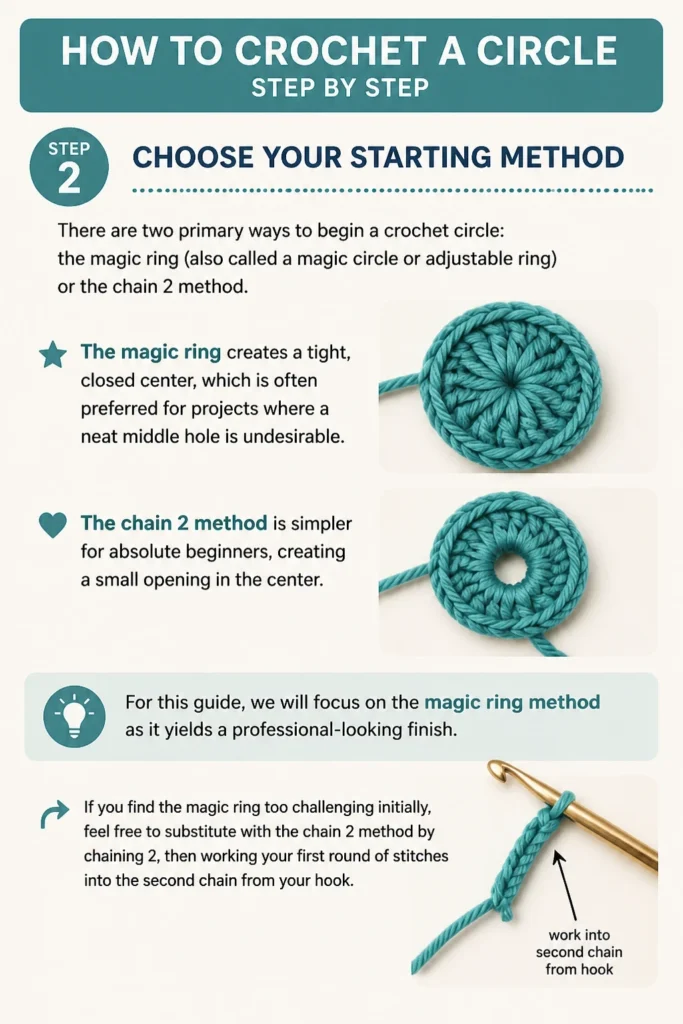
The magic ring creates a tight, closed center, which is often preferred for projects where a neat middle hole is undesirable.
The chain 2 method is simpler for absolute beginners, creating a small opening in the center.
For this guide, we will focus on the magic ring method as it yields a professional-looking finish.
If you find the magic ring too challenging initially, feel free to substitute with the chain 2 method by chaining 2, then working your first round of stitches into the second chain from your hook.
Step 3: Create Your Magic Ring Foundation
The magic ring provides a flexible loop that you can tighten after working your first stitches.
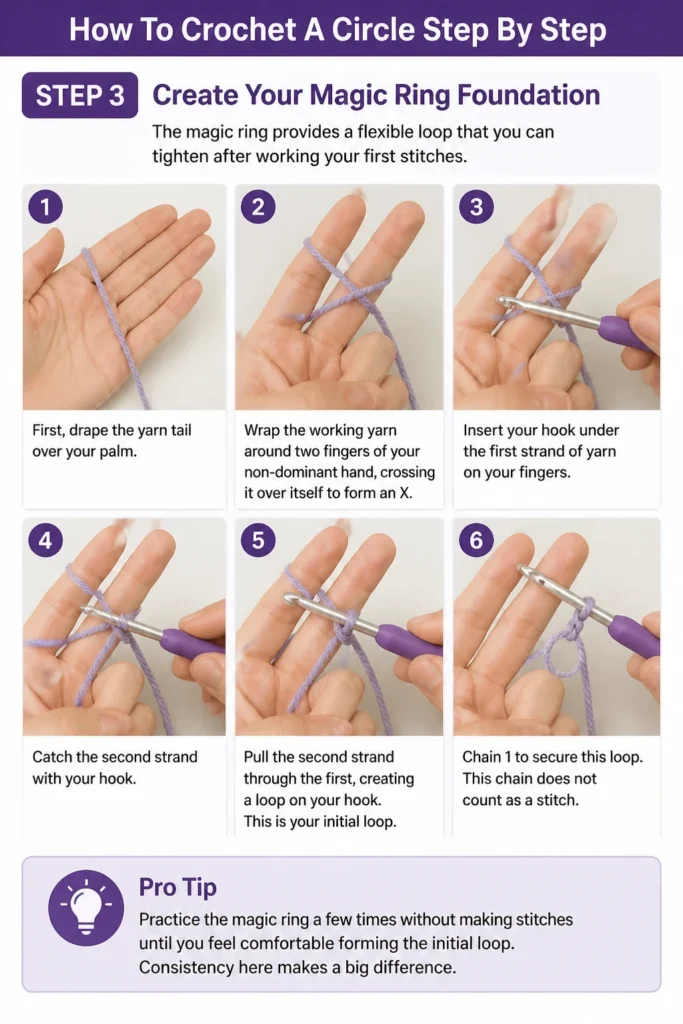
First, drape the yarn tail over your palm. Wrap the working yarn around two fingers of your non-dominant hand, crossing it over itself to form an “X”.
Insert your hook under the first strand of yarn on your fingers. Catch the second strand with your hook.
Pull the second strand through the first, creating a loop on your hook. This is your initial loop.
Chain 1 to secure this loop. This chain does not count as a stitch.
Pro Tip: Practice the magic ring a few times without making stitches until you feel comfortable forming the initial loop. Consistency here makes a big difference.
Step 4: Work Your First Round of Stitches (R1)
Now that your magic ring is established, you will work your first set of stitches into it.
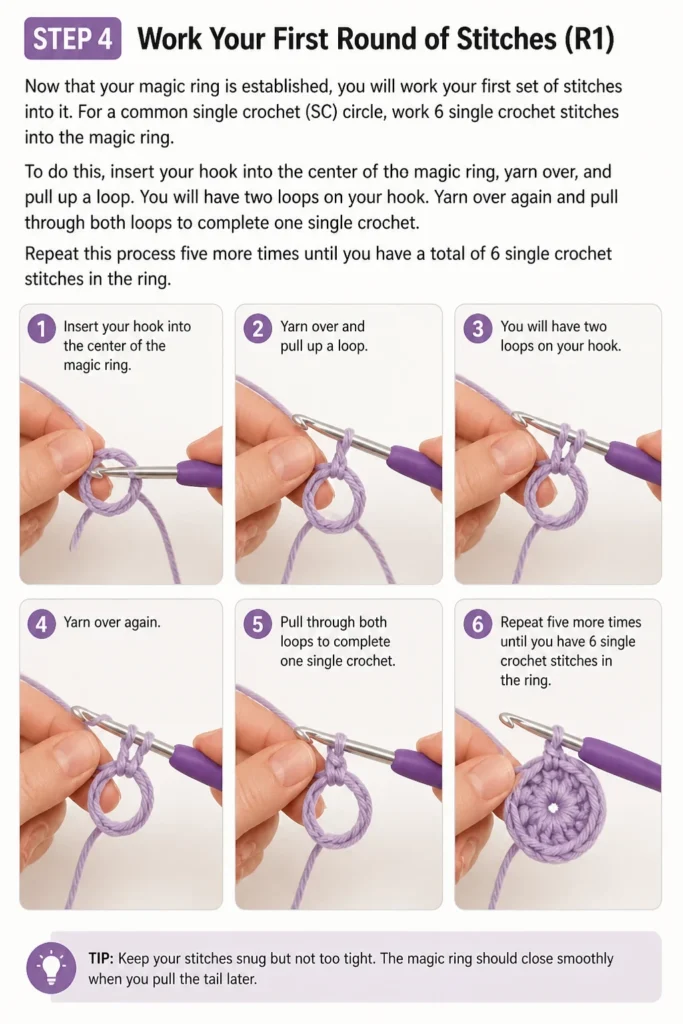
For a common single crochet (SC) circle, work 6 single crochet stitches into the magic ring.
To do this, insert your hook into the center of the magic ring, yarn over, and pull up a loop.
You will have two loops on your hook. Yarn over again and pull through both loops to complete one single crochet.
Repeat this process five more times until you have a total of 6 single crochet stitches in the ring.
Step 5: Close the Magic Ring and Join the Round
Once you have completed your 6 single crochet stitches, gently pull the yarn tail of the magic ring.
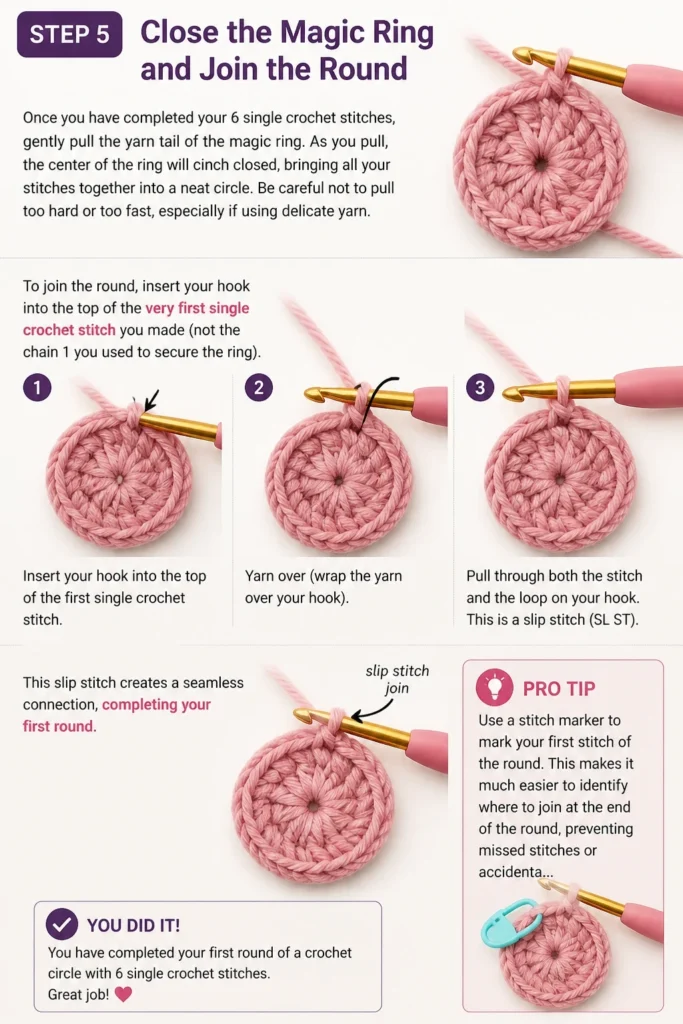
As you pull, the center of the ring will cinch closed, bringing all your stitches together into a neat circle.
Be careful not to pull too hard or too fast, especially if using delicate yarn.
To join the round, insert your hook into the top of the very first single crochet stitch you made (not the chain 1 you used to secure the ring).
Yarn over and pull through both the stitch and the loop on your hook. This is a slip stitch (SL ST).
This slip stitch creates a seamless connection, completing your first round.
Pro Tip: Use a stitch marker to mark your first stitch of the round. This makes it much easier to identify where to join at the end of the round, preventing missed stitches or accidental increases.
Step 6: Begin Round 2 (R2): The First Increases
To make your circle grow and stay flat, you need to increase the number of stitches in each round.
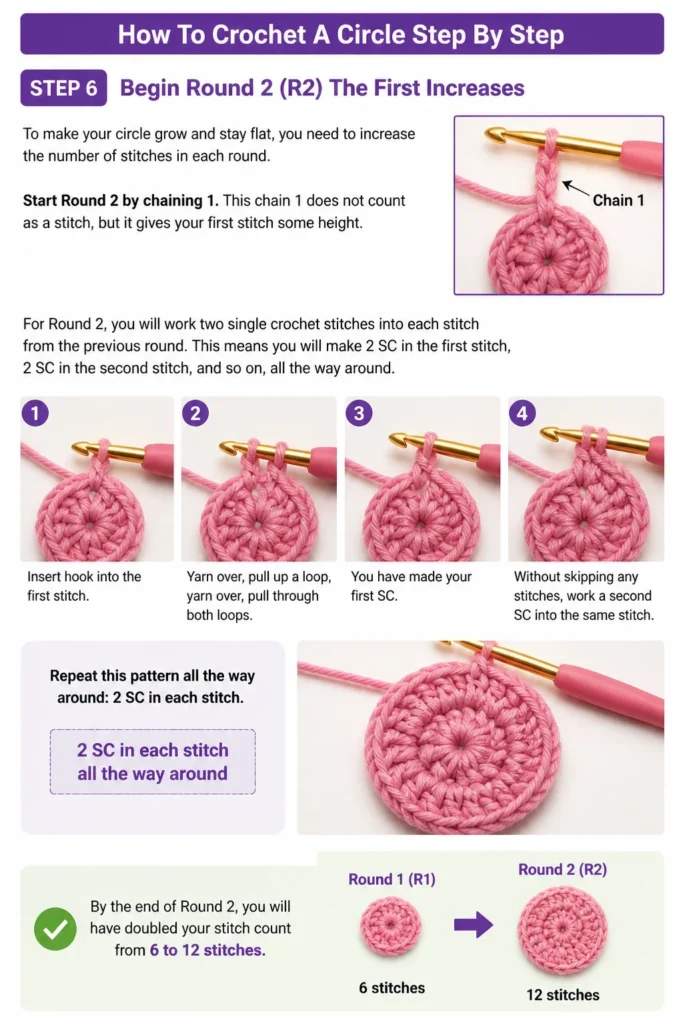
Start Round 2 by chaining 1. This chain 1 does not count as a stitch, but it gives your first stitch some height.
For Round 2, you will work two single crochet stitches into each stitch from the previous round.
This means you will make 2 SC in the first stitch, 2 SC in the second stitch, and so on, all the way around.
By the end of Round 2, you will have doubled your stitch count from 6 to 12 stitches.
Step 7: Continue Increasing in Subsequent Rounds (R3, R4, etc.)
The key to a flat circle is a consistent increase pattern. Each round, you add the same number of stitches you started with (e.g., 6 stitches for an SC circle).
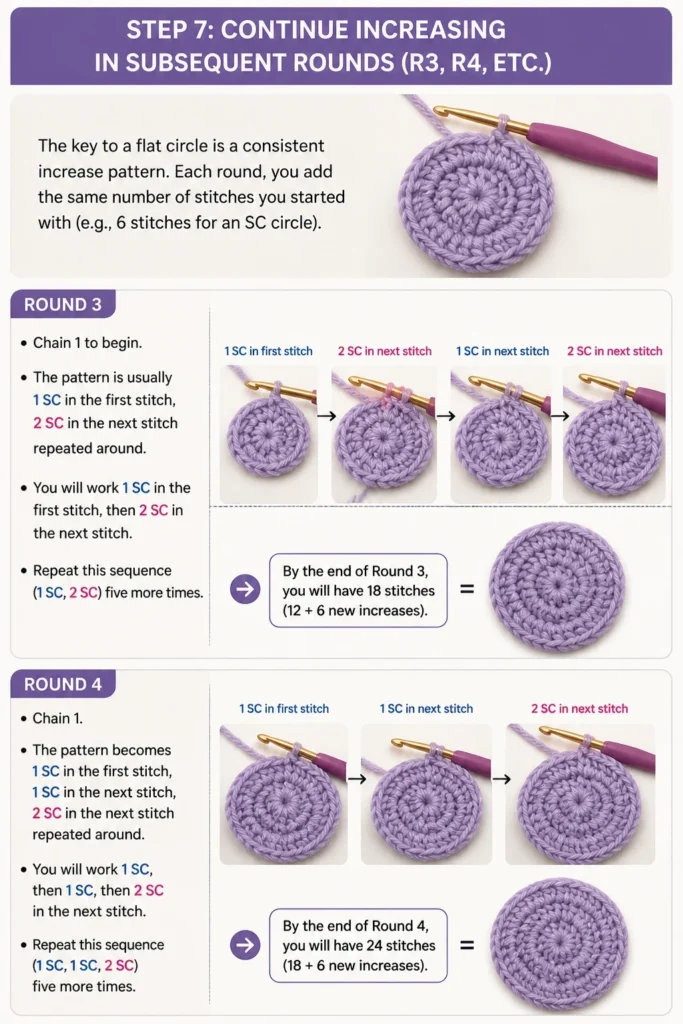
For Round 3, chain 1 to begin. The pattern is usually 1 SC in the first stitch, 2 SC in the next stitch repeated around.
You will work 1 SC in the first stitch, then 2 SC in the next stitch. Repeat this sequence (1 SC, 2 SC) five more times.
By the end of Round 3, you will have 18 stitches (12 + 6 new increases).
For Round 4, chain 1. The pattern becomes 1 SC in the first stitch, 1 SC in the next stitch, 2 SC in the next stitch repeated around.
You will work 1 SC, then 1 SC, then 2 SC in the next stitch. Repeat this sequence (1 SC, 1 SC, 2 SC) five more times.
This round will result in 24 stitches (18 + 6 new increases).
The general rule for single crochet circles is: “Increase by your starting stitch count in each round, evenly spaced.”
The number of single stitches between your increases grows by one in each subsequent round.
Pro Tip: Always place your stitch marker in the first stitch of every new round. This helps you keep track of your stitch count and ensures you join in the correct place.
Step 8: Finish Your Circle
Once your circle reaches the desired size, you need to finish it neatly.
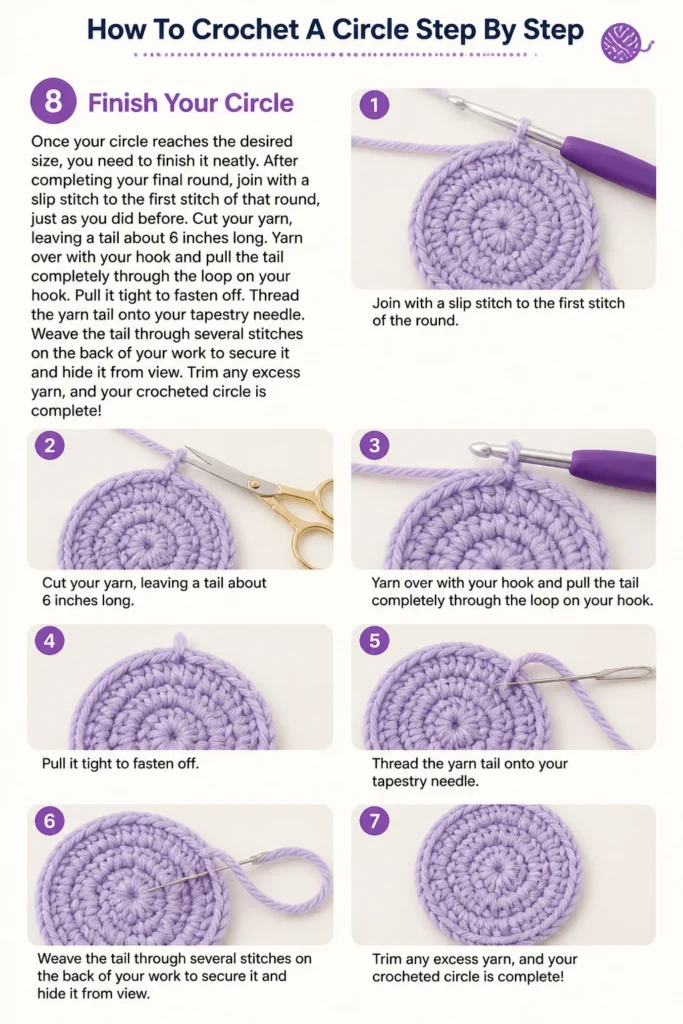
After completing your final round, join with a slip stitch to the first stitch of that round, just as you did before.
Cut your yarn, leaving a tail about 6 inches long. Yarn over with your hook and pull the tail completely through the loop on your hook. Pull it tight to fasten off.
Thread the yarn tail onto your tapestry needle. Weave the tail through several stitches on the back of your work to secure it and hide it from view.
Trim any excess yarn, and your crocheted circle is complete!
Common Mistakes to Avoid
Uneven Increases
A common pitfall is placing increases too close together or in the same spot in consecutive rounds. This can lead to your circle becoming hexagonal or having noticeable “corners” instead of a smooth curve.
To avoid this, stagger your increases. For example, in Round 4 (SC, SC, Inc), you might start with an increase in the first stitch sometimes, then continue the pattern (Inc, SC, SC) for the rest of the round.
Alternatively, use the established pattern of increasing the number of single stitches between increases in each round to ensure even distribution.
Too Tight or Too Loose Stitches
Your tension, or how tightly you hold your yarn, significantly impacts the final look of your circle. Stitches that are too tight can make your circle cup or curl, while overly loose stitches can make it appear floppy or gappy.
Try to maintain consistent tension throughout your work. If your hands feel tired, take a break. Practice helps you find a comfortable and even tension.
If your work is too tight, try a larger hook size. If it’s too loose, try a smaller hook.
Forgetting Stitch Markers
It’s incredibly easy to lose track of where a round begins, especially when working in continuous spirals without joining.
Forgetting to mark your first stitch often leads to incorrect stitch counts, resulting in circles that are either too wavy or cup-shaped.
Make it a habit to place a stitch marker in the first stitch of every new round immediately after you make it. Move it up as you progress.
Incorrect Stitch Count
Miscounting your stitches is a frequent mistake that directly affects the shape of your circle. Too many stitches lead to ruffling, and too few cause cupping.
Always count your stitches at the end of each round before moving on to the next. This allows you to catch and correct errors early.
If your count is off, unravel the last round and recount as you redo it. It’s better to fix it now than to have to unravel more later.
Troubleshooting
Your Circle is Wavy or Ruffled
If your crocheted circle is looking less like a flat disc and more like a ruffled potato chip, you’ve likely added too many increases.
Each round has too many stitches, causing the fabric to expand faster than it needs to lie flat.
Go back to the round where the ruffling began. Reduce the number of increases in that round, or space them out more evenly.
Ensure you are only increasing by your starting stitch count (e.g., 6 stitches per round for an SC circle) and not more.
Your Circle is Cupping or Coning
Conversely, if your circle is starting to curl upwards, forming a bowl or cone shape, you haven’t added enough increases.
The fabric isn’t expanding enough to lie flat, causing it to pull inwards.
Review your increase pattern. Make sure you are adding the correct number of stitches (e.g., 6 SC increases) in each successive round.
You might need to add an extra increase or two in the problematic rounds to flatten it out.
The Starting Hole is Too Big
If you used the magic ring method but still have a noticeable hole in the center of your circle, it means the ring wasn’t tightened sufficiently.
Sometimes, the yarn tail can slip, or the initial pull wasn’t firm enough.
To fix this, gently pull the yarn tail again, ensuring it’s as tight as possible without breaking the yarn. You can also try weaving the tail back through the base of the stitches once more before securing it.
If using the chain 2 method, a small hole is inherent, but you can minimize it by working more stitches into the first chain.
Key Takeaways
- Mastering the magic ring creates a perfectly closed center for your circles.
- Consistent increases are vital for maintaining a flat, even shape.
- Always use a stitch marker to easily identify the beginning of each round.
- Count your stitches at the end of every round to catch errors early.
- Maintain even tension for a professional and consistent fabric.
- Practice is key; don’t be afraid to unravel and try again.
Frequently Asked Questions
What’s the best yarn for beginners?
For beginners, acrylic worsted weight yarn is highly recommended. It’s affordable, widely available, and easy to work with because it has good stitch definition. Avoid dark colors, fuzzy, or highly textured yarns initially, as they can obscure your stitches.
How do I make a larger circle?
To make a larger circle, simply continue the established increase pattern for more rounds. Each round will add the same number of stitches as your initial round (e.g., 6 for SC, 12 for DC). Keep increasing evenly until your circle reaches the desired diameter.
Can I use different stitches to crochet a circle?
Absolutely! While single crochet (SC) is common, you can also use half double crochet (HDC) or double crochet (DC) stitches. The principle of increasing remains the same: add your starting stitch count evenly in each round. The chain at the beginning of each round will change to match the height of your chosen stitch (e.g., chain 2 for HDC, chain 3 for DC).
How do I avoid the “seam” when joining rounds?
The slip stitch used to join rounds can sometimes create a visible “seam.” To minimize this, you can try working in a continuous spiral without joining, using only a stitch marker to denote the start of each round. This technique is often used for amigurumi. If you prefer joining, try to vary where you place your slip stitch or chain at the start of the next round by shifting it slightly.
Our Top Recommended Finds
- Ergonomic Crochet Hook Set: Comfortable grips reduce hand fatigue, making long crafting sessions more enjoyable.
- Beginner-Friendly Acrylic Yarn Pack: A variety of bright, smooth yarns perfect for practicing without a large investment.
- Locking Stitch Marker Combo Pack: Essential for keeping track of your rounds and stitches, preventing common mistakes.
Your Journey Begins Here: Mastering the Crochet Circle
You now have the fundamental knowledge to crochet a perfect circle, a building block for so many wonderful projects.
Don’t be discouraged if your first few attempts aren’t flawless; practice is what truly hones your skill.
Take your new skill and create a set of vibrant coasters, a charming trivet, or even the base for a crocheted basket.
Grab your hook and yarn today, and let your creativity flow!