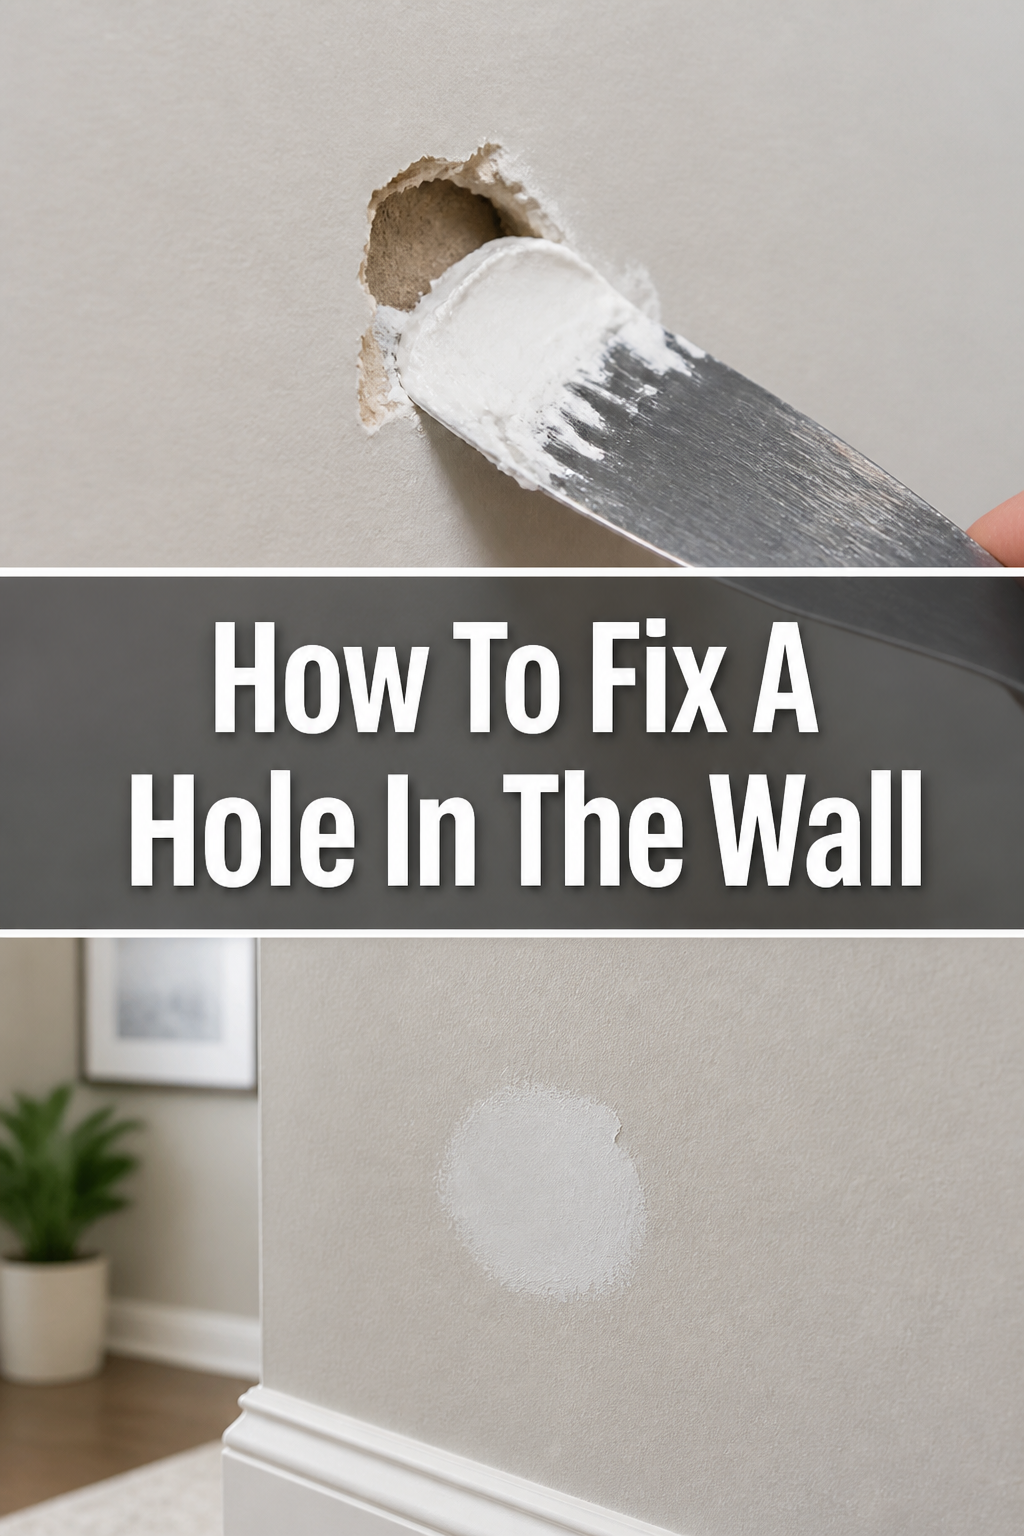
🔨 How To Fix A Hole In The Wall

Beginner-friendly templates, step-by-step guides,
and weekly project ideas in your inbox.
You’ve probably been there, staring at an unsightly ding or a gaping gash in your drywall. It’s frustrating, isn’t it?
I’ve patched my fair share of walls over the years, from small nail holes to larger, more intimidating craters. This guide distills that hands-on experience, providing clear, practical steps to get your wall looking flawless again.
You don’t need to be a seasoned contractor to tackle this common household repair. We’ll walk through everything you need to know, making the process straightforward and achievable for anyone.
Quick Overview
This guide will empower you to confidently repair minor to moderate holes in your drywall, restoring your wall’s smooth, unblemished surface ready for a fresh coat of paint.
- Time needed: 2-4 hours (including drying times, spread over multiple stages)
- Difficulty: Beginner
- What you’ll need: Spackle or joint compound, putty knife, sandpaper, drywall patch (for larger holes), utility knife, primer, paint, painter’s tape, drop cloth.
Step-by-Step Instructions
Step 1: Assess the Damage & Gather Your Tools
Before you grab any materials, take a good look at the hole. Is it a tiny nail hole, a medium-sized ding, or a larger punch-through? The size dictates the repair method.
For small holes (under 1/2 inch), spackle alone will often suffice. Medium holes (1/2 inch to 4 inches) might benefit from a mesh or metal patch. Larger holes (over 4 inches) require more extensive drywall repair techniques, often involving cutting out a square and inserting a new piece of drywall, which is beyond the scope of this basic guide.
Gather your materials:
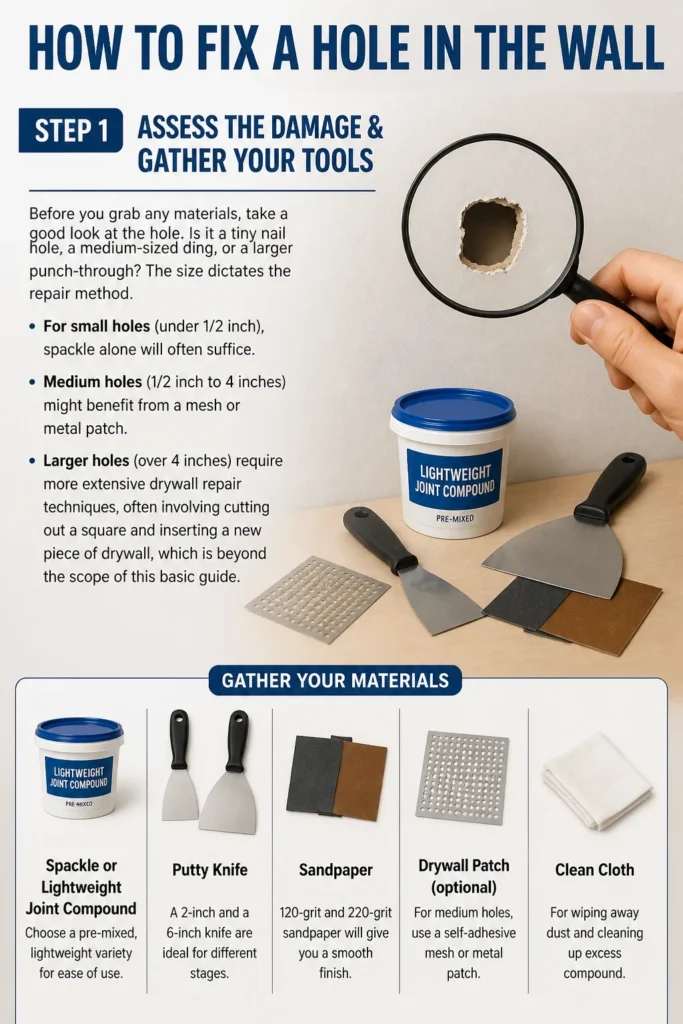
- Spackle or Lightweight Joint Compound: Choose a pre-mixed, lightweight variety for ease of use.
- Putty Knife: A 2-inch and a 6-inch knife are ideal for different stages.
- Sandpaper: 120-grit and 220-grit sandpaper will give you a smooth finish.
- Drywall Patch (for medium holes): Self-adhesive mesh or metal patches are very convenient.
- Utility Knife: Handy for trimming loose paper or squaring off edges.
- Drop Cloth or Plastic Sheeting: To protect your floor and furniture from dust and drips.
- Painter’s Tape: To secure the drop cloth and protect adjacent surfaces.
- Primer: A good quality stain-blocking primer is essential.
- Paint: Matching your wall color is crucial for an invisible repair.
- Clean Rags: For wiping tools and cleaning up.
Pro Tip: Always check if you have leftover paint from the original wall color. It makes matching much easier. If not, carefully cut a small chip from an inconspicuous area (like behind a picture frame) and take it to a paint store for color matching.
Step 2: Prepare the Area
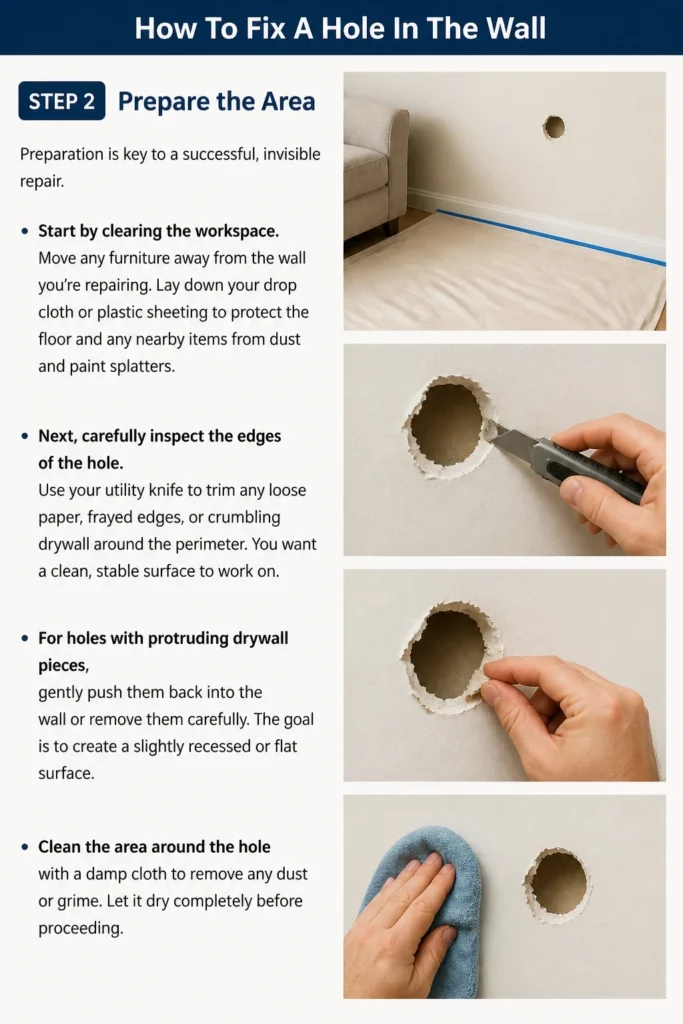
Preparation is key to a successful, invisible repair. Start by clearing the workspace.
Move any furniture away from the wall you’re repairing. Lay down your drop cloth or plastic sheeting to protect the floor and any nearby items from dust and paint splatters.
Next, carefully inspect the edges of the hole. Use your utility knife to trim any loose paper, frayed edges, or crumbling drywall around the perimeter. You want a clean, stable surface to work on.
For holes with protruding drywall pieces, gently push them back into the wall or remove them carefully. The goal is to create a slightly recessed or flat surface.
Clean the area around the hole with a damp cloth to remove any dust or grime. Let it dry completely before proceeding.
Step 3: Apply the First Layer of Spackle/Patch
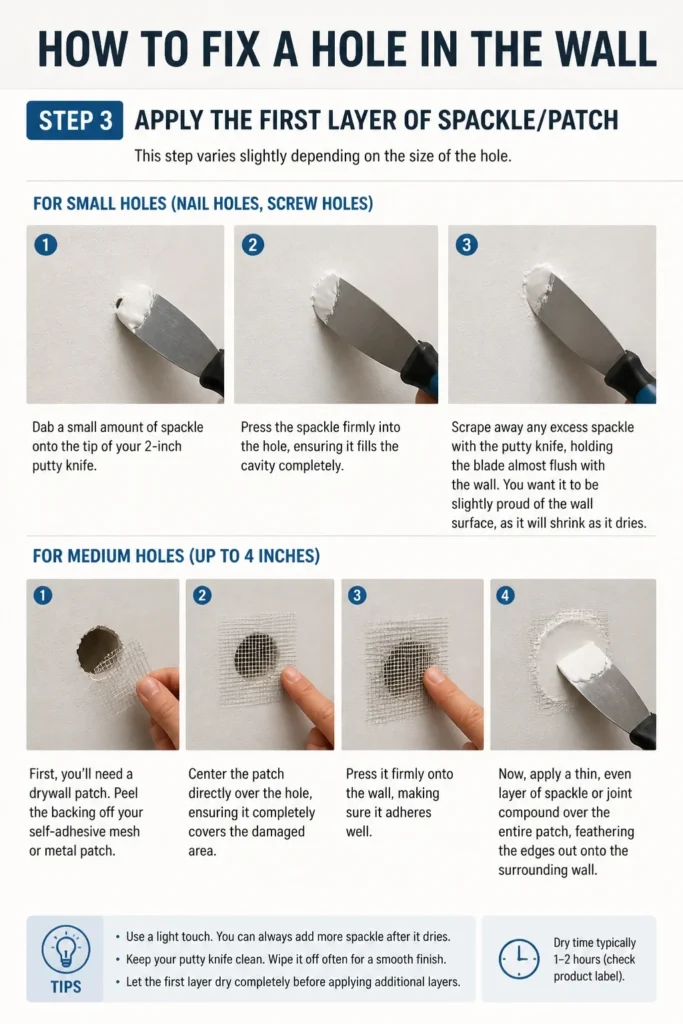
This step varies slightly depending on the size of the hole.
For small holes (nail holes, screw holes):
Dab a small amount of spackle onto the tip of your 2-inch putty knife. Press the spackle firmly into the hole, ensuring it fills the cavity completely.
Scrape away any excess spackle with the putty knife, holding the blade almost flush with the wall. You want it to be slightly proud of the wall surface, as it will shrink as it dries.
For medium holes (up to 4 inches):
First, you’ll need a drywall patch. Peel the backing off your self-adhesive mesh or metal patch.
Center the patch directly over the hole, ensuring it completely covers the damaged area. Press it firmly onto the wall, making sure it adheres well.
Now, apply a thin, even layer of spackle or joint compound over the entire patch using your 6-inch putty knife. Spread it from the center outwards, feathering the edges so the spackle blends smoothly into the surrounding wall.
Ensure the mesh or metal of the patch is completely covered. Aim for a layer that’s just thick enough to hide the patch, but not so thick it creates a noticeable bump.
Step 4: Let it Dry & Sand Smooth
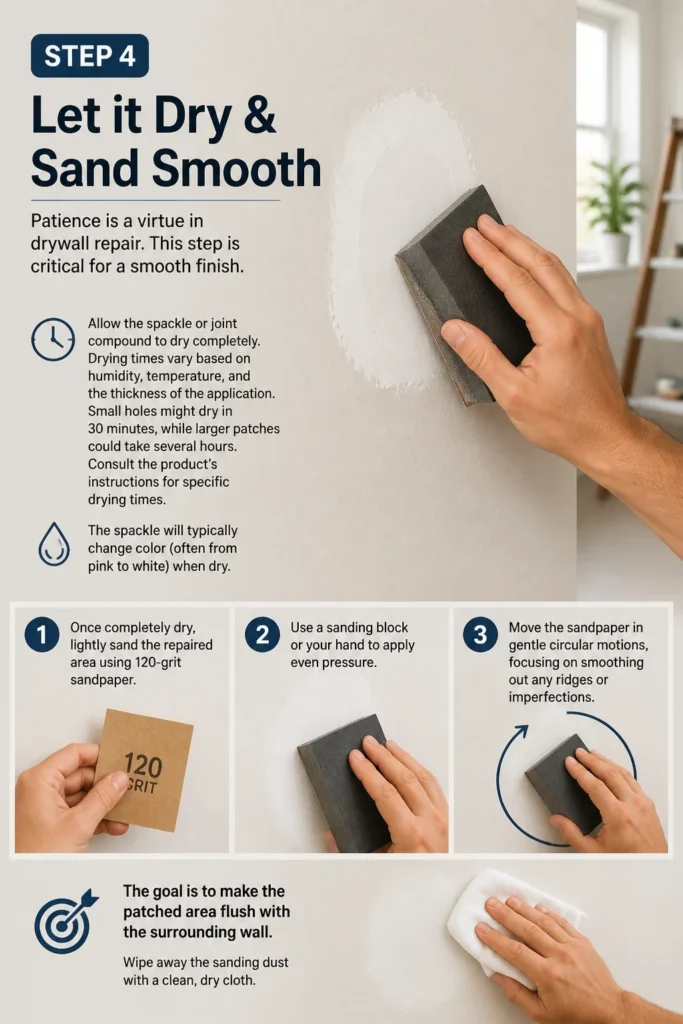
Patience is a virtue in drywall repair. This step is critical for a smooth finish.
Allow the spackle or joint compound to dry completely. Drying times vary based on humidity, temperature, and the thickness of the application. Small holes might dry in 30 minutes, while larger patches could take several hours.
Consult the product’s instructions for specific drying times. The spackle will typically change color (often from pink to white) when dry.
Once completely dry, lightly sand the repaired area using 120-grit sandpaper. Use a sanding block or your hand to apply even pressure.
Move the sandpaper in gentle circular motions, focusing on smoothing out any ridges or imperfections. The goal is to make the patched area flush with the surrounding wall.
Wipe away the sanding dust with a clean, dry cloth. Inspect the area carefully. Run your hand over it to feel for any bumps or depressions.
If it feels perfectly smooth and flush, you’re ready for the next step. If not, you might need another thin layer of spackle.
Step 5: Apply the Second Layer (if needed)
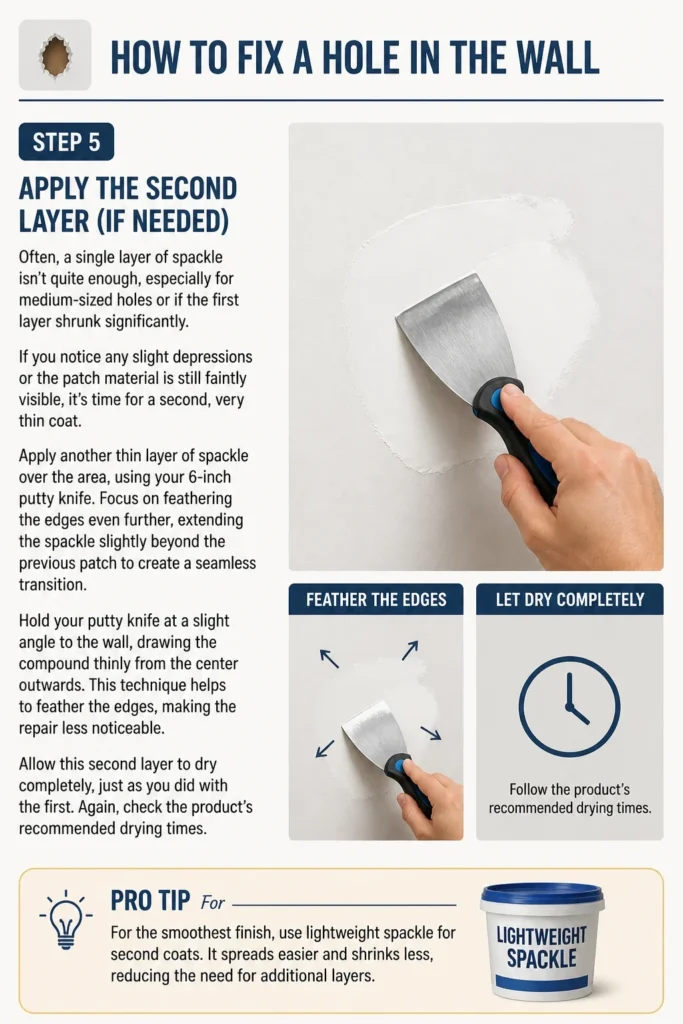
Often, a single layer of spackle isn’t quite enough, especially for medium-sized holes or if the first layer shrunk significantly.
If you notice any slight depressions or the patch material is still faintly visible, it’s time for a second, very thin coat.
Apply another thin layer of spackle over the area, using your 6-inch putty knife. Focus on feathering the edges even further, extending the spackle slightly beyond the previous patch to create a seamless transition.
Hold your putty knife at a slight angle to the wall, drawing the compound thinly from the center outwards. This technique helps to “feather” the edges, making the repair less noticeable.
Allow this second layer to dry completely, just as you did with the first. Again, check the product’s recommended drying times.
Pro Tip: For a truly invisible repair, multiple thin layers are always better than one thick layer. Thick layers take longer to dry, are more prone to cracking, and are harder to sand smooth.
Step 6: Feather the Edges & Final Sanding
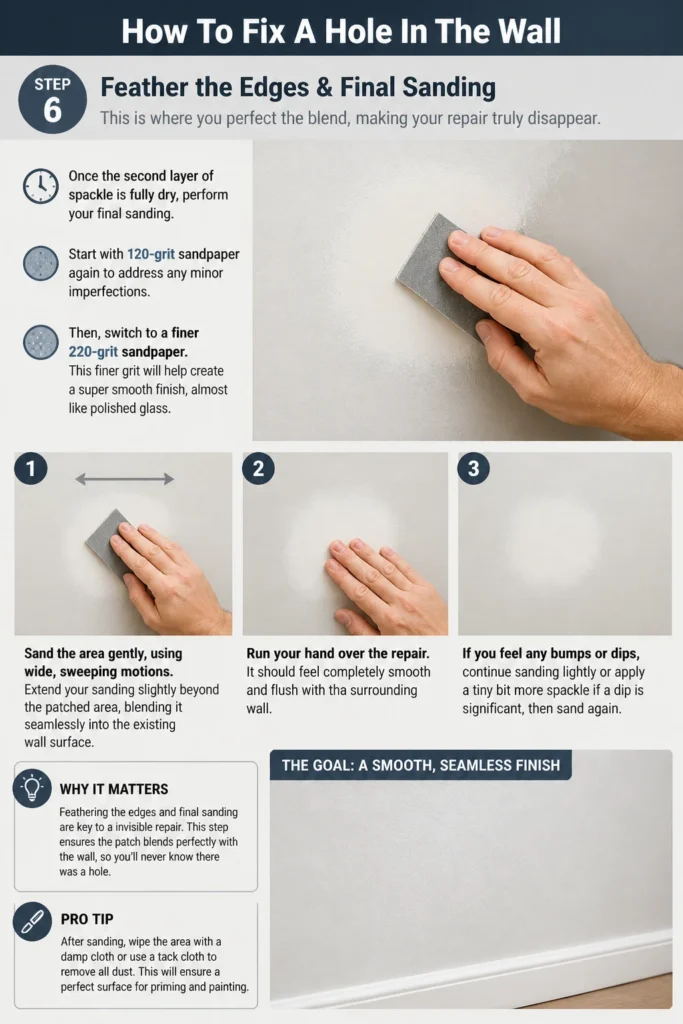
This is where you perfect the blend, making your repair truly disappear.
Once the second layer of spackle is fully dry, perform your final sanding. Start with 120-grit sandpaper again to address any minor imperfections.
Then, switch to a finer 220-grit sandpaper. This finer grit will help create a super smooth finish, almost like polished glass.
Sand the area gently, using wide, sweeping motions. Extend your sanding slightly beyond the patched area, blending it seamlessly into the existing wall surface. The goal is to eliminate any perceptible edges or ridges.
Run your hand over the repair. It should feel completely smooth and flush with the surrounding wall. If you feel any bumps or dips, continue sanding lightly or apply a tiny bit more spackle if a dip is significant, then sand again.
Wipe away all sanding dust thoroughly with a clean, damp cloth. Dust left behind can interfere with primer and paint adhesion.
Step 7: Clean and Prime
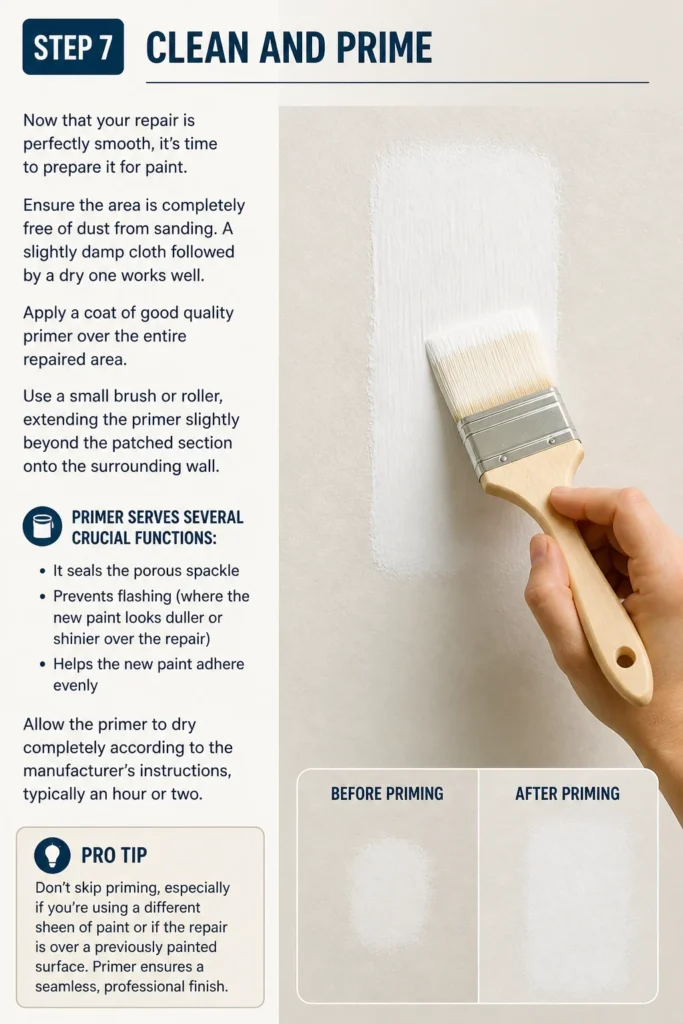
Now that your repair is perfectly smooth, it’s time to prepare it for paint.
Ensure the area is completely free of dust from sanding. A slightly damp cloth followed by a dry one works well.
Apply a coat of good quality primer over the entire repaired area. Use a small brush or roller, extending the primer slightly beyond the patched section onto the surrounding wall.
Primer serves several crucial functions: it seals the porous spackle, prevents “flashing” (where the new paint looks duller or shinier over the repair), and helps the new paint adhere evenly.
Allow the primer to dry completely according to the manufacturer’s instructions, typically an hour or two.
Pro Tip: Don’t skip priming, especially if you’re using a different sheen of paint or if the repair is over a previously painted surface. Primer creates a uniform surface for the topcoat, ensuring an even finish and true color.
Step 8: Paint to Match
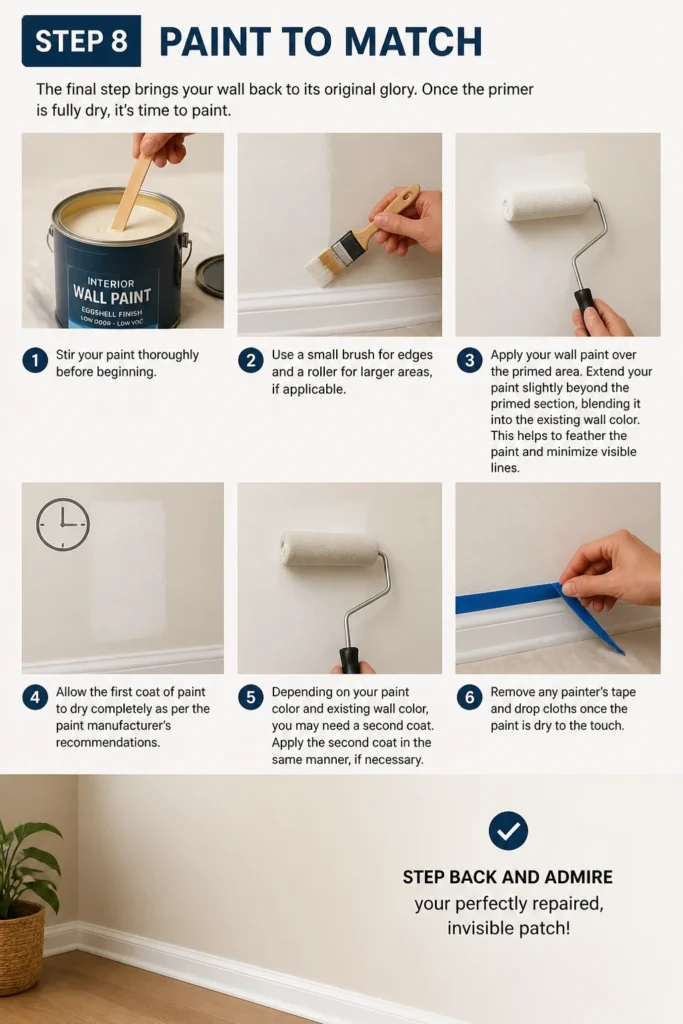
The final step brings your wall back to its original glory.
Once the primer is fully dry, it’s time to paint. Stir your paint thoroughly before beginning.
Apply your wall paint over the primed area. Use a small brush for edges and a roller for larger areas, if applicable.
Extend your paint slightly beyond the primed section, blending it into the existing wall color. This helps to feather the paint and minimize visible lines.
Allow the first coat of paint to dry completely as per the paint manufacturer’s recommendations.
Depending on your paint color and existing wall color, you may need a second coat. Apply the second coat in the same manner, if necessary.
Remove any painter’s tape and drop cloths once the paint is dry to the touch. Step back and admire your perfectly repaired, invisible patch.
Common Mistakes to Avoid
Rushing Drying Times
One of the biggest pitfalls is not letting spackle or joint compound dry completely between coats or before sanding. If you sand too soon, the material will gum up on your sandpaper and create a messy, uneven finish. Painting over wet spackle can lead to cracking, bubbling, or visible inconsistencies in the paint finish later on. Always check the product’s instructions and be patient.
Using Too Much Material
Applying an overly thick layer of spackle or compound is a common beginner mistake. Thick layers are more prone to shrinking and cracking as they dry, and they are significantly harder to sand smooth without creating a noticeable hump on the wall. It’s always better to apply multiple thin layers, allowing each to dry and be lightly sanded, than one heavy coat.
Skipping Sanding or Priming
Neglecting to properly sand or prime the repaired area will almost guarantee a visible repair. Skipping sanding leaves bumps and ridges, making the patch obvious. Omitting primer means the porous spackle will absorb paint differently than the surrounding wall, leading to a duller finish over the repair, a phenomenon known as “flashing.” Primer creates a uniform surface for paint adhesion and color consistency.
Ignoring the Hole Size
Trying to fix a large hole (over 4 inches) with just spackle or a small mesh patch is a recipe for failure. These larger holes require more structural support, typically involving cutting out a square, adding backing wood, and inserting a new piece of drywall. Using inappropriate materials for the size of the damage will result in a weak, sagging, or repeatedly cracking repair.
Troubleshooting
Patch Cracks After Drying
If your spackle or joint compound patch develops cracks after drying, it’s usually due to applying too thick a layer at once, or insufficient drying time before a subsequent layer. To fix this, gently scrape out the cracked material with your putty knife. Apply a new, thinner layer of spackle, ensuring it’s spread evenly. Allow it to dry completely, and apply additional thin coats as needed, letting each dry fully before proceeding.
Visible Seams or Bumps
A visible seam or bump means the patched area isn’t perfectly flush with the surrounding wall. This is typically a sanding issue. Sand the area again with 120-grit, then 220-grit sandpaper, focusing on feathering the edges out further into the existing wall. Use a wide, sweeping motion. If there’s a significant bump, you might need to scrape some material away before sanding. If it’s a dip, apply another very thin layer of spackle, let it dry, and then sand again.
Paint Doesn’t Match
If your new paint doesn’t blend seamlessly with the old paint, several factors could be at play. The most common reason is not using primer, which causes the spackle to absorb paint differently. Another reason is using paint that isn’t perfectly color-matched, or the existing paint has faded over time. To fix this, ensure the area is primed. If the color still doesn’t match, you may need to paint the entire wall from corner to corner to hide the difference. For future repairs, always test paint in an inconspicuous area first.
Key Takeaways
- Assess the hole size: Choose the right repair method and materials based on the damage.
- Prepare thoroughly: Clean the area and remove loose debris for a stable foundation.
- Apply thin layers: Multiple thin coats of spackle prevent cracking and make sanding easier.
- Patience with drying: Allow each layer to dry completely before sanding or adding more material.
- Sand meticulously: Achieve a perfectly smooth, flush surface with progressive sanding grits.
- Never skip priming: Primer ensures even paint absorption and a consistent finish.
Frequently Asked Questions
What’s the difference between spackle and joint compound?
Spackle is generally used for smaller holes and cracks. It dries quickly, shrinks less, and is easier to sand. Joint compound (or drywall mud) is typically used for larger repairs, taping seams, and skim coating entire walls. It comes in various forms, including lightweight and setting types, and is often more durable for extensive work but can be harder to sand than spackle. For most home wall repairs, lightweight spackle is the easiest choice.
Can I fix a large hole with just spackle?
No, attempting to fix a large hole (generally anything over 4 inches in diameter) with just spackle will likely result in a sagging, cracked, or weak repair. Large holes require structural support, usually involving cutting out the damaged section, adding wood backing, and installing a new piece of drywall. Spackle is designed for filling, not for structural support over large gaps.
How long does it take for spackle to dry?
Drying times for spackle can vary significantly. Factors like the thickness of the application, room temperature, and humidity all play a role. Thin layers of lightweight spackle can be dry to the touch in as little as 30 minutes to an hour. Thicker applications or high humidity can extend drying times to several hours. Always refer to the product’s specific instructions and ensure it’s completely dry before sanding or applying another coat.
Do I really need to prime?
Yes, priming is a crucial step that should not be skipped. Spackle is porous and will absorb paint differently than the surrounding painted wall, leading to an uneven sheen or color variation (known as flashing). Primer seals the spackle, creating a uniform, non-porous surface that allows the topcoat of paint to adhere evenly and display its true color and sheen.
Our Top Recommended Finds
- DAP DryDex Spackle: This popular spackle changes color from pink to white when dry, providing a clear visual cue for when it’s ready for sanding.
- STANLEY Putty Knife Set: A set including 2-inch and 6-inch flexible putty knives will cover all your application and feathering needs, making the job much smoother.
- 3M Patch Plus Primer: A convenient all-in-one product that combines spackle with primer, saving you a step for smaller repairs and ensuring good adhesion.
Your Wall, Reborn: Take Action Today
You’ve got the knowledge, the steps, and the confidence to tackle that unsightly hole in your wall. No more hiding it behind furniture or framed pictures.
Imagine the satisfaction of seeing a perfectly smooth, unblemished surface once again. This isn’t just about fixing a hole; it’s about reclaiming your space and boosting your home’s appeal.
So, gather your tools, follow these simple steps, and transform that damaged wall into a testament to your DIY prowess. Your walls (and your peace of mind) will thank you.
Beginner-friendly templates, step-by-step guides,
and weekly project ideas in your inbox.