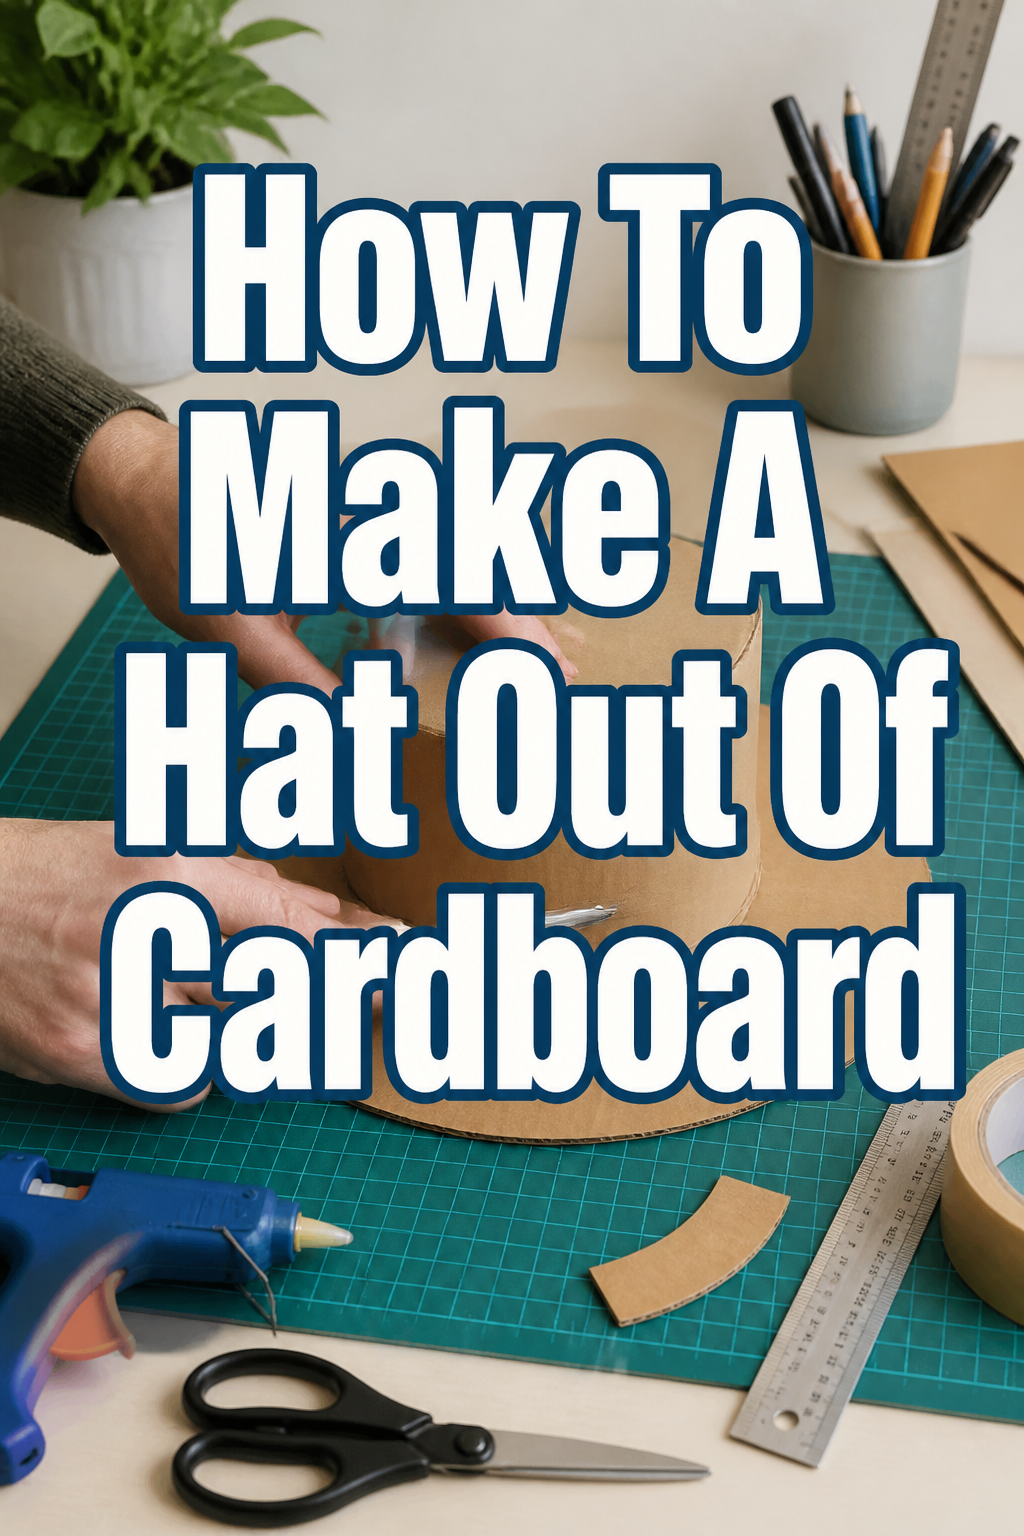
🎩 How To Make A Hat Out Of Cardboard

Beginner-friendly templates, step-by-step guides,
and weekly project ideas in your inbox.
Making something with your own hands brings a unique satisfaction. There’s a special joy in transforming simple materials into a wearable piece. I’ve spent countless hours crafting props and costumes, and cardboard often proves to be the most versatile medium for creative projects.
This guide will walk you through creating your very own custom cardboard hat, sharing all the practical insights I’ve gathered along the way.
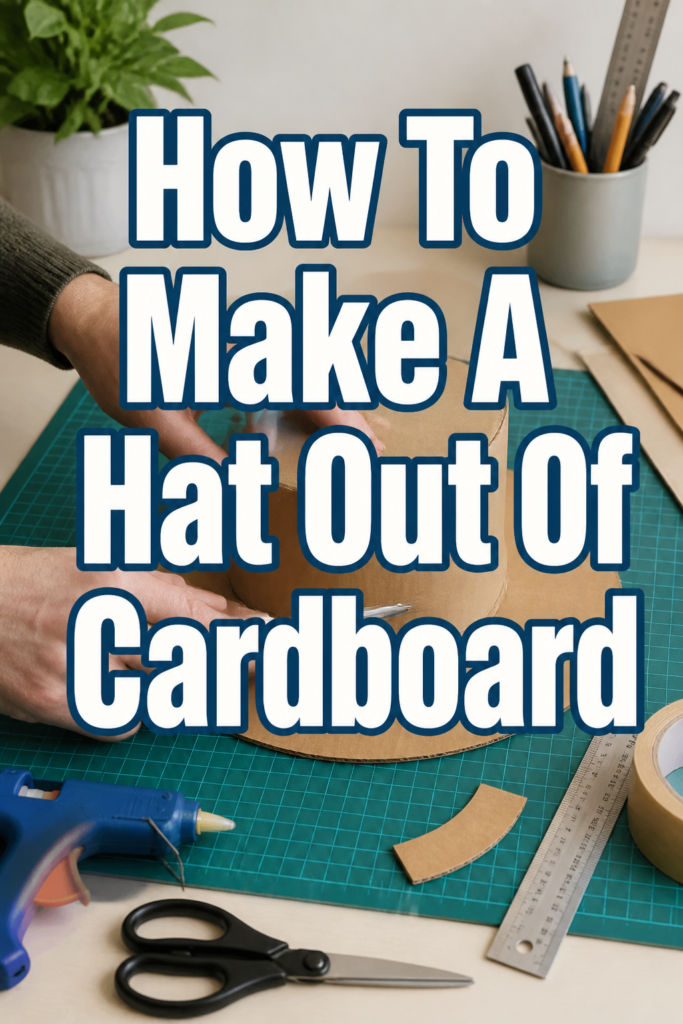
Quick Overview
You’re about to embark on a fun, hands-on project that results in a unique, custom-fit hat. This process is perfect for costume parties, imaginative play, or simply expressing your creative side. Get ready to transform ordinary cardboard into something extraordinary.
- Time needed: 2-4 hours (depending on drying time and decoration complexity)
- Difficulty: Beginner
- What you’ll need: Cardboard, scissors/craft knife, ruler, pencil, glue/tape, measuring tape, optional decorations
Step-by-Step Instructions
Step 1: Gather Your Materials
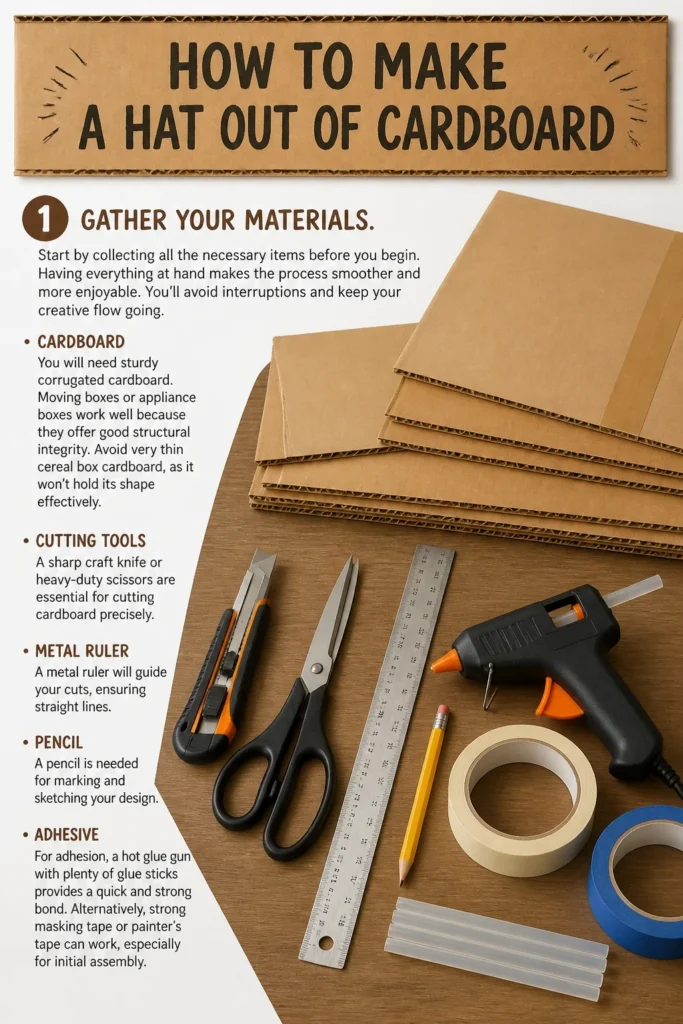
Start by collecting all the necessary items before you begin. Having everything at hand makes the process smoother and more enjoyable. You’ll avoid interruptions and keep your creative flow going.
You will need sturdy corrugated cardboard. Moving boxes or appliance boxes work well because they offer good structural integrity. Avoid very thin cereal box cardboard, as it won’t hold its shape effectively.
A sharp craft knife or heavy-duty scissors are essential for cutting cardboard precisely. A metal ruler will guide your cuts, ensuring straight lines. A pencil is needed for marking and sketching your design.
For adhesion, a hot glue gun with plenty of glue sticks provides a quick and strong bond. Alternatively, strong masking tape or painter’s tape can work, especially for initial assembly. A flexible measuring tape is crucial for accurate head measurements.
Step 2: Measure Your Head
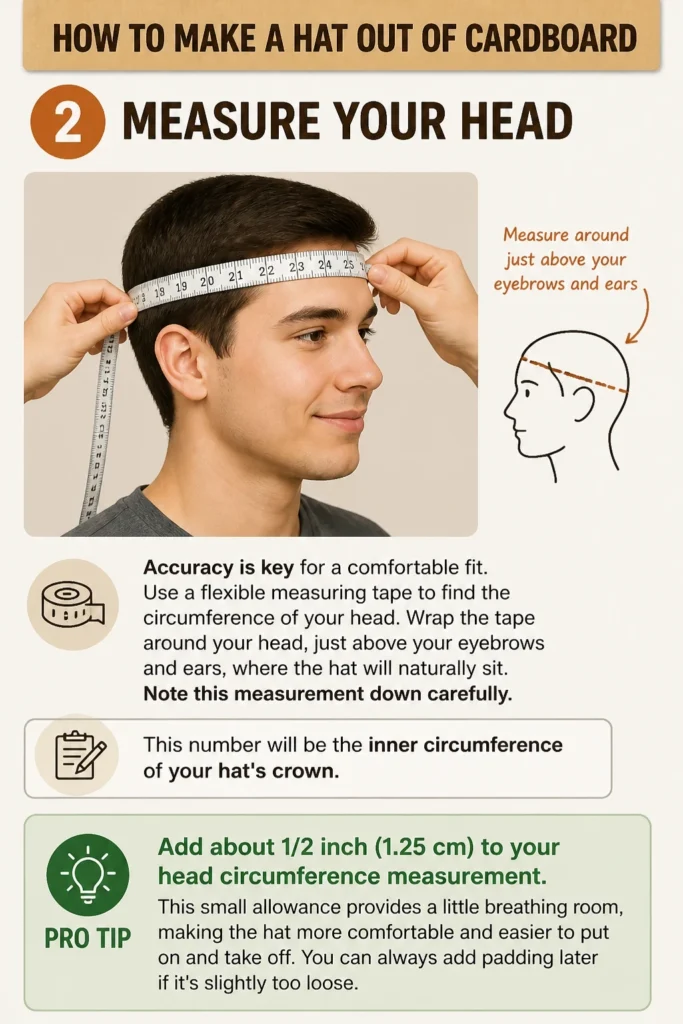
Accuracy is key for a comfortable fit. Use a flexible measuring tape to find the circumference of your head. Wrap the tape around your head, just above your eyebrows and ears, where the hat will naturally sit.
Note this measurement down carefully. This number will be the inner circumference of your hat’s crown. A well-fitting hat is much more enjoyable to wear.
Pro Tip: Add about 1/2 inch (1.25 cm) to your head circumference measurement. This small allowance provides a little breathing room, making the hat more comfortable and easier to put on and take off. You can always add padding later if it’s slightly too loose.
Step 3: Design Your Hat
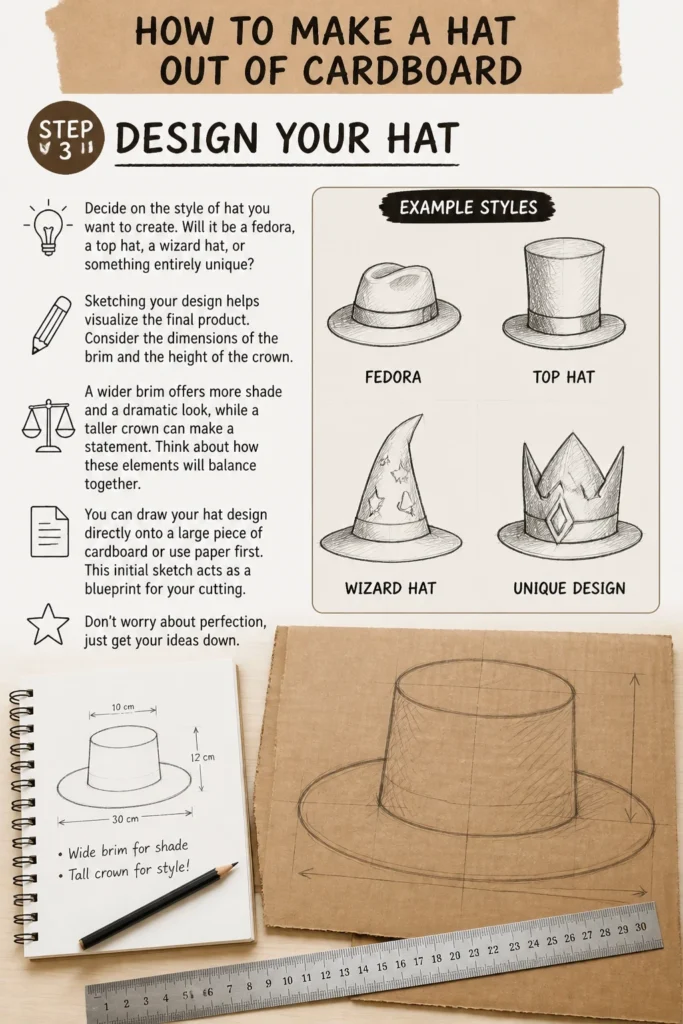
Decide on the style of hat you want to create. Will it be a fedora, a top hat, a wizard hat, or something entirely unique? Sketching your design helps visualize the final product.
Consider the dimensions of the brim and the height of the crown. A wider brim offers more shade and a dramatic look, while a taller crown can make a statement. Think about how these elements will balance together.
You can draw your hat design directly onto a large piece of cardboard or use paper first. This initial sketch acts as a blueprint for your cutting. Don’t worry about perfection, just get your ideas down.
Step 4: Cut the Main Pieces
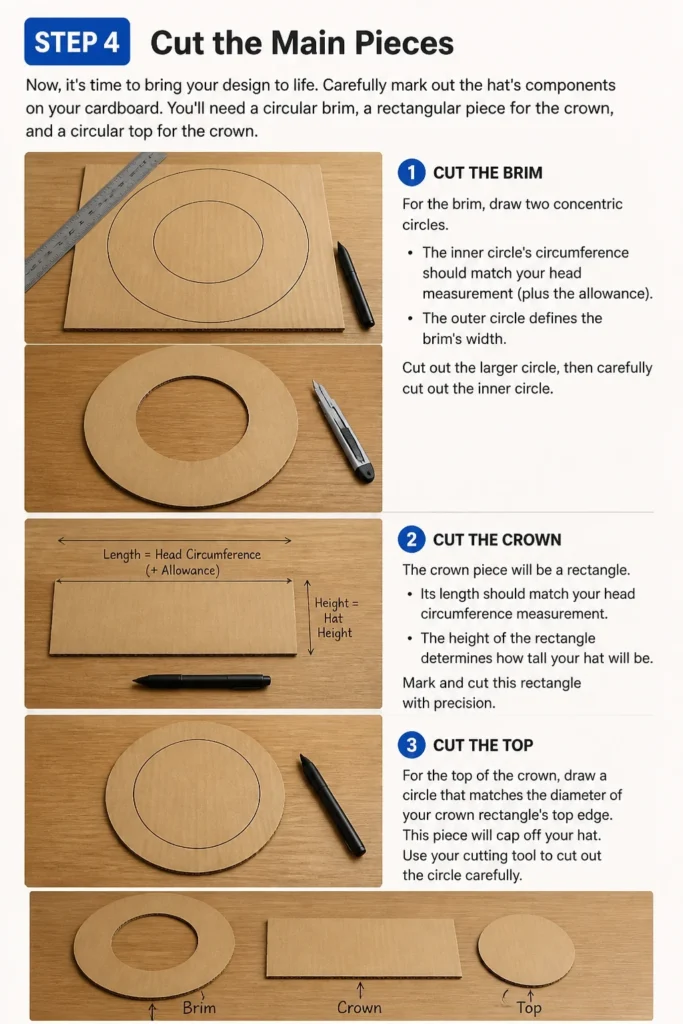
Now, it’s time to bring your design to life. Carefully mark out the hat’s components on your cardboard. You’ll need a circular brim, a rectangular piece for the crown, and a circular top for the crown.
For the brim, draw two concentric circles. The inner circle’s circumference should match your head measurement (plus the allowance). The outer circle defines the brim’s width. Cut out the larger circle, then carefully cut out the inner circle.
The crown piece will be a rectangle. Its length should match your head circumference measurement. The height of the rectangle determines how tall your hat will be. Mark and cut this rectangle with precision.
For the top of the crown, draw a circle that matches the diameter of your crown rectangle’s top edge. This piece will cap off your hat. Use your compass or a round object to get a perfect circle.
Pro Tip: When cutting with a craft knife, always use a cutting mat underneath your cardboard. This protects your work surface and helps the blade glide smoothly. Make multiple light passes with the knife rather than trying to cut through in one go, especially on thick cardboard. This reduces the risk of slips and yields cleaner edges.
Step 5: Assemble the Crown
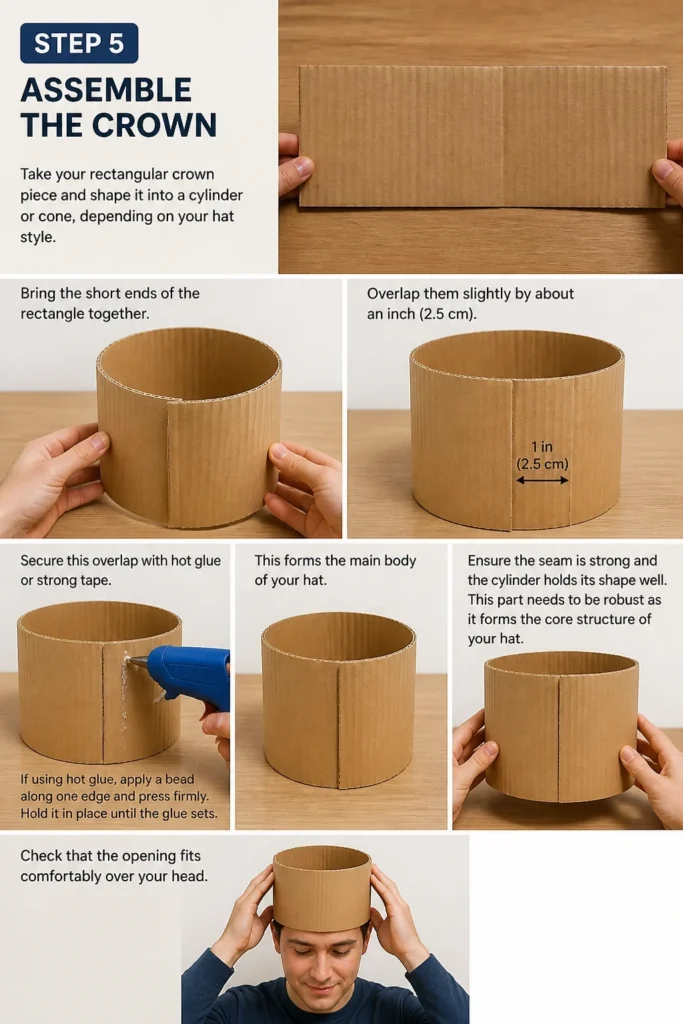
Take your rectangular crown piece and shape it into a cylinder or cone, depending on your hat style. Bring the short ends of the rectangle together. Overlap them slightly by about an inch (2.5 cm).
Secure this overlap with hot glue or strong tape. If using hot glue, apply a bead along one edge and press firmly. Hold it in place until the glue sets. This forms the main body of your hat.
Ensure the seam is strong and the cylinder holds its shape well. This part needs to be robust as it forms the core structure of your hat. Check that the opening fits comfortably over your head.
Step 6: Attach the Brim
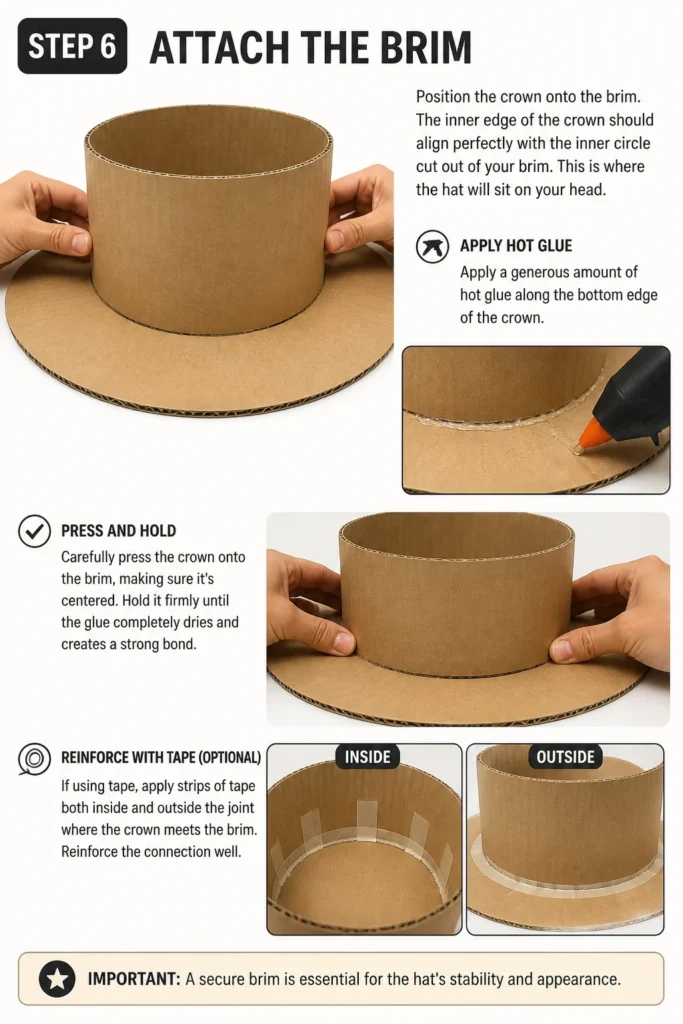
Position the crown onto the brim. The inner edge of the crown should align perfectly with the inner circle cut out of your brim. This is where the hat will sit on your head.
Apply a generous amount of hot glue along the bottom edge of the crown. Carefully press the crown onto the brim, making sure it’s centered. Hold it firmly until the glue completely dries and creates a strong bond.
If using tape, apply strips of tape both inside and outside the joint where the crown meets the brim. Reinforce the connection well. A secure brim is essential for the hat’s stability and appearance.
Step 7: Add the Top
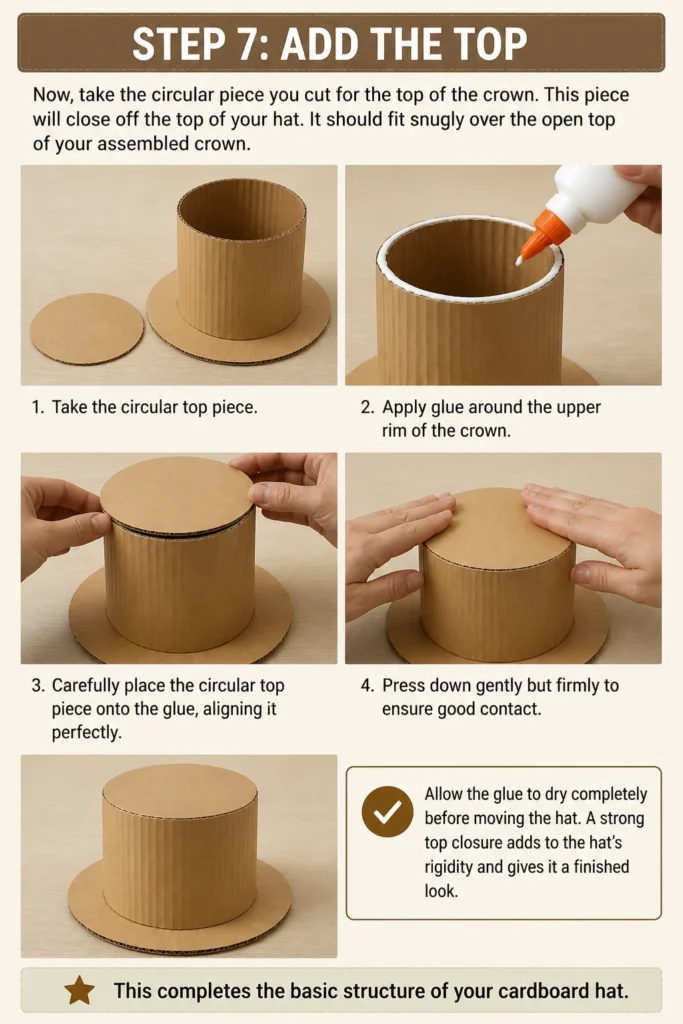
Now, take the circular piece you cut for the top of the crown. This piece will close off the top of your hat. It should fit snugly over the open top of your assembled crown.
Apply glue around the upper rim of the crown. Carefully place the circular top piece onto the glue, aligning it perfectly. Press down gently but firmly to ensure good contact.
Allow the glue to dry completely before moving the hat. A strong top closure adds to the hat’s rigidity and gives it a finished look. This completes the basic structure of your cardboard hat.
Step 8: Decorate Your Hat
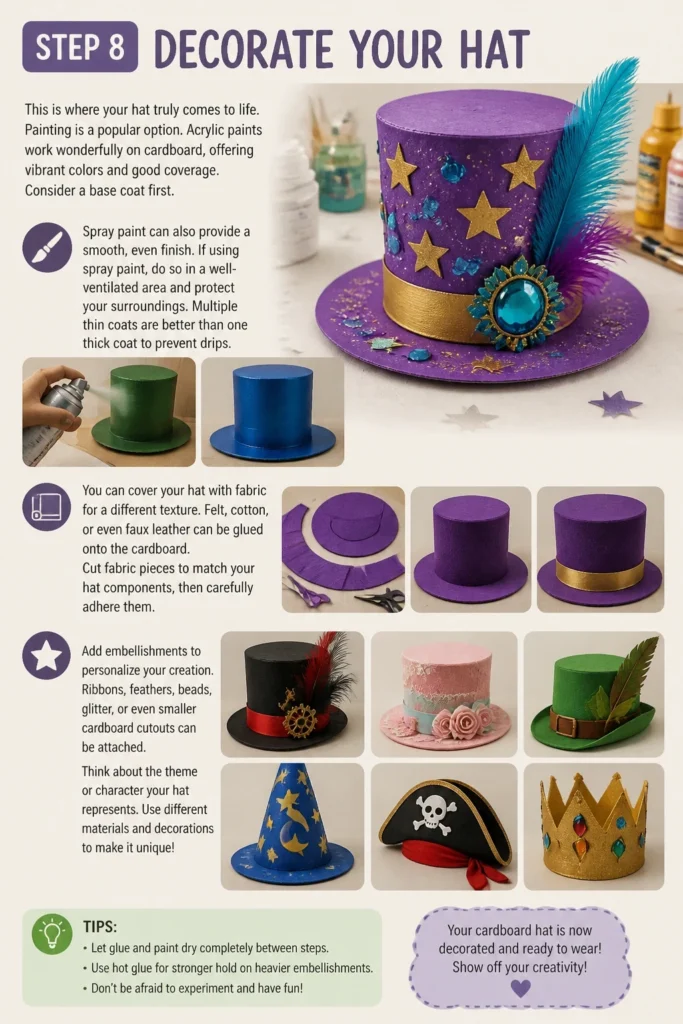
This is where your hat truly comes to life. Painting is a popular option. Acrylic paints work wonderfully on cardboard, offering vibrant colors and good coverage. Consider a base coat first.
Spray paint can also provide a smooth, even finish. If using spray paint, do so in a well-ventilated area and protect your surroundings. Multiple thin coats are better than one thick coat to prevent drips.
You can cover your hat with fabric for a different texture. Felt, cotton, or even faux leather can be glued onto the cardboard. Cut fabric pieces to match your hat components, then carefully adhere them.
Add embellishments to personalize your creation. Ribbons, feathers, beads, glitter, or even smaller cardboard cutouts can be attached. Think about the theme or character your hat represents.
Use different textures and colors to make your hat visually interesting. You might add a hatband, a buckle, or even small painted details. Let your imagination guide your decorative choices.
Common Mistakes to Avoid
Inaccurate Measurements
One of the most common pitfalls is not measuring your head precisely. An ill-fitting hat, whether too tight or too loose, will be uncomfortable and frustrating to wear. Always double-check your head circumference before cutting any cardboard. Take your time with this crucial first step.
Rushing the Glue/Tape
Impatience with adhesives can lead to a flimsy hat. Hot glue needs a few moments to cool and set properly, while other glues require even more drying time. If you rush to handle or move pieces before the bond is secure, parts can detach or shift. Allow each glued section ample time to cure fully.
Ignoring Cardboard Grain
Cardboard has a “grain” or fluting direction. Bending cardboard against its grain can cause it to crack or create unsightly creases. When forming curves, try to cut your cardboard so the fluting runs in the direction you want to bend it. This makes shaping much easier and results in a smoother curve.
Over-Decorating Too Soon
Adding heavy decorations before the hat’s structure is completely solid can warp or collapse the cardboard. Ensure all structural components are firmly glued and dried. Build the hat’s foundation first, then add embellishments. This prevents unnecessary stress on the cardboard and ensures your hat maintains its shape.
Troubleshooting
Hat is Too Big/Small
If your hat feels too large, you can add an inner band. Cut a strip of foam or thick felt and glue it around the inside circumference of the crown. This padding will reduce the internal size and improve the fit. For a hat that’s too small, carefully make small vertical cuts (snips) along the bottom edge of the crown. These snips allow the cardboard to splay out slightly, increasing the diameter.
Hat Feels Flimsy
A wobbly or weak hat needs reinforcement. Cut additional strips of cardboard and glue them along the inside seams where the crown meets the brim and where the top attaches. You can also add a second layer of cardboard to the brim for extra stiffness. Consider lining the inside of the crown with another layer of cardboard for added rigidity.
Decorations Aren’t Sticking
If your paint isn’t adhering well, the cardboard surface might be too smooth or dusty. Lightly sand the area with fine-grit sandpaper to create a better surface for paint to grip. For other decorations, ensure the surface is clean and dry. Use an appropriate adhesive for the material you’re attaching – fabric glue for fabric, super glue for small embellishments, etc.
Key Takeaways
- Accurate head measurement is crucial for a comfortable fit.
- Choose sturdy corrugated cardboard for a durable hat.
- Use a craft knife and ruler for precise, clean cuts.
- Allow hot glue or tape to dry completely for strong bonds.
- Consider the cardboard’s grain when forming curves.
- Decorate creatively to personalize your unique hat.
Frequently Asked Questions
Can I use any type of cardboard?
While you can technically use any cardboard, corrugated cardboard (like from shipping boxes) is highly recommended. Its fluted core provides strength and rigidity, which is essential for a hat that holds its shape. Cereal box cardboard is too thin and will likely collapse.
How can I make the hat waterproof?
To add some water resistance, you can seal your finished cardboard hat. Apply several coats of clear acrylic spray sealer or a coat of Mod Podge. Ensure each coat dries thoroughly before applying the next. This will help protect it from light moisture, but it won’t be completely waterproof.
What if I don’t have a compass for drawing circles?
No compass? No problem! You can use various household items as templates for circles. Plates, bowls, lids, or even a piece of string tied to a pencil (one end held at the center point) can help you draw perfect circles. Just ensure the object matches the desired diameter.
How long will a cardboard hat last?
The lifespan of your cardboard hat depends on its construction and how it’s used. A well-built hat, reinforced and possibly sealed, can last for many uses, especially if handled with care. If it gets wet or squashed, its lifespan will shorten significantly. Store it properly to extend its life.
Our Top Recommended Finds
- Heavy-Duty Craft Knife: A sharp, ergonomic craft knife makes cutting cardboard much safer and more precise than regular scissors.
- Hot Glue Gun with High-Temp Setting: Essential for quick, strong bonds that hold your hat’s structure together effectively.
- Metal Ruler: Provides a straight edge for accurate cuts and protects your fingers when using a craft knife.
Unleash Your Inner Artisan
Crafting a hat from cardboard is more than just a project; it’s an opportunity to create something truly unique. You’ve transformed a simple, often discarded material into a wearable piece of art. The skills you’ve honed here—measuring, cutting, assembling, and decorating—are incredibly versatile.
Why stop at one hat? Try a different style, experiment with new decorations, or even create matching accessories. Share your creation with friends, wear it proudly, or use it as inspiration for your next DIY adventure. Start building your cardboard masterpiece today!
Beginner-friendly templates, step-by-step guides,
and weekly project ideas in your inbox.