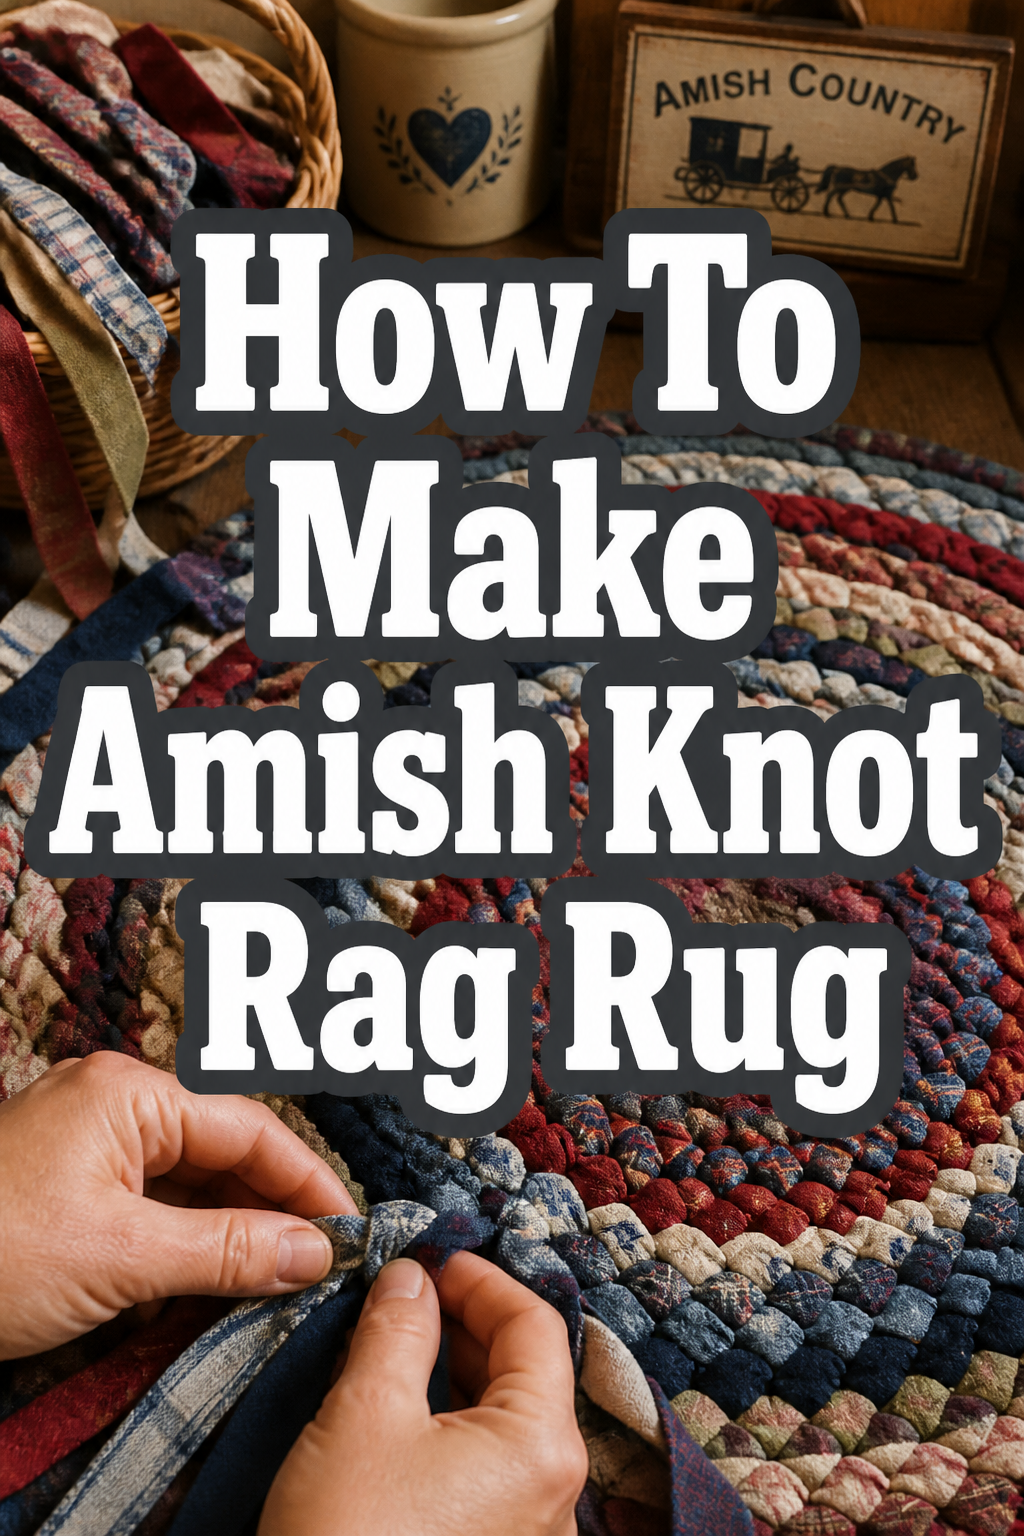
🌟 How To Make Amish Knot Rag Rug

Beginner-friendly templates, step-by-step guides,
and weekly project ideas in your inbox.
There’s a special warmth that only a handmade item can bring into a home.
I remember the quiet satisfaction of completing my first Amish knot rag rug, seeing old fabric scraps transform into something beautiful and functional.
This guide will walk you through creating your own piece of cozy, sustainable charm, drawing from my own experience with this delightful craft.
Quick Overview
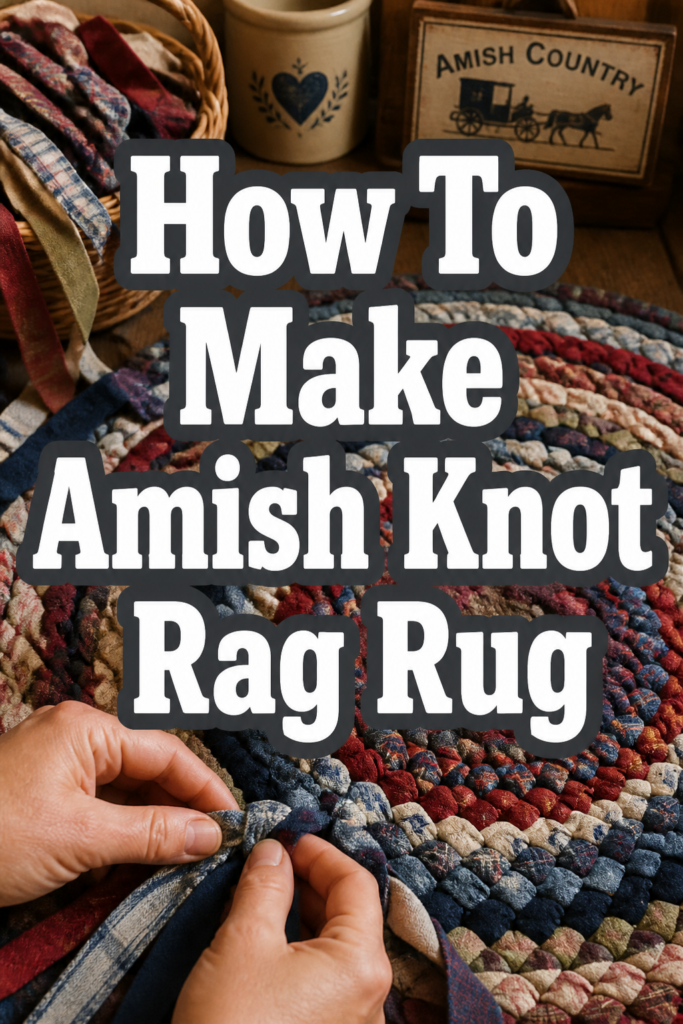
You’re about to embark on a journey to create a unique, durable rag rug using a traditional knotting technique.
This method is incredibly forgiving and perfect for upcycling old textiles into a functional work of art for your home.
- Time needed: 8-15 hours (can be spread over several days)
- Difficulty: Beginner
- What you’ll need: Fabric scraps, sharp scissors, ruler or measuring tape, large crochet hook (optional), non-slip rug pad (optional).
Step-by-Step Instructions
Step 1: Gather and Prepare Your Fabric
The beauty of an Amish knot rag rug lies in its ability to repurpose materials.
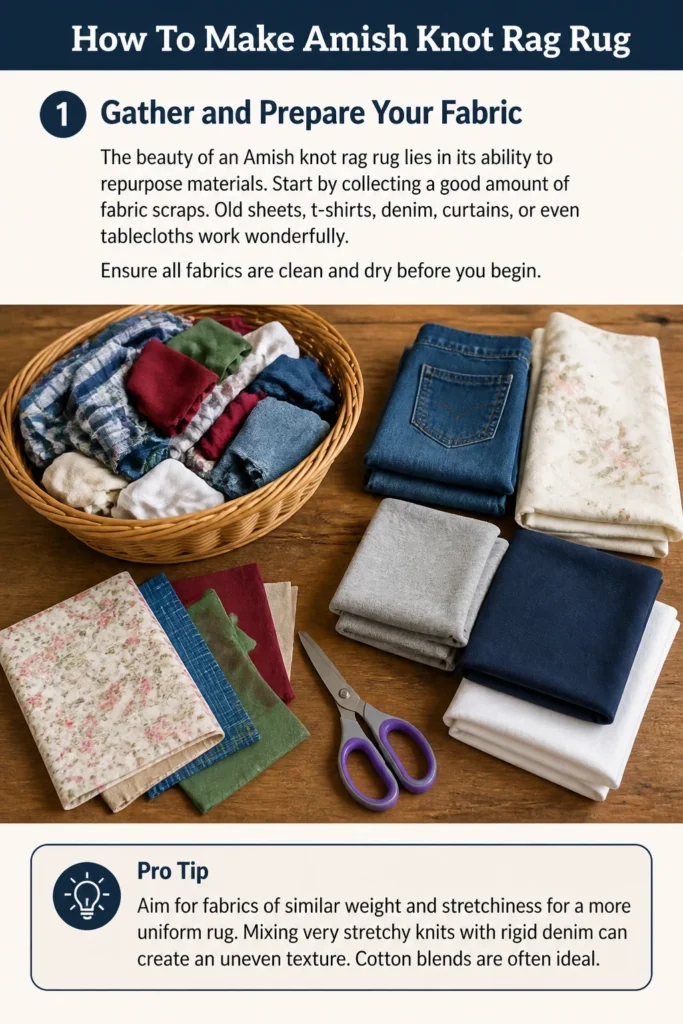
Start by collecting a good amount of fabric scraps. Old sheets, t-shirts, denim, curtains, or even tablecloths work wonderfully.
Ensure all fabrics are clean and dry before you begin.
Pro Tip: Aim for fabrics of similar weight and stretchiness for a more uniform rug. Mixing very stretchy knits with rigid denim can create an uneven texture. Cotton blends are often ideal.
Step 2: Cut Fabric into Strips
This step is crucial for the consistency of your rug.
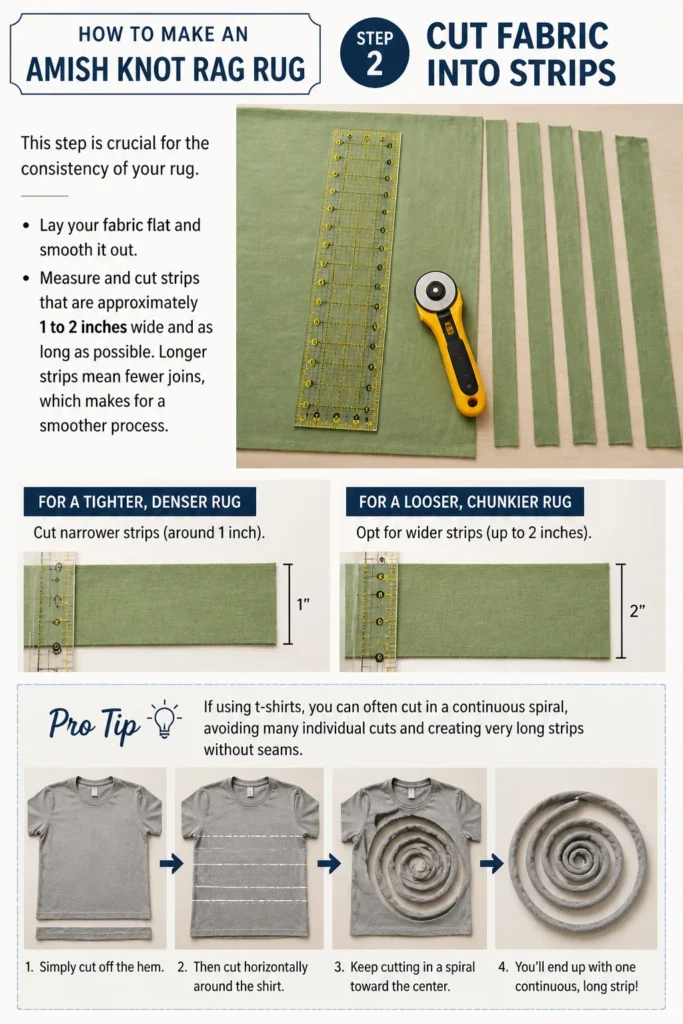
Lay your fabric flat and smooth it out. Measure and cut strips that are approximately 1 to 2 inches wide and as long as possible.
Longer strips mean fewer joins, which makes for a smoother process.
For a tighter, denser rug, cut narrower strips (around 1 inch).
For a looser, chunkier rug, opt for wider strips (up to 2 inches).
Pro Tip: If using t-shirts, you can often cut in a continuous spiral, avoiding many individual cuts and creating very long strips without seams. Simply cut off the hem, then cut horizontally around the shirt.
Step 3: Create Your Starting Loop
This loop forms the very center of your rug.
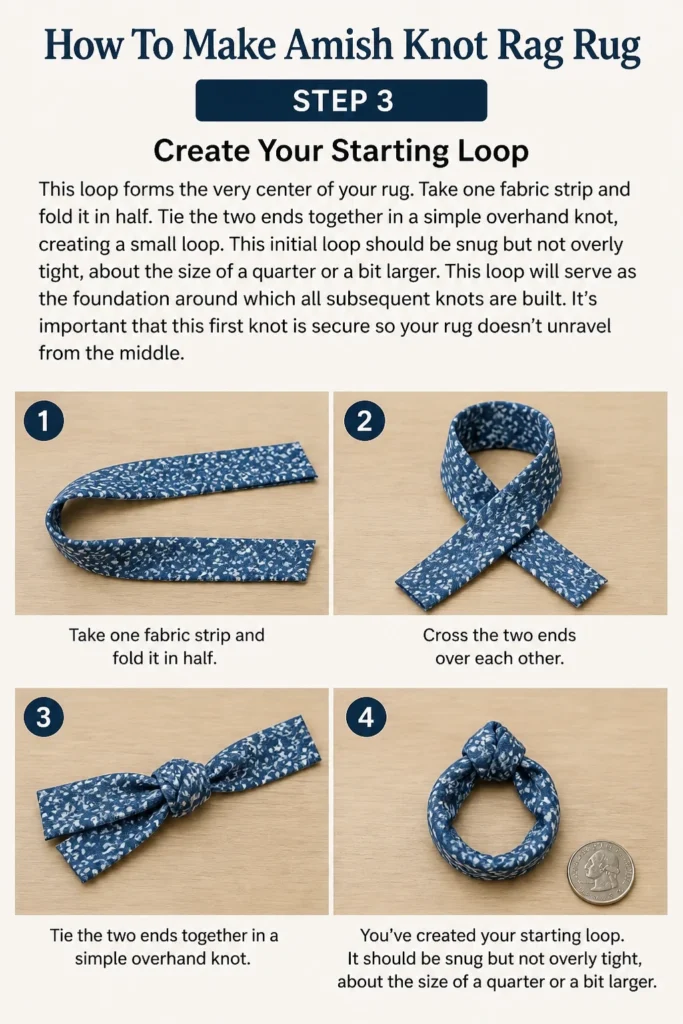
Take one fabric strip and fold it in half. Tie the two ends together in a simple overhand knot, creating a small loop.
This initial loop should be snug but not overly tight, about the size of a quarter or a bit larger.
This loop will serve as the foundation around which all subsequent knots are built.
It’s important that this first knot is secure so your rug doesn’t unravel from the middle.
Step 4: Begin the Knotting Process
Now the fun truly begins!
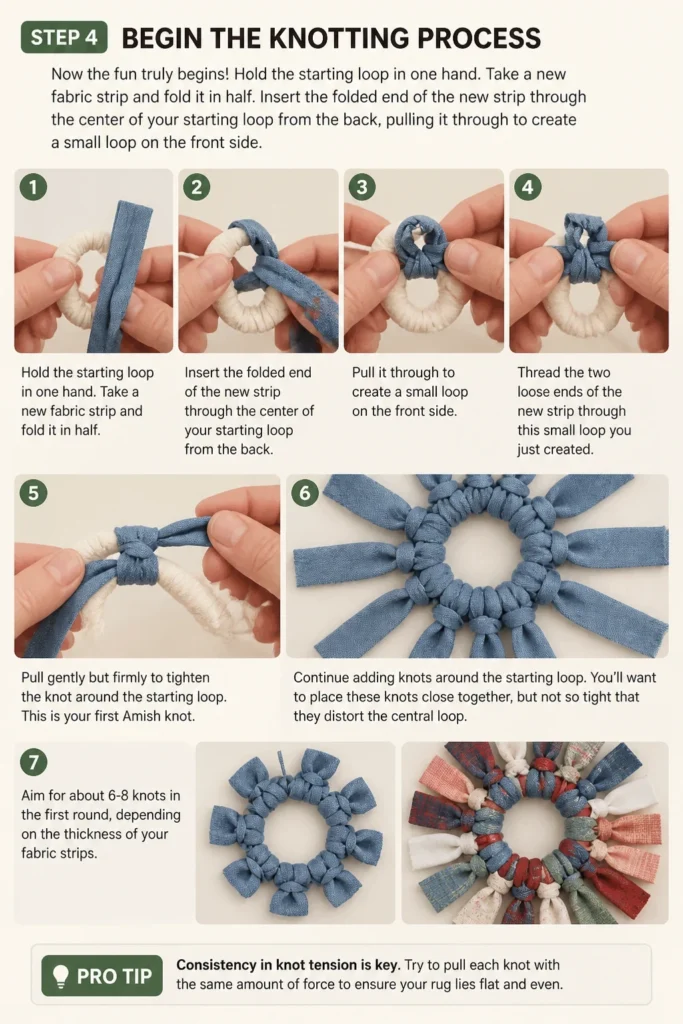
Hold the starting loop in one hand. Take a new fabric strip and fold it in half.
Insert the folded end of the new strip through the center of your starting loop from the back, pulling it through to create a small loop on the front side.
Thread the two loose ends of the new strip through this small loop you just created.
Pull gently but firmly to tighten the knot around the starting loop.
This is your first Amish knot.
Continue adding knots around the starting loop. You’ll want to place these knots close together, but not so tight that they distort the central loop.
Aim for about 6-8 knots in the first round, depending on the thickness of your fabric strips.
Pro Tip: Consistency in knot tension is key. Try to pull each knot with the same amount of force to ensure your rug lays flat and has an even texture. Too loose, and it will be flimsy; too tight, and it will buckle.
Step 5: Add New Fabric Strips
You’ll inevitably run out of fabric strips as you work.
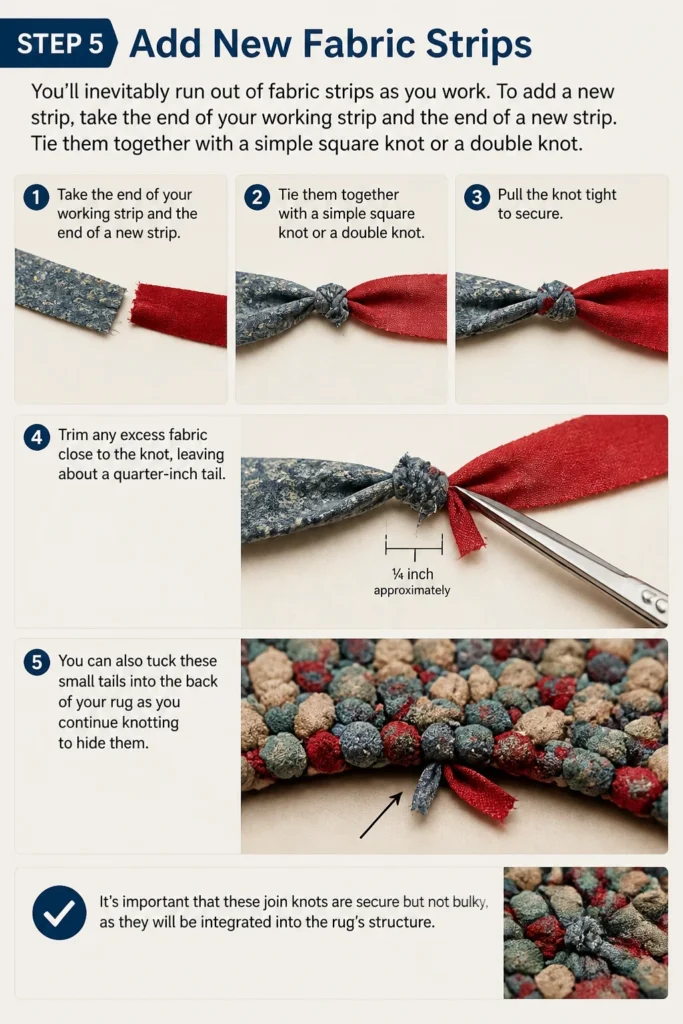
To add a new strip, take the end of your working strip and the end of a new strip.
Tie them together with a simple square knot or a double knot.
Trim any excess fabric close to the knot, leaving about a quarter-inch tail.
You can also tuck these small tails into the back of your rug as you continue knotting to hide them.
It’s important that these join knots are secure but not bulky, as they will be integrated into the rug’s structure.
Step 6: Shape and Expand Your Rug
As you continue knotting, you’ll work in rounds, spiraling outwards from the center.
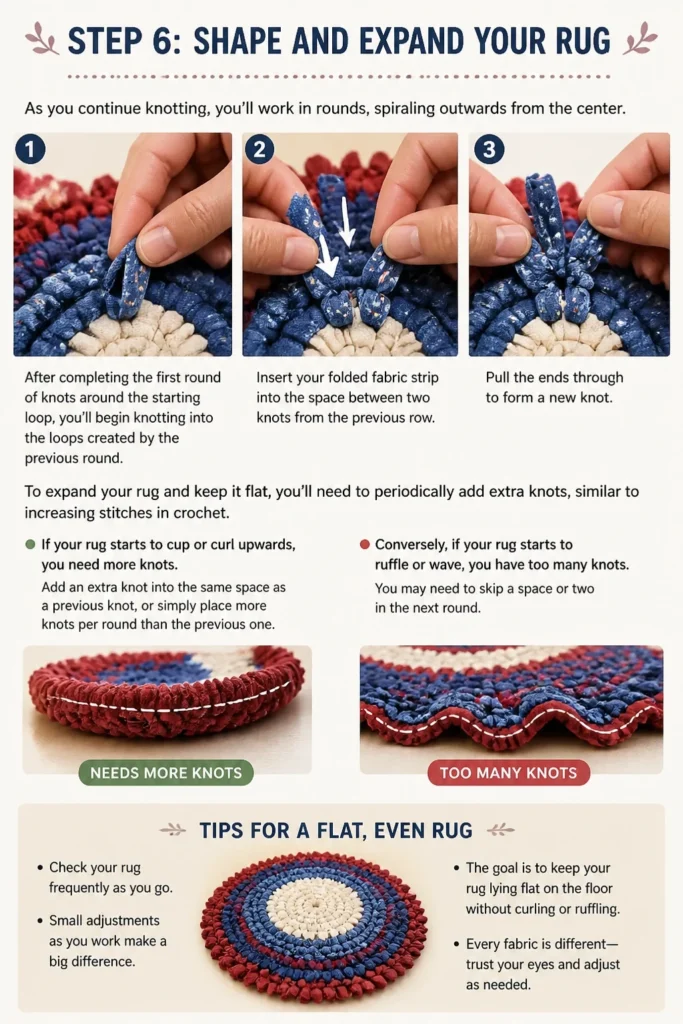
After completing the first round of knots around the starting loop, you’ll begin knotting into the loops created by the previous round.
Specifically, you’ll insert your folded fabric strip into the space between two knots from the previous row, then pull the ends through to form a new knot.
To expand your rug and keep it flat, you’ll need to periodically add extra knots, similar to increasing stitches in crochet.
If your rug starts to cup or curl upwards, you need more knots.
Add an extra knot into the same space as a previous knot, or simply place more knots per round than the previous one.
Conversely, if your rug starts to ruffle or wave, you have too many knots.
You may need to skip a space or two in the next round, or carefully remove some knots from the current round.
Pro Tip: Lay your rug flat on a hard surface every few rounds to check its shape. Adjust your knotting density as needed to maintain a flat, even circle or oval. This continuous checking prevents major shaping issues later on.
Step 7: Finish Your Rug
Once your rug reaches the desired size, it’s time to finish it securely.
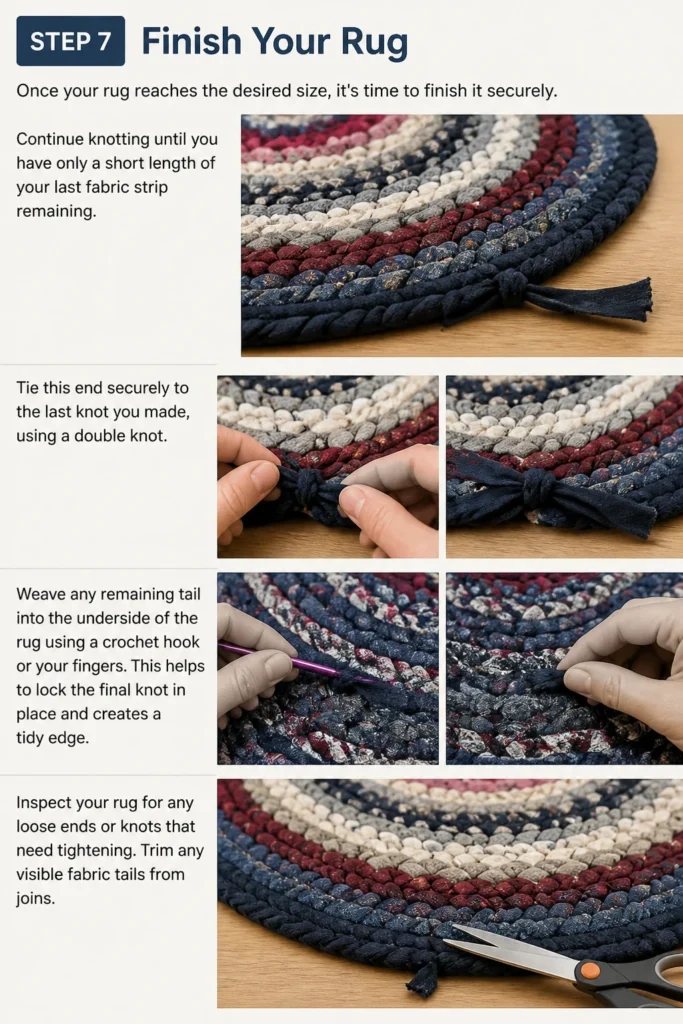
Continue knotting until you have only a short length of your last fabric strip remaining.
Tie this end securely to the last knot you made, using a double knot.
Weave any remaining tail into the underside of the rug using a crochet hook or your fingers.
This helps to lock the final knot in place and creates a tidy edge.
Inspect your rug for any loose ends or knots that need tightening. Trim any visible fabric tails from joins.
Step 8: Care for Your Rag Rug
Amish knot rag rugs are quite durable, but proper care will extend their life.
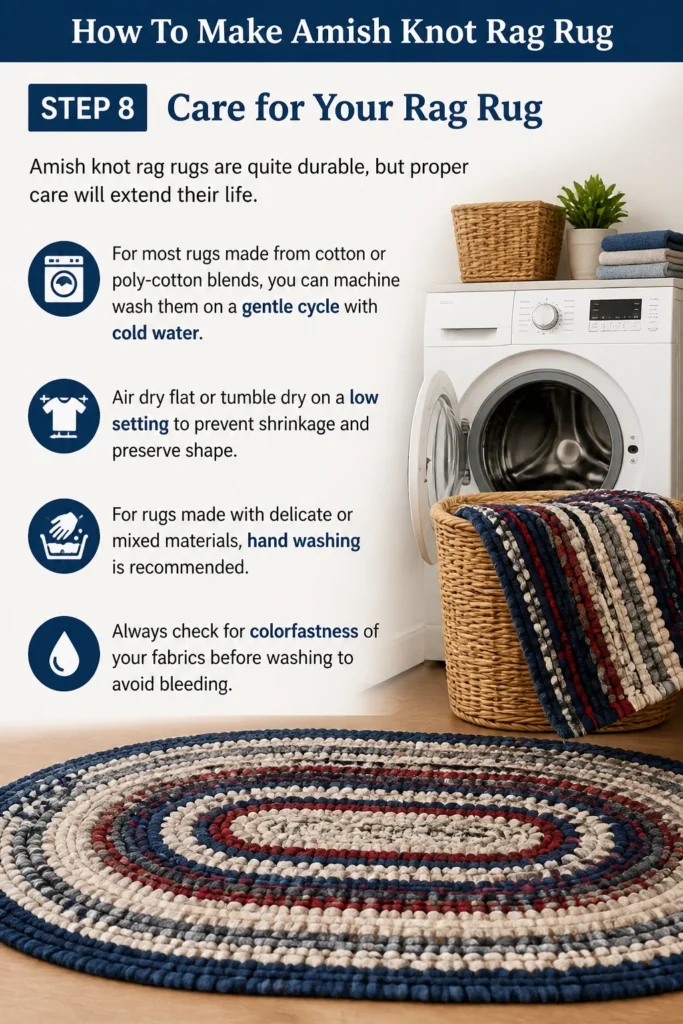
For most rugs made from cotton or poly-cotton blends, you can machine wash them on a gentle cycle with cold water.
Air dry flat or tumble dry on a low setting to prevent shrinkage and preserve shape.
For rugs made with delicate or mixed materials, hand washing is recommended.
Always check for colorfastness of your fabrics before washing to avoid bleeding.
Common Mistakes to Avoid
Inconsistent Strip Size
Cutting fabric strips of varying widths can lead to an uneven rug. Wider strips create bulkier knots, while narrower ones result in smaller, tighter knots.
This inconsistency can make your rug lumpy, cause it to ripple in places, or prevent it from lying flat. Strive for uniform strip width from the start.
Too-Tight or Too-Loose Knots
The tension of your knots directly impacts the rug’s structure. Knots that are too tight will make the rug stiff and prone to cupping or buckling.
Conversely, knots that are too loose will result in a flimsy rug with gaps, prone to unraveling. Practice maintaining a consistent, medium tension for the best results.
Running Out of Fabric Mid-Project
It can be frustrating to be halfway through a rug and realize you don’t have enough material to finish. This often leads to scrambling for matching fabrics or abandoning the project.
Always overestimate your fabric needs. It’s better to have too much than too little. Collect a large stash before you begin, especially if you’re aiming for a specific color palette.
Ignoring the Rug’s Shape
Many beginners focus solely on knotting and forget to regularly check the rug’s overall shape. This can lead to a rug that curls, ruffles, or becomes lopsided.
Periodically lay your rug flat on a hard surface. If it’s cupping, add more knots in the next round. If it’s ruffling, reduce your knot count. Proactive shaping ensures a flat, beautiful finished product.
Troubleshooting
Rug is Curving or Rippling
If your rug is curving upwards like a bowl, you likely need to add more knots per round. This is a common issue when expanding a circular rug.
Try placing two knots in the same space from the previous round every few knots, or simply increase the overall number of knots in your next round compared to the last.
If your rug is rippling or waving, you have too many knots. You need to decrease the number of knots you’re making per round.
Carefully unknot a few sections and re-knot them, spacing your knots slightly further apart or skipping a space occasionally.
Knots Are Unraveling
This usually happens if the knots aren’t pulled tight enough, or if the fabric is very slippery. Ensure each knot is snug and secure before moving to the next.
When joining new strips, make sure your connecting knots (square knots or double knots) are very firm. If using very slick fabric like silk or satin, consider using a small dab of fabric glue on the join knots for extra security.
Rug Feels Too Stiff or Too Loose
The overall feel of your rug is determined by your knot tension and fabric choice. If it feels too stiff, your knots might be too tight, or your fabric strips too wide and rigid.
For a softer rug, try using slightly narrower strips or looser tension in subsequent rounds. If it feels too loose or flimsy, your knots are likely too slack.
You’ll need to pull your knots more firmly. For future projects, consider slightly wider strips or fabrics with more body to create a denser rug.
Key Takeaways
- Fabric preparation, especially consistent strip cutting, is fundamental to a beautiful rug.
- Maintain even knot tension throughout the project to ensure a flat and stable rug.
- Don’t be afraid to add extra knots to expand your rug and prevent cupping.
- Regularly check your rug’s shape by laying it flat to make adjustments.
- Joining new fabric strips seamlessly is a key skill to master for continuous work.
- Embrace the process; the handmade imperfections add to the charm of your finished piece.
Frequently Asked Questions
What kind of fabric works best for Amish knot rag rugs?
Durable, non-stretchy fabrics like cotton sheets, denim, canvas, and heavy linens are excellent choices. T-shirt material (jersey knit) also works well but can be stretchier, requiring slightly different tension. Avoid very thin or delicate fabrics that might tear easily.
Can I wash my rag rug?
Yes, most Amish knot rag rugs are washable. For cotton or cotton blend rugs, machine wash on a gentle cycle with cold water and air dry or tumble dry low. For mixed materials or delicate fabrics, hand washing is recommended. Always check for colorfastness beforehand.
How do I make a specific shape other than a circle?
While circles are the most common, you can create ovals by lengthening your starting chain of knots instead of just a single loop. Rectangles are more challenging with this technique but can be achieved by working back and forth in rows rather than spiraling, similar to crochet, though it requires careful turning.
Is this craft suitable for children?
Older children (pre-teen and up) with good fine motor skills and patience can certainly learn this craft. Supervise them with scissors. It’s a great way to introduce them to recycling and textile arts.
Our Top Recommended Finds
- Heavy-duty Fabric Scissors: Essential for cleanly cutting through multiple layers or tough fabrics like denim, saving your hands from strain.
- Large Crochet Hook (Size P/Q or 10-15mm): While not strictly necessary, a large hook can be incredibly helpful for pulling fabric strips through tight knots, especially when starting or working with thicker materials.
- Non-slip Rug Pad: Once your beautiful rug is complete, a non-slip pad beneath it will ensure it stays safely in place on any hard floor surface.
Embrace the Art of Rug Making
Crafting an Amish knot rag rug is more than just a project; it’s a mindful journey of transformation.
You’re not just making a rug; you’re weaving stories from discarded textiles, creating a piece that holds history and warmth.
So gather your fabric, find a cozy spot, and let your hands begin the rhythmic dance of knotting.
Your unique, handcrafted heirloom is waiting to be brought to life, ready to add comfort and character to your home.
Beginner-friendly templates, step-by-step guides,
and weekly project ideas in your inbox.