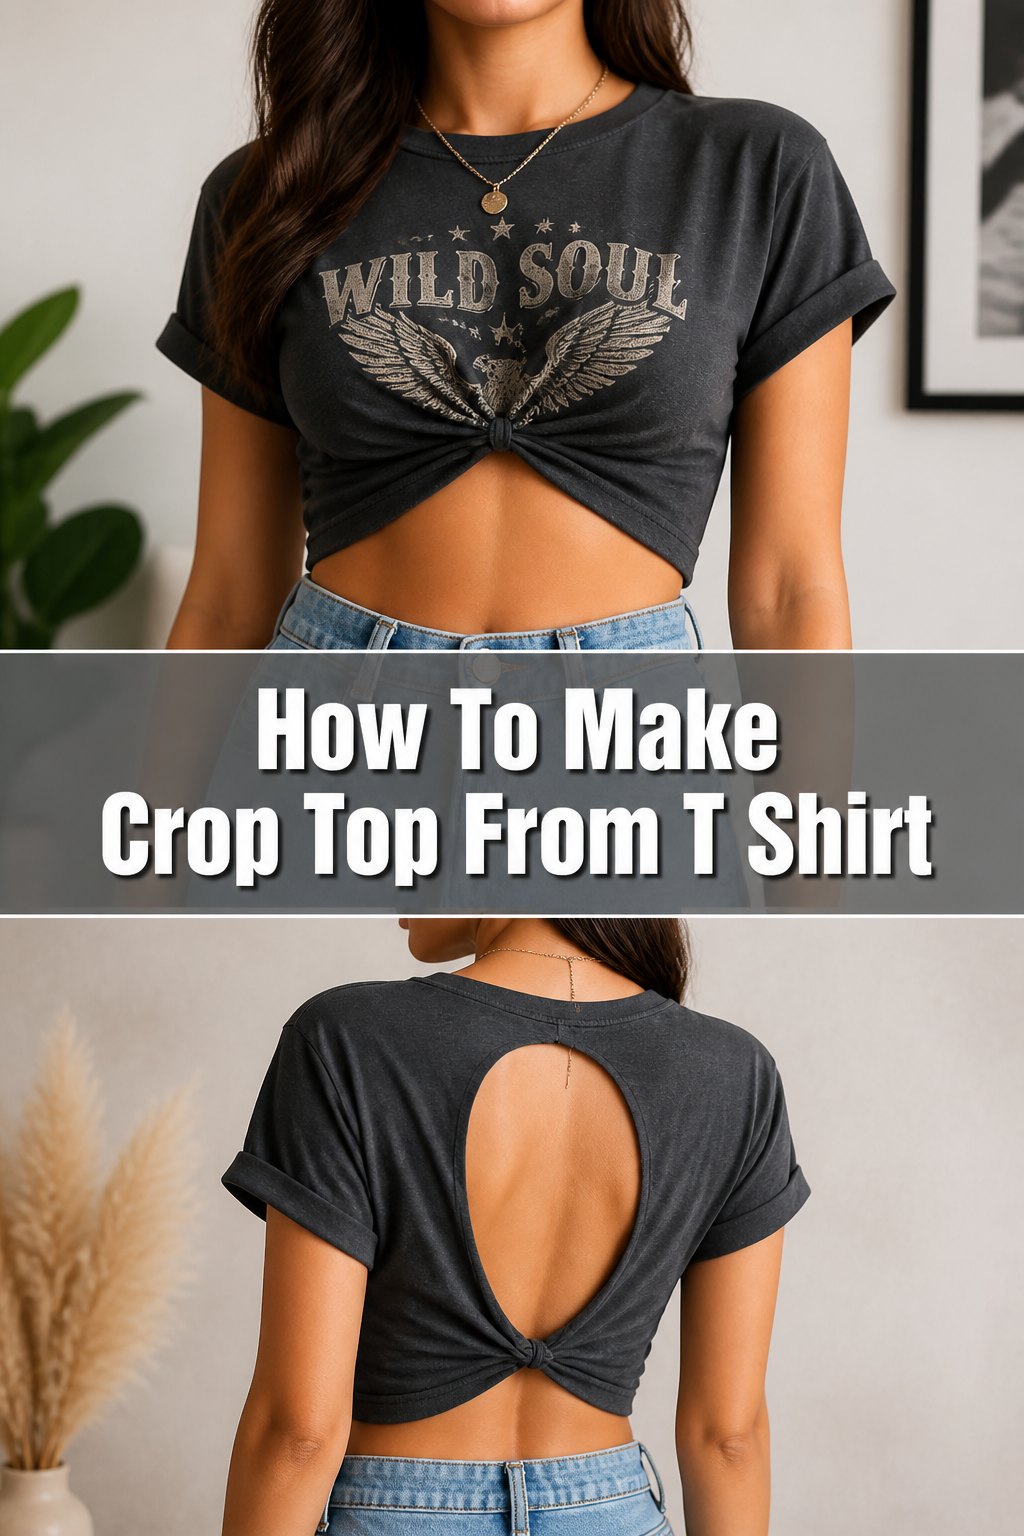
👕 How To Make Crop Top From T Shirt

Beginner-friendly templates, step-by-step guides,
and weekly project ideas in your inbox.
Transforming an old T-shirt into a stylish crop top is incredibly satisfying. I remember the first time I snipped the bottom off a forgotten band tee, instantly breathing new life into it. This guide comes from years of experimenting with various cuts and styles, ensuring you get the best results.
You can trust these steps to walk you through the process, even if you’ve never picked up a pair of fabric scissors before. Let’s create something awesome together.
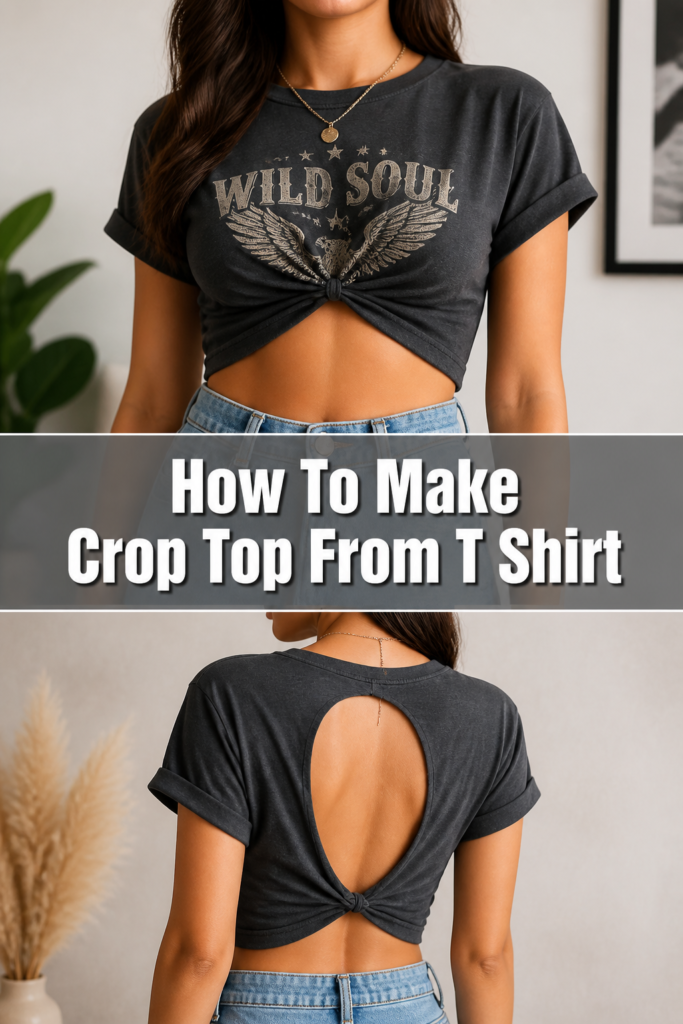
Quick Overview
You’re about to repurpose an old favorite into a trendy, custom-fit crop top. This project is perfect for refreshing your wardrobe without spending a dime.
It’s a fantastic way to personalize your clothing and express your unique style.
- Time needed: 30-60 minutes (depending on customization)
- Difficulty: Beginner
- What you’ll need: An old T-shirt, sharp scissors, fabric chalk or marker, a ruler or measuring tape.
Step-by-Step Instructions
Step 1: Gather Your Supplies
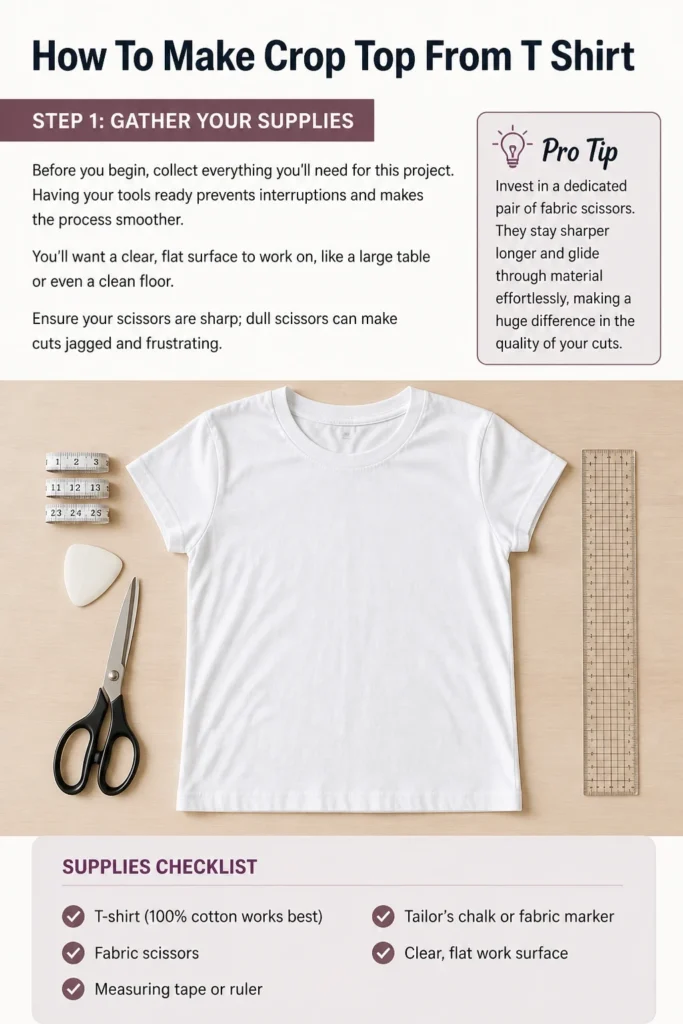
Before you begin, collect everything you’ll need for this project. Having your tools ready prevents interruptions and makes the process smoother. You’ll want a clear, flat surface to work on, like a large table or even a clean floor.
Ensure your scissors are sharp; dull scissors can make cuts jagged and frustrating.
Pro Tip: Invest in a dedicated pair of fabric scissors. They stay sharper longer and glide through material effortlessly, making a huge difference in the quality of your cuts.
Step 2: Choose Your T-Shirt Wisely
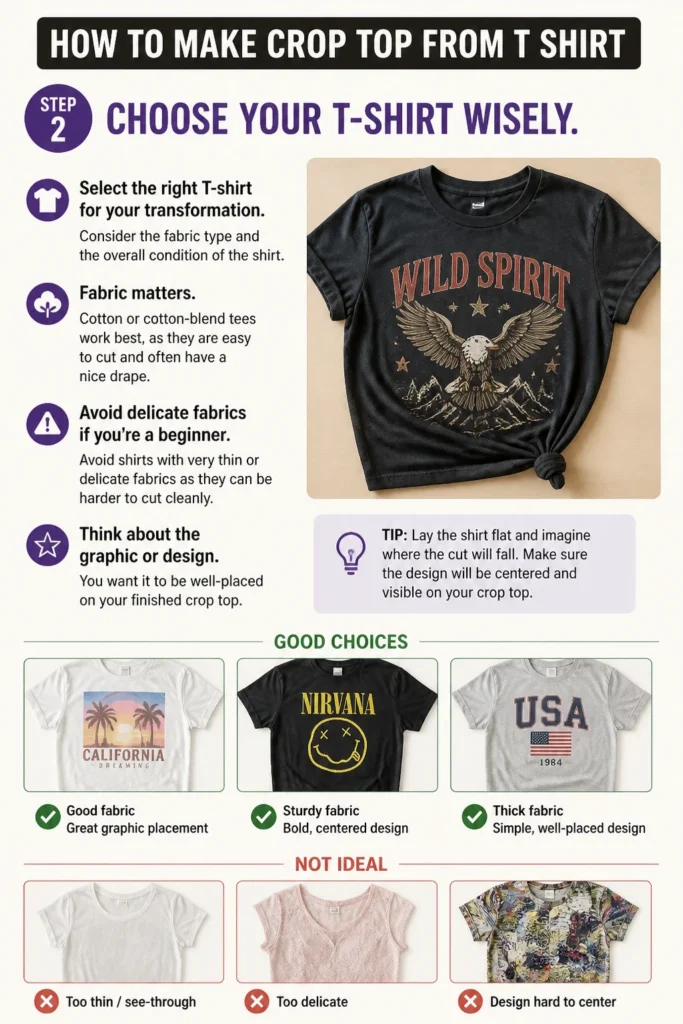
Select the right T-shirt for your transformation. Consider the fabric type and the overall condition of the shirt. Cotton or cotton-blend tees work best, as they are easy to cut and often have a nice drape.
Avoid shirts with very thin or delicate fabrics if you’re a beginner, as they can be harder to cut cleanly.
Think about the graphic or design on the shirt too. You want it to be well-placed on your finished crop top.
Step 3: Decide Your Length and Fit
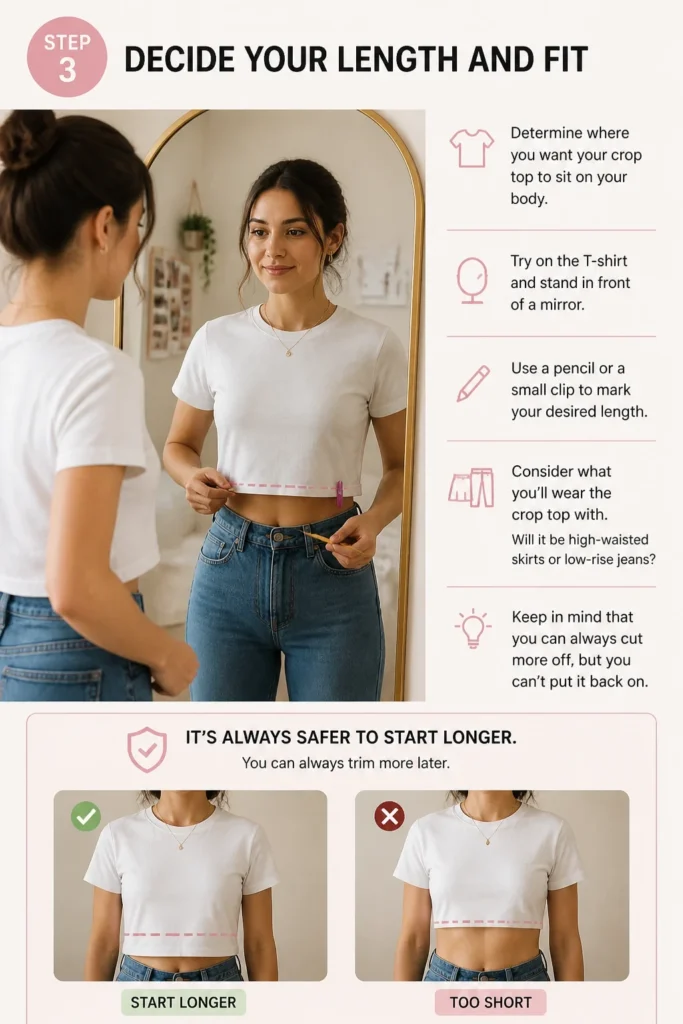
Determine where you want your crop top to sit on your body. Try on the T-shirt and stand in front of a mirror. Use a pencil or a small clip to mark your desired length.
Consider what you’ll wear the crop top with. Will it be high-waisted skirts or low-rise jeans?
Keep in mind that you can always cut more off, but you can’t put it back on. It’s always safer to start longer.
Step 4: Mark Your Cut Line
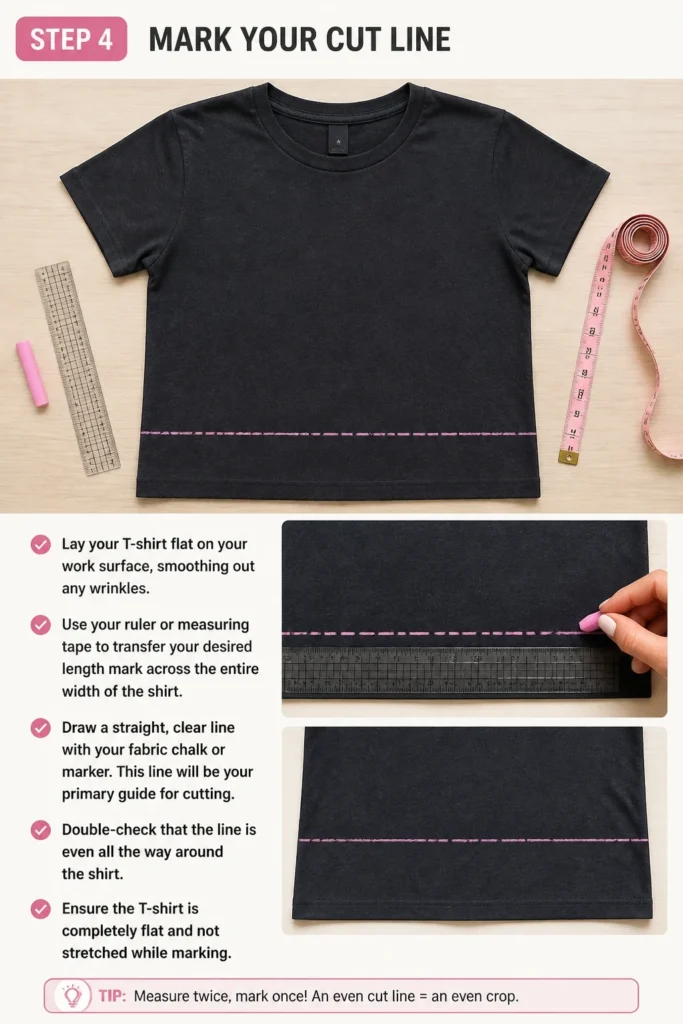
Lay your T-shirt flat on your work surface, smoothing out any wrinkles. Use your ruler or measuring tape to transfer your desired length mark across the entire width of the shirt. Draw a straight, clear line with your fabric chalk or marker.
This line will be your primary guide for cutting. Double-check that the line is even all the way around the shirt.
Ensure the T-shirt is completely flat and not stretched while marking.
Step 5: Cut The Bottom Hem
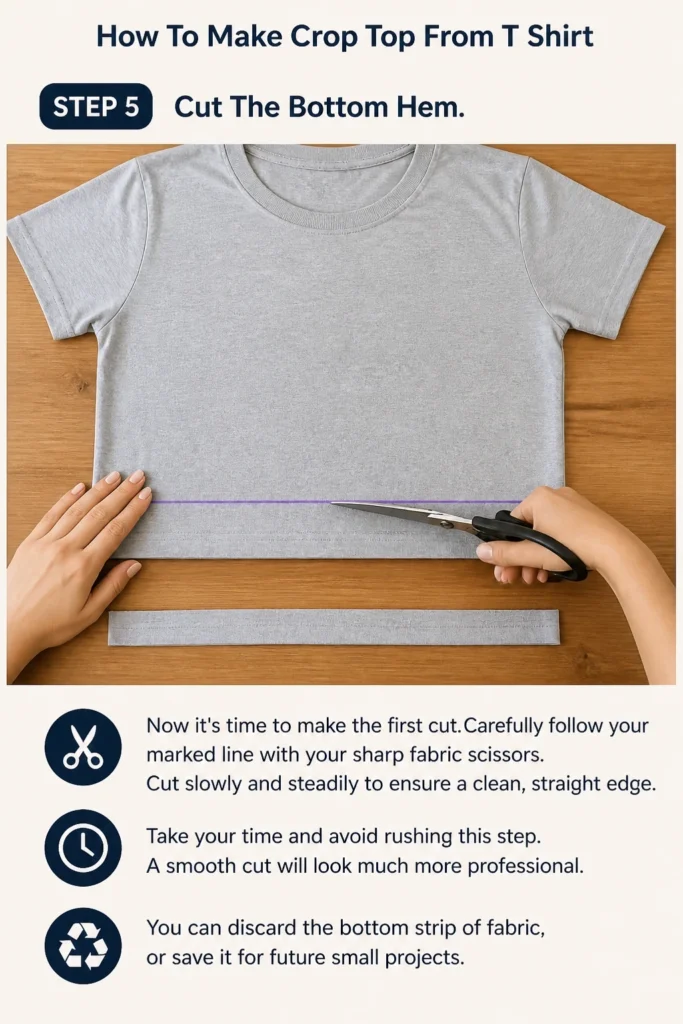
Now it’s time to make the first cut. Carefully follow your marked line with your sharp fabric scissors. Cut slowly and steadily to ensure a clean, straight edge.
Take your time and avoid rushing this step. A smooth cut will look much more professional.
You can discard the bottom strip of fabric, or save it for future small projects.
Step 6: Shape The Sides (Optional)
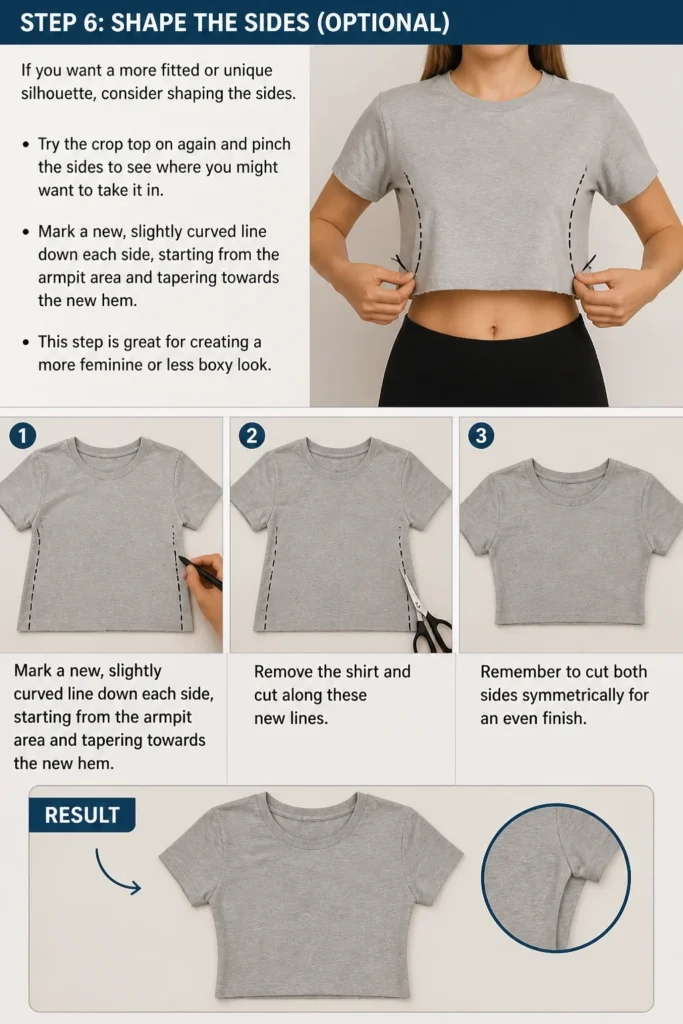
If you want a more fitted or unique silhouette, consider shaping the sides. Try the crop top on again and pinch the sides to see where you might want to take it in. Mark a new, slightly curved line down each side, starting from the armpit area and tapering towards the new hem.
This step is great for creating a more feminine or less boxy look. Remove the shirt and cut along these new lines.
Remember to cut both sides symmetrically for an even finish.
Step 7: Create Your Hem (No-Sew or Sewn)
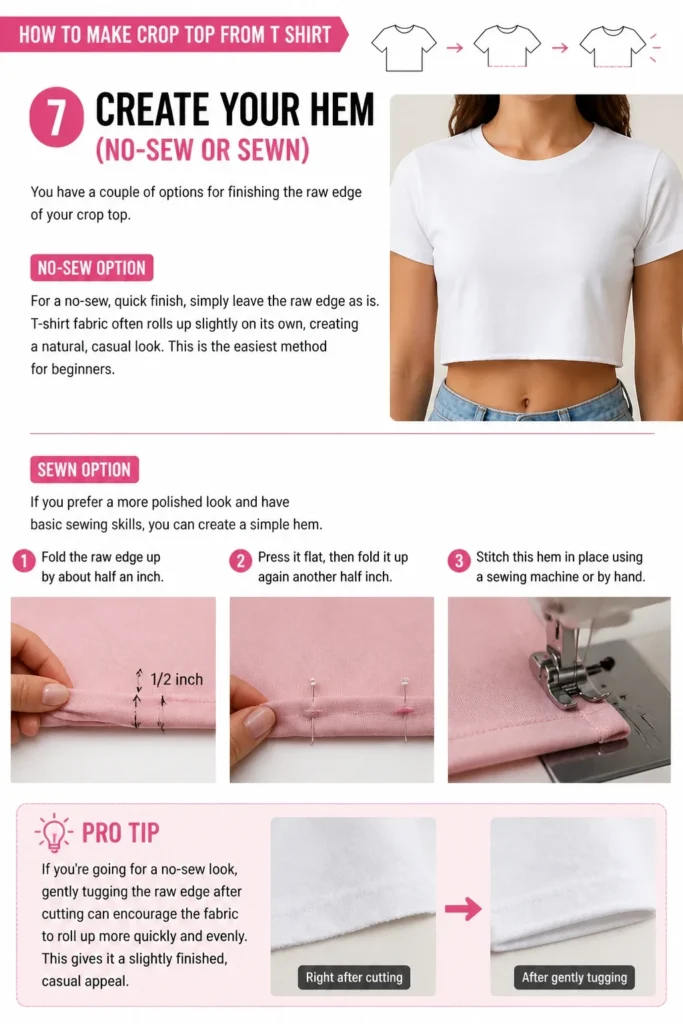
You have a couple of options for finishing the raw edge of your crop top. For a no-sew, quick finish, simply leave the raw edge as is. T-shirt fabric often rolls up slightly on its own, creating a natural, casual look. This is the easiest method for beginners.
If you prefer a more polished look and have basic sewing skills, you can create a simple hem. Fold the raw edge up by about half an inch, press it flat, then fold it up again another half inch. Stitch this hem in place using a sewing machine or by hand.
Pro Tip: If you’re going for a no-sew look, gently tugging the raw edge after cutting can encourage the fabric to roll up more quickly and evenly. This gives it a slightly finished, casual appeal.
Step 8: Style The Sleeves (Optional)
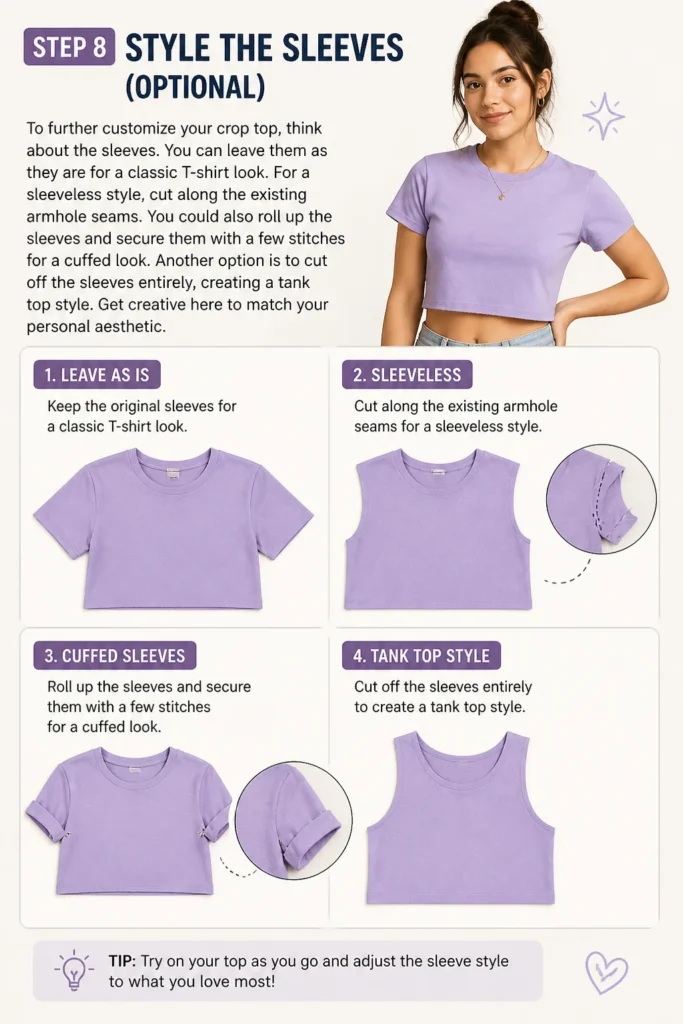
To further customize your crop top, think about the sleeves. You can leave them as they are for a classic T-shirt look. For a sleeveless style, cut along the existing armhole seams.
You could also roll up the sleeves and secure them with a few stitches for a cuffed look. Another option is to cut off the sleeves entirely, creating a tank top style.
Get creative here to match your personal aesthetic.
Step 9: Customize Your Crop Top
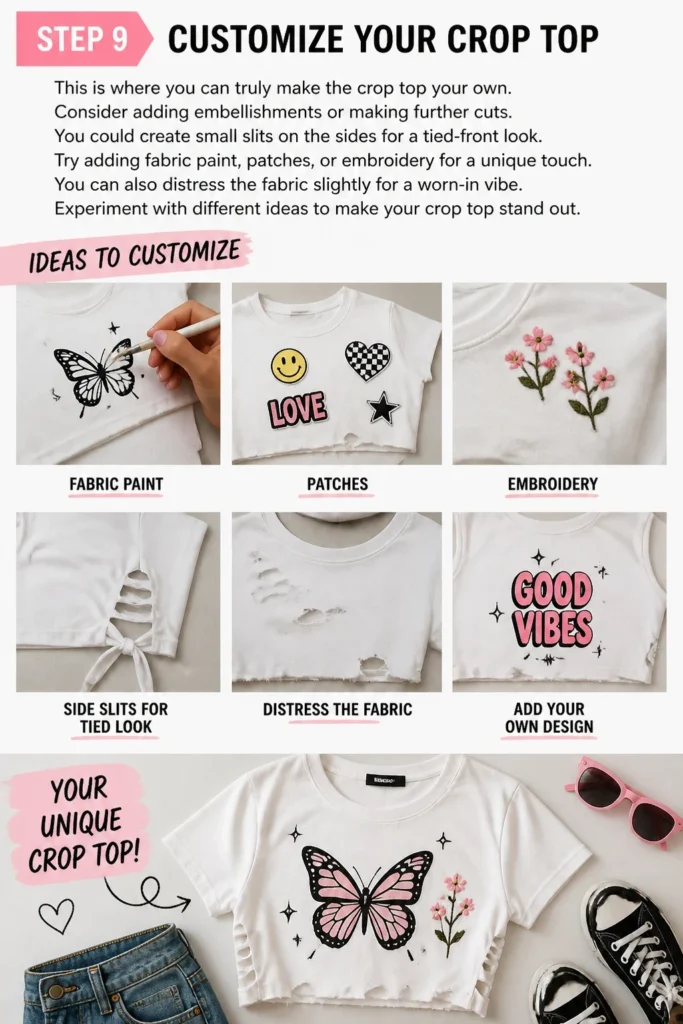
This is where you can truly make the crop top your own. Consider adding embellishments or making further cuts. You could create small slits on the sides for a tied-front look.
Try adding fabric paint, patches, or embroidery for a unique touch. You can also distress the fabric slightly for a worn-in vibe.
Experiment with different ideas to make your crop top stand out.
Common Mistakes to Avoid
Cutting Too Short Too Soon
Many people get excited and cut their T-shirt much shorter than intended right away. This often leads to a crop top that’s unwearable or uncomfortable. Always remember you can take more off, but you can’t add fabric back. Start longer, try it on, and then trim gradually until you reach your perfect length.
Ignoring Fabric Stretch
T-shirt fabric, especially cotton blends, has a natural stretch to it. If you cut the shirt while it’s stretched out on your work surface, your final crop top might end up shorter or wider than you expected once it relaxes. Always ensure the fabric is lying flat and relaxed before marking and cutting. This helps maintain accuracy.
Uneven Cut Lines
A wobbly or uneven cut line can make your crop top look unprofessional and lopsided. This often happens when rushing or using dull scissors. Take your time, use a ruler to draw a clear line, and cut slowly and steadily. Sharp scissors are your best friend for clean, straight edges.
Forgetting to Pre-Wash
If your T-shirt is brand new, it might shrink slightly after its first wash. Cutting a new shirt before washing it can result in a crop top that becomes too short or tight after laundering. Always pre-wash and dry your T-shirt before starting any cutting project. This ensures the fabric is pre-shrunk to its final size.
Troubleshooting
Crop Top Feels Too Boxy
If your newly cut crop top feels shapeless or too wide, don’t worry. This is a common issue, especially with straight cuts. You can easily fix this by taking in the sides.
Try the crop top on inside out and use pins to mark where you want to tighten the fit along the side seams. Remove the shirt, draw new, slightly curved lines, and carefully cut along them. This will give it a more tailored silhouette.
Edges Are Fraying
If you opted for a raw, no-sew edge and find it’s fraying excessively, it might be due to the fabric type or a rough cut. For cotton tees, fraying usually stops after a wash or two as the fabric naturally rolls. If it continues, or if you prefer a neater look, you can add a simple hem.
Fold the raw edge up twice and use fabric glue designed for clothing to secure it. This creates a neat, no-sew hem that prevents further fraying.
Length Is Still Not Right
Sometimes, even after careful measurement, the crop top might still feel too long or too short. If it’s too long, simply repeat Step 3 and Step 4. Try it on, mark a new, shorter line, and trim a small amount at a time until it’s perfect.
If it feels too short, unfortunately, you can’t add fabric back. This is why starting longer is always recommended. For a too-short top, consider wearing it over another tank top or high-waisted bottoms to make it work.
Key Takeaways
- Always choose a T-shirt that is pre-washed to account for shrinkage.
- Start by marking a longer cut line than you think you need, as you can always trim more.
- Use sharp fabric scissors for clean, even cuts that prevent fraying and jagged edges.
- Take your time during the marking and cutting phases to ensure accuracy and a professional finish.
- Consider shaping the sides for a more fitted silhouette if your T-shirt feels too boxy.
- Embrace the no-sew raw edge for a casual look, or add a simple hem for a more polished finish.
Frequently Asked Questions
Can I make a crop top from any type of T-shirt fabric?
While you can technically cut any T-shirt, cotton and cotton blends are ideal for beginners. They cut cleanly and often roll naturally at the edges, which is great for no-sew options. Stretchy fabrics like spandex blends can be trickier to cut straight and might require more precise hemming.
How do I prevent my crop top from shrinking after washing?
The best way to prevent unexpected shrinkage is to pre-wash and dry your T-shirt before you even start cutting it. This sets the fabric to its final size. Once it’s cut, wash it according to the fabric care instructions, typically in cold water and tumble dry low, to maintain its shape and size.
What if I don’t have fabric chalk?
No fabric chalk? No problem. You can use a regular pencil on lighter fabrics, just make sure it’s sharpened and creates a clear line. For darker fabrics, a bar of soap (a thin sliver works well) or even a piece of masking tape can serve as a temporary marking guide. Just ensure your mark is visible but won’t permanently stain the fabric.
Can I add a drawstring to my crop top?
Absolutely! Adding a drawstring is a fantastic way to customize your crop top. After cutting your desired length, create a small casing along the new hem by folding the fabric up twice and stitching it, leaving a small opening. Then, thread a piece of ribbon or cord through the casing using a safety pin. This allows you to cinch the bottom for an adjustable fit.
Our Top Recommended Finds
- Fiskars Fabric Scissors: These are a classic for a reason. Their sharp blades make cutting fabric smooth and effortless, ensuring clean lines every time.
- Dritz Disappearing Ink Fabric Marker: Perfect for marking your cut lines and other guides. The ink vanishes within a few hours or with water, leaving no trace behind.
- Omnigrid Ruler and Rotary Cutter: For those who want ultimate precision, a clear quilting ruler paired with a rotary cutter allows for perfectly straight cuts, especially on a cutting mat.
Your Custom Crop Top Awaits
You now have all the knowledge and steps to transform an ordinary T-shirt into a fabulous, custom-fit crop top. This project is more than just cutting fabric; it’s about reclaiming your clothes and infusing them with your personal style. Imagine the possibilities with every old tee in your closet.
Don’t let those forgotten shirts gather dust. Grab your supplies, pick a T-shirt, and start creating your next favorite wardrobe piece today. You’ll love the feeling of wearing something you made yourself.
Beginner-friendly templates, step-by-step guides,
and weekly project ideas in your inbox.