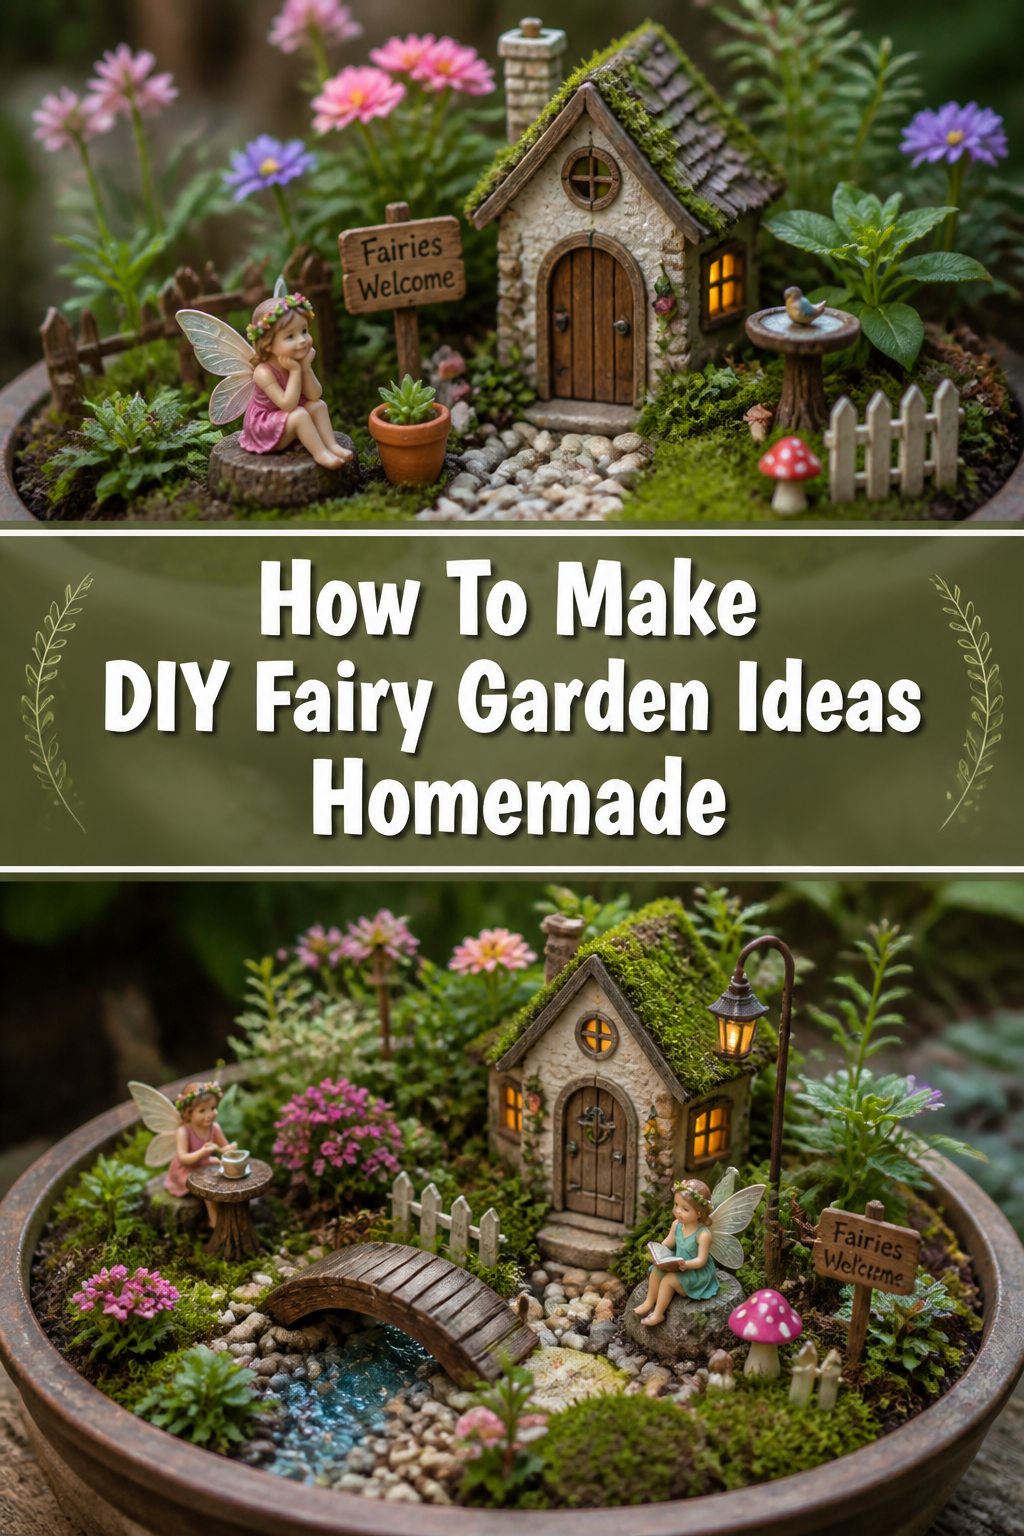
✨ How To Make DIY Fairy Garden Ideas Homemade

Beginner-friendly templates, step-by-step guides,
and weekly project ideas in your inbox.
Have you ever dreamt of a tiny, magical world nestled right in your home or garden? Imagine miniature pathways, sparkling ponds, and cozy cottages, all crafted by your own hands. Creating a DIY fairy garden is a delightful journey into imagination.
I’ve spent countless hours transforming ordinary containers into enchanting landscapes, discovering the joy of bringing these miniature realms to life. This guide will walk you through every step, helping you create your own whimsical escape with ease and confidence.
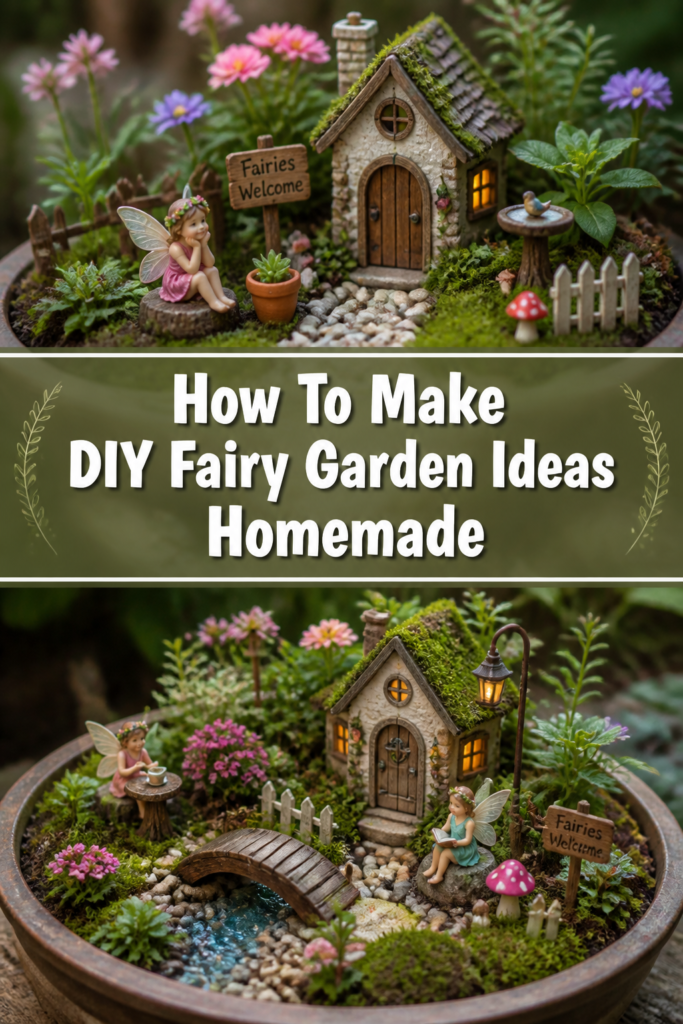
Quick Overview
Embark on a creative adventure to build a charming fairy garden from scratch. You’ll learn how to select the perfect vessel, arrange natural elements, and add tiny, enchanting details to craft a magical miniature world.
- Time needed: 4-8 hours (depending on complexity and drying times)
- Difficulty: Beginner
- What you’ll need: A container, soil, small plants, decorative elements (pebbles, moss, twigs), miniature accessories, and crafting supplies.
Step-by-Step Instructions
Step 1: Choose Your Magical Vessel
The first decision is selecting the right container for your fairy garden. This vessel will define the entire world you’re about to create. Think about its size, shape, and material.
Select a container with good drainage. Options include terracotta pots, old wooden crates, broken ceramic pots, or even a hollowed-out log.
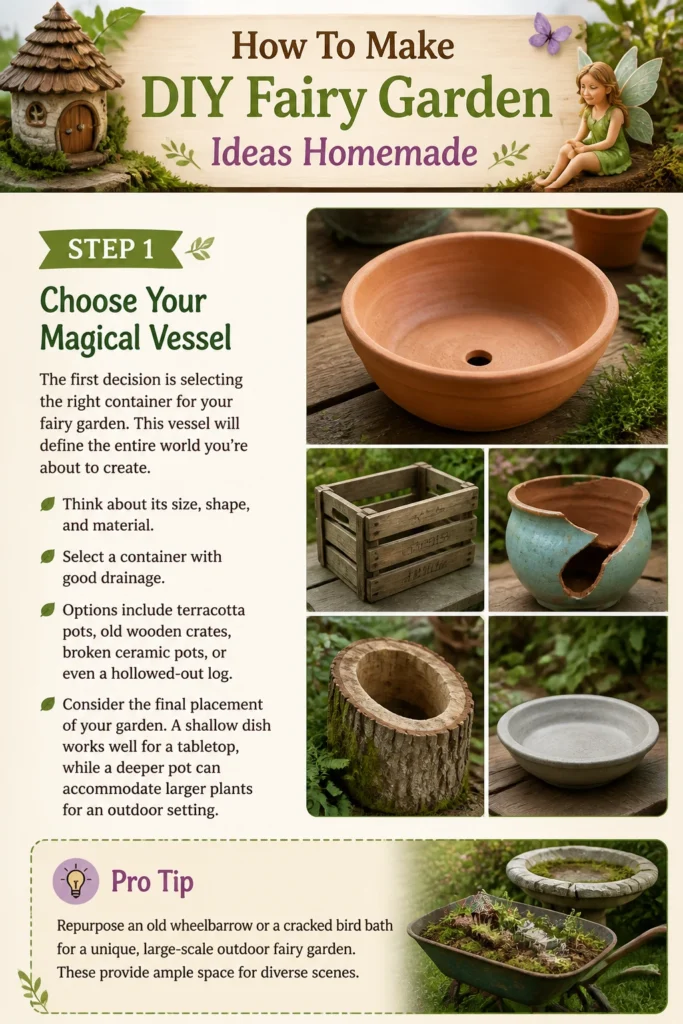
Consider the final placement of your garden. A shallow dish works well for a tabletop, while a deeper pot can accommodate larger plants for an outdoor setting.
Pro Tip: Repurpose an old wheelbarrow or a cracked bird bath for a unique, large-scale outdoor fairy garden. These provide ample space for diverse scenes.
Step 2: Prepare the Foundation
Proper preparation ensures your fairy garden thrives and lasts. This involves setting up the drainage and initial soil layers.
Add a layer of gravel or small stones to the bottom of your chosen container. This is crucial for drainage, preventing water from pooling and rotting plant roots.
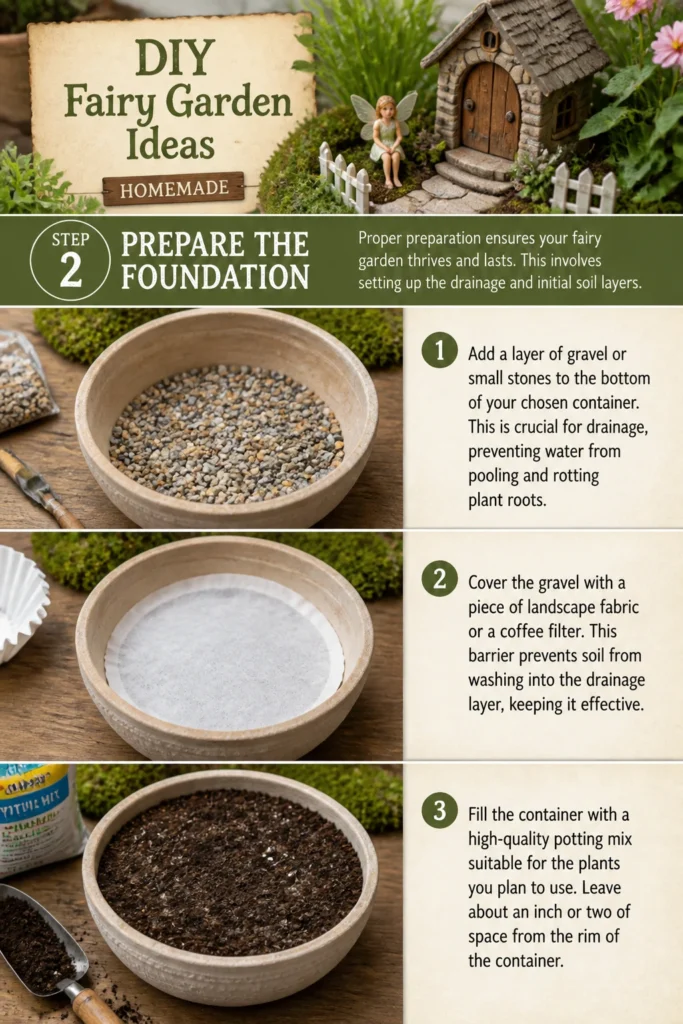
Cover the gravel with a piece of landscape fabric or a coffee filter. This barrier prevents soil from washing into the drainage layer, keeping it effective.
Fill the container with a high-quality potting mix suitable for the plants you plan to use. Leave about an inch or two of space from the rim of the container.
Step 3: Design Your Landscape Layout
Now comes the exciting part: envisioning the topography of your miniature world. This is where you decide where hills, valleys, and pathways will be.
Sketch a rough design on paper first. Plan the placement of larger elements like houses, ponds, and significant plants.
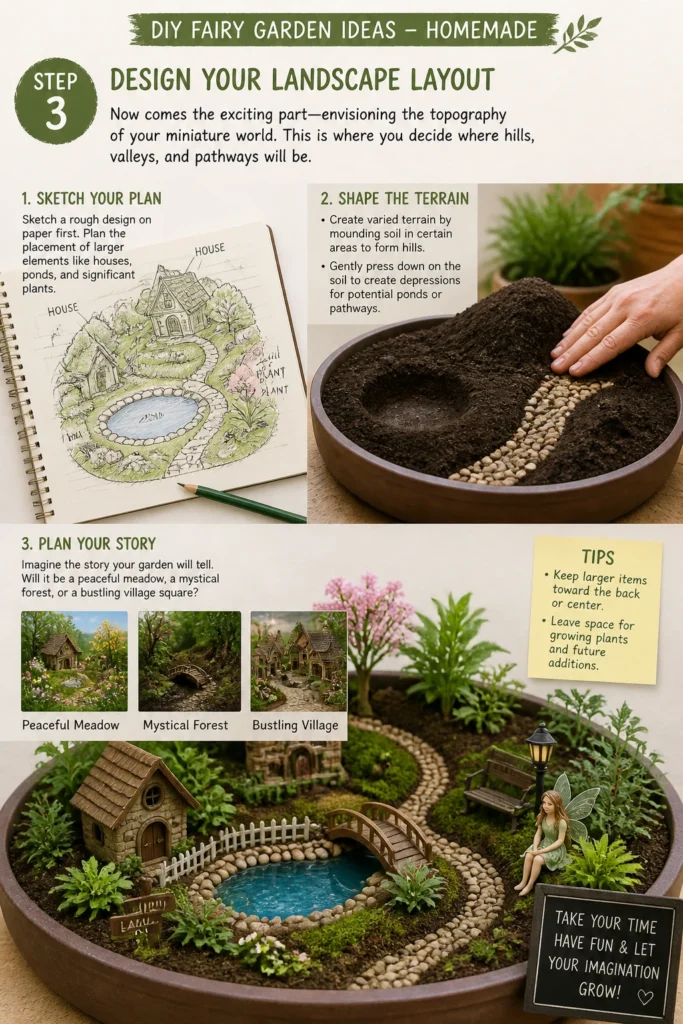
Create varied terrain by mounding soil in certain areas to form hills. Gently press down on the soil to create depressions for potential ponds or pathways.
Imagine the story your garden will tell. Will it be a peaceful meadow, a mystical forest, or a bustling village square?
Step 4: Plant Your Miniature Flora
Bringing life to your garden begins with selecting and planting the perfect miniature plants. These will form the backdrop and natural elements.
Choose small, slow-growing plants that thrive in similar conditions. Succulents, mosses, creeping thyme, Irish moss, and miniature ferns are excellent choices.
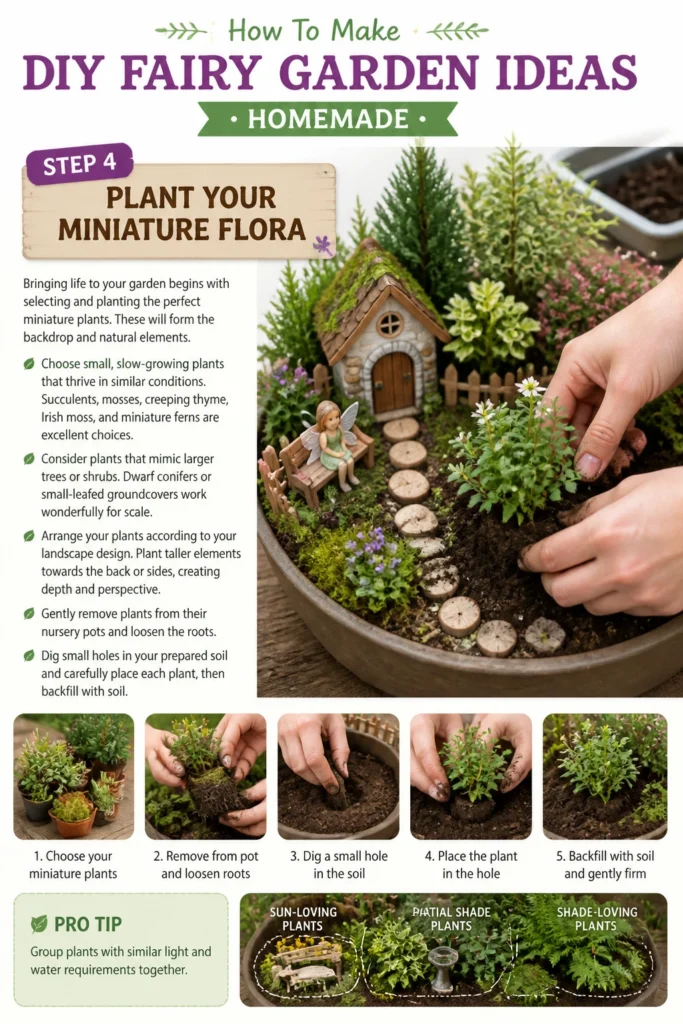
Consider plants that mimic larger trees or shrubs. Dwarf conifers or small-leafed groundcovers work wonderfully for scale.
Arrange your plants according to your landscape design. Plant taller elements towards the back or sides, creating depth and perspective.
Gently remove plants from their nursery pots and loosen the roots. Dig small holes in your prepared soil and carefully place each plant, then backfill with soil.
Pro Tip: Group plants with similar light and water requirements together. This simplifies care and ensures all your miniature flora thrive.
Step 5: Construct Pathways and Water Features
These elements add structure and a sense of journey to your fairy garden. They invite the eye to explore.
Lay pathways using small pebbles, fine gravel, or even flattened pieces of bark. Create winding paths that lead to different areas of your garden.
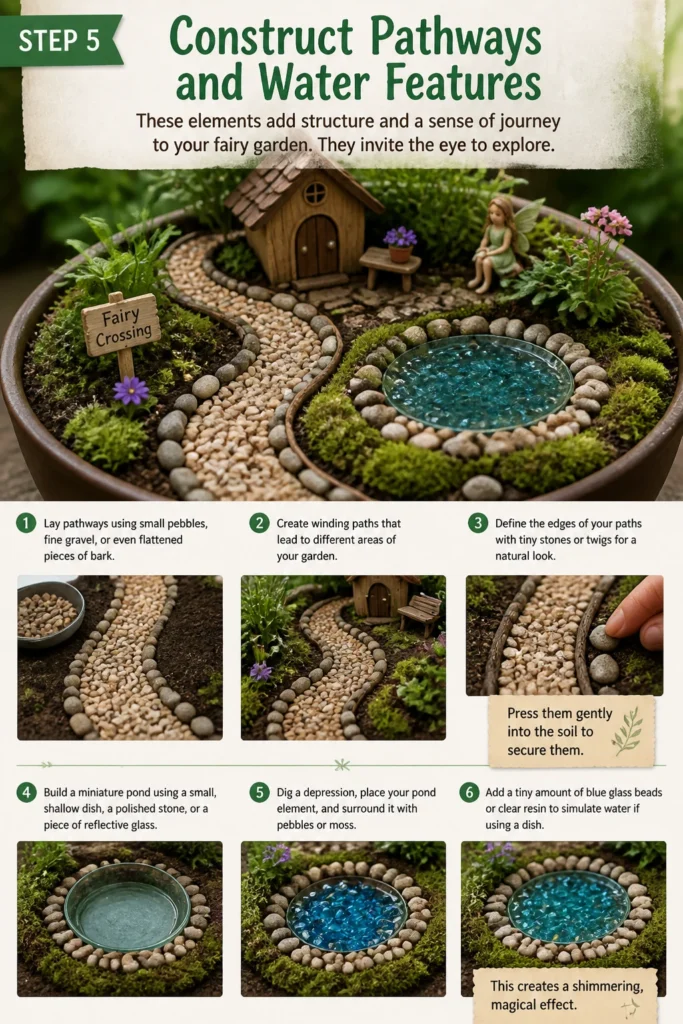
Define the edges of your paths with tiny stones or twigs for a natural look. Press them gently into the soil to secure them.
Build a miniature pond using a small, shallow dish, a polished stone, or a piece of reflective glass. Dig a depression, place your “pond” element, and surround it with pebbles or moss.
Add a tiny amount of blue glass beads or clear resin to simulate water if using a dish. This creates a shimmering, magical effect.
Step 6: Craft Homemade Miniature Accessories
This is where your creativity truly shines. Homemade accessories add personality and unique charm.
Fashion a tiny fairy house from a hollowed-out gourd, a small birdhouse, or even a piece of bark. Decorate it with small windows and doors made from twigs or polymer clay.
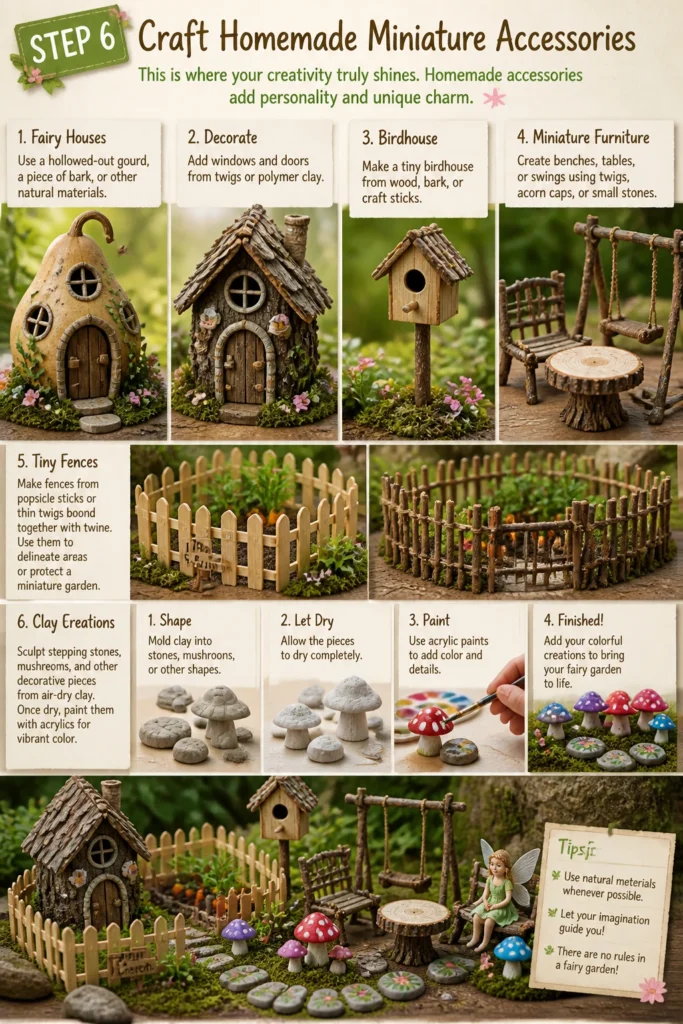
Create miniature furniture from twigs, acorn caps, or small stones. Think benches, tables, or swings for your fairy inhabitants.
Make tiny fences from popsicle sticks or thin twigs bound together with twine. These can delineate garden areas or protect a miniature vegetable patch.
Sculpt tiny stepping stones or decorative mushrooms from air-dry clay. Once dry, paint them with acrylic paints for vibrant colors.
Step 7: Add Natural Embellishments
Natural elements bring authenticity and texture to your miniature landscape. They ground your magical world in reality.
Place moss strategically to create soft, green carpets or to cover bare soil. Sheet moss and sphagnum moss work beautifully.
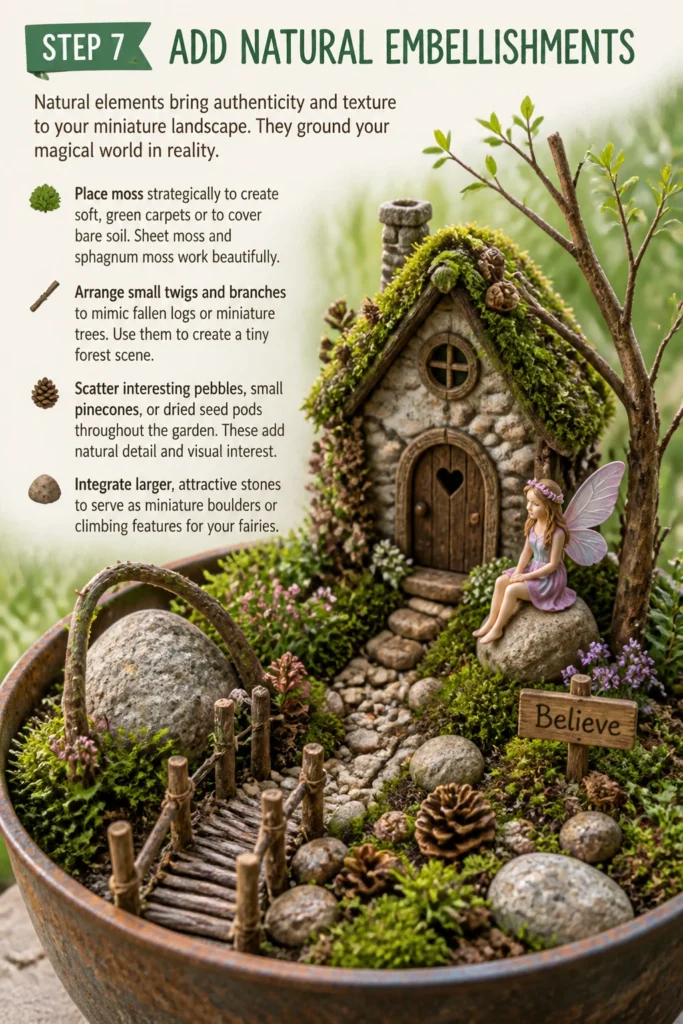
Arrange small twigs and branches to mimic fallen logs or miniature trees. Use them to create a tiny forest scene.
Scatter interesting pebbles, small pinecones, or dried seed pods throughout the garden. These add natural detail and visual interest.
Integrate larger, attractive stones to serve as miniature boulders or climbing features for your fairies.
Step 8: Introduce Magical Touches
These are the finishing details that truly transform your garden into an enchanting realm. Sparkle and whimsy are key.
Incorporate small, store-bought fairy figurines or other miniature creatures. Place them interacting with your handmade elements.
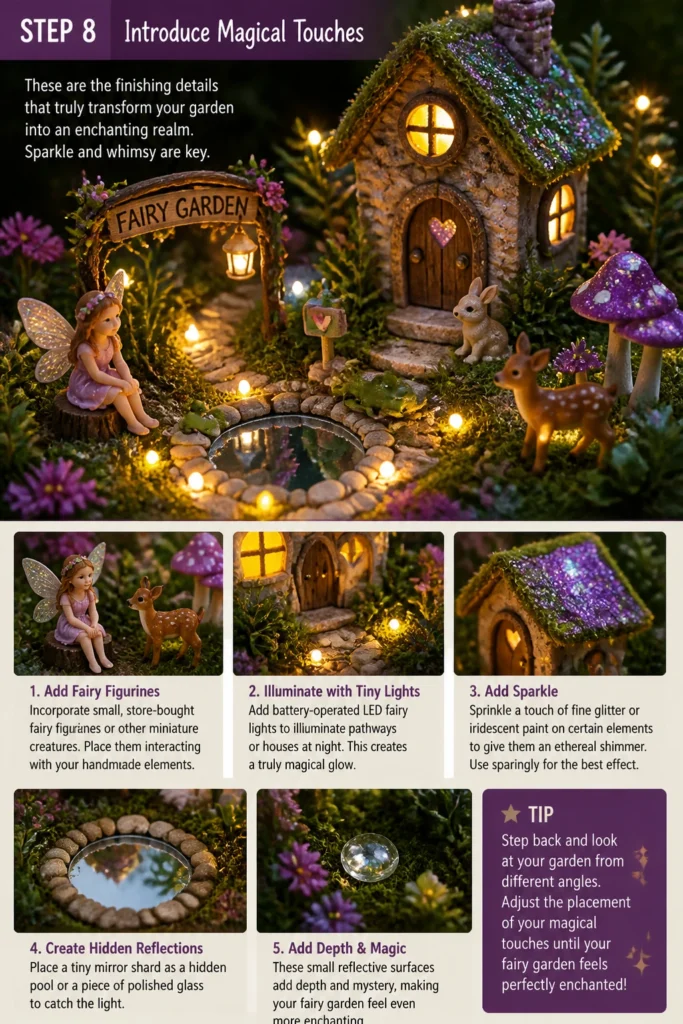
Add tiny lights, such as battery-operated LED fairy lights, to illuminate pathways or houses at night. This creates a truly magical glow.
Sprinkle a touch of fine glitter or iridescent paint on certain elements to give them an ethereal shimmer. Use sparingly for the best effect.
Place a tiny mirror shard as a hidden pool or a piece of polished glass to catch the light. These small reflective surfaces add depth.
Step 9: Maintain Your Miniature Paradise
Once complete, your fairy garden needs a little love to keep it thriving. Regular care ensures its longevity and beauty.
Water your plants carefully, checking the soil moisture regularly. Miniature plants in small containers can dry out quickly.
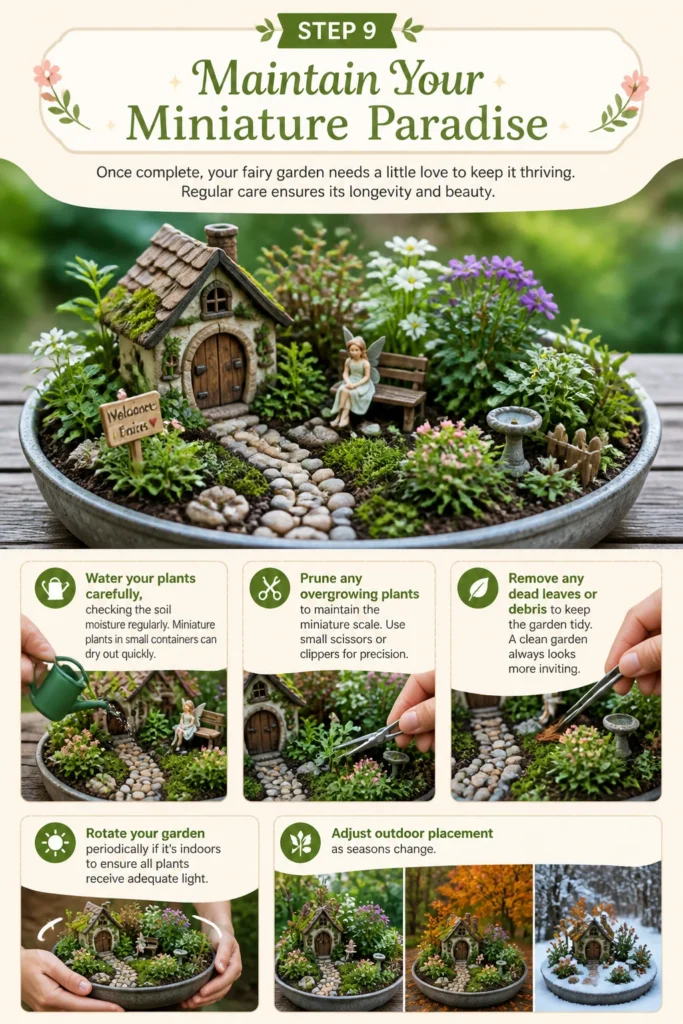
Prune any overgrowing plants to maintain the miniature scale. Use small scissors or clippers for precision.
Remove any dead leaves or debris to keep the garden tidy. A clean garden always looks more inviting.
Rotate your garden periodically if it’s indoors to ensure all plants receive adequate light. Adjust outdoor placement as seasons change.
Common Mistakes to Avoid
Overcrowding Your Garden
A common pitfall is trying to fit too many plants or accessories into a small space. This makes the garden look cluttered and can hinder plant growth.
Instead, practice restraint and allow each element space to breathe. A few well-placed items create a more impactful and whimsical scene than a crowded one. Remember that less can often be more in miniature landscaping.
Ignoring Drainage
Failing to provide adequate drainage for your container is a recipe for disaster. Standing water will lead to root rot and unhappy plants.
Always start with a layer of gravel and ensure your container has drainage holes. This simple step is critical for the health and longevity of your miniature ecosystem. It protects your hard work and investment in plants.
Using Unsuitable Plants
Choosing plants that grow too quickly, require different care, or are not suited for miniature environments can quickly overwhelm your garden. Your carefully crafted scene will lose its scale.
Research miniature varieties and select plants with similar light and water needs. Opt for slow-growing species that will maintain their size for longer, reducing the need for constant pruning.
Disregarding Scale
Mixing items of wildly different scales can break the illusion of a miniature world. A giant fairy door next to a tiny gnome house just looks out of place.
Strive for consistency in scale across all your elements. This creates a cohesive and believable miniature landscape, allowing the magic to truly unfold. Pay attention to how objects relate to each other in size.
Troubleshooting
Plants are Wilting or Turning Yellow
This often indicates an issue with watering or light. Wilting can mean too little water, while yellowing leaves might suggest overwatering or insufficient light.
Check the soil moisture by sticking your finger about an inch deep. If it’s dry, water thoroughly. If it’s soggy, reduce watering frequency and ensure proper drainage. Consider moving the garden to a brighter spot if leaves are pale.
Moss is Drying Out or Turning Brown
Moss thrives in humid environments and can dry out quickly, especially indoors or in direct sunlight. Brown moss loses its vibrant appeal.
Mist your moss regularly with a spray bottle, especially if your indoor air is dry. Avoid direct, harsh sunlight. You can also place a shallow tray of water nearby to increase ambient humidity for indoor gardens.
Miniature Accessories Are Falling Over
Lightweight accessories or those placed on uneven terrain can easily topple, disrupting your carefully arranged scene. This can be frustrating when you’re trying to maintain a perfect illusion.
Secure items by burying their bases slightly in the soil. For taller structures, use a dab of hot glue on a flat stone base, then bury the stone. Small amounts of craft glue can also stabilize elements.
Key Takeaways
- Start with a container that offers good drainage to ensure plant health.
- Design your landscape layout first, planning for varied terrain and key features.
- Choose slow-growing, miniature plants with similar care requirements for lasting beauty.
- Craft homemade accessories using natural materials to add unique charm and personality.
- Incorporate natural elements like moss and pebbles to enhance authenticity and texture.
- Regular maintenance, including watering and pruning, is essential for a thriving fairy garden.
Frequently Asked Questions
Can I use real flowers in my fairy garden?
Yes, you can use real flowers, but choose miniature or dwarf varieties that won’t quickly outgrow the space. Annuals like alyssum or petunias in small sizes can add a pop of color, but they will need to be replaced seasonally. Perennial groundcovers are often a better long-term choice.
How do I make a tiny pond look realistic?
To create a realistic pond, start with a shallow, waterproof dish or a piece of polished blue or clear glass. Surround it with small pebbles and moss. You can add a thin layer of clear resin or blue craft beads to mimic water, giving it depth and sparkle.
What kind of soil is best for a fairy garden?
A good quality potting mix suitable for indoor or outdoor container plants is ideal. If you’re using succulents, opt for a succulent-specific potting mix that provides excellent drainage. Always ensure the soil is fresh and well-aerated.
How often should I water my fairy garden?
Watering frequency depends on your plants, container size, and environment. Generally, check the soil moisture every few days. Water when the top inch of soil feels dry to the touch. Ensure water drains out the bottom to prevent root rot.
Our Top Recommended Finds
- Miniature Succulent Assortment: A variety pack provides diverse textures and colors, perfect for a low-maintenance garden.
- Crafting Polymer Clay Kit: Ideal for sculpting custom tiny mushrooms, stepping stones, or even miniature food items for your fairies.
- LED Fairy String Lights (Battery-Operated): These tiny lights add a magical glow to your garden, especially enchanting in the evening.
Your Miniature World Awaits!
You now have all the tools and inspiration to begin crafting your own enchanting fairy garden. Imagine the delight of seeing your miniature landscape come to life, a testament to your creativity and imagination. This isn’t just a craft; it’s an invitation to cultivate a piece of magic.
Don’t wait to bring this whimsical vision to reality. Gather your materials, let your imagination soar, and start building your homemade fairy garden today. Perhaps your next project could be a themed garden, like a winter wonderland fairy scene or a bustling market square for gnomes!
Beginner-friendly templates, step-by-step guides,
and weekly project ideas in your inbox.