🌿 How To Make A Terrarium Step By Step

Beginner-friendly templates, step-by-step guides,
and weekly project ideas in your inbox.
Watching a tiny ecosystem flourish under glass is incredibly rewarding. I remember the first terrarium I ever built; it felt like creating a miniature world. This guide shares all the practical steps I learned along the way, helping you build your own vibrant, self-sustaining garden.
You’ll discover how simple it is to bring a piece of nature indoors, even if you’ve never gardened before.
Quick Overview
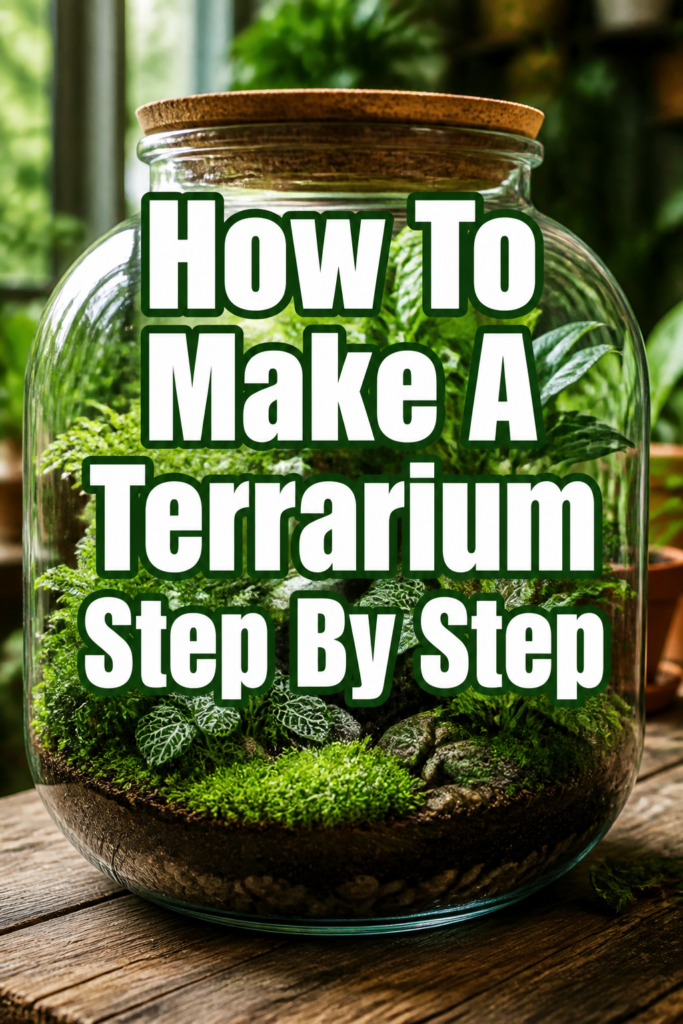
Creating a terrarium is a delightful project that transforms a glass container into a living, green display. By following these steps, you’ll build a self-contained ecosystem that requires minimal care. It’s a perfect way to add natural beauty to any space.
- Time needed: 1-2 hours for assembly, ongoing minimal maintenance
- Difficulty: Beginner
- What you’ll need: Glass container, drainage material, activated charcoal, potting mix, small plants, decorative elements, tools
Step-by-Step Instructions
Step 1: Gather Your Materials
Before you begin, ensure you have all the necessary items on hand. This prevents interruptions and makes the process smooth. A well-prepared workspace is key to a successful terrarium build.
Collect a clear glass container with a lid for a closed terrarium, or an open top for an open terrarium. Jars, bowls, or even old aquariums work well.
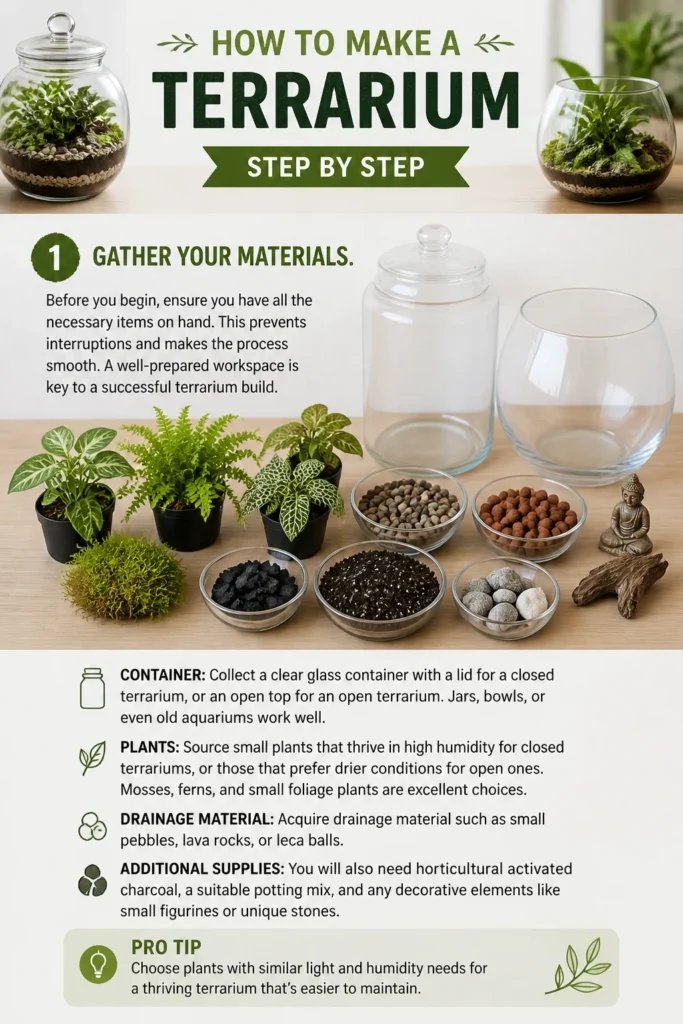
Source small plants that thrive in high humidity for closed terrariums, or those that prefer drier conditions for open ones. Mosses, ferns, and small foliage plants are excellent choices.
Acquire drainage material such as small pebbles, lava rocks, or leca balls. You will also need horticultural activated charcoal, a suitable potting mix, and any decorative elements like small figurines or unique stones.
Pro Tip: Choose plants with similar light and humidity requirements to ensure they all thrive together in your chosen environment. Consider the mature size of your plants to avoid overcrowding.
Step 2: Clean and Prepare Your Container
A clean container is essential for a healthy terrarium. Any residue can introduce unwanted elements to your closed ecosystem. This step sets the foundation for a clear view of your miniature garden.
Wash your glass container thoroughly with warm, soapy water. Use a bottle brush for hard-to-reach areas if needed.
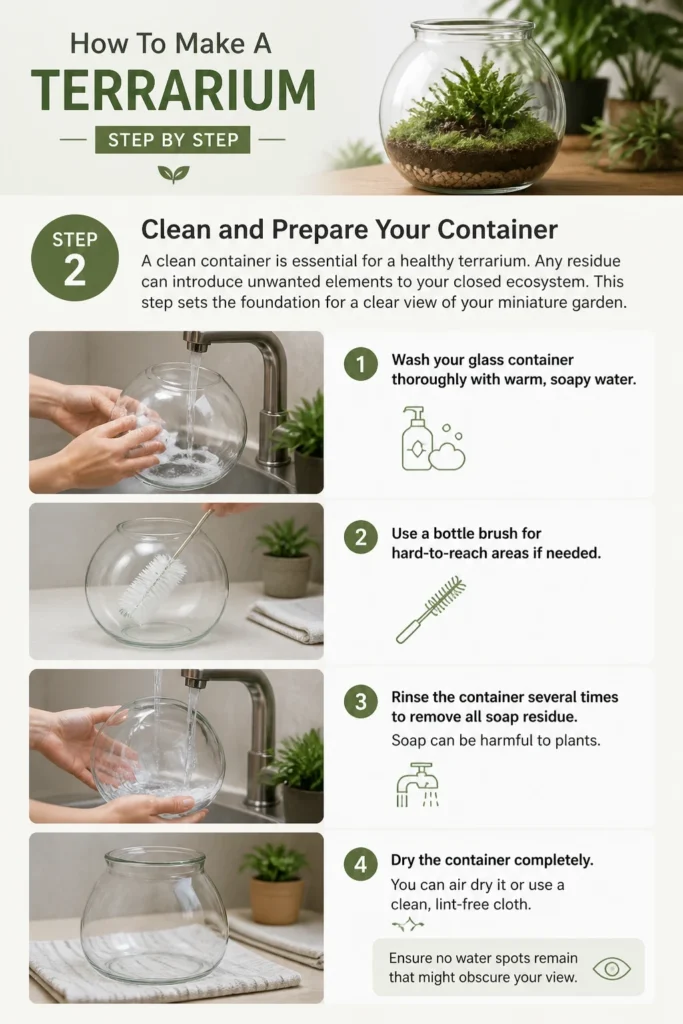
Rinse the container several times to remove all soap residue. Soap can be harmful to plants.
Dry the container completely. You can air dry it or use a clean, lint-free cloth. Ensure no water spots remain that might obscure your view.
Step 3: Lay the Drainage Layer
The drainage layer is crucial, especially for closed terrariums, as it prevents waterlogging. Without a drainage hole, this layer acts as a reservoir for excess water, keeping plant roots healthy. It’s the first physical layer you’ll add.
Pour your chosen drainage material into the bottom of the container. Aim for a layer that is about 1-2 inches deep, depending on the size of your container.
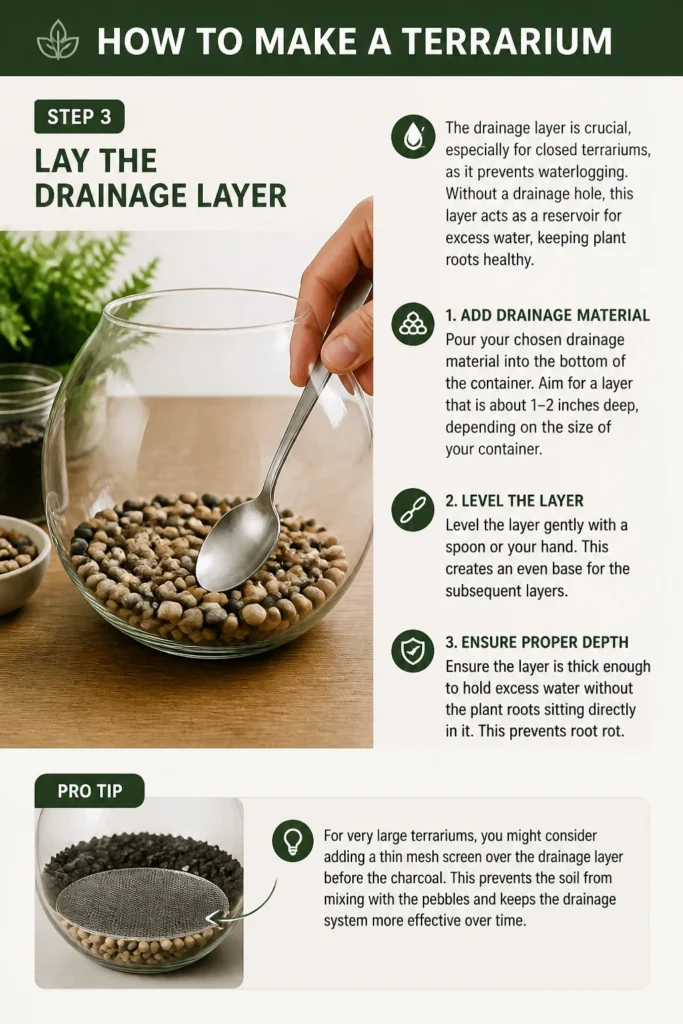
Level the layer gently with a spoon or your hand. This creates an even base for the subsequent layers.
Ensure the layer is thick enough to hold excess water without the plant roots sitting directly in it. This prevents root rot.
Pro Tip: For very large terrariums, you might consider adding a thin mesh screen over the drainage layer before the charcoal. This prevents the soil from mixing with the pebbles over time.
Step 4: Add the Activated Charcoal
Activated charcoal plays a vital role in maintaining a fresh and healthy terrarium. It filters the air and water within the sealed environment. This layer helps prevent mold and odors.
Spread a thin, even layer of horticultural activated charcoal over the drainage material. About half an inch is usually sufficient.
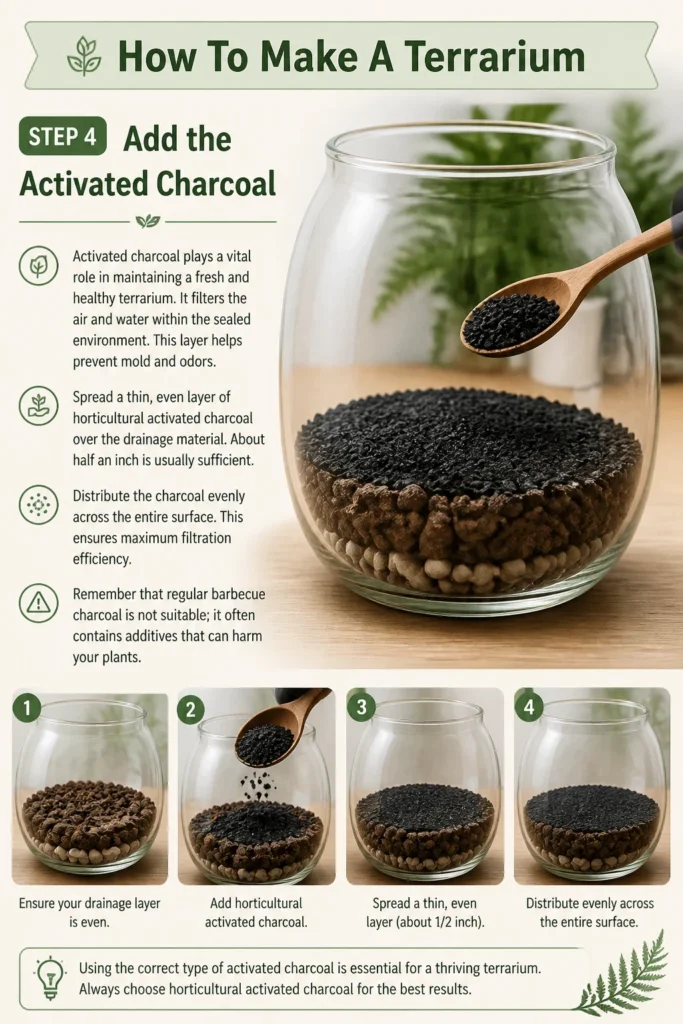
Distribute the charcoal evenly across the entire surface. This ensures maximum filtration efficiency.
Remember that regular barbecue charcoal is not suitable; it often contains additives that can harm your plants.
Step 5: Introduce the Substrate
The substrate, or potting mix, is where your plants will root and draw nutrients. Choosing the right mix is important for plant health. It provides the necessary structure and nutrients for growth.
Add a generous layer of high-quality potting mix on top of the charcoal. The depth of this layer depends on the root size of your plants, but generally aim for 2-4 inches.
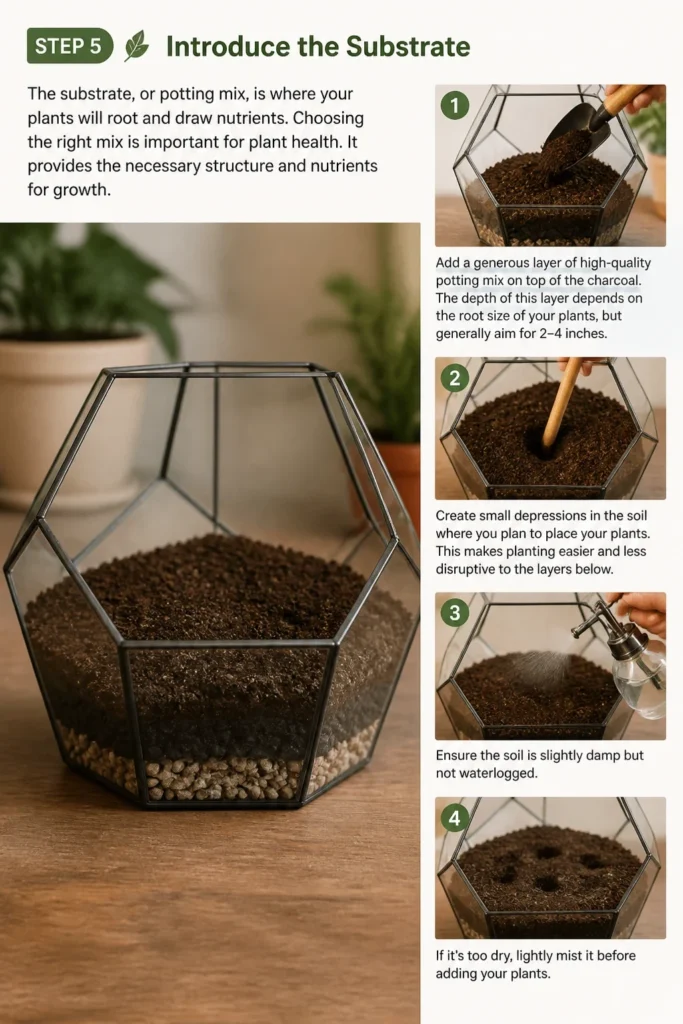
Create small depressions in the soil where you plan to place your plants. This makes planting easier and less disruptive to the layers below.
Ensure the soil is slightly damp but not waterlogged. If it’s too dry, lightly mist it before adding your plants.
Step 6: Plant Your Greenery
This is where your terrarium truly starts to come alive. Carefully placing your plants requires a gentle touch and some foresight. Think about the final arrangement as you work.
Remove plants from their nursery pots. Gently loosen any compacted roots, but avoid damaging them.
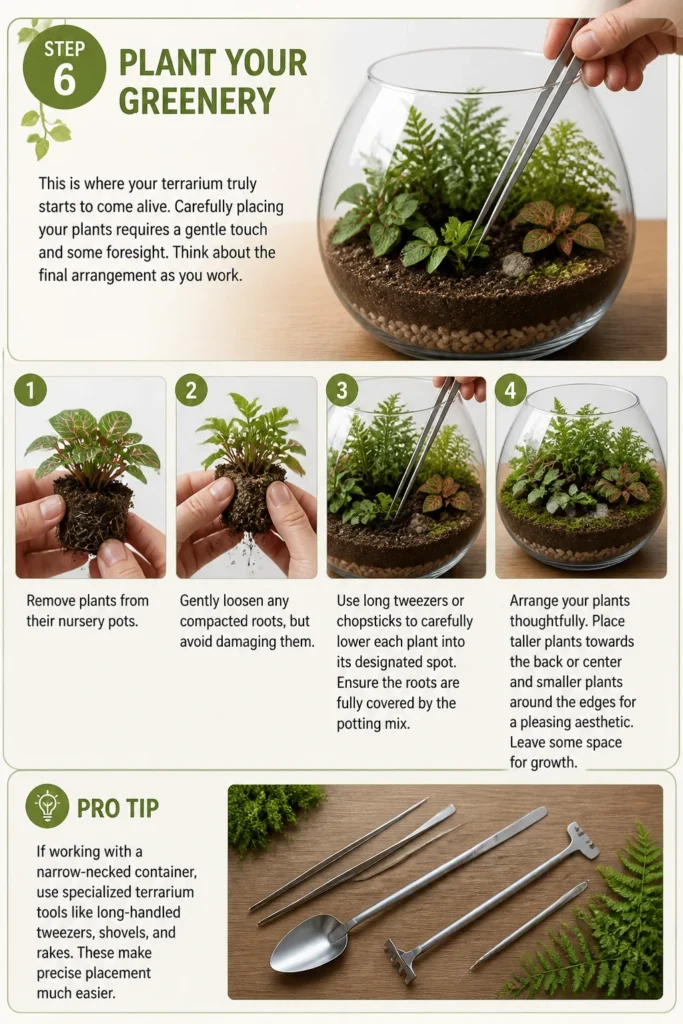
Use long tweezers or chopsticks to carefully lower each plant into its designated spot. Ensure the roots are fully covered by the potting mix.
Arrange your plants thoughtfully. Place taller plants towards the back or center and smaller plants around the edges for a pleasing aesthetic. Leave some space for growth.
Pro Tip: If working with a narrow-necked container, use specialized terrarium tools like long-handled tweezers, shovels, and rakes. These make precise placement much easier.
Step 7: Decorate and Personalize
Adding decorative elements allows you to infuse your personality into the terrarium. These details enhance the visual appeal and create a sense of scale. This step adds the finishing touches.
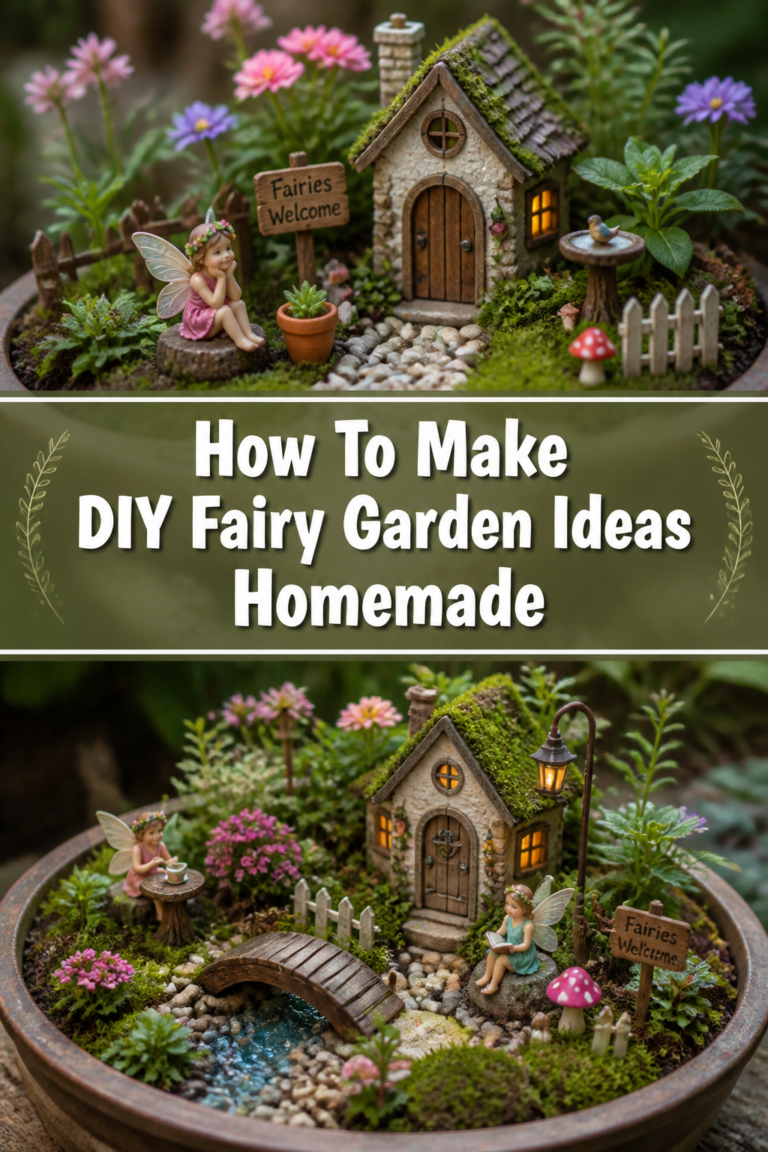
Place decorative elements like polished stones, small pieces of driftwood, or miniature figurines. Arrange them to create a focal point or a path.
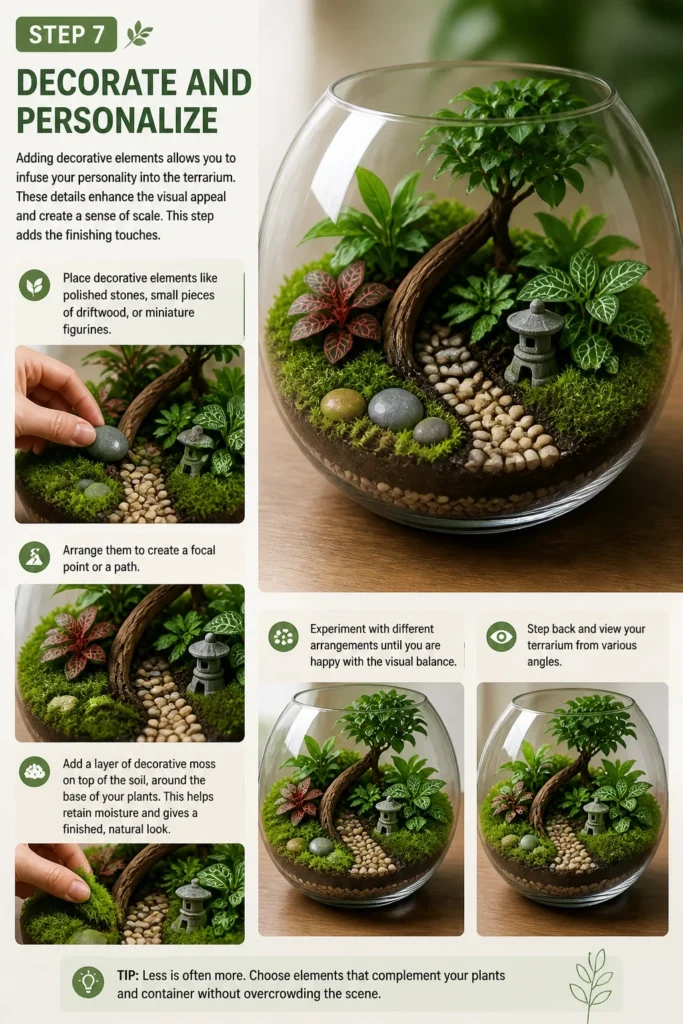
Add a layer of decorative moss on top of the soil, around the base of your plants. This helps retain moisture and gives a finished, natural look.
Experiment with different arrangements until you are happy with the visual balance. Step back and view your terrarium from various angles.
Step 8: Water and Seal
The initial watering is critical for establishing the terrarium’s ecosystem. Proper watering sets the stage for the self-sustaining cycle. Sealing it then locks in the humidity.
Mist the inside of the terrarium gently with a spray bottle. Aim to moisten the soil and clean any soil off the plant leaves.
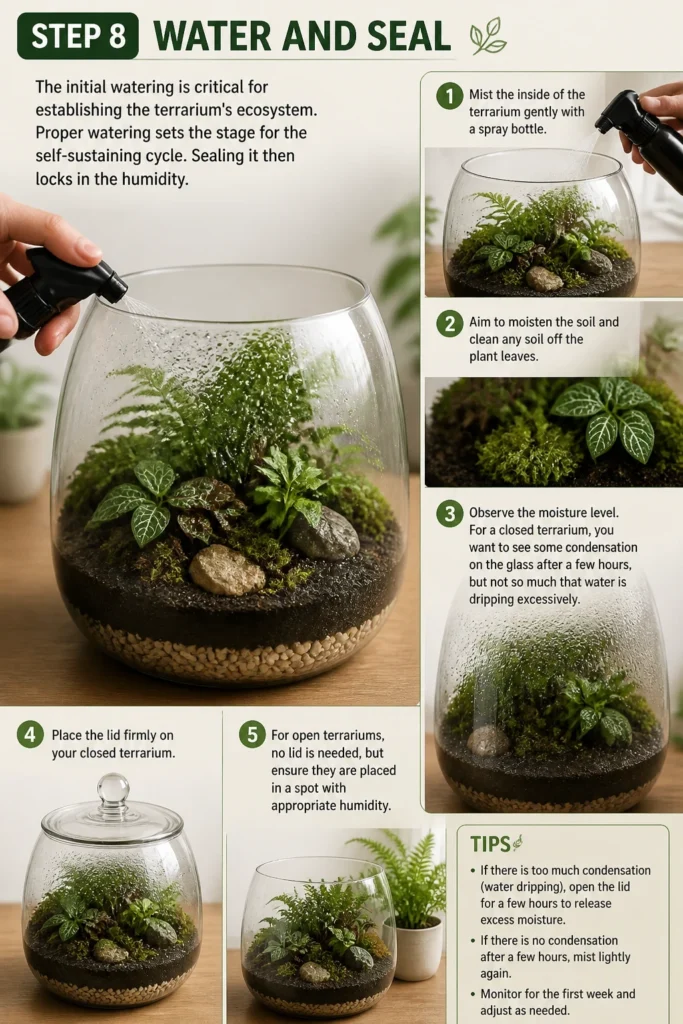
Observe the moisture level. For a closed terrarium, you want to see some condensation on the glass after a few hours, but not so much that water is dripping excessively.
Place the lid firmly on your closed terrarium. For open terrariums, no lid is needed, but ensure they are placed in a spot with appropriate humidity.
Common Mistakes to Avoid
Overwatering
This is perhaps the most common mistake, especially in closed terrariums. Too much water leads to root rot, mold growth, and a generally unhealthy environment. Always err on the side of caution with watering.
If you see heavy condensation that doesn’t dissipate, or standing water, open the lid for a few hours to allow some moisture to evaporate. Then re-seal it. Only water again when the soil surface feels dry to the touch.
Choosing the Wrong Plants
Not all plants are suited for terrarium life, especially closed ones. Selecting plants with different light or humidity needs will quickly lead to some struggling while others thrive. This creates an unbalanced ecosystem.
For closed terrariums, opt for moisture-loving plants like ferns, mosses, Fittonia, or small peperomias. For open terrariums, succulents, air plants, or cacti are better choices, as they prefer drier conditions.
Inadequate Drainage
Skipping the drainage layer or making it too thin is a recipe for disaster in a closed terrarium. Without proper drainage, excess water has nowhere to go. This suffocates roots and causes them to rot.
Always include a substantial drainage layer of pebbles or leca. This allows water to collect away from the plant roots, mimicking natural soil conditions where water drains deeper into the earth.
Placing in Direct Sunlight
While plants need light, direct, intense sunlight can quickly turn a closed terrarium into an oven. The glass magnifies the sun’s heat, scorching plants and leading to rapid moisture evaporation.
Position your terrarium in a spot with bright, indirect light. A north-facing window is often ideal. If direct sun is unavoidable, use sheer curtains to diffuse the light.
Troubleshooting
Excessive Condensation or Mold
If your closed terrarium has constant heavy condensation, or you see fuzzy mold growing on plants or soil, it’s likely too wet. This indicates an imbalance in the moisture level.
Remove the lid and leave it off for a few hours, or even a full day, to allow some moisture to evaporate. You can also use a cotton swab to gently remove visible mold. Resume monitoring before replacing the lid.
Wilting or Yellowing Plants
This can be a sign of either too much or too little water, or insufficient light. It’s important to observe other signs to diagnose the issue correctly. Yellowing leaves often point to nutrient deficiency or overwatering.
Check the soil moisture. If dry, water lightly. If soggy, air out the terrarium. Ensure it’s receiving adequate indirect light. If plants are still struggling, they might not be suitable for the terrarium environment.
Unpleasant Odor
A foul smell usually indicates decay or anaerobic conditions within your terrarium. This often happens when plant matter decomposes without enough oxygen, or if there’s too much moisture.
Open the lid to air out the terrarium. Remove any decaying plant material immediately. Ensure your activated charcoal layer is present and functioning. If the smell persists, you might need to partially rebuild layers.
Key Takeaways
- The success of your terrarium hinges on careful material selection and proper layering.
- Always include a drainage layer and activated charcoal to prevent root rot and odors.
- Choose plants with similar environmental needs, especially for closed terrariums.
- Water sparingly and monitor condensation levels to avoid overwatering.
- Place your terrarium in bright, indirect light to prevent scorching and overheating.
- Regularly inspect your terrarium for signs of distress and address issues promptly.
Frequently Asked Questions
What is the difference between an open and closed terrarium?
A closed terrarium has a lid, creating a self-sustaining humid environment where water cycles internally. An open terrarium has no lid, allowing for air circulation and requiring more frequent watering. Closed terrariums are suitable for humidity-loving plants, while open ones are better for succulents and cacti.
How often should I water my terrarium?
For a closed terrarium, you might only need to water every few weeks or even months, depending on how well it’s sealed and its environment. Look for condensation on the glass as a sign of adequate moisture. Open terrariums need watering more frequently, usually once every week or two, similar to regular houseplants.
What kind of plants are best for terrariums?
For closed terrariums, small, slow-growing plants that love humidity are ideal. Examples include Fittonia, ferns (like maidenhair or button ferns), mosses, baby’s tears, and small peperomias. For open terrariums, consider succulents, cacti, or air plants that prefer drier conditions.
How do I clean the inside of my terrarium?
For the inside glass, you can use a long-handled soft cloth or paper towel to gently wipe away any condensation or smudges. For plant leaves, a soft brush can remove dust. If you notice mold, use a cotton swab dipped in a very diluted hydrogen peroxide solution to gently clean the affected area, then air it out.
Our Top Recommended Finds
- Long-Handled Terrarium Tool Kit: Essential for planting and arranging in narrow-necked containers without disturbing layers.
- Horticultural Activated Charcoal: Specifically designed for plant environments, crucial for filtration and odor prevention.
- Sphagnum Moss (Dried): Excellent for decorative ground cover and retaining moisture around plant roots.
Create Your Own Green Oasis Today
You now have all the knowledge to embark on your terrarium-building adventure. Imagine the joy of watching a miniature world thrive under your care. Each layer you place, each plant you position, brings you closer to a beautiful, living piece of art.
Don’t let hesitation stop you from experiencing this rewarding craft. Gather your supplies, follow these steps, and bring a touch of vibrant nature into your home or office. Your personal green sanctuary awaits.
Beginner-friendly templates, step-by-step guides,
and weekly project ideas in your inbox.