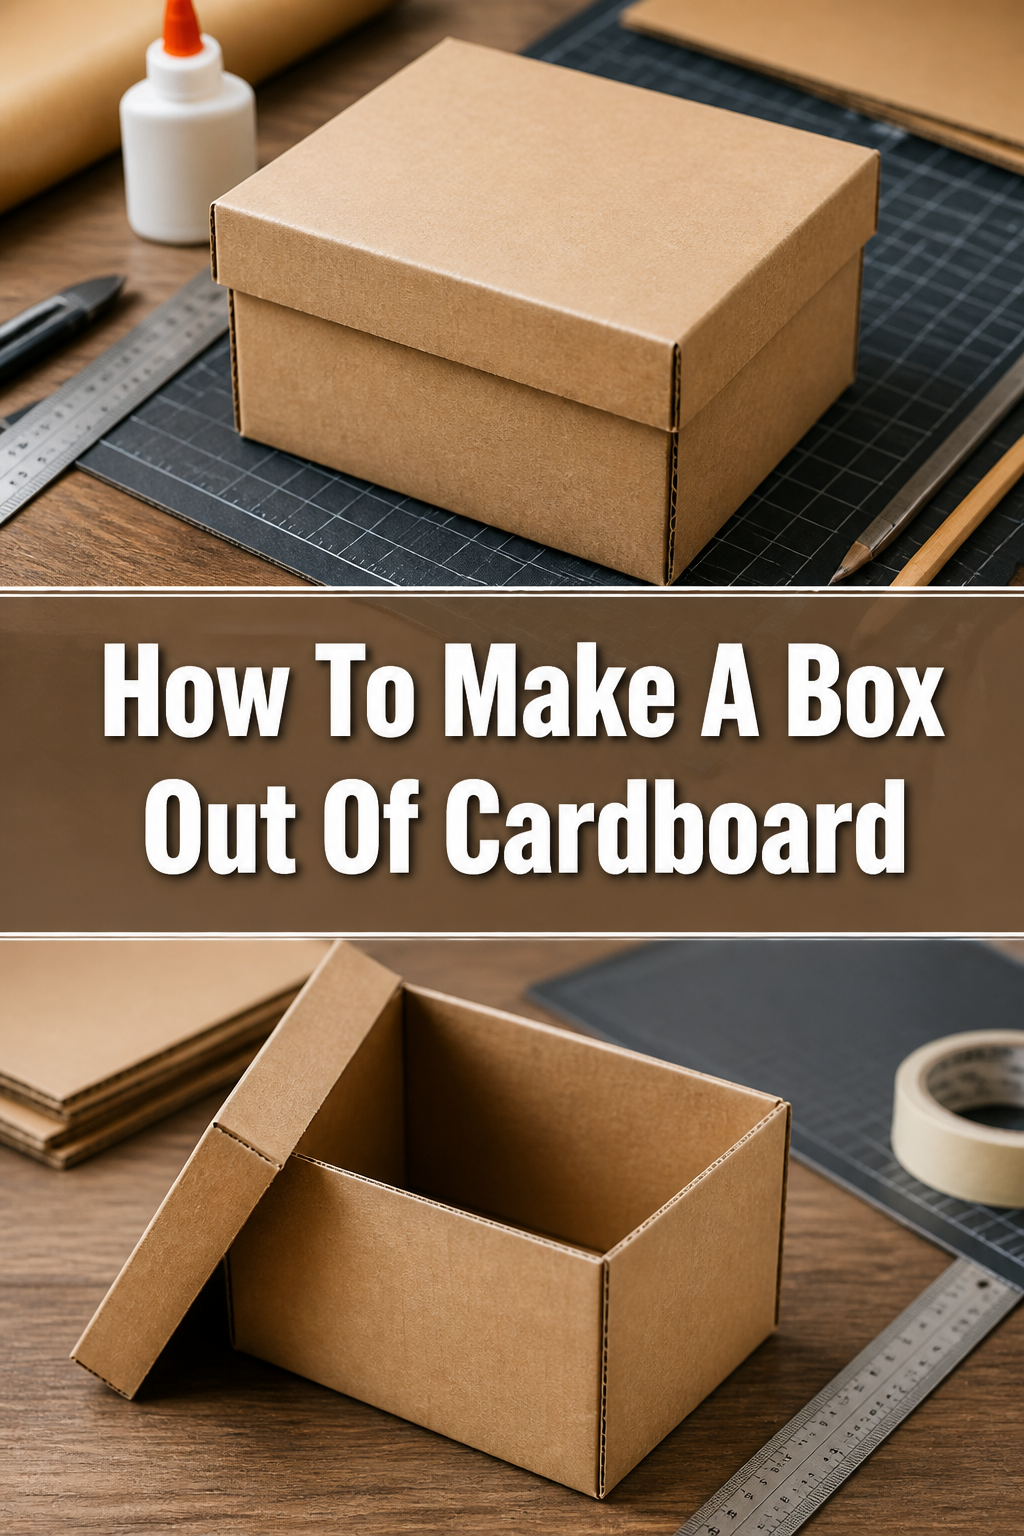
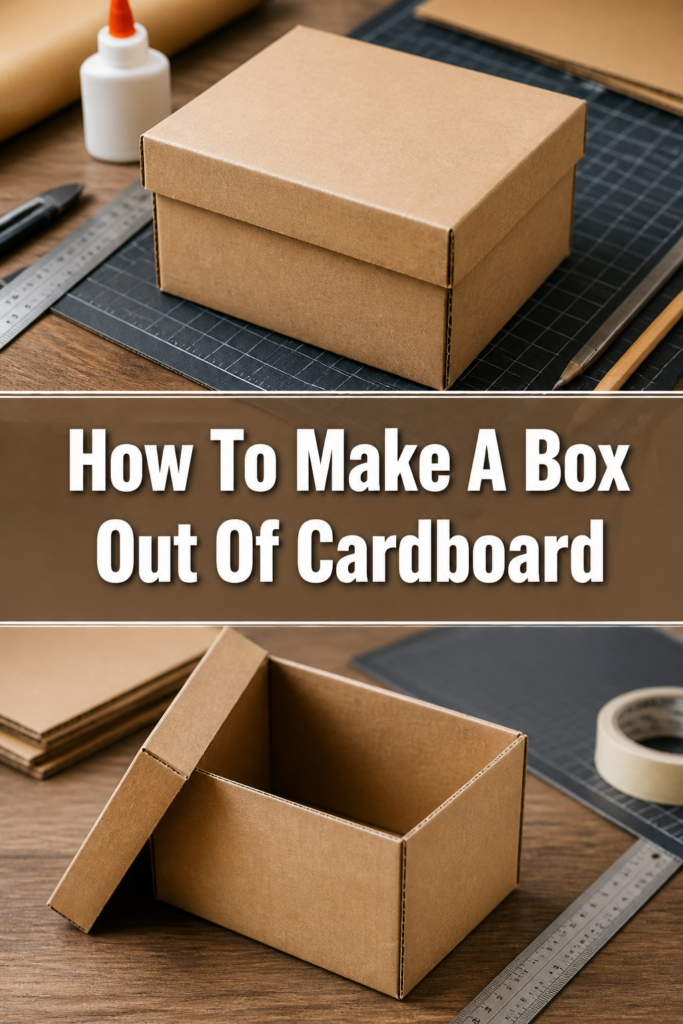
✨ How To Make A Box Out Of Cardboard

Beginner-friendly templates, step-by-step guides,
and weekly project ideas in your inbox.
I’ve spent countless hours crafting and organizing with cardboard boxes, from simple storage solutions to elaborate playhouses.
There’s a real satisfaction in transforming a flat sheet into something functional and sturdy.
This guide distills my hands-on experience, showing you exactly how to create a reliable cardboard box from scratch.
Quick Overview
You’re about to learn how to construct a versatile cardboard box, perfect for storage, shipping, or crafting projects.
This process breaks down into clear, manageable steps, ensuring a strong, well-formed container.
- Time needed: 45-90 minutes (depending on size and complexity)
- Difficulty: Beginner
- What you’ll need: Cardboard, ruler, cutting tool, strong adhesive, pencil
Step-by-Step Instructions
Step 1: Gather Your Materials and Plan Your Box
Start by collecting all your necessary tools and materials. Ensure your workspace is clear and well-lit, providing ample room for cutting and assembling.
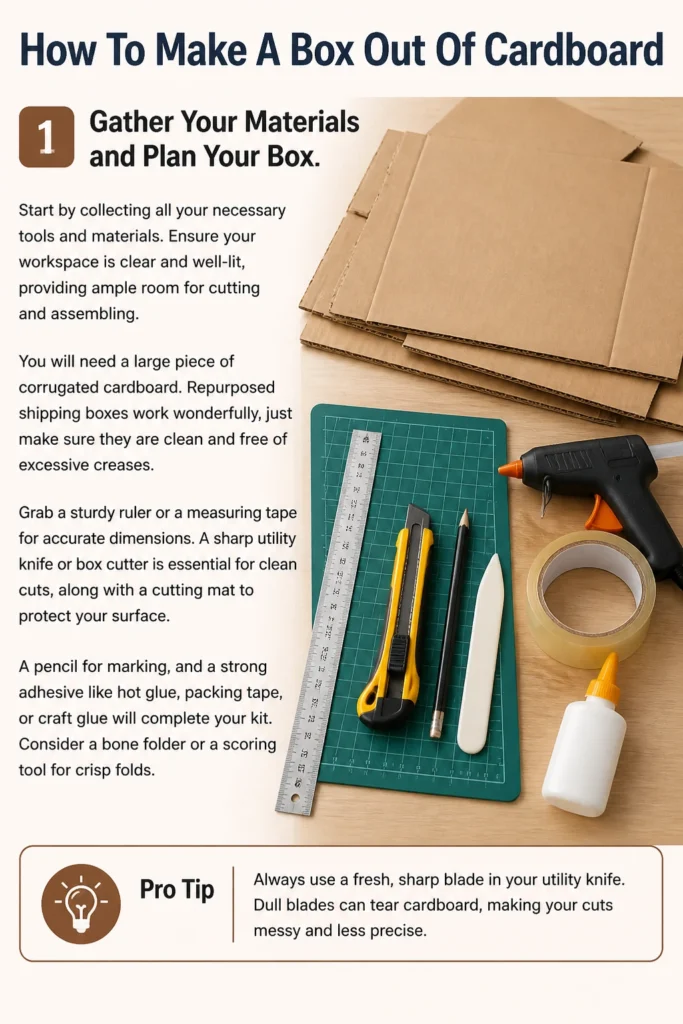
You will need a large piece of corrugated cardboard. Repurposed shipping boxes work wonderfully, just make sure they are clean and free of excessive creases.
Grab a sturdy ruler or a measuring tape for accurate dimensions. A sharp utility knife or box cutter is essential for clean cuts, along with a cutting mat to protect your surface.
A pencil for marking, and a strong adhesive like hot glue, packing tape, or craft glue will complete your kit. Consider a bone folder or a scoring tool for crisp folds.
Pro Tip: Always use a fresh, sharp blade in your utility knife. Dull blades can tear cardboard, making your cuts messy and less precise. Replace blades frequently for best results.
Step 2: Determine Your Box Dimensions
Decide on the exact length, width, and height your finished box will have. These three measurements are fundamental to your design.
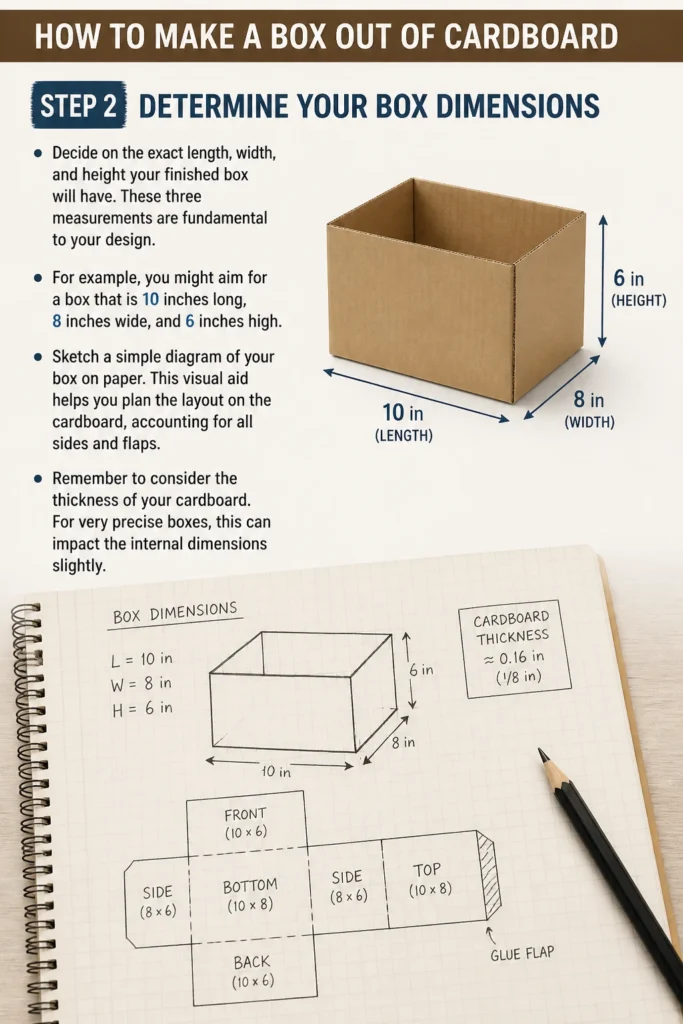
For example, you might aim for a box that is 10 inches long, 8 inches wide, and 6 inches high.
Sketch a simple diagram of your box on paper. This visual aid helps you plan the layout on the cardboard, accounting for all sides and flaps.
Remember to consider the thickness of your cardboard. For very precise boxes, this can impact the internal dimensions slightly.
Step 3: Lay Out Your Pattern on Cardboard
Unfold your cardboard completely so it lies flat. If you’re using a pre-existing box, carefully cut or separate its seams to create a single flat sheet.
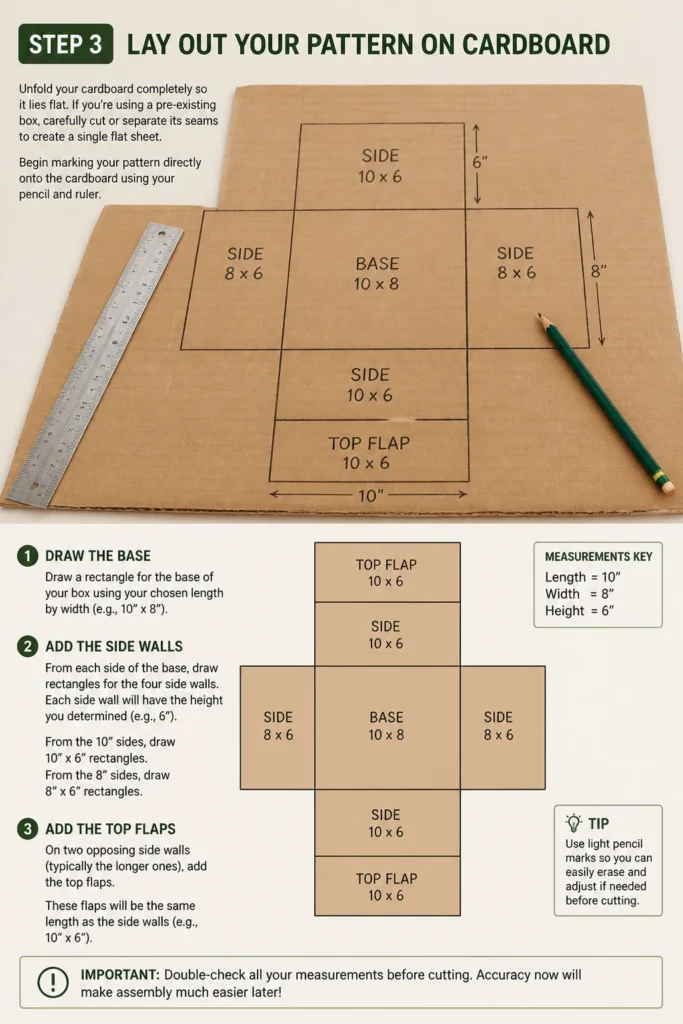
Begin marking your pattern directly onto the cardboard using your pencil and ruler. You’ll essentially be drawing a cross shape, which forms the bottom and four side walls.
First, draw the base rectangle of your box. This will be your chosen length by width (e.g., 10″ x 8″).
Next, extend lines from each side of the base to create the four side walls. Each side wall will have the height you determined (e.g., 6″). So, from the 10″ sides, draw 6″ high rectangles, and from the 8″ sides, draw 6″ high rectangles.
On two opposing side walls (typically the longer ones), you will add the top flaps. These flaps will be the same length as the side wall they attach to, and their width will be half of your box’s width (e.g., 10″ long, 4″ wide). This allows them to meet in the middle when closed.
On the remaining two side walls, add smaller glue tabs. These tabs should be about 0.5 to 1 inch wide and run the full height of the side wall. These tabs are crucial for securely joining the box corners.
Pro Tip: Use a light touch with your pencil. You want marks that are visible for cutting but not so deep they weaken the cardboard or show through the finished box. You can always erase guide marks later.
Step 4: Score the Fold Lines
Scoring the cardboard makes folding much easier and creates crisp, professional-looking edges. This is a crucial step for a well-made box.
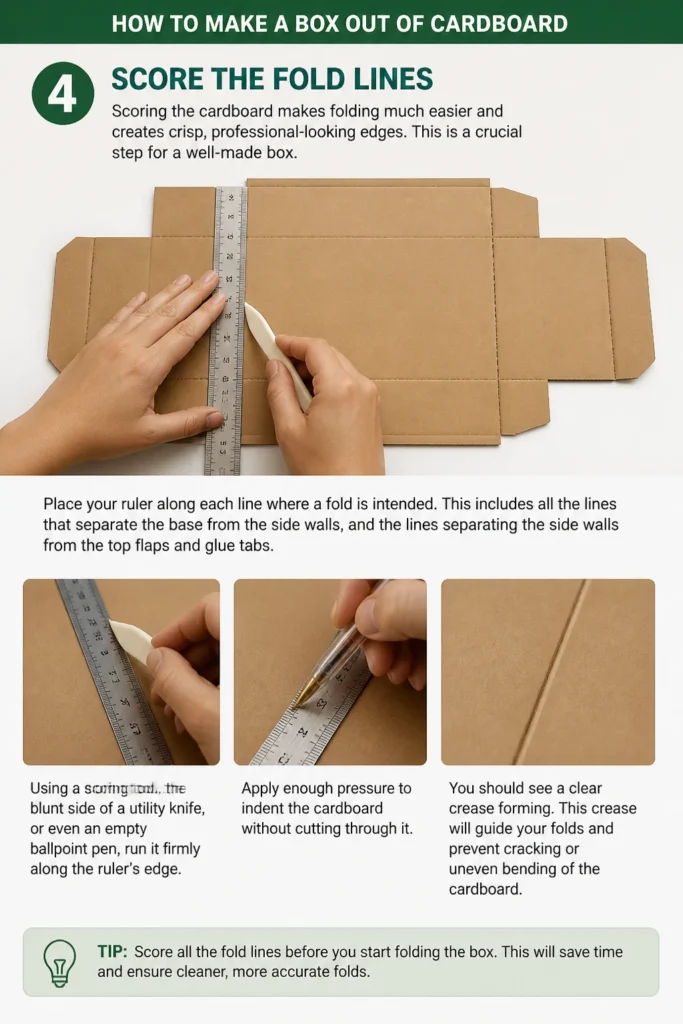
Place your ruler along each line where a fold is intended. This includes all the lines that separate the base from the side walls, and the lines separating the side walls from the top flaps and glue tabs.
Using a scoring tool, the blunt side of a utility knife, or even an empty ballpoint pen, run it firmly along the ruler’s edge. Apply enough pressure to indent the cardboard without cutting through it.
You should see a clear crease forming. This crease will guide your folds and prevent cracking or uneven bending of the cardboard.
Step 5: Carefully Cut Out Your Pattern
Now it’s time to cut your box pattern from the larger piece of cardboard. Place your cardboard on a cutting mat to protect your work surface.
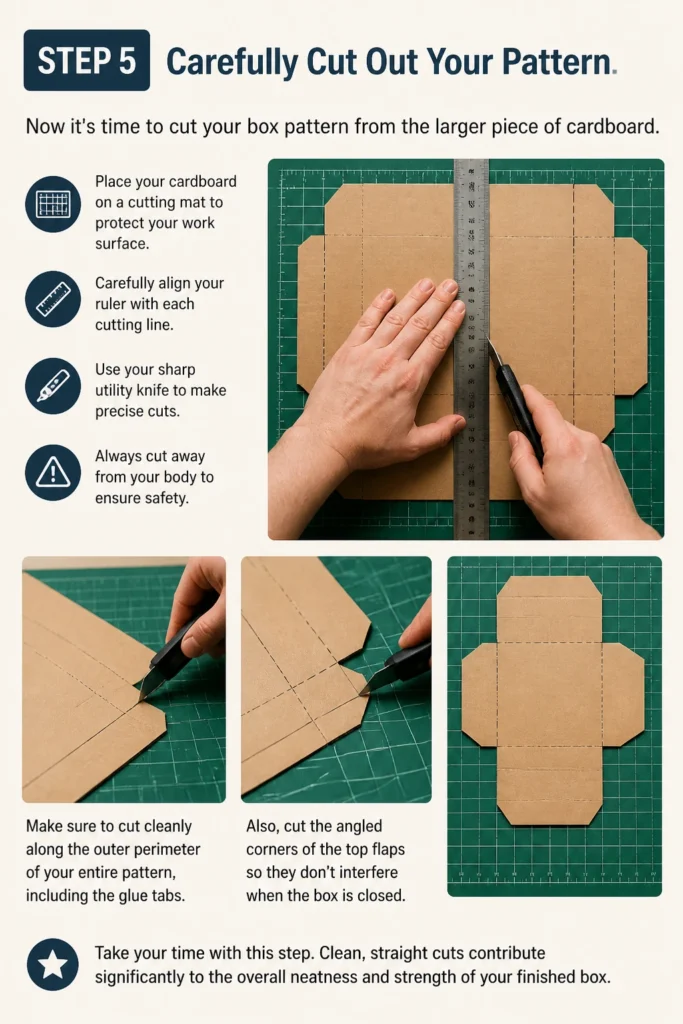
Carefully align your ruler with each cutting line. Use your sharp utility knife to make precise cuts. Always cut away from your body to ensure safety.
Make sure to cut cleanly along the outer perimeter of your entire pattern, including the glue tabs. Also, cut the angled corners of the top flaps so they don’t interfere when the box is closed.
Take your time with this step. Clean, straight cuts contribute significantly to the overall neatness and strength of your finished box.
Step 6: Fold Along the Scored Lines
Once your pattern is cut out, begin folding all the scored lines. Start by folding up all four side walls from the base.
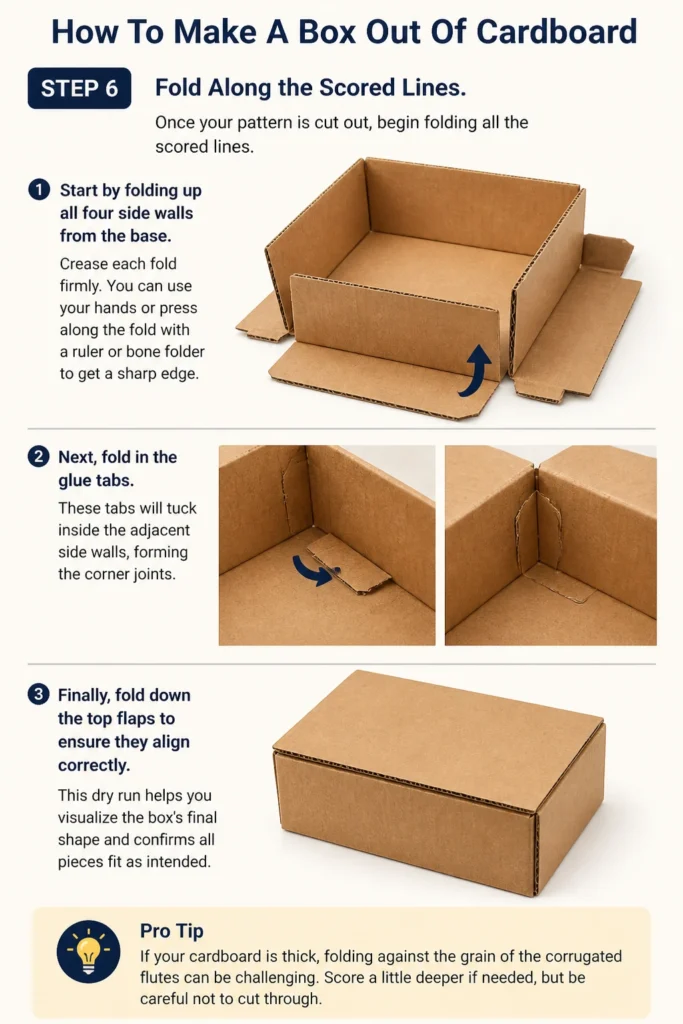
Crease each fold firmly. You can use your hands or press along the fold with a ruler or bone folder to get a sharp edge.
Next, fold in the glue tabs. These tabs will tuck inside the adjacent side walls, forming the corner joints.
Finally, fold down the top flaps to ensure they align correctly. This dry run helps you visualize the box’s final shape and confirms all pieces fit as intended.
Pro Tip: If your cardboard is thick, folding against the grain of the corrugated flutes can be challenging. Score a little deeper if needed, but be careful not to cut through.
Step 7: Secure the Box Seams
With all your folds made, it’s time to assemble the box. Apply your chosen adhesive to the glue tabs.
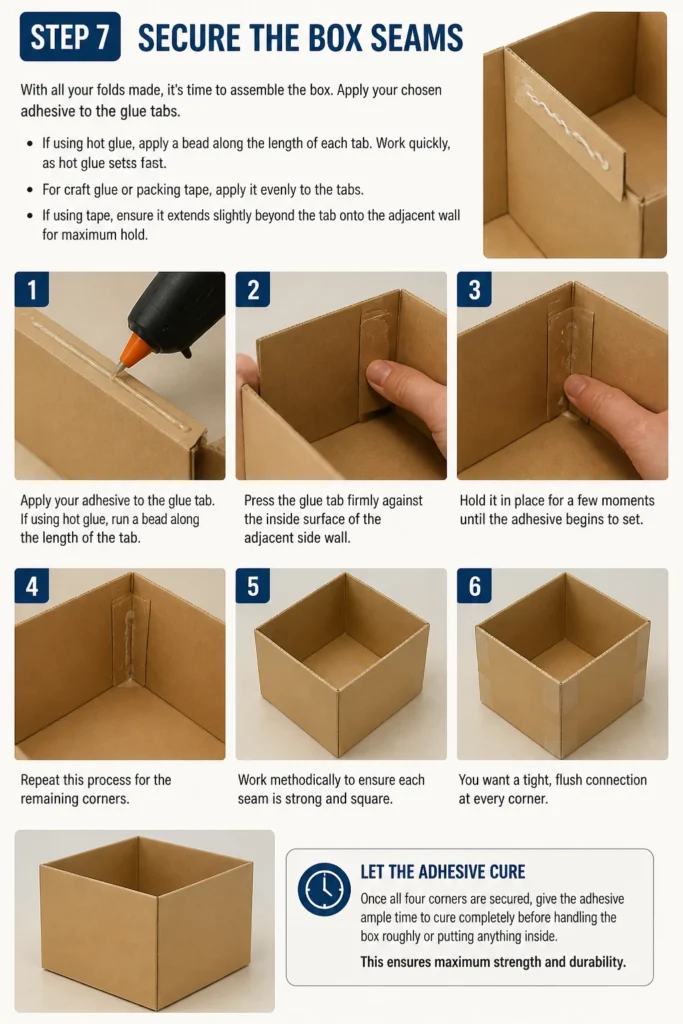
If using hot glue, apply a bead along the length of each tab. Work quickly, as hot glue sets fast.
For craft glue or packing tape, apply it evenly to the tabs. If using tape, ensure it extends slightly beyond the tab onto the adjacent wall for maximum hold.
Press the glue tabs firmly against the inside surface of the adjacent side walls. Hold them in place for a few moments until the adhesive begins to set.
Repeat this process for all four corners, working methodically to ensure each seam is strong and square. You want a tight, flush connection at every corner.
Once all four corners are secured, give the adhesive ample time to cure completely before handling the box roughly or putting anything inside.
Common Mistakes to Avoid
Inaccurate Measurements and Cuts
One of the most common pitfalls is rushing the measuring and cutting process. Even a small error in your initial measurements or an uneven cut can lead to a crooked box that doesn’t hold its shape.
Always double-check your measurements before marking. Use a ruler and a sharp pencil to draw precise lines. When cutting, take your time and use a straight edge to guide your blade, ensuring perfectly straight lines.
Insufficient Scoring
Forgetting to score or scoring too lightly is another frequent mistake. Without proper scoring, cardboard tends to tear or fold unevenly, especially along the grain, resulting in weak and unprofessional-looking creases.
Make sure to score all fold lines with firm, consistent pressure. The goal is to compress the cardboard fibers without cutting through them. This creates a hinge that allows for clean, sharp folds.
Weak Adhesive Application
Using too little glue, using the wrong type of glue, or not allowing enough drying time can result in a box that falls apart. The seams are the structural integrity of your box.
Choose a strong adhesive suitable for cardboard, such as hot glue, wood glue, or heavy-duty packing tape. Apply it generously and evenly to all glue tabs. Crucially, hold the seams firmly together until the adhesive begins to set, and always allow the recommended drying time before stressing the box.
Troubleshooting
Box Corners Don’t Align Squarely
If your box corners appear lopsided or don’t form perfect 90-degree angles, it’s usually due to imprecise cutting or scoring. Even a slight deviation can throw off the entire structure.
Go back to your pattern and re-measure. Ensure all opposing sides are exactly the same length and that your initial cuts were perfectly straight. When folding, press firmly into the scored lines to achieve a crisp, true fold. Sometimes, applying light pressure to the corners while the glue dries can help force them into square alignment.
Cardboard Tears During Folding
Tearing during folding indicates that the cardboard was either not scored deeply enough, or you applied too much force. It can also happen if the cardboard is old, brittle, or bending against its grain.
Next time, try scoring the lines more firmly. If using a utility knife, use the blunt side. For very thick or stiff cardboard, you might even score it lightly on both sides if the design allows. If the cardboard is simply too old, consider using a fresh piece.
Glue Tabs Don’t Hold Securely
If your glue tabs are coming undone, the adhesive might be insufficient, incompatible with the cardboard, or not given enough time to bond. Dusty or greasy cardboard can also prevent good adhesion.
Ensure your cardboard surfaces are clean and dry before applying glue. Use a strong, appropriate adhesive like hot glue for quick bonds or a quality craft/wood glue for a more permanent hold. Apply a continuous bead or strip to the entire tab. Most importantly, apply firm, consistent pressure to the joint for at least 30 seconds and allow the glue to cure fully before testing the strength.
Key Takeaways
- Accurate measurements and precise cutting are the foundation of a strong, square box.
- Scoring all fold lines ensures clean, crisp creases and prevents cardboard tearing.
- A strong adhesive applied correctly and given adequate drying time is vital for durable seams.
- Double-check all dimensions and practice your folds before committing to glue.
- Patience throughout the measuring, cutting, and gluing stages yields the best results.
- You can adapt this basic technique to create boxes of various sizes and shapes.
Frequently Asked Questions
Can I make a box without glue?
Yes, you can. You’d need to design a box with interlocking tabs or a series of folds that tuck into each other. This often requires more complex cutting patterns but can be effective for temporary storage or if you need to disassemble the box later.
What type of cardboard is best for making boxes?
Single-wall corrugated cardboard is ideal for most general-purpose boxes. It’s sturdy yet easy to cut and fold. For heavier items, you might look for double-wall corrugated cardboard, which offers extra strength.
How can I make my cardboard box more durable?
To increase durability, reinforce the seams with extra layers of packing tape, especially on the inside and outside corners. You can also line the bottom with an additional piece of cardboard or use stronger, thicker cardboard to begin with. Applying a sealant or paint can also add a layer of protection.
Can I use this method to make a box with a lid?
Absolutely! To make a box with a separate lid, simply create two box patterns. Make the lid pattern slightly larger (e.g., 1/8 to 1/4 inch longer and wider) than the main box to ensure it fits snugly over the base. The height of the lid’s side walls can be adjusted to your preference.
Our Top Recommended Finds
- Heavy-Duty Utility Knife: Essential for clean, precise cuts through corrugated cardboard, ensuring a professional finish.
- Self-Healing Cutting Mat: Protects your work surface and provides a stable base, extending the life of your blades and improving cutting accuracy.
- Strong Packing Tape: A reliable alternative or supplement to glue, offering robust reinforcement for all seams and corners.
Your Next Cardboard Creation Awaits
You now possess the knowledge and practical steps to craft your very own cardboard box.
This fundamental skill opens up a world of possibilities, from organizing your home to creating custom packaging or even starting a fun crafting project.
Don’t just read about it; grab some cardboard today and put these instructions into action. The satisfaction of a self-made, perfectly functional box is incredibly rewarding.
Beginner-friendly templates, step-by-step guides,
and weekly project ideas in your inbox.