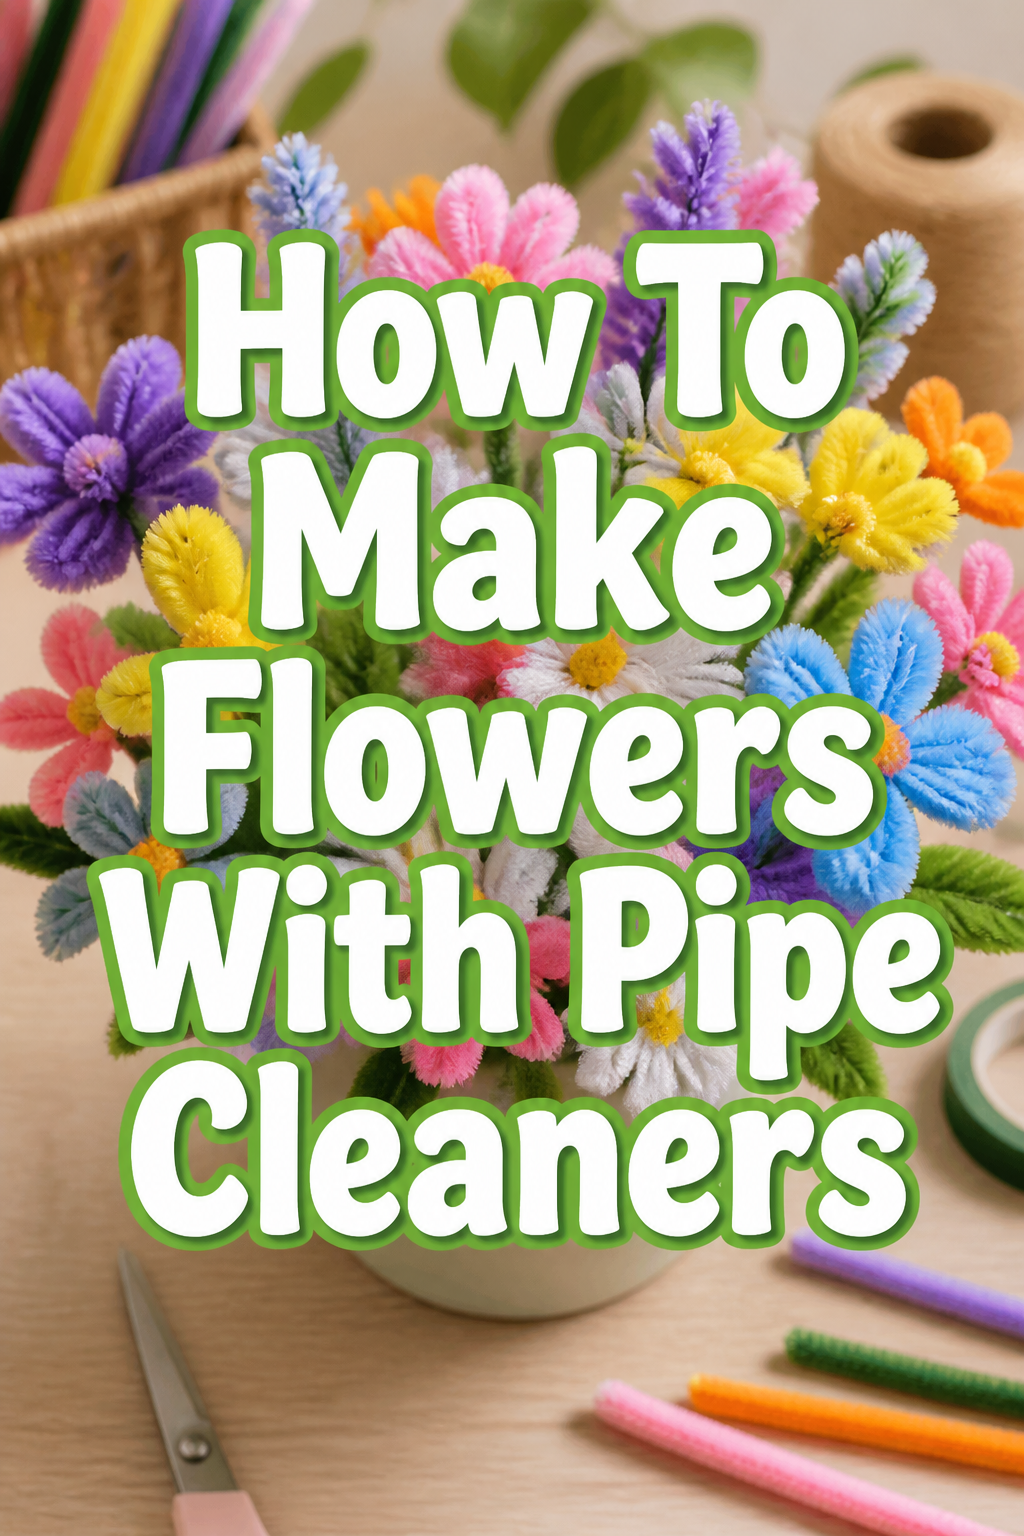
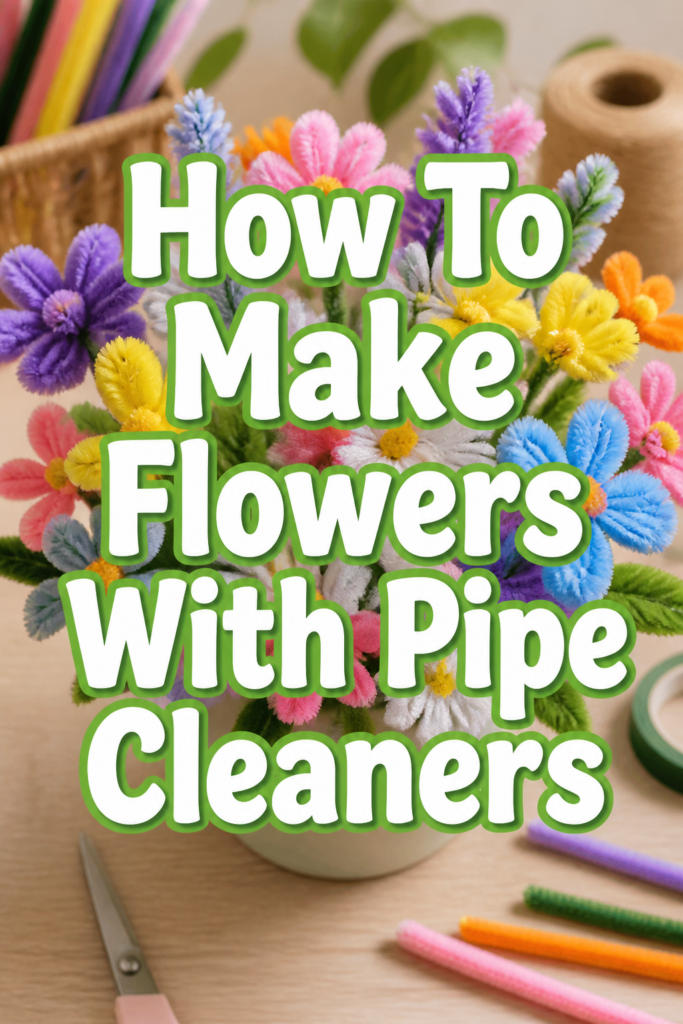
🌸 How To Make Flowers With Pipe Cleaners

Beginner-friendly templates, step-by-step guides,
and weekly project ideas in your inbox.
I remember sitting at my kitchen table as a child, surrounded by a mountain of neon-colored fuzzy wires and a pair of blunt scissors.
My grandmother showed me how a few simple twists could transform a straight piece of wire into a blooming rose that would never wilt.
You can trust this guide because I have spent years teaching these tactile crafts to students of all ages, refining techniques that prioritize durability and aesthetic appeal.
Quick Overview
This project allows you to create a vibrant, everlasting bouquet using only a few basic supplies and your own hands.
- Time needed: 15 to 20 minutes per flower
- Difficulty: Beginner
- What you’ll need: Colorful pipe cleaners (chenille stems), wire cutters or strong scissors, a pencil, and optional floral tape.
Step-by-Step Instructions
Step 1: Choose Your Color Palette
Select at least three different colors of pipe cleaners to give your flower depth and a realistic appearance.
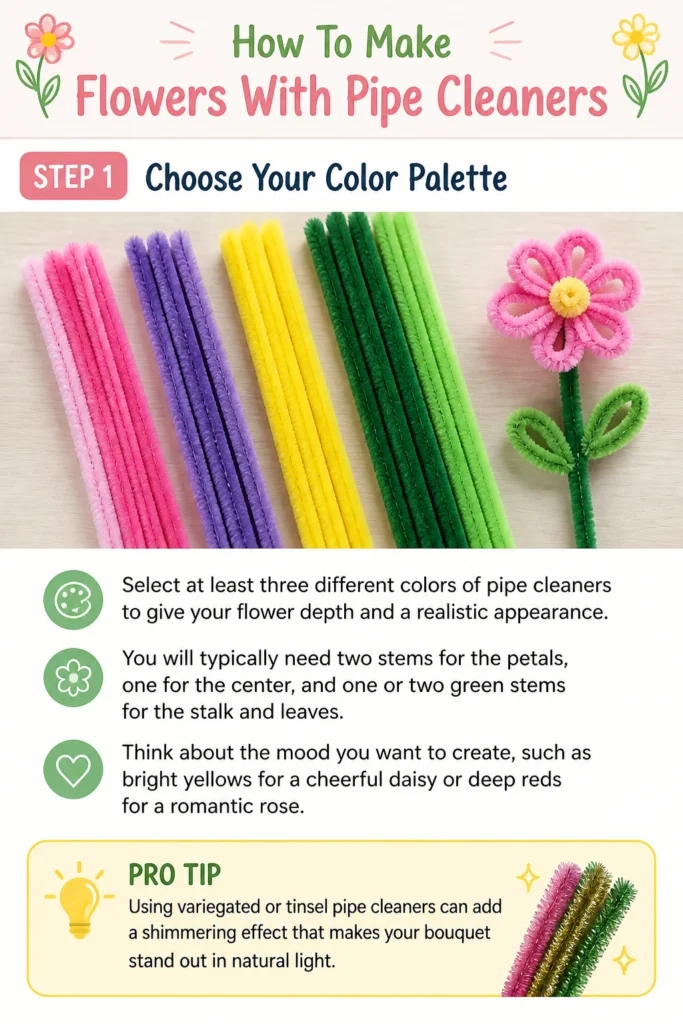
You will typically need two stems for the petals, one for the center, and one or two green stems for the stalk and leaves.
Think about the mood you want to create, such as bright yellows for a cheerful daisy or deep reds for a romantic rose.
Pro Tip: Using variegated or “tinsel” pipe cleaners can add a shimmering effect that makes your bouquet stand out in natural light.
Step 2: Create the Petal Loops
Take your first petal-colored pipe cleaner and fold it in half to find the exact center point.
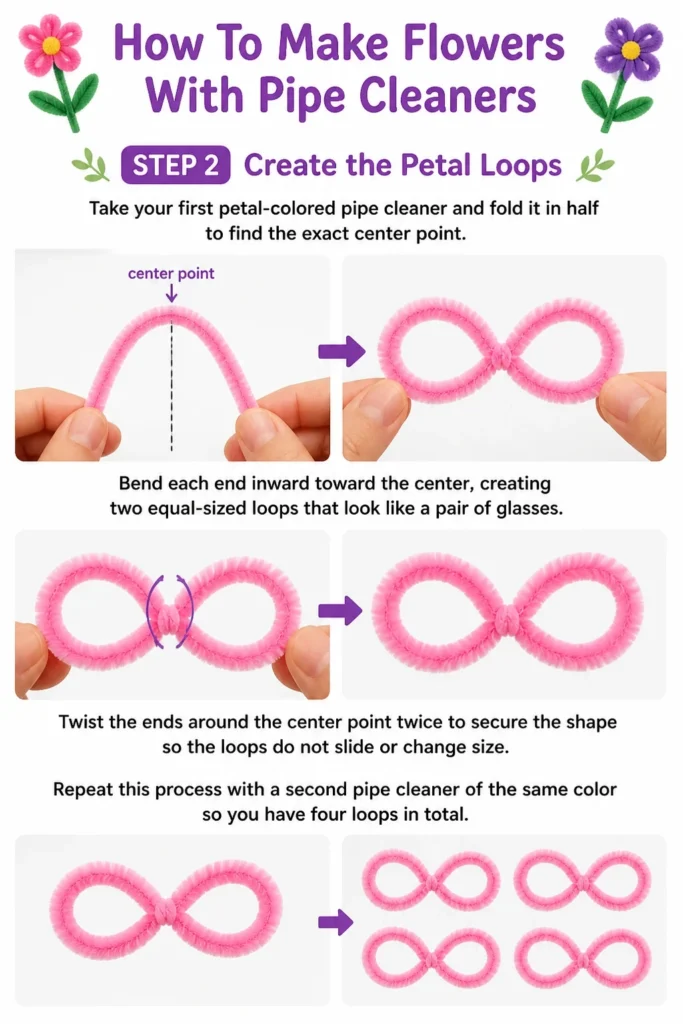
Bend each end inward toward the center, creating two equal-sized loops that look like a pair of glasses.
Twist the ends around the center point twice to secure the shape so the loops do not slide or change size.
Repeat this process with a second pipe cleaner of the same color so you have four loops in total.
Step 3: Form the Flower Base
Stack the two looped pieces on top of each other in a cross or “X” shape.
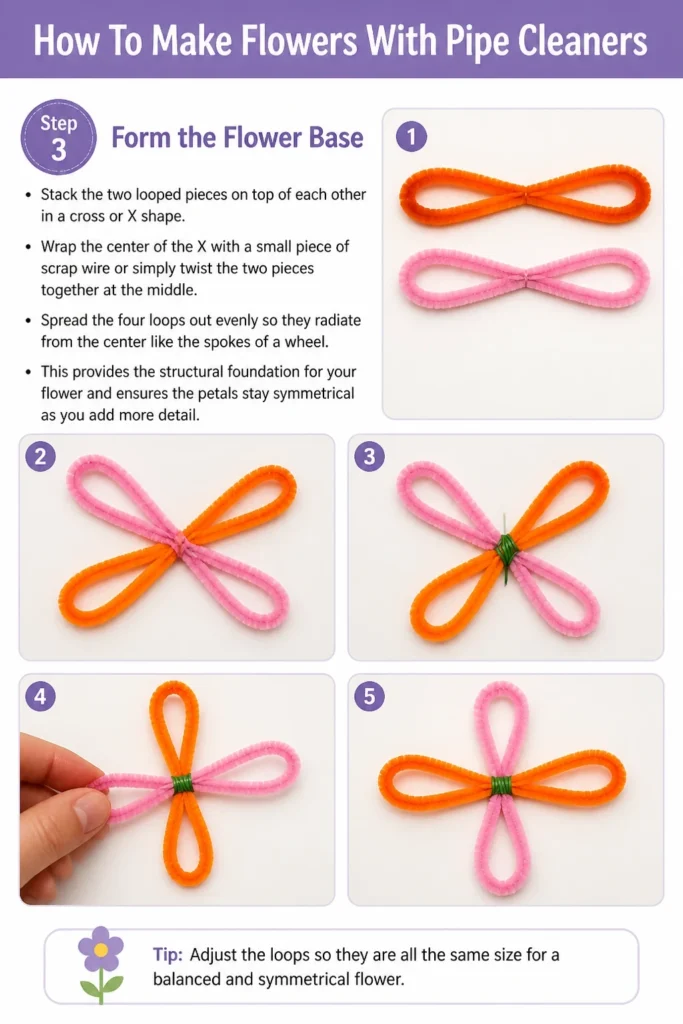
Wrap the center of the “X” with a small piece of scrap wire or simply twist the two pieces together at the middle.
Spread the four loops out evenly so they radiate from the center like the spokes of a wheel.
This provides the structural foundation for your flower and ensures the petals stay symmetrical as you add more detail.
Step 4: Craft the Flower Center
Pick a contrasting color, such as yellow or orange, to serve as the pollen-heavy center of your bloom.
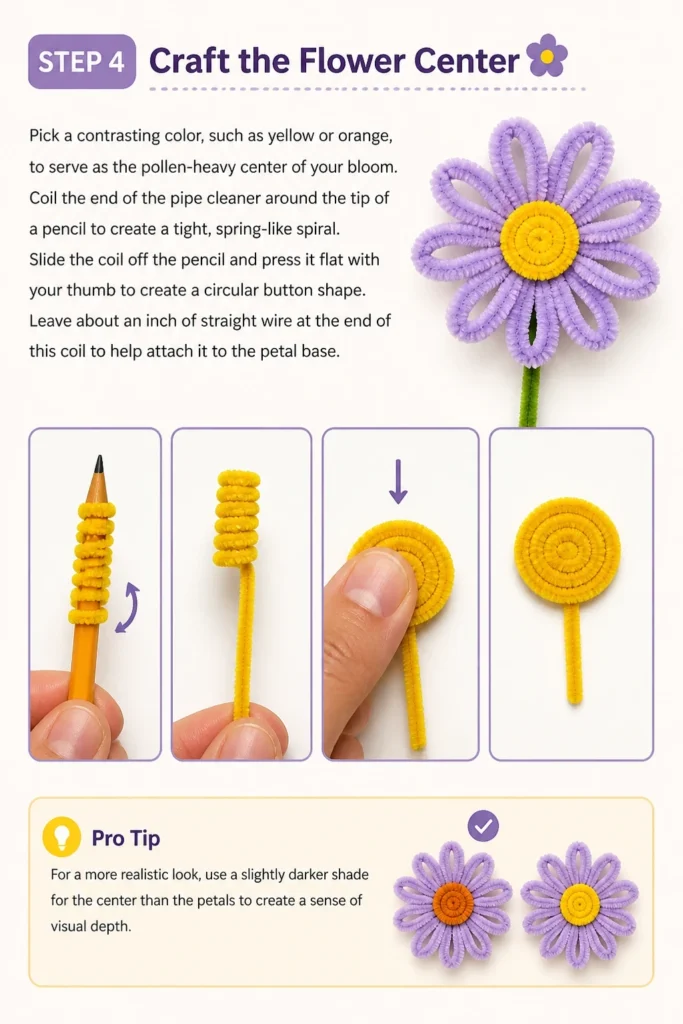
Coil the end of the pipe cleaner around the tip of a pencil to create a tight, spring-like spiral.
Slide the coil off the pencil and press it flat with your thumb to create a circular “button” shape.
Leave about an inch of straight wire at the end of this coil to help attach it to the petal base.
Pro Tip: For a more realistic look, use a slightly darker shade for the center than the petals to create a sense of visual depth.
Step 5: Attach the Center to the Petals
Poke the straight end of your center coil through the middle point where all your petal loops meet.
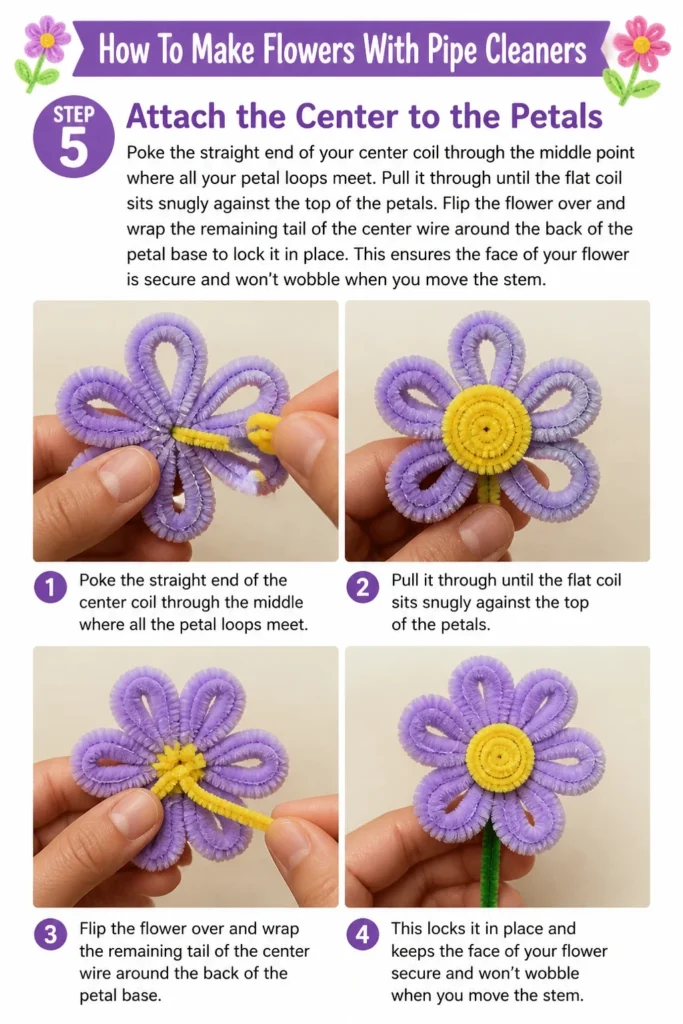
Pull it through until the flat coil sits snugly against the top of the petals.
Flip the flower over and wrap the remaining tail of the center wire around the back of the petal base to lock it in place.
This ensures the “face” of your flower is secure and won’t wobble when you move the stem.
Step 6: Construct the Stem
Take a full-length green pipe cleaner and align one end with the back of your flower head.
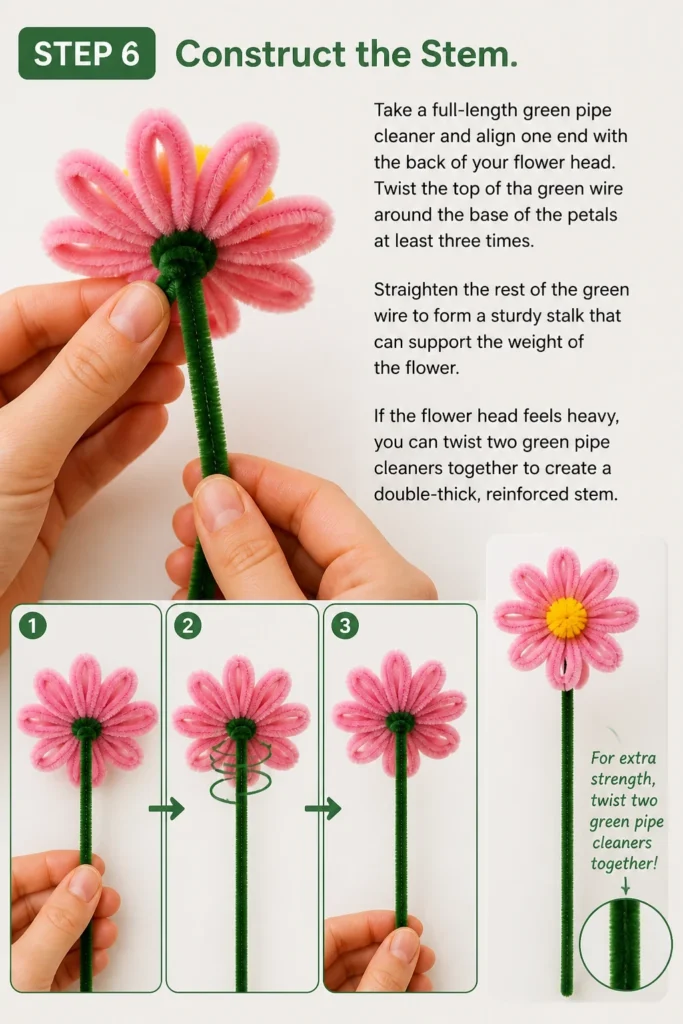
Twist the top of the green wire around the base of the petals at least three times.
Straighten the rest of the green wire to form a sturdy stalk that can support the weight of the flower.
If the flower head feels heavy, you can twist two green pipe cleaners together to create a double-thick, reinforced stem.
Step 7: Shape the Petals
Grasp each loop individually and gently tug it outward to elongate the shape.
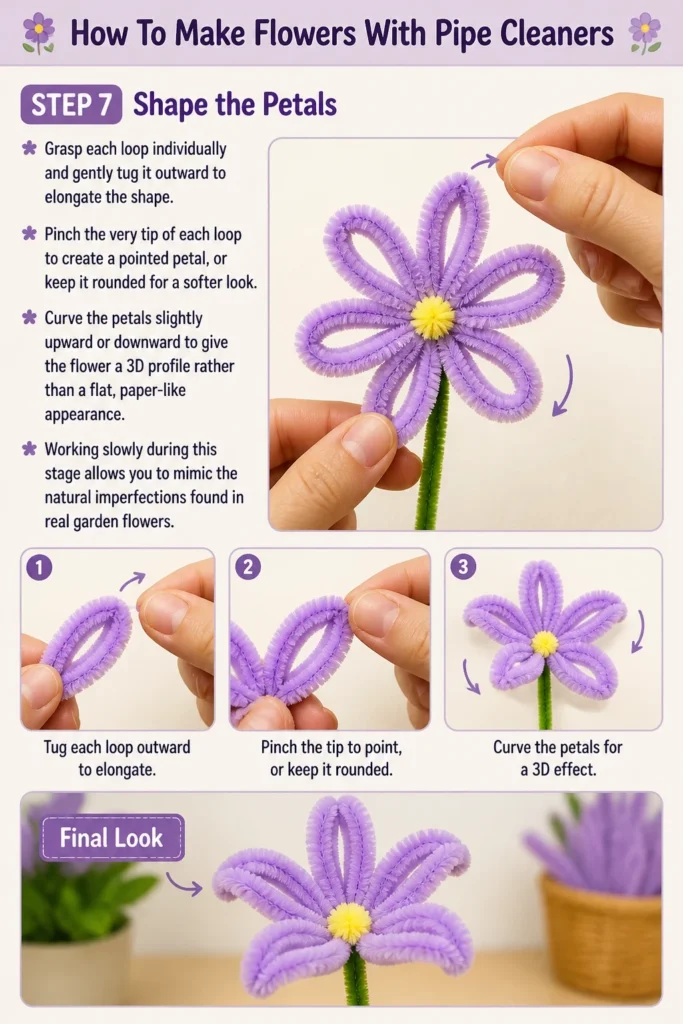
Pinch the very tip of each loop to create a pointed petal, or keep it rounded for a softer look.
Curve the petals slightly upward or downward to give the flower a 3D profile rather than a flat, paper-like appearance.
Working slowly during this stage allows you to mimic the natural imperfections found in real garden flowers.
Step 8: Add the Leaves
Wrap a separate green pipe cleaner around the middle of your stem, leaving two long ends sticking out.
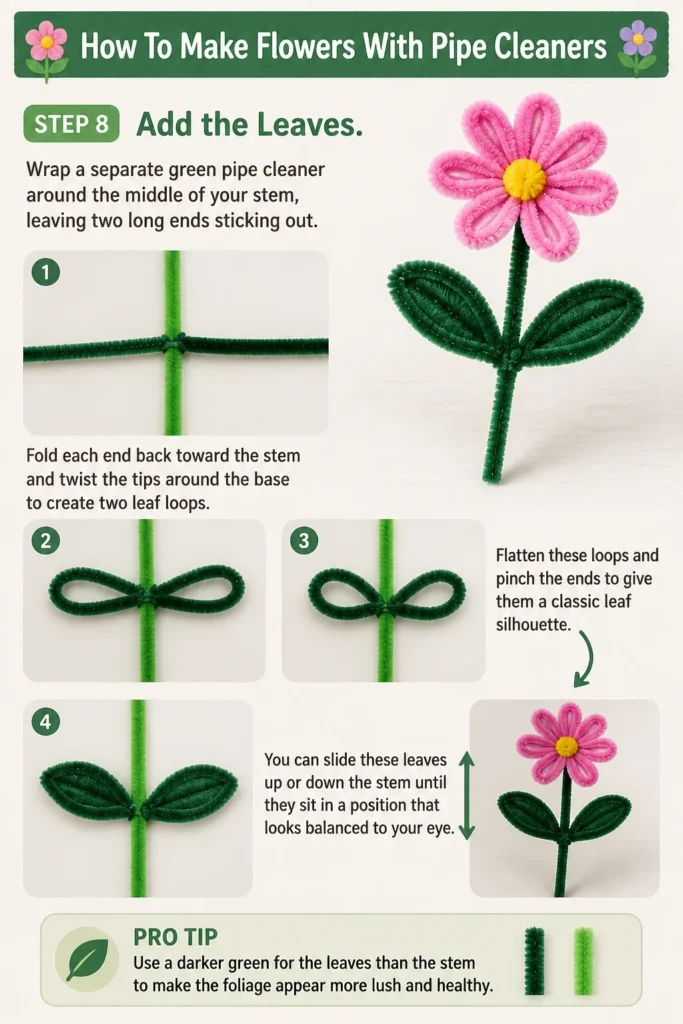
Fold each end back toward the stem and twist the tips around the base to create two leaf loops.
Flatten these loops and pinch the ends to give them a classic leaf silhouette.
You can slide these leaves up or down the stem until they sit in a position that looks balanced to your eye.
Pro Tip: Use a darker green for the leaves than the stem to make the foliage appear more lush and healthy.
Step 9: Final Adjustments and Fluffing
Inspect the flower from all angles to ensure no sharp wire ends are sticking out.
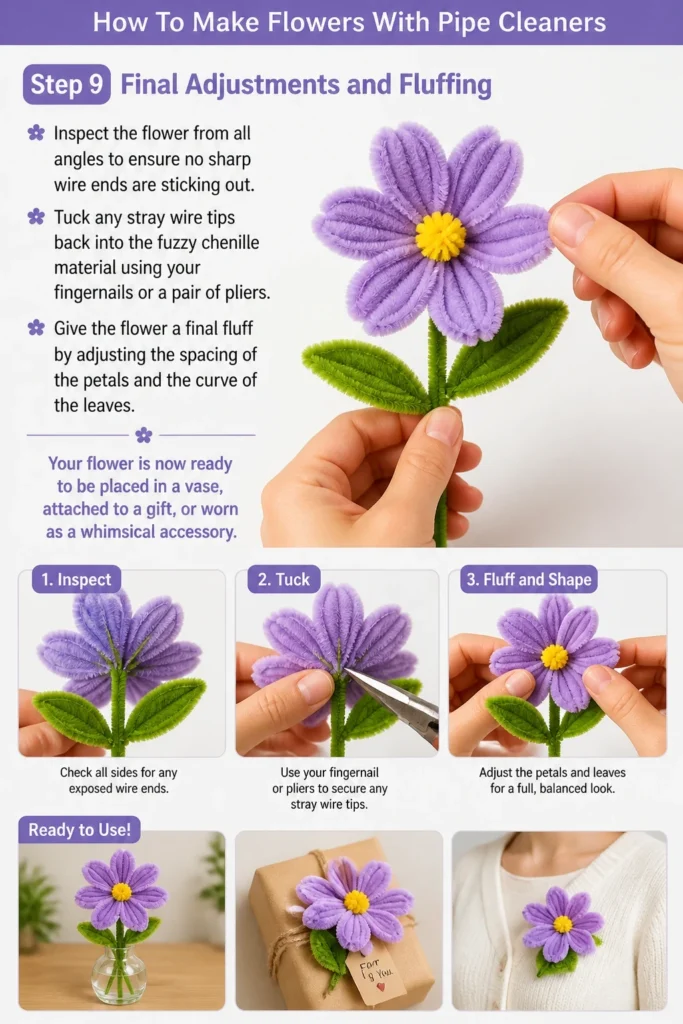
Tuck any stray wire tips back into the fuzzy chenille material using your fingernails or a pair of pliers.
Give the flower a final “fluff” by adjusting the spacing of the petals and the curve of the leaves.
Your flower is now ready to be placed in a vase, attached to a gift, or worn as a whimsical accessory.
Common Mistakes to Avoid
Over-Twisting the Wire
It is tempting to twist the pipe cleaners repeatedly to make them “extra secure,” but this can be counterproductive. The thin wire inside the chenille can snap if it is stressed too much in one spot. Two or three firm twists are usually enough to hold everything together without risking a break.
If you feel the wire becoming brittle or see the fuzzy coating starting to fall off, stop twisting immediately. Back off half a turn and let the tension settle. A gentle touch often results in a much more durable finished product.
Ignoring the Sharp Ends
The ends of pipe cleaners are essentially raw wire and can be quite sharp, especially for younger crafters. Leaving these ends exposed can lead to accidental scratches or snags on clothing. Always make a conscious effort to fold the tips back into the “fuzz” of the stem.
You can also use a tiny drop of clear-drying glue on the very tips if you are making these for small children. This seals the sharp edge and prevents the chenille fibers from shedding over time. Safety and comfort make the final craft much more enjoyable to handle.
Using Low-Density Pipe Cleaners
Not all pipe cleaners are created equal, and the “budget” versions often have very sparse fuzz. Using thin, balding stems will result in a flower that looks skeletal and shows too much of the inner wire. This takes away from the soft, organic look of a flower.
Look for “jumbo” or “extra-thick” chenille stems if you want your flowers to look full and plush. High-quality stems have more fibers per inch, which helps hide the structural twists and turns. The better the material, the more professional your bouquet will look in the end.
Troubleshooting
The Flower Head Is Floppy
If your flower head droops forward or won’t stay upright, the connection between the stem and the petals is likely too loose. This happens when the stem wire isn’t wrapped tightly enough around the base of the flower. The weight of the petals pulls against the weak joint, causing it to lean.
To fix this, take an extra scrap of green pipe cleaner and wrap it tightly around the junction where the head meets the stem. Create a “collar” of wire that reinforces the neck of the flower. This added thickness provides the leverage needed to keep the bloom facing upward.
Petals Are Uneven or Lopsided
Lopsided petals usually stem from the initial folding process in Step 2. If one loop is even a fraction of an inch larger than the others, the whole flower will look tilted. Because pipe cleaners are flexible, it is easy to accidentally pull one loop tighter than the rest during assembly.
You can remedy this by gently “massaging” the wire. Hold the center of the flower firmly and tug on the smaller petals to expand them, or compress the larger ones. Since there is no glue involved yet, you have the freedom to adjust the proportions until the symmetry is restored.
Key Takeaways
- Start with quality materials: Thick, high-density pipe cleaners provide the best coverage and a more realistic floral appearance.
- Master the twist: Secure your components with two or three firm rotations rather than excessive twisting to avoid breaking the internal wire.
- Focus on the center: A tight, well-defined center coil acts as the anchor for the entire flower and draws the eye inward.
- Safety first: Always tuck or fold the sharp wire ends back into the chenille to prevent scratches and snags.
- Add dimension: Use your fingers to curve and pinch the petals and leaves, moving away from a flat 2D shape to a lifelike 3D bloom.
- Reinforce the stem: If your flower is large, use multiple green stems twisted together to provide the necessary support.
Frequently Asked Questions
Can I wash pipe cleaner flowers if they get dusty?
You should avoid getting pipe cleaner flowers wet because the internal wire is usually made of steel and can rust. If they become dusty, the best method is to use a hair dryer on a cool, low setting to blow the dust away. You can also use a soft-bristled paintbrush to gently whisk away debris from the fibers.
How many pipe cleaners do I need for a full bouquet?
A standard bouquet of twelve flowers typically requires about 48 to 60 pipe cleaners. This accounts for the petals, centers, stems, and leaves for each individual bloom. It is always a good idea to have a few extra stems on hand in case you want to add extra leaves or if a wire snaps during the twisting process.
What is the best way to display these flowers?
Pipe cleaner flowers look wonderful in a glass mason jar or a ceramic bud vase. Because the stems are wire, you can bend them to different heights or angles, which you cannot do with real flowers. You can also wrap the stems around a headband, a gift box, or even a curtain rod to add a pop of color to a room.
Are pipe cleaner flowers safe for pets?
While they are not toxic, you should keep them away from cats and dogs who like to chew. The small fibers can be swallowed, and the wire inside can be dangerous if ingested or if it pokes the animal’s mouth. It is best to display your bouquet on a high shelf or in a spot where curious pets cannot reach them.
Our Top Recommended Finds
- Assorted Chenille Stem Pack: Look for packs that offer 500+ pieces in a variety of neon, pastel, and primary colors to give you the most creative freedom.
- Precision Wire Cutters: While scissors work, a small pair of wire cutters will give you a cleaner snip and prevent you from dulling your good fabric or kitchen scissors.
- Floral Tape: This self-adhesive tape can be wrapped around the green pipe cleaner stems to give them a smooth, professional finish that looks just like a real flower stalk.
Bring Your Everlasting Garden To Life
Now that you have mastered the basic loop-and-twist technique, the possibilities are virtually endless.
You might try creating different species like long-stemmed tulips by using oval loops, or tiny lavender sprigs by making dozens of small purple beads on a single stem.
These flowers make incredible handmade gifts for teachers, friends, or family members who might have allergies to real pollen.
Grab a handful of stems today and see how many unique shapes you can create with just a few simple folds.
Beginner-friendly templates, step-by-step guides,
and weekly project ideas in your inbox.