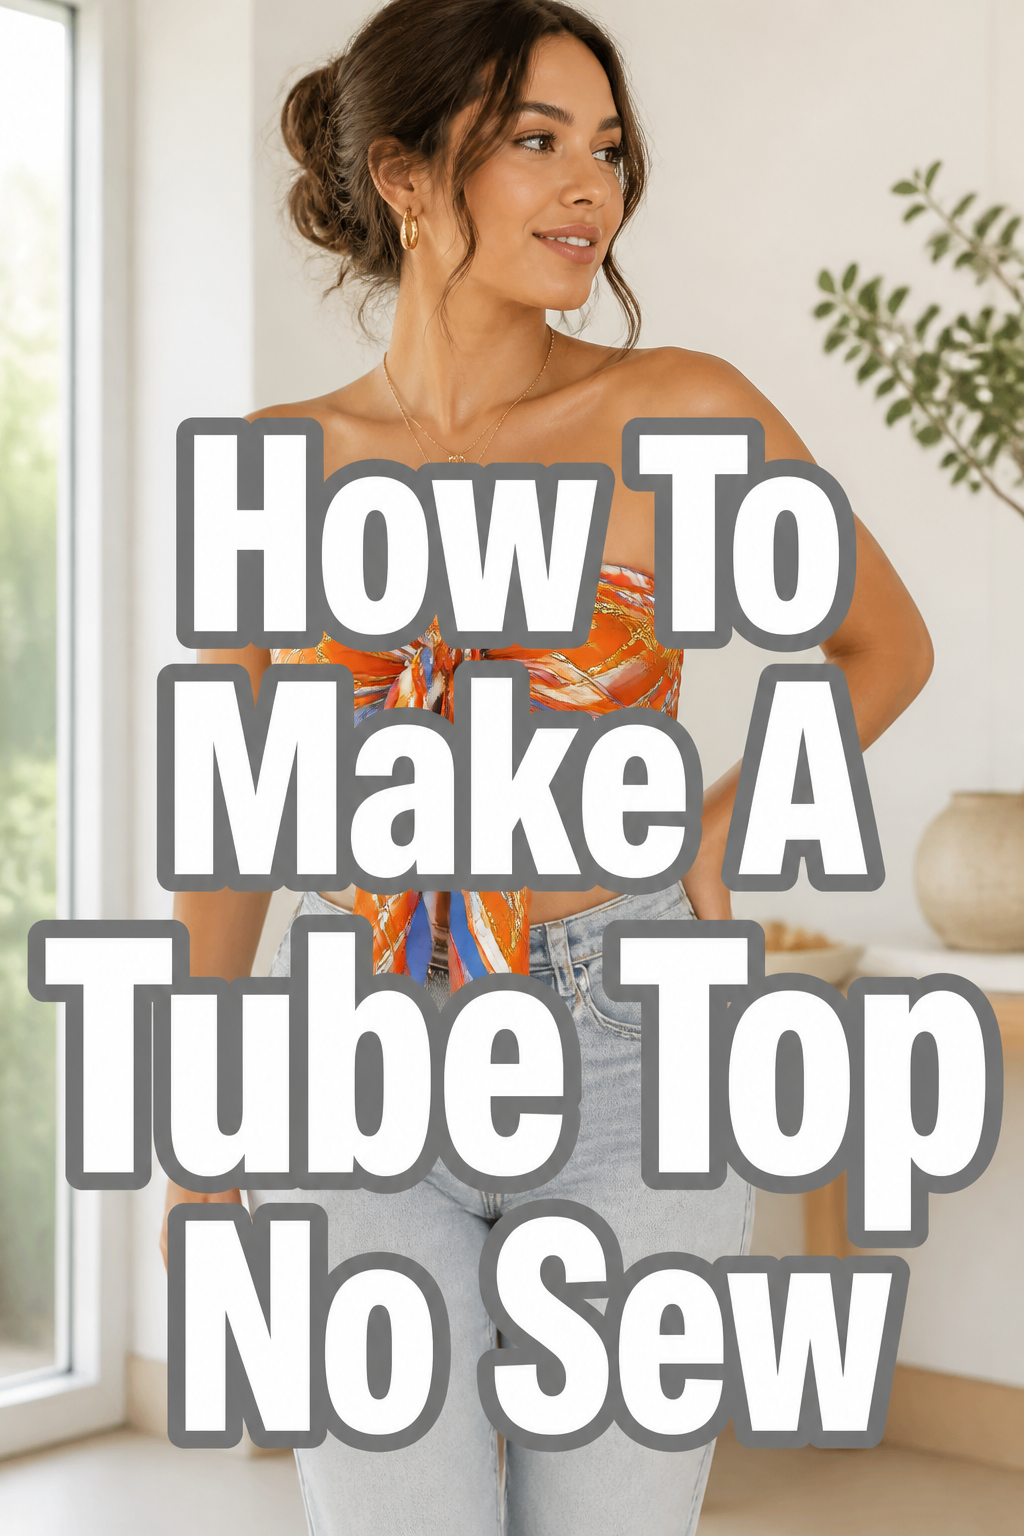
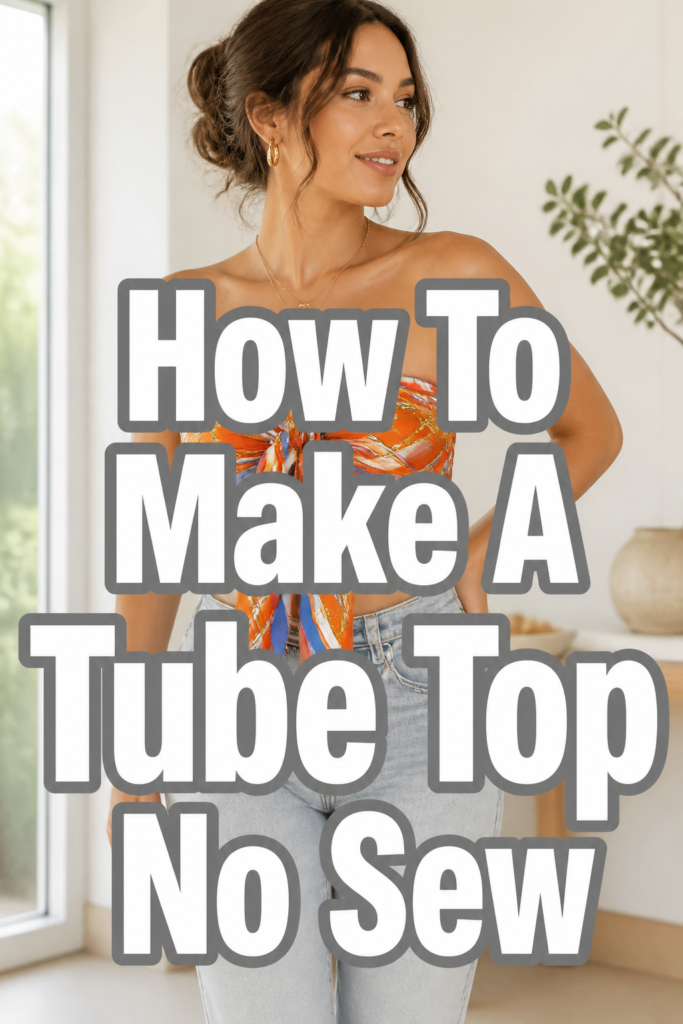
👚 How To Make A Tube Top No Sew

Beginner-friendly templates, step-by-step guides,
and weekly project ideas in your inbox.
Ever found yourself needing a specific top for an outfit, but couldn’t find it anywhere?
I’ve been there, staring at my closet, wishing I had just the right piece. That’s when I discovered the magic of no-sew fashion.
This guide comes from my own experience transforming simple fabric into a stylish tube top in minutes, and I’m here to show you exactly how.
Quick Overview
You’re about to create a versatile, custom-fit tube top without touching a needle or thread. It’s perfect for a quick outfit refresh or a creative DIY project.
- Time needed: 20-40 minutes (including prep)
- Difficulty: Beginner
- What you’ll need: Fabric, sharp scissors, measuring tape, fabric adhesive (optional)
Step-by-Step Instructions
Step 1: Choose Your Fabric Wisely
Selecting the right fabric is the most crucial part of a successful no-sew tube top. You need something with stretch and good drape.
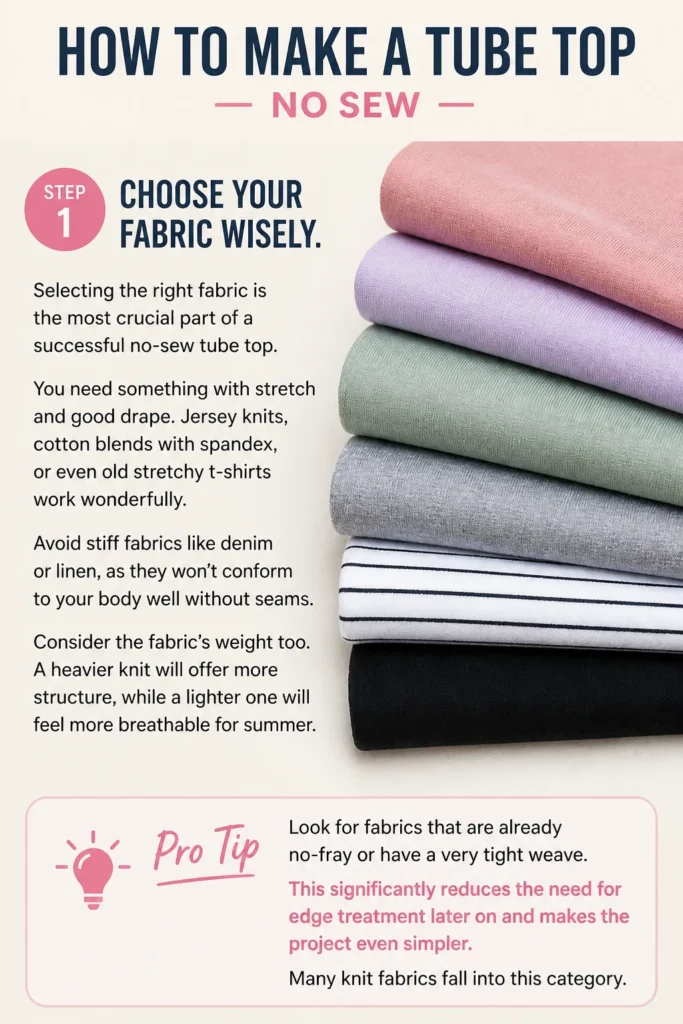
Jersey knits, cotton blends with spandex, or even old stretchy t-shirts work wonderfully. Avoid stiff fabrics like denim or linen, as they won’t conform to your body well without seams.
Consider the fabric’s weight too. A heavier knit will offer more structure, while a lighter one will feel more breathable for summer.
Pro Tip: Look for fabrics that are already “no-fray” or have a very tight weave. This significantly reduces the need for edge treatment later on and makes the project even simpler. Many knit fabrics fall into this category.
Step 2: Measure for the Perfect Fit
Accuracy here ensures your tube top stays up and feels comfortable. Grab your measuring tape.
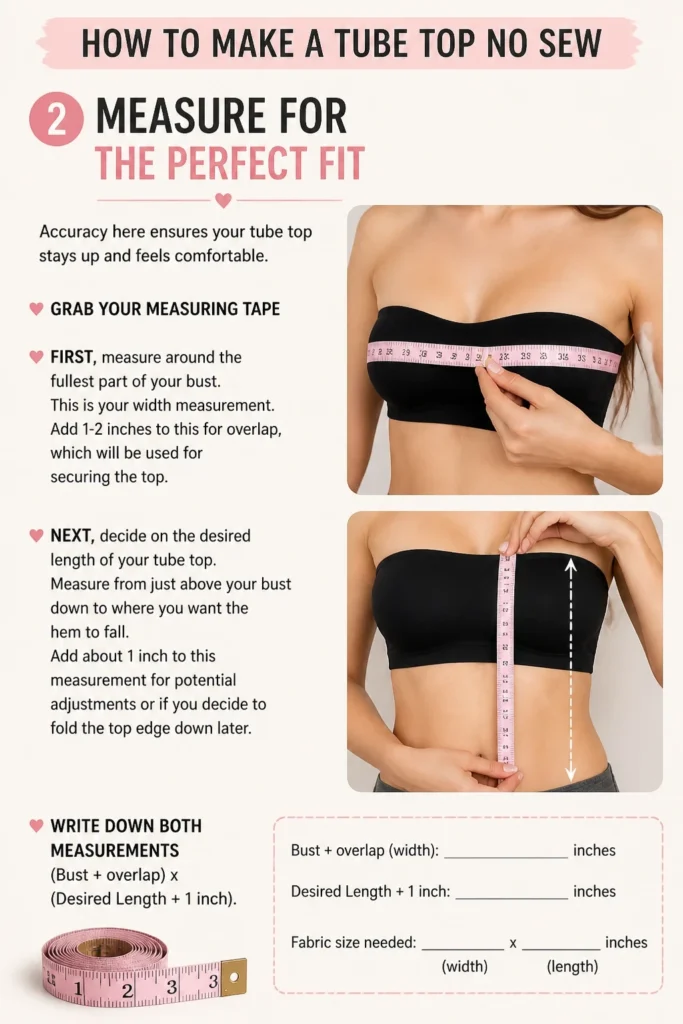
First, measure around the fullest part of your bust. This is your width measurement. Add 1-2 inches to this for overlap, which will be used for securing the top.
Next, decide on the desired length of your tube top. Measure from just above your bust down to where you want the hem to fall. Add about 1 inch to this measurement for potential adjustments or if you decide to fold the top edge down later.
Write down both measurements: (Bust + overlap) x (Desired Length + 1 inch).
Step 3: Cut Your Fabric Accurately
Lay your chosen fabric flat on a clean surface. Smooth out any wrinkles to ensure an even cut.
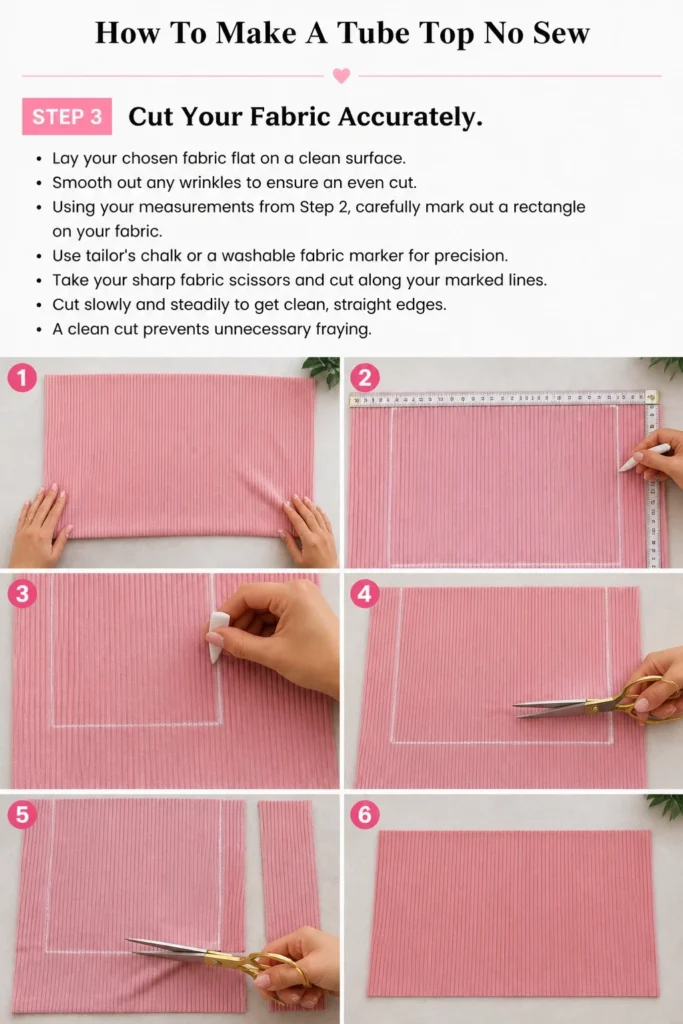
Using your measurements from Step 2, carefully mark out a rectangle on your fabric. Use tailor’s chalk or a washable fabric marker for precision.
Take your sharp fabric scissors and cut along your marked lines. Cut slowly and steadily to get clean, straight edges. A clean cut prevents unnecessary fraying.
Step 4: Prepare the Edges
Even with no-fray fabric, a little edge preparation can make your tube top look more finished and last longer. For knit fabrics, often no treatment is needed as they resist fraying.
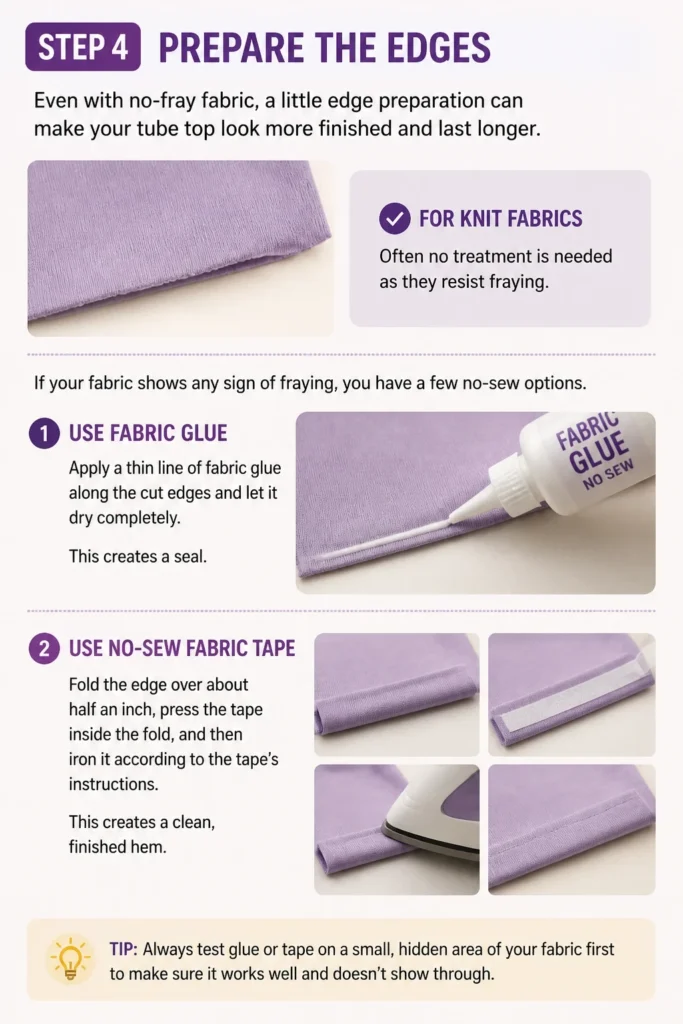
If your fabric shows any sign of fraying, you have a few no-sew options. You can apply a thin line of fabric glue along the cut edges and let it dry completely. This creates a seal.
Another option is to use no-sew fabric tape. Fold the edge over about half an inch, press the tape inside the fold, and then iron it according to the tape’s instructions. This creates a clean, finished hem.
Step 5: Create the Secure Closure
Now it’s time to bring your rectangle to life as a tube top. Wrap the fabric around your bust, with the right side of the fabric facing out.
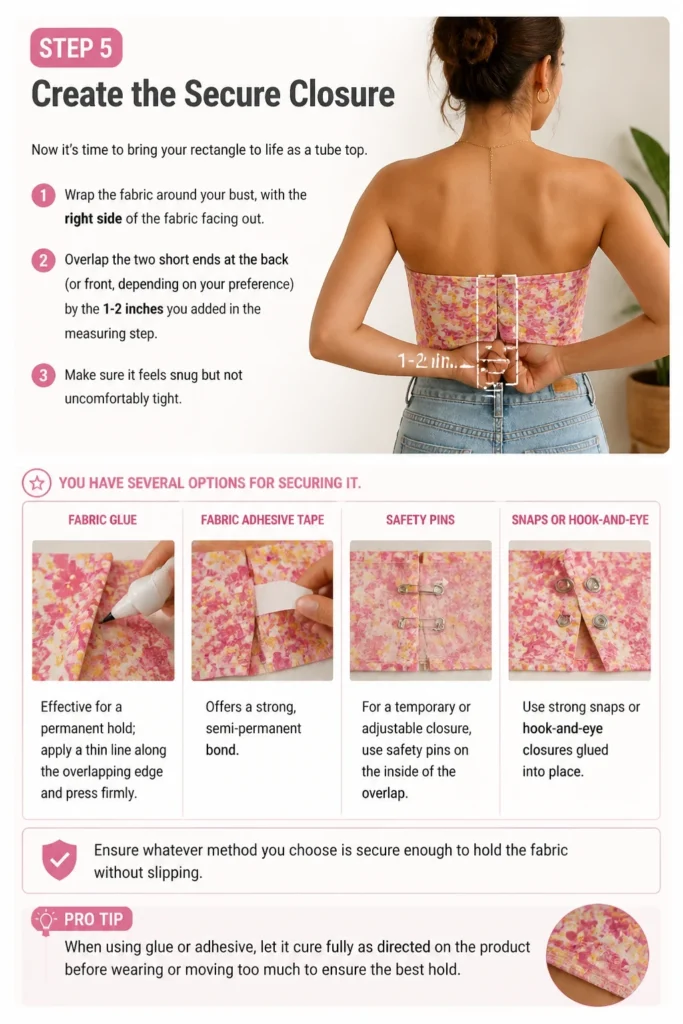
Overlap the two short ends at the back (or front, depending on your preference) by the 1-2 inches you added in the measuring step. Make sure it feels snug but not uncomfortably tight.
You have several options for securing it. Fabric glue is effective for a permanent hold; apply a thin line along the overlapping edge and press firmly. Fabric adhesive tape offers a strong, semi-permanent bond.
For a temporary or adjustable closure, consider using safety pins on the inside of the overlap, or even strong snaps or hook-and-eye closures glued into place. Ensure whatever method you choose is secure enough to hold the fabric without slipping.
Pro Tip: When using fabric glue or tape, test it on a scrap piece of your fabric first. This helps you understand drying times and how well it adheres to your specific material. Always allow ample drying time before wearing.
Step 6: Try On and Adjust
Once your chosen closure method has set, carefully try on your new tube top. Pay attention to how it feels around your bust and if the length is as desired.
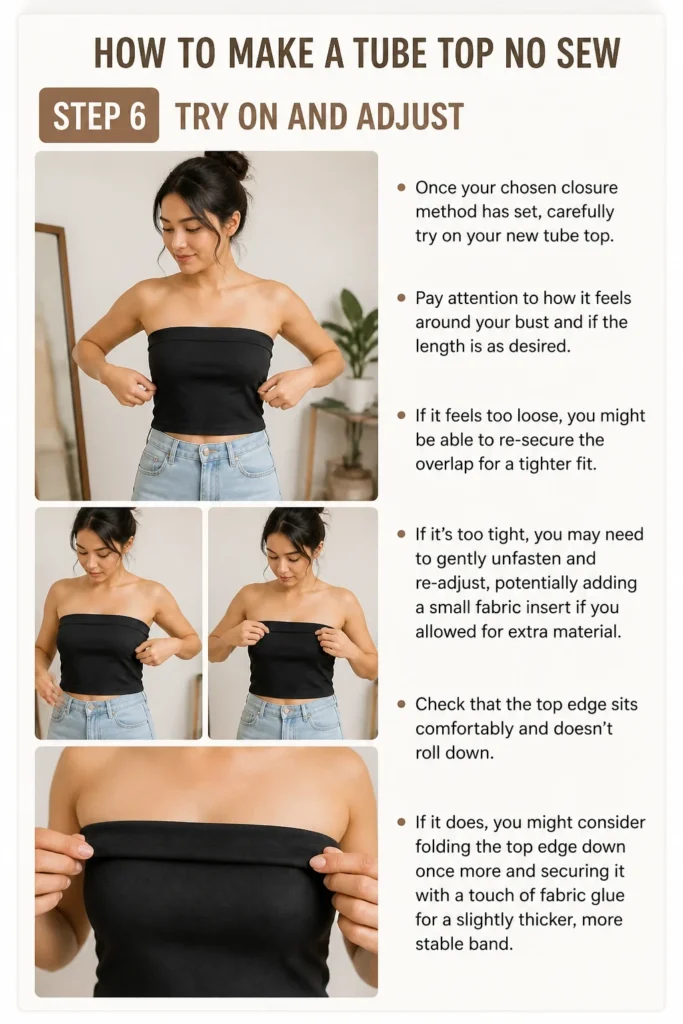
If it feels too loose, you might be able to re-secure the overlap for a tighter fit. If it’s too tight, you may need to gently unfasten and re-adjust, potentially adding a small fabric insert if you allowed for extra material.
Check that the top edge sits comfortably and doesn’t roll down. If it does, you might consider folding the top edge down once more and securing it with a touch of fabric glue for a slightly thicker, more stable band.
Step 7: Style Your New Tube Top
Your no-sew tube top is complete! Now comes the fun part: styling it. This versatile piece can be dressed up or down.
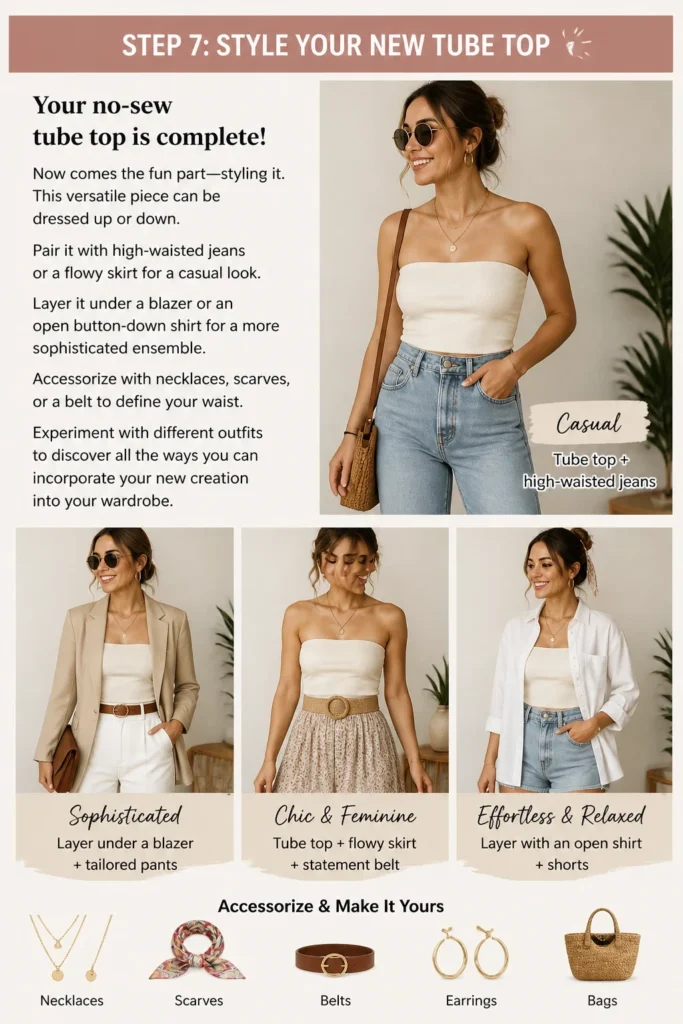
Pair it with high-waisted jeans or a flowy skirt for a casual look. Layer it under a blazer or an open button-down shirt for a more sophisticated ensemble.
Accessorize with necklaces, scarves, or a belt to define your waist. Experiment with different outfits to discover all the ways you can incorporate your new creation into your wardrobe.
Common Mistakes to Avoid
Picking the Wrong Fabric
Choosing a fabric that lacks stretch or is prone to heavy fraying can lead to frustration. Stiff fabrics won’t conform to your body, making the top uncomfortable and difficult to secure without sewing. Highly fraying fabrics will require extensive edge treatment, adding complexity to a project meant to be simple.
Inaccurate Measuring
Underestimating your bust measurement can result in a tube top that’s too tight and constantly rolls down. Overestimating can make it too loose and prone to slipping. Always measure carefully and add the recommended overlap for a secure, comfortable fit. Double-check your numbers before cutting.
Forgetting Edge Treatment
Skipping edge treatment on fabrics that fray will quickly lead to a messy, unraveling garment. Even if your fabric is mostly no-fray, a little attention to the edges ensures durability and a polished look. A quick swipe of fabric glue or a simple fold with tape can make a big difference.
Relying on Temporary Fasteners Alone
While safety pins are great for a quick fix or trying on, relying solely on them for a long-term closure can be risky. They can come undone, poke your skin, or even damage the fabric. For a truly secure and lasting tube top, use fabric glue, strong fabric tape, or properly installed snaps or hook-and-eye closures.
Troubleshooting
Top Keeps Slipping Down
If your tube top constantly slides down, it’s likely due to one of two reasons: the fabric isn’t stretchy enough or the fit around your bust is too loose. Ensure your fabric has good recovery (snaps back into shape). For a quick fix, try adding a strip of non-slip elastic or silicone grip tape to the inside top edge using fabric glue or tape. You can also try re-securing the overlap a bit tighter.
Edges Fraying
If your fabric’s edges are unraveling despite initial treatment, the adhesive might not have been strong enough, or the fabric is particularly prone to fraying. Apply a second, thin layer of fabric glue, ensuring it fully saturates the edge. Alternatively, consider using a wider no-sew fabric tape, folding the edge over twice for a double hem, and securing it firmly.
Fabric Feels Too Tight/Loose
A tube top that feels uncomfortable usually points to an inaccurate initial measurement. If it’s too tight, you might need to carefully unfasten the overlap and re-secure it with less overlap, potentially adding a small fabric extension if needed. If it’s too loose, unfasten and secure it with a larger overlap to tighten the fit. Always try on and adjust before the adhesive fully cures if possible.
Key Takeaways
- Choose stretchy, no-fray fabrics like jersey knits for best results.
- Accurate measuring is essential for a comfortable and secure fit.
- Use sharp scissors for clean cuts to minimize fraying.
- Secure edges with fabric glue or no-sew tape for a polished finish.
- Opt for fabric glue or strong fabric tape for a durable closure.
- Always try on and adjust your tube top before the adhesive fully sets.
- This no-sew project offers a quick, customizable, and stylish wardrobe addition.
Frequently Asked Questions
What kind of fabric is best for a no-sew tube top?
The best fabrics are those with a good amount of stretch and excellent recovery, such as jersey knit, spandex blends, or cotton lycra. These fabrics naturally resist fraying and conform well to the body, ensuring a comfortable and secure fit without the need for traditional seams.
Can I wash my no-sew tube top?
Yes, you can usually wash your no-sew tube top, but it depends on the adhesive used. If you used fabric glue, check if it’s machine washable once cured. For fabric tape, follow the product instructions. Generally, hand washing in cold water and air drying will help preserve the integrity of the adhesive and the garment for longer.
How can I make it more secure?
To make your tube top more secure, ensure you’ve used a strong, permanent fabric adhesive for the overlap. You can also add a thin strip of non-slip elastic or silicone grip tape to the inside of the top edge. For extra confidence, consider attaching a few small snaps or hook-and-eye closures to the inside of the overlap after the main adhesive has dried.
Can men wear tube tops too?
Absolutely! Fashion is about personal expression, and tube tops are a versatile garment. Anyone can wear a tube top, regardless of gender. The principles of measuring and construction remain the same, focusing on comfort and fit around the chest and desired length.
Our Top Recommended Finds
- Sharp Fabric Shears: A good pair of fabric shears makes clean cuts, which are vital for a neat no-sew project and minimizing fraying.
- Strong Fabric Glue: A reliable, flexible fabric glue ensures a durable bond for your tube top, holding the overlap securely and allowing for some stretch.
- No-Sew Fabric Tape: For those who prefer an iron-on solution, a good quality no-sew fabric tape provides a clean, flat finish for hems and overlaps.
Your Style Canvas Awaits
You’ve just unlocked a fantastic skill: creating custom fashion with minimal effort. This no-sew tube top is more than just a garment; it’s a testament to your creativity and resourcefulness.
Think of all the possibilities! You can make them in different colors, patterns, and lengths. You can even experiment with adding embellishments like fringe or appliques.
Don’t stop here. Use this newfound confidence to explore other no-sew projects, from skirts to headbands. Grab some fabric today and let your imagination lead the way to a wardrobe that truly reflects you.
Beginner-friendly templates, step-by-step guides,
and weekly project ideas in your inbox.