🎁 How To Fold Tissue Paper For Gift Bags

Beginner-friendly templates, step-by-step guides,
and weekly project ideas in your inbox.
I remember my first holiday season working at a high-end boutique in the city.
My manager spent an entire afternoon teaching me that a gift bag isn’t just a container; it is a presentation that starts with the tissue paper.
I have since folded thousands of sheets, and I can tell you that the right technique makes even a budget-friendly gift look like a luxury purchase.
Quick Overview
Giving a gift is an art form that begins before the recipient even sees what is inside.
Using the right folding method ensures your gift looks professional, intentional, and festive.
- Time needed: 5 to 10 minutes
- Difficulty: Beginner
- What you’ll need: High-quality tissue paper, a gift bag, and your gift item
Step-by-Step Instructions
Step 1: Select Your Paper and Bag
Choose tissue paper that complements the color of your gift bag.
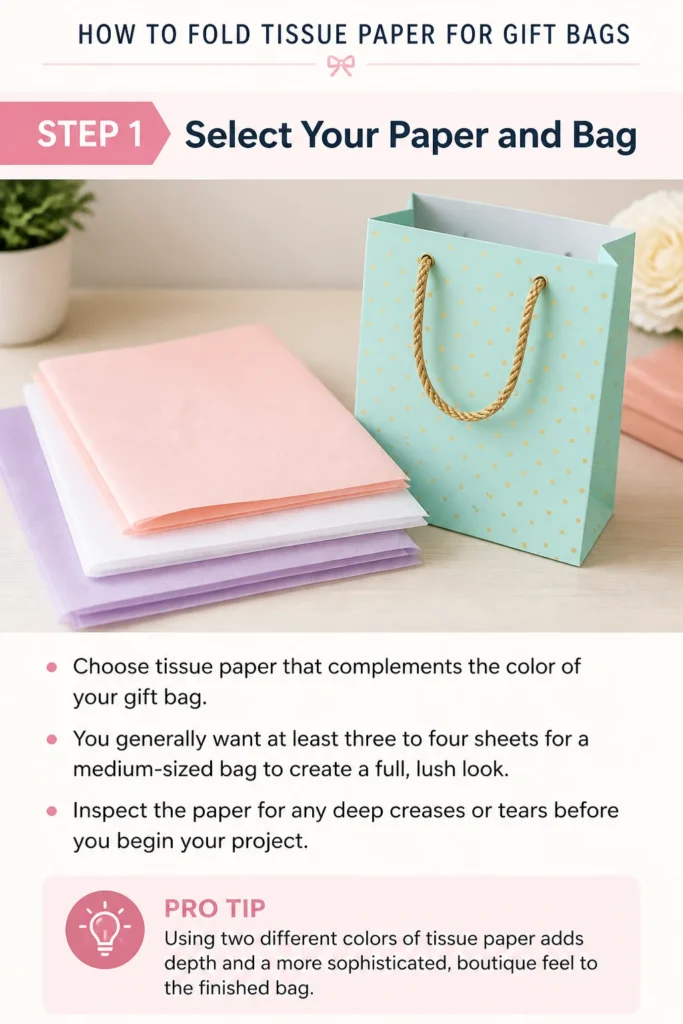
You generally want at least three to four sheets for a medium-sized bag to create a full, lush look.
Inspect the paper for any deep creases or tears before you begin your project.
Pro Tip: Using two different colors of tissue paper adds depth and a more sophisticated, “boutique” feel to the finished bag.
Step 2: Prepare Your Workspace
Clear a large, flat surface like a dining table or a clean floor space.
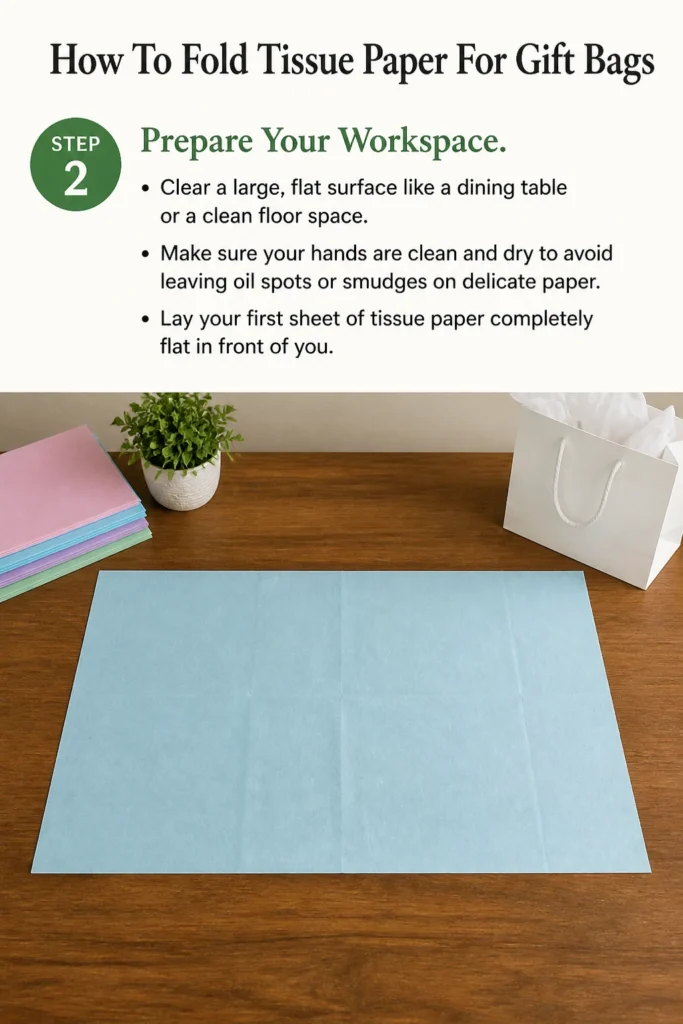
Make sure your hands are clean and dry to avoid leaving oil spots or smudges on delicate paper.
Lay your first sheet of tissue paper completely flat in front of you.
Step 3: The Classic Pinch Technique
Locate the exact center of the tissue paper sheet by eyeing the middle point.
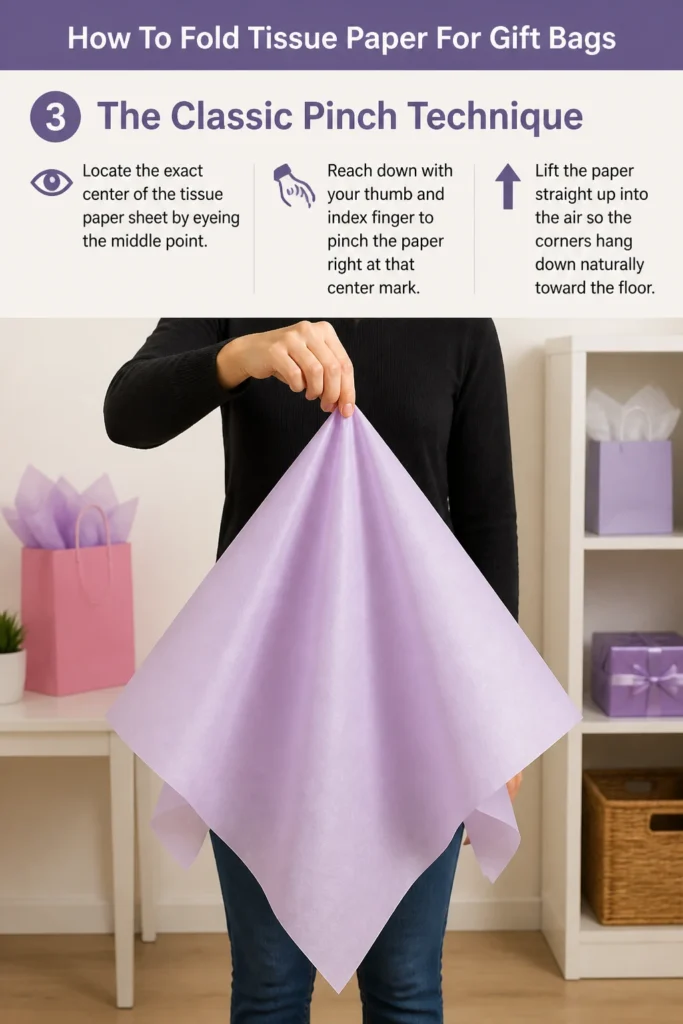
Reach down with your thumb and index finger to pinch the paper right at that center mark.
Lift the paper straight up into the air so the corners hang down naturally toward the floor.
Step 4: Smooth and Form the Cone
Use your other hand to gently slide down the length of the paper from your pinch point.
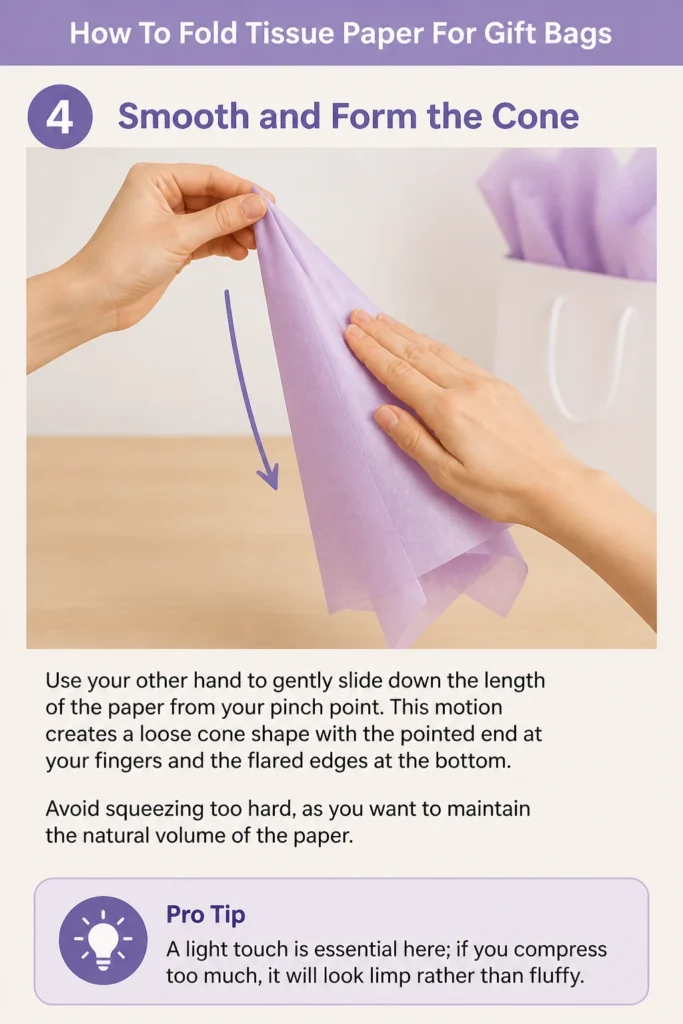
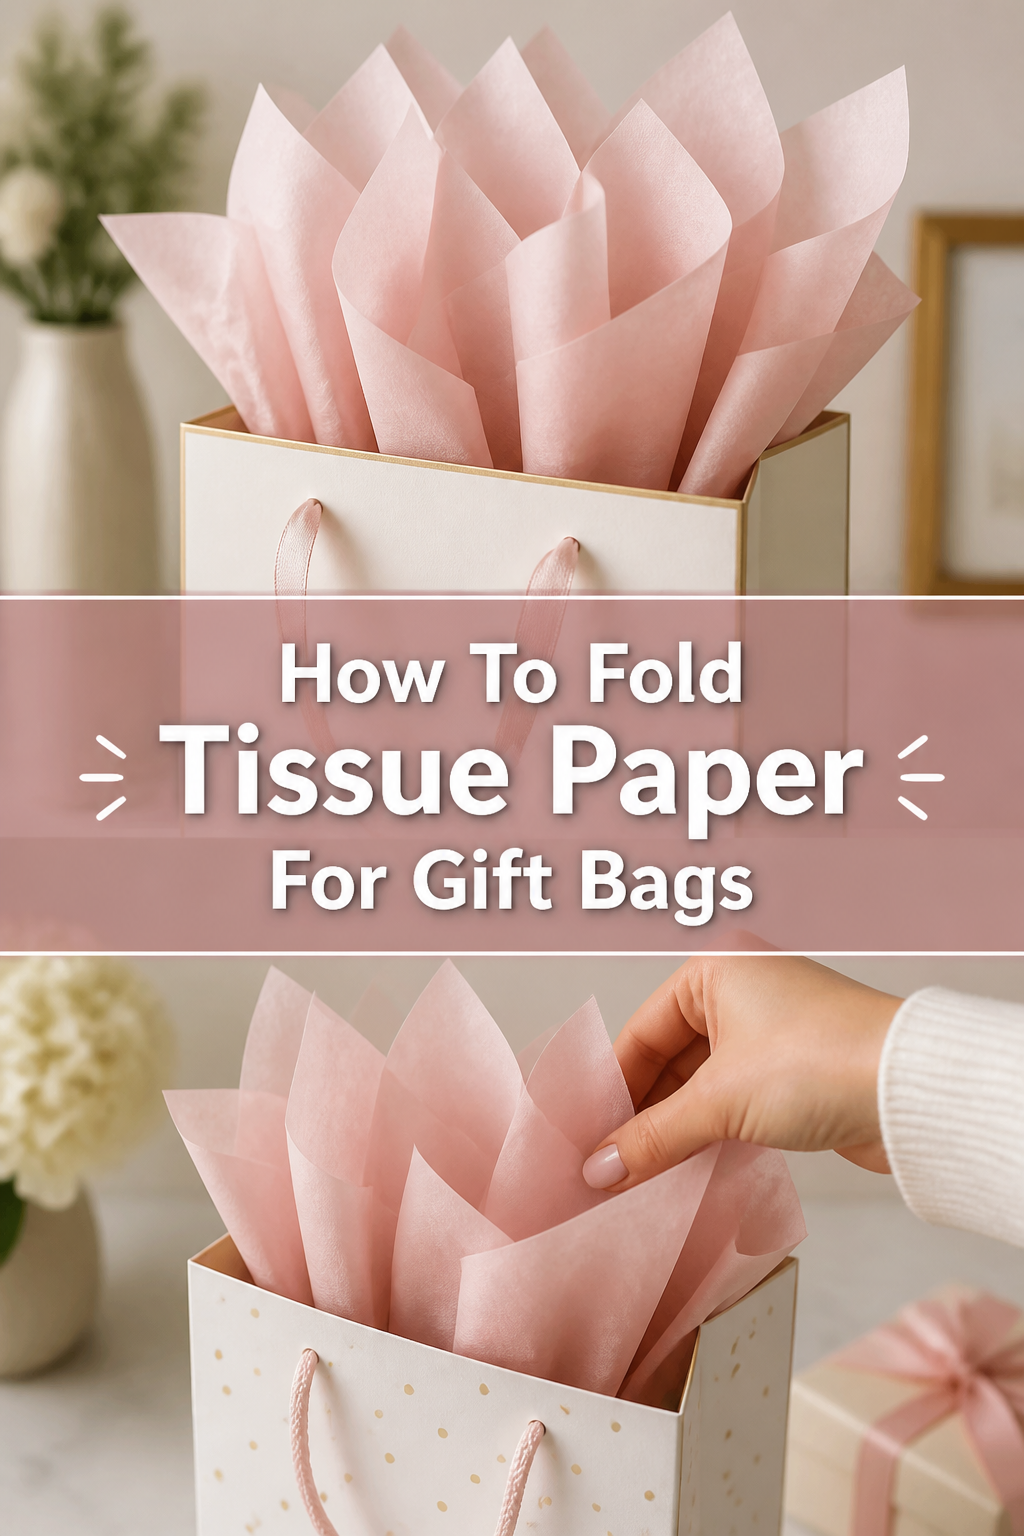
This motion creates a loose “cone” shape with the pointed end at your fingers and the flared edges at the bottom.
Avoid squeezing too hard, as you want to maintain the natural volume of the paper.
Pro Tip: A light touch is essential here; if you compress the paper too much, it will look limp rather than fluffy.
Step 5: The “Flick” and Fluff
Give the paper a gentle shake or a quick flick of the wrist while holding the pinched end.
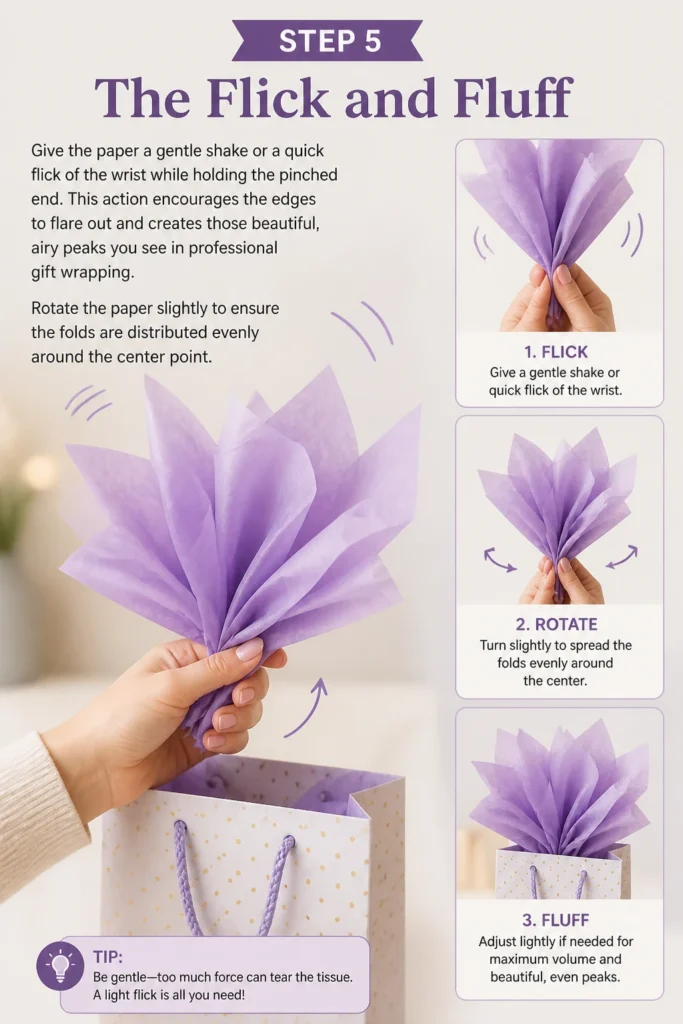
This action encourages the edges to flare out and creates those beautiful, airy peaks you see in professional gift wrapping.
Rotate the paper slightly to ensure the folds are distributed evenly around the center point.
Step 6: Place the Paper in the Bag
Insert the pinched end of the tissue paper into the gift bag first.
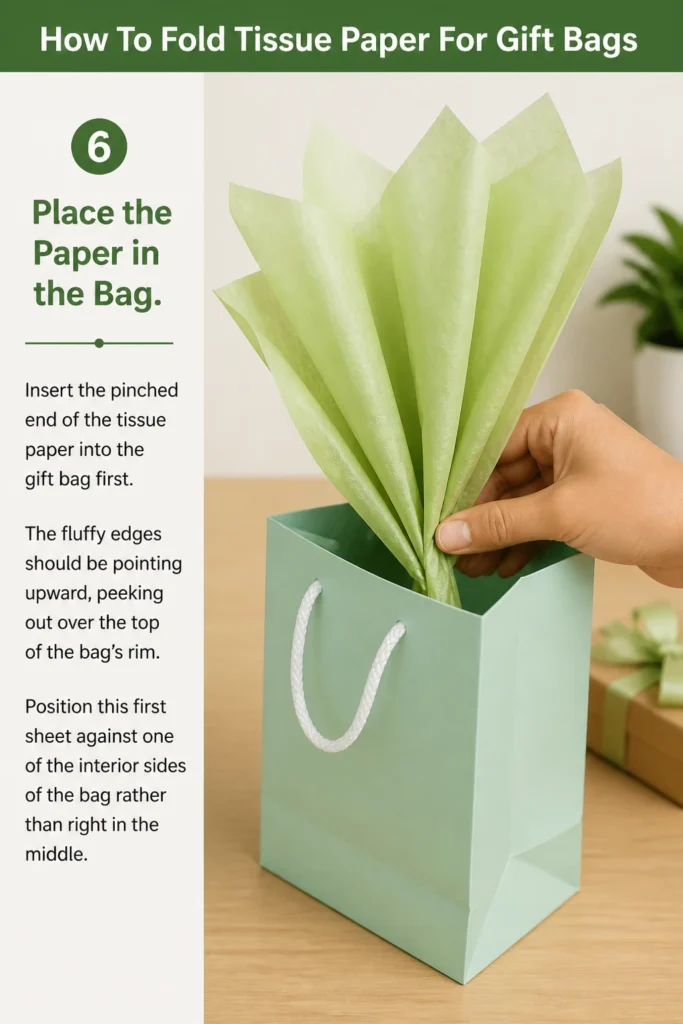
The “fluffy” edges should be pointing upward, peeking out over the top of the bag’s rim.
Position this first sheet against one of the interior sides of the bag rather than right in the middle.
Step 7: Layer for Maximum Volume
Repeat the pinching and fluffing process with your remaining sheets of tissue paper.
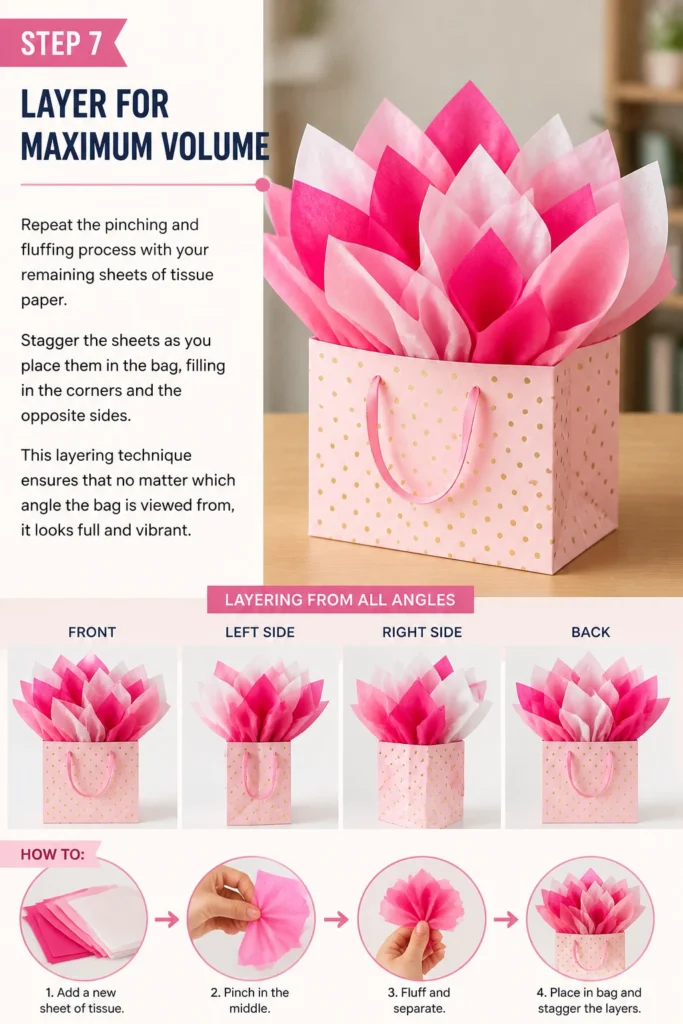
Stagger the sheets as you place them in the bag, filling in the corners and the opposite sides.
This layering technique ensures that no matter which angle the bag is viewed from, it looks full and vibrant.
Step 8: Secure the Gift
Nestle your gift item into the center of the bag, surrounded by the bottom points of the tissue paper.
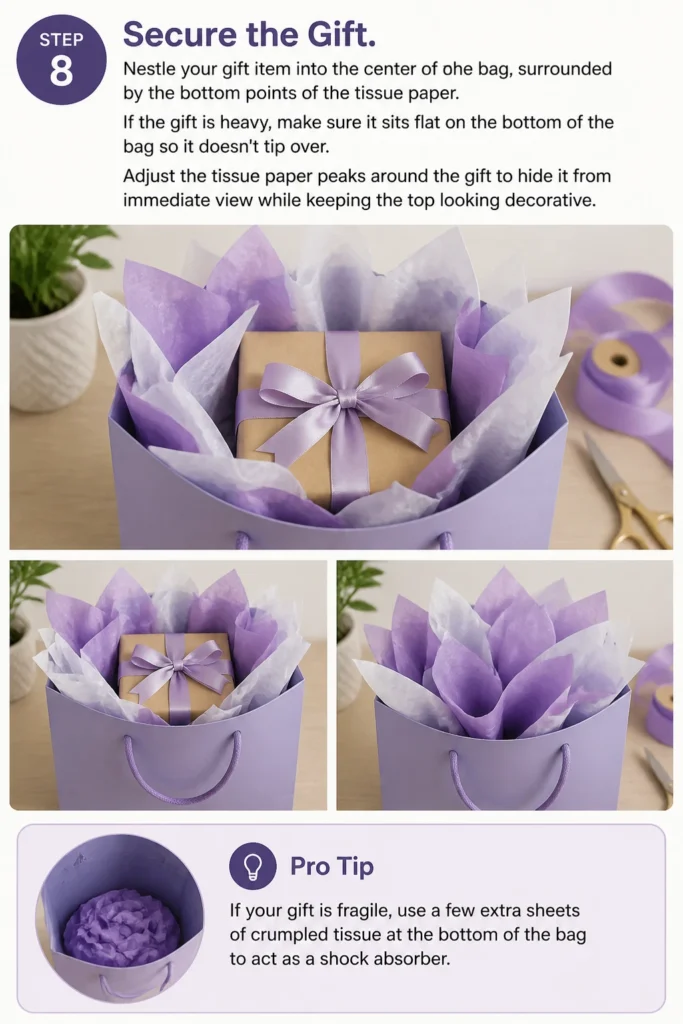
If the gift is heavy, make sure it sits flat on the bottom of the bag so it doesn’t tip over.
Adjust the tissue paper peaks around the gift to hide it from immediate view while keeping the top looking decorative.
Pro Tip: If your gift is fragile, use a few extra sheets of crumpled tissue at the bottom of the bag to act as a shock absorber.
Step 9: Final Aesthetic Adjustments
Tug gently on individual peaks of the tissue paper to create a balanced, symmetrical look.
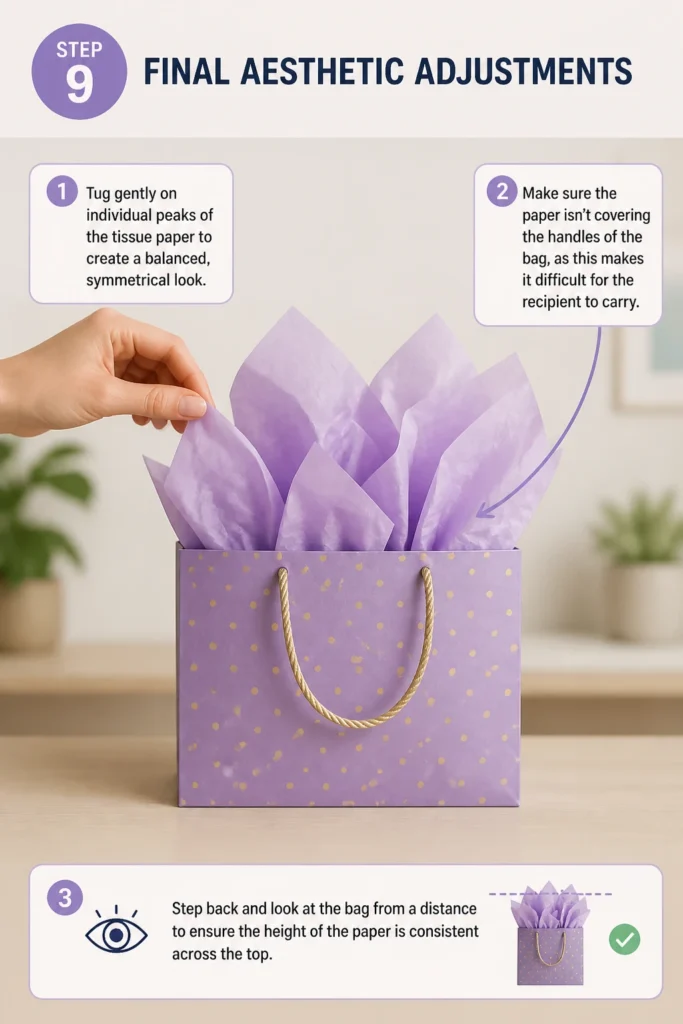
Make sure the paper isn’t covering the handles of the bag, as this makes it difficult for the recipient to carry.
Step back and look at the bag from a distance to ensure the height of the paper is consistent across the top.
Common Mistakes to Avoid
Using Too Little Paper
One of the most frequent errors is trying to save money by using only one or two sheets of paper.
This often results in a “sunken” look where the paper falls into the bag and disappears.
To fix this, always use enough sheets to create a structural base that supports the decorative peaks at the top.
The “Stuffing” Method
Many people simply crumple the paper into a ball and shove it into the bag.
This creates a messy, wrinkled appearance that looks rushed and unprofessional.
The pinch-and-lift method is the only way to get those crisp, clean points that signify a well-wrapped gift.
Ignoring Paper Orientation
If you place the paper in the bag with the pinched end facing up, it will look like a bunch of sticks poking out.
Always ensure the “blooming” side of the fold is what the recipient sees at the top of the bag.
The structural, pinched part of the paper should always be hidden inside the bag with the gift.
Over-Handling the Tissue
Tissue paper is incredibly sensitive to moisture and repeated folding.
The more you touch and move the paper, the more it loses its “crunch” and starts to look soft and worn.
Try to get the fold right on the first or second attempt to keep the paper looking brand new.
Troubleshooting
The Paper Keeps Falling Into the Bag
This usually happens when the gift bag is much larger than the gift itself.
You can solve this by loosely crumpling a few “filler” sheets and placing them at the bottom of the bag first.
This creates a platform for your decorative sheets to sit on, keeping them high and visible.
The Peaks Look Uneven or Messy
If your peaks look like they are leaning to one side, you may have pinched the paper off-center.
Take the sheet out, flatten it gently, and try to find the true center again.
You can also use a small piece of clear tape inside the bag to hold a specific sheet against the side if it won’t stay put.
The Paper Is Too Translucent
Sometimes cheaper tissue paper allows the recipient to see the gift right through the folds.
The best solution is to double up your sheets, placing two pieces of paper directly on top of each other before you pinch.
This increases the opacity and makes the colors look much more vibrant and solid.
Key Takeaways
- Always use the “Pinch and Lift” method for a professional, flared look.
- Layer multiple sheets to create volume and hide the gift effectively.
- Choose complementary colors to elevate the visual appeal of the bag.
- Minimize handling to keep the tissue paper crisp and wrinkle-free.
- Use filler paper at the bottom of the bag to support the decorative top layers.
- Check your work from all angles to ensure a balanced and symmetrical presentation.
Frequently Asked Questions
How many sheets of tissue paper should I use per bag?
For a small jewelry-sized bag, two sheets are usually sufficient.
For a medium or large bag, you should aim for four to six sheets to ensure the bag looks full and the gift is well-hidden.
Can I reuse tissue paper from old gifts?
You can reuse it if it isn’t heavily wrinkled or torn.
If the paper is slightly wrinkled, you can sometimes smooth it out with your hands or hide the wrinkles by using the “crumple” method as a base layer.
What is the best way to store tissue paper so it stays flat?
Store your tissue paper in its original packaging or a dedicated flat plastic bin.
Avoid folding the sheets in half for storage, as the permanent crease will be visible when you try to use it for a gift.
Should I fold the tissue paper or just stuff it in?
You should never “stuff” the paper; instead, use the pinch method described in this guide.
Folding the paper into a square or rectangle and placing it inside is acceptable for clothing boxes, but for bags, the pinched “bloom” look is the standard.
Our Top Recommended Finds
- Premium Acid-Free Tissue Paper: This type of paper won’t bleed color onto the gift and maintains its crispness longer than standard paper.
- Assorted Metallic Tissue Packs: Gold and silver accents can make any plain gift bag look expensive and festive.
- Bone Folder Tool: While not strictly necessary for bags, this tool helps create perfect creases if you decide to use tissue paper for lining boxes.
Elevate Your Gifting Game Today
Now that you have mastered the boutique-style fold, you can turn every gift-giving occasion into a memorable experience.
The small effort of properly folding your tissue paper shows the recipient that you cared about every detail of their present.
Try experimenting with different color combinations, such as navy and gold or blush and cream, to find a signature style that reflects your personality.
If you enjoyed this guide, consider looking into how to tie the perfect ribbon bow to finish off your gift bag presentation.
Grab a stack of paper and a bag right now to practice these steps; you will be surprised at how quickly it becomes second nature.
Beginner-friendly templates, step-by-step guides,
and weekly project ideas in your inbox.