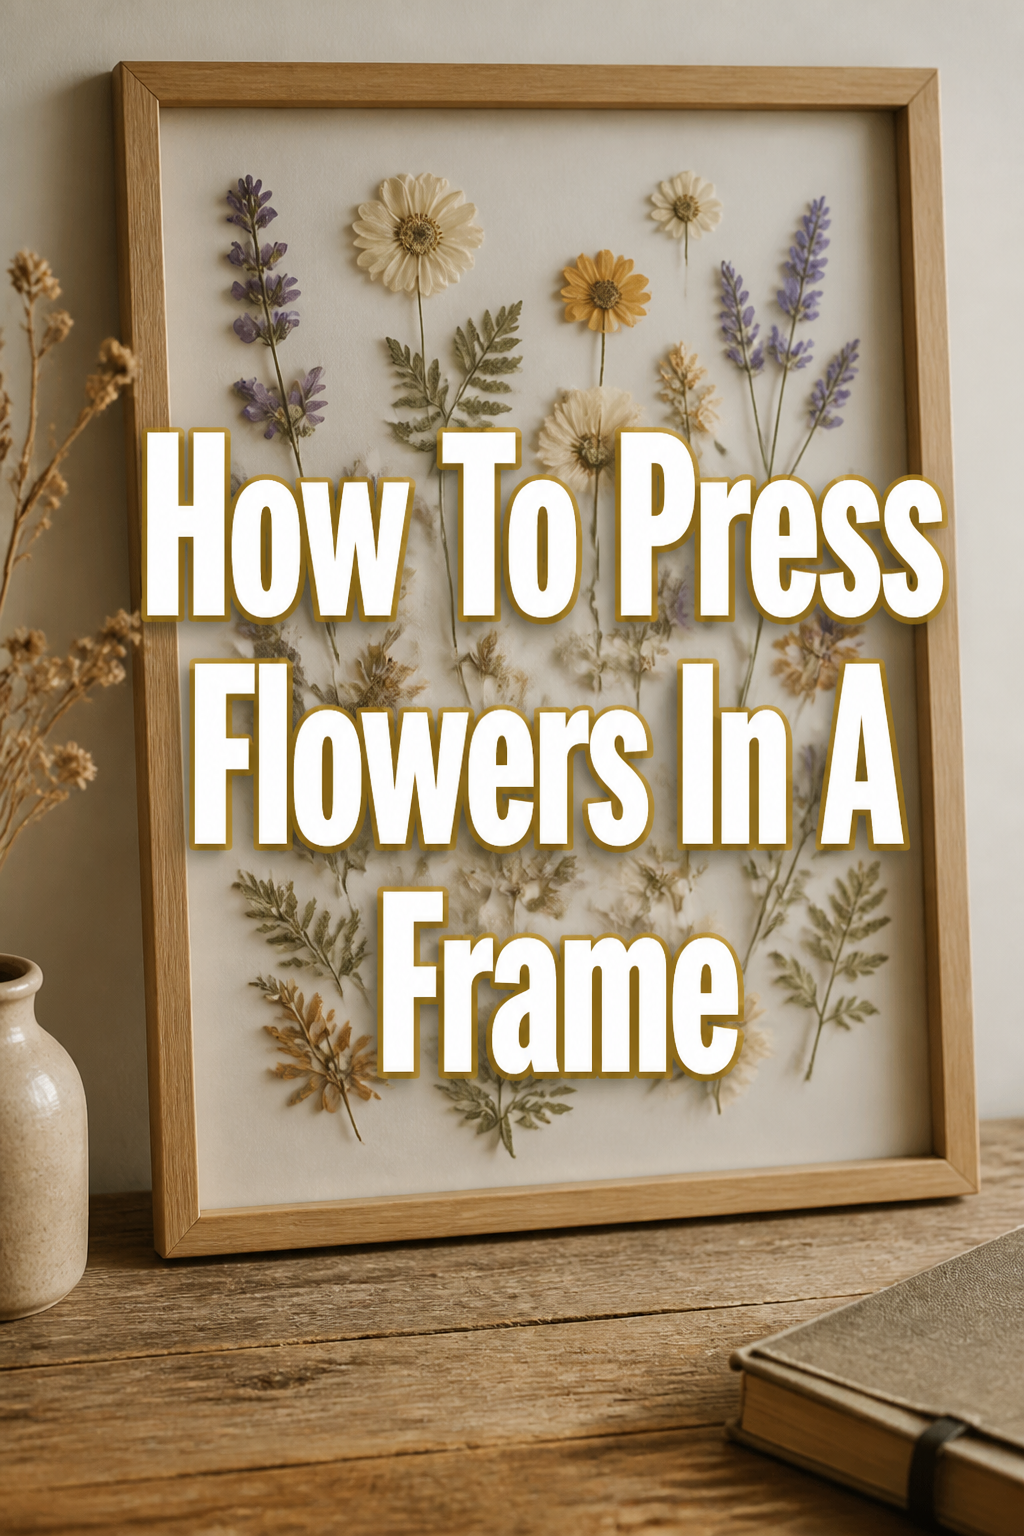
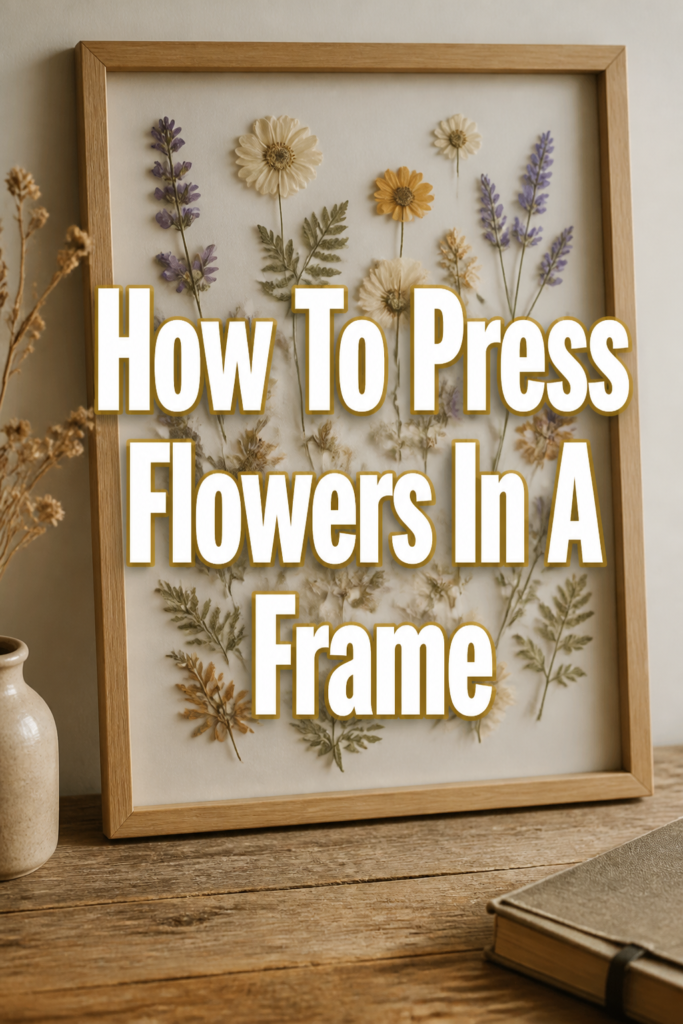
🌸 How To Press Flowers In A Frame

Beginner-friendly templates, step-by-step guides,
and weekly project ideas in your inbox.
My journey into preserving botanical beauty began years ago, a simple desire to hold onto a fleeting moment in nature. Each pressed flower holds a story, a memory, or a special significance.
Learning to press and frame flowers transformed how I viewed everyday blooms. This guide shares my tried-and-true methods, ensuring your creations are both beautiful and lasting. You can trust this guide to walk you through each step, making the process enjoyable and rewarding.
Quick Overview
Transforming fresh flowers into framed art is a delightful process, allowing you to capture nature’s delicate beauty forever. You’ll learn how to properly press flowers and then arrange them into a stunning display.
- Time needed: 1-4 weeks (for pressing), 1-2 hours (for framing)
- Difficulty: Beginner
- What you’ll need: Fresh flowers, flower press or heavy books, absorbent paper (blotting paper, newspaper), acid-free cardstock, picture frame (with or without mat), craft glue (PVA or clear-drying), fine-tipped tweezers, scissors, clean cloth.
Step-by-Step Instructions
Step 1: Choose Your Blooms Wisely
Selecting the right flowers is the foundation of successful pressing. Opt for fresh, healthy flowers that are free from blemishes or excess moisture. Flowers that are naturally flatter tend to press more easily and retain their shape better.
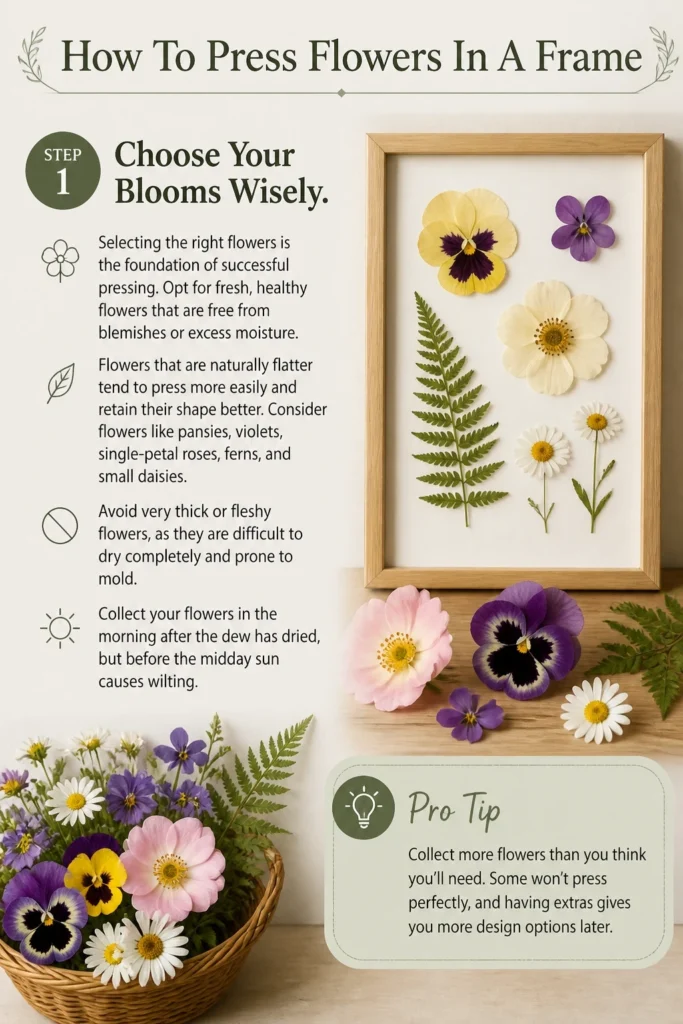
Consider flowers like pansies, violets, single-petal roses, ferns, and small daisies. Avoid very thick or fleshy flowers, as they are difficult to dry completely and prone to mold. Collect your flowers in the morning after the dew has dried, but before the midday sun causes wilting.
Pro Tip: Collect more flowers than you think you’ll need. Some won’t press perfectly, and having extras gives you more design options later.
Step 2: Prepare Your Pressing Station
Before you begin pressing, gather all your necessary materials. This includes your flower press or a stack of heavy books, absorbent paper, and your chosen flowers. Good preparation makes the process smooth and efficient.
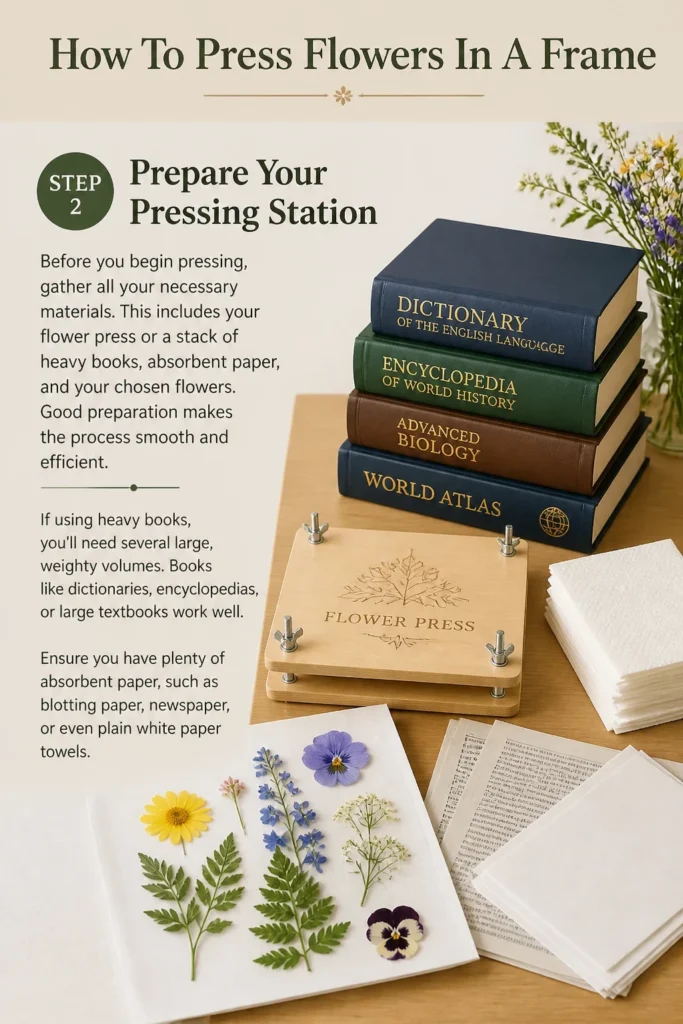
If using heavy books, you’ll need several large, weighty volumes. Books like dictionaries, encyclopedias, or large textbooks work well. Ensure you have plenty of absorbent paper, such as blotting paper, newspaper, or even plain white paper towels.
Step 3: Arrange Flowers for Pressing
Carefully place your chosen flowers between sheets of absorbent paper. Lay them flat, ensuring petals and leaves are arranged exactly how you want them to appear in the final frame. Avoid overcrowding the paper, as this can hinder proper drying.
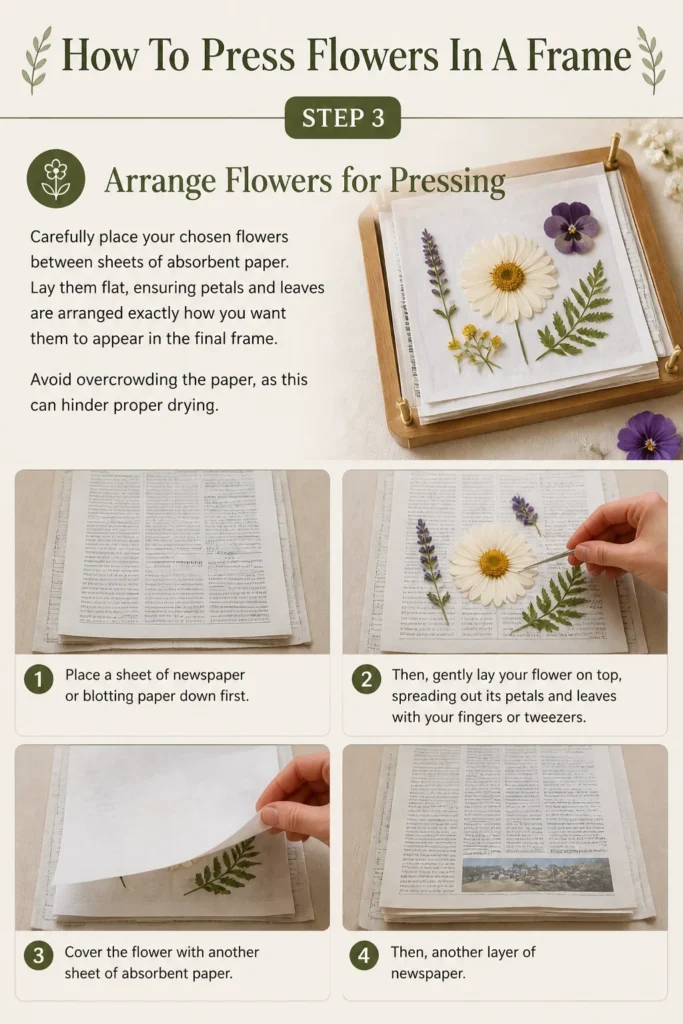
Place a sheet of newspaper or blotting paper down first. Then, gently lay your flower on top, spreading out its petals and leaves with your fingers or tweezers. Cover the flower with another sheet of absorbent paper, then another layer of newspaper.
Step 4: Begin the Pressing Process
Once your flowers are arranged between the paper layers, it’s time to apply pressure. If using a flower press, tighten the screws firmly but gently. For books, stack several heavy books on top of your arranged layers.
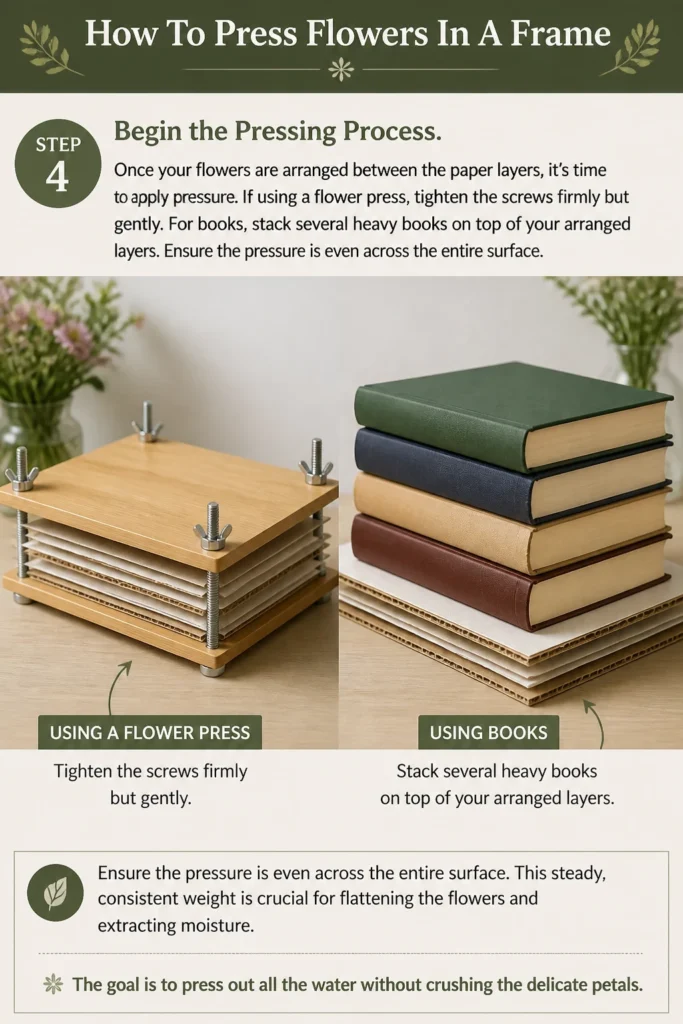
Ensure the pressure is even across the entire surface. This steady, consistent weight is crucial for flattening the flowers and extracting moisture. The goal is to press out all the water without crushing the delicate petals.
Step 5: Check on Your Pressed Flowers
Patience is a virtue when pressing flowers. After about 3-5 days, carefully open your press or lift your books to check on the flowers. At this stage, you might need to replace the damp absorbent paper with fresh, dry sheets.
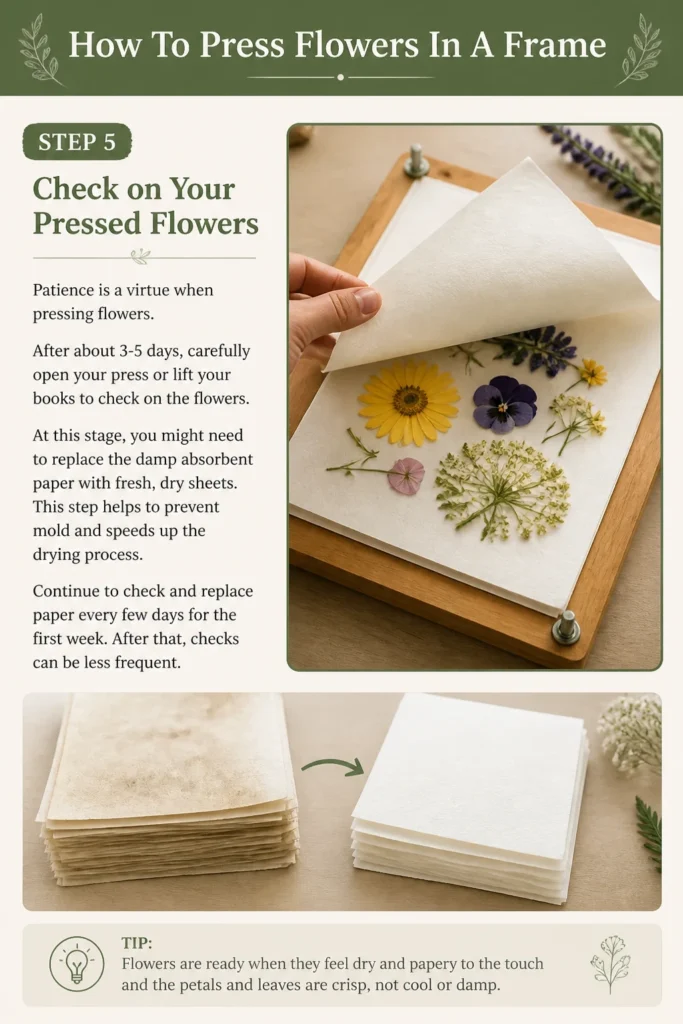
This step helps to prevent mold and speeds up the drying process. Continue to check and replace paper every few days for the first week. After that, checks can be less frequent.
Step 6: Determine When Flowers Are Ready
Your flowers are fully pressed and dry when they feel papery and stiff to the touch. They should no longer feel cool or damp. The drying process typically takes between one to four weeks, depending on the flower’s thickness and moisture content.
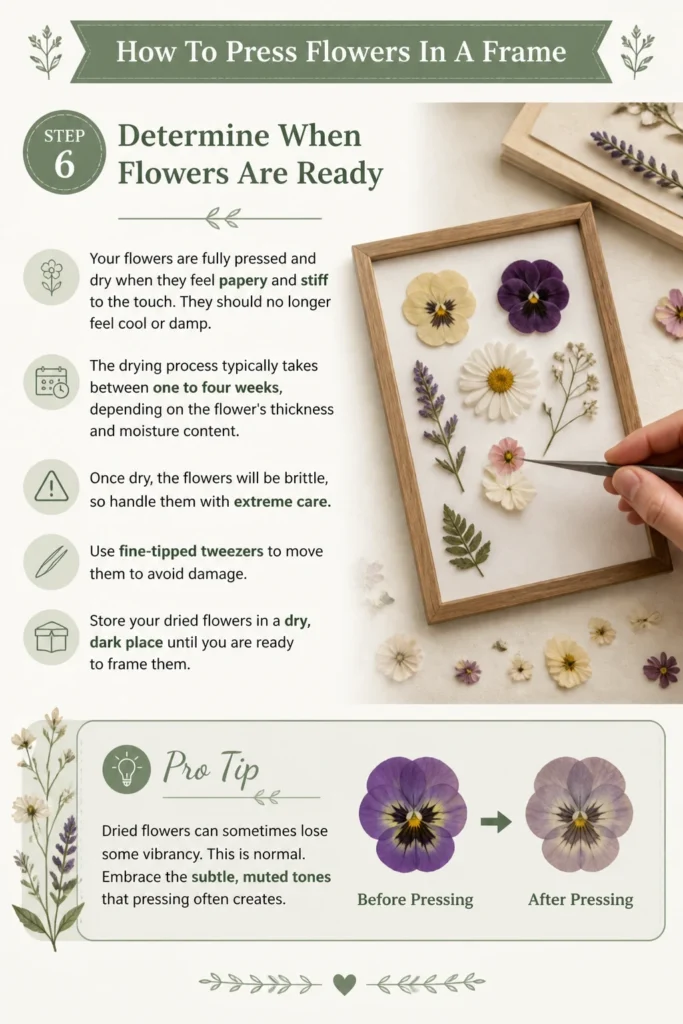
Once dry, the flowers will be brittle, so handle them with extreme care. Use fine-tipped tweezers to move them to avoid damage. Store your dried flowers in a dry, dark place until you are ready to frame them.
Pro Tip: Dried flowers can sometimes lose some vibrancy. This is normal. Embrace the subtle, muted tones that pressing often creates.
Step 7: Gather Your Framing Supplies
With your beautiful pressed flowers ready, it’s time to prepare for framing. You’ll need your chosen picture frame, a piece of acid-free cardstock for the background, craft glue that dries clear, and fine-tipped tweezers. A clean cloth is also useful for wiping glass.
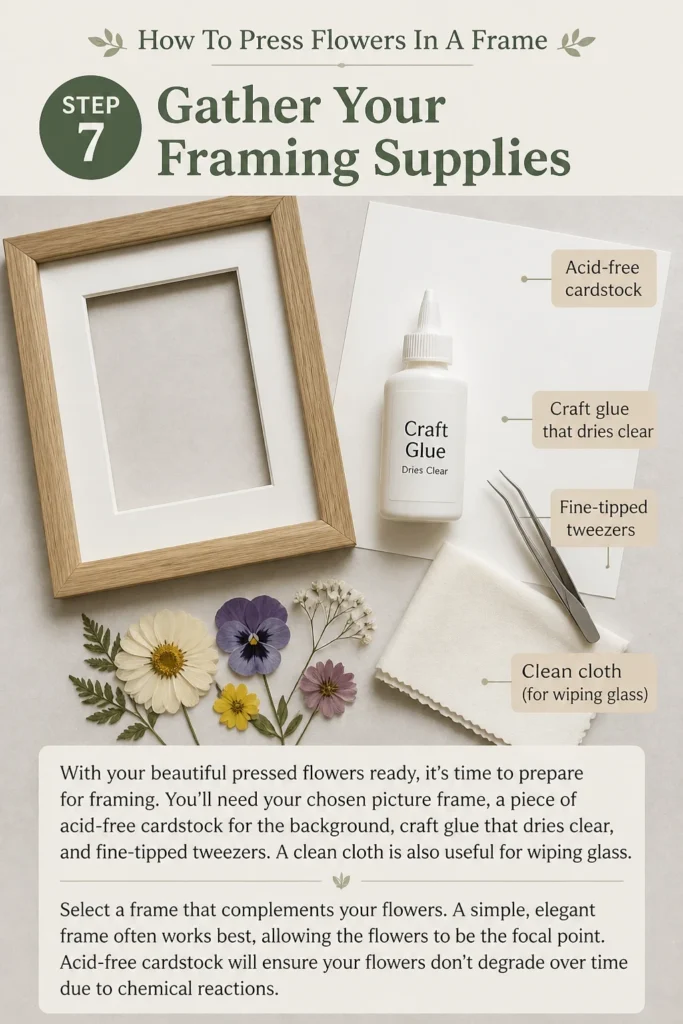
Select a frame that complements your flowers. A simple, elegant frame often works best, allowing the flowers to be the focal point. Acid-free cardstock will ensure your flowers don’t degrade over time due to chemical reactions.
Step 8: Design Your Floral Layout
Before applying any glue, experiment with different arrangements on your background cardstock. This is the creative heart of the project. Play with various compositions until you find a layout that speaks to you.
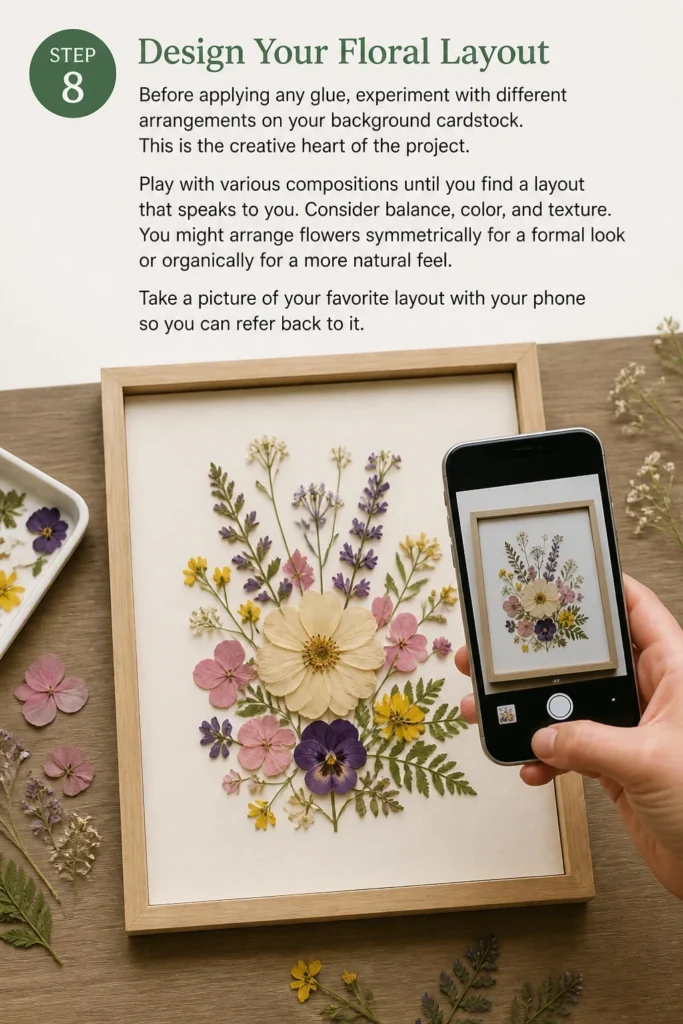
Consider balance, color, and texture. You might arrange flowers symmetrically for a formal look or organically for a more natural feel. Take a picture of your favorite layout with your phone so you can refer back to it.
Step 9: Secure Flowers to the Background
Once you’re happy with your design, it’s time to carefully glue each flower into place. Use a tiny amount of craft glue applied with a toothpick or the tip of a needle. Apply glue to the underside of the flower, typically at its center or along the main stem.
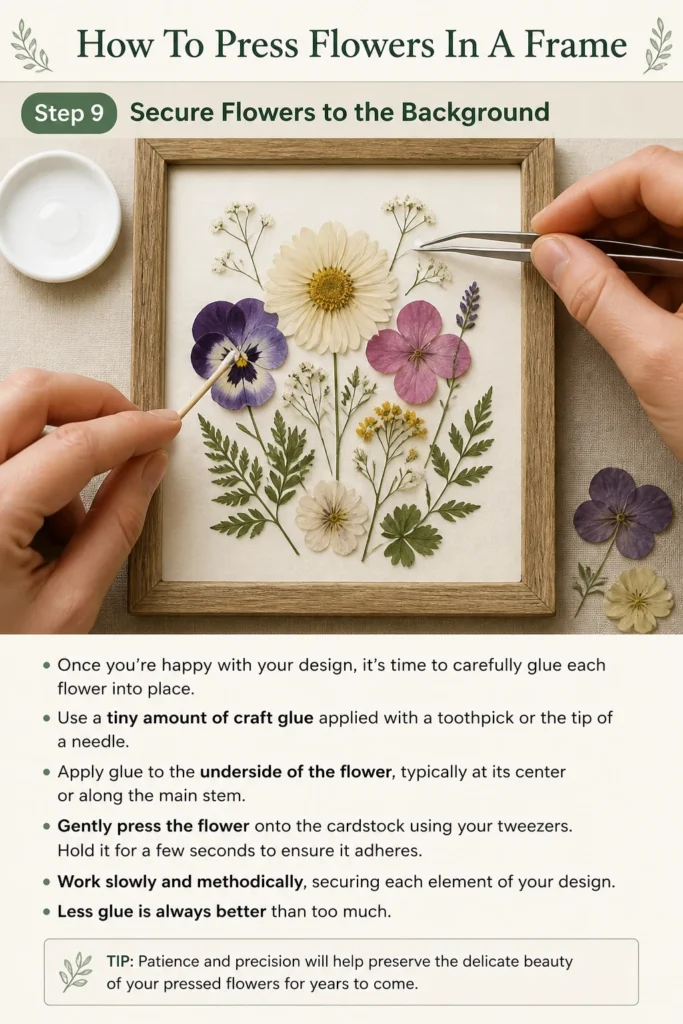
Gently press the flower onto the cardstock using your tweezers. Hold it for a few seconds to ensure it adheres. Work slowly and methodically, securing each element of your design. Less glue is always better than too much.
Step 10: Assemble Your Frame
With all your flowers securely glued and the glue completely dry, it’s time to assemble your framed artwork. First, ensure the glass of your frame is immaculately clean. Dust and fingerprints will be very noticeable.
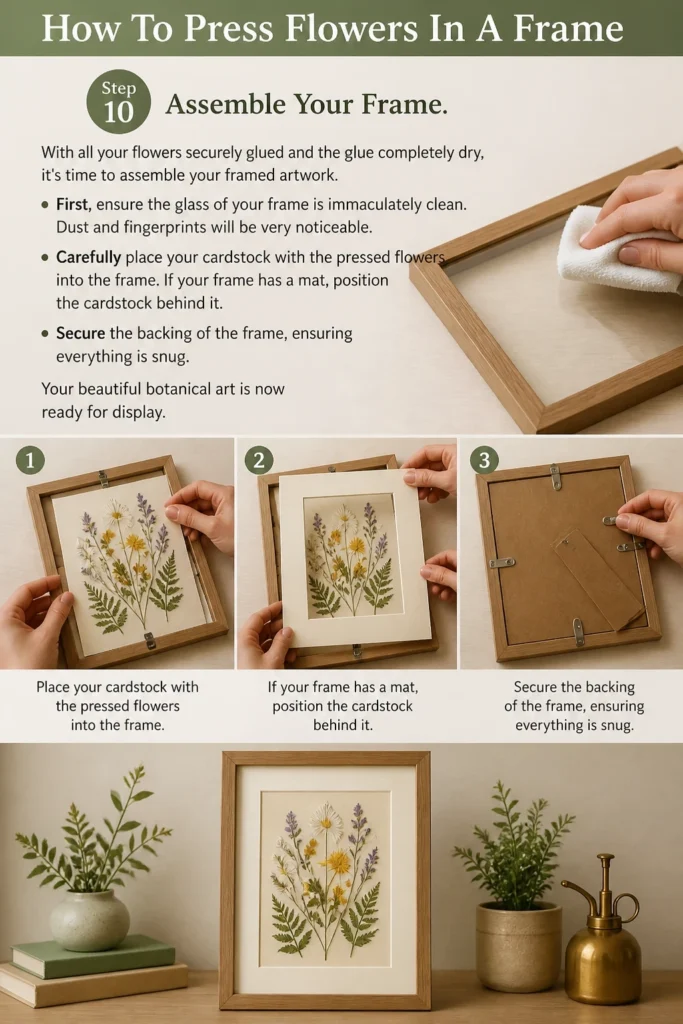
Carefully place your cardstock with the pressed flowers into the frame. If your frame has a mat, position the cardstock behind it. Secure the backing of the frame, ensuring everything is snug. Your beautiful botanical art is now ready for display.
Common Mistakes to Avoid
Pressing Wet or Damp Flowers
One of the most common pitfalls is attempting to press flowers that still have moisture on them, either from dew, rain, or being freshly watered. This excess moisture becomes trapped, creating an ideal environment for mold and mildew to grow. Your flowers will likely turn brown, become mushy, and be ruined. Always ensure your flowers are completely dry to the touch before placing them in the press.
Not Using Absorbent Paper
Simply placing flowers between book pages without any absorbent paper is a recipe for disaster. The moisture from the flowers will transfer directly to the book pages, potentially staining and warping them. More importantly, the flowers won’t dry effectively, increasing the risk of mold. Always use layers of blotting paper, newspaper, or thick paper towels to draw out moisture and protect your flowers and books.
Insufficient Pressure
If you don’t apply enough consistent pressure, your flowers won’t flatten properly. They might curl, wrinkle, or retain their original three-dimensional shape, which is not ideal for framing. The goal of pressing is to remove moisture and create a flat, two-dimensional specimen. Make sure your flower press is tightened firmly or that you have a substantial stack of heavy books providing even weight across the entire pressing area.
Rushing the Drying Process
Patience is paramount in flower pressing. Trying to rush the drying process by using heat or removing flowers too early can lead to brittle, crumbling flowers or incomplete drying. Flowers that are removed before they are fully dry will reabsorb moisture from the air, becoming limp and eventually molding. Allow the full recommended time for drying, and only remove flowers when they feel completely papery and stiff.
Troubleshooting
Flowers are Molding or Turning Brown
If you notice mold or a significant browning beyond a natural color change, it usually indicates excess moisture. This can happen if the flowers were too wet when pressed, or if the absorbent paper wasn’t changed frequently enough.
To prevent this, ensure flowers are completely dry before pressing. During the pressing process, replace damp absorbent paper with fresh, dry sheets every few days, especially during the first week. If mold appears, unfortunately, those flowers are likely ruined and should be discarded to prevent contamination of other pressed blooms.
Flowers Aren’t Flattening Properly
If your pressed flowers are still lumpy, curled, or not uniformly flat, the most likely issue is insufficient or uneven pressure. The weight needs to be consistent across the entire flower and pressing area.
Ensure your flower press screws are tightened firmly and evenly, or that your stack of books is heavy and stable. You might also check if the flowers were arranged properly; very thick parts of a flower can sometimes prevent overall flattening. Re-press with more weight or adjust the flower’s position.
Petals are Falling Off or Crushing
This problem often arises from over-drying, making the flowers extremely brittle, or from handling them too roughly. Pressed flowers become very delicate once dry, almost like thin paper.
Always use fine-tipped tweezers when handling dried flowers to minimize direct contact and pressure from your fingers. When applying glue, use the smallest amount possible, applied to a sturdy part of the flower. If flowers are consistently crumbling, try reducing the pressing time slightly for future batches, aiming for just dry enough to be stable.
Key Takeaways
- Patience is essential for successful flower pressing, allowing adequate time for complete drying.
- Proper flower selection and preparation prevent common issues like mold and incomplete flattening.
- Regularly changing absorbent paper during pressing is crucial for effective moisture removal.
- Experiment with your floral layout before gluing to create a balanced and appealing design.
- Handle dried flowers with extreme care, using tweezers to avoid damage to delicate petals.
- Use minimal, clear-drying glue to secure flowers, ensuring a clean and professional finish.
Frequently Asked Questions
What are the best flowers to press for framing?
The best flowers for pressing are generally those with naturally flat petals and less moisture content. Excellent choices include pansies, violas, cosmos, single-petal roses, ferns, and small daisies. Avoid very thick flowers like tulips or orchids, as they are difficult to dry evenly and are more prone to molding.
How long does it typically take for flowers to press completely?
The pressing time varies significantly depending on the type and thickness of the flower, as well as the humidity of your environment. Generally, most flowers take between one to four weeks to dry completely. Thinner flowers might be ready in a week, while thicker ones could take up to a month or longer.
Can I press flowers without a dedicated flower press?
Absolutely! While a dedicated flower press offers excellent results, you can easily press flowers using heavy books. Simply layer your flowers between sheets of absorbent paper (like newspaper or blotting paper) and stack several heavy books on top. Ensure the books provide consistent, even pressure.
How do I prevent my pressed flowers from fading over time?
To minimize fading, keep your framed pressed flowers out of direct sunlight. UV rays are the primary cause of color degradation. You can also use UV-protective glass in your frame, which offers an added layer of protection. While some natural fading is inevitable over many years, these steps will help preserve their color for as long as possible.
Our Top Recommended Finds
- Wooden Flower Press Kit: Perfect for beginners, these kits provide even pressure and absorb moisture effectively, making the pressing process straightforward and successful.
- Acid-Free Cardstock Assortment: Using acid-free paper for your background ensures your beautiful pressed flowers won’t yellow or degrade over time, preserving your artwork for years to come.
- Fine-Tipped Craft Tweezers: Essential for handling delicate pressed flowers without causing damage, these tweezers allow for precise placement and arrangement.
Embrace the Art of Floral Preservation
Creating framed pressed flower art is more than just a craft; it’s a way to capture and cherish nature’s fleeting beauty. Each piece tells a unique story, a memory, or a moment frozen in time. The process is meditative, rewarding, and results in a stunning, personalized display.
Begin your botanical journey today. Gather some flowers, find an old book, and start experimenting. You might be surprised by the incredible artistry you can create with a little patience and care. Let your creativity bloom and transform simple petals into lasting masterpieces.
Beginner-friendly templates, step-by-step guides,
and weekly project ideas in your inbox.