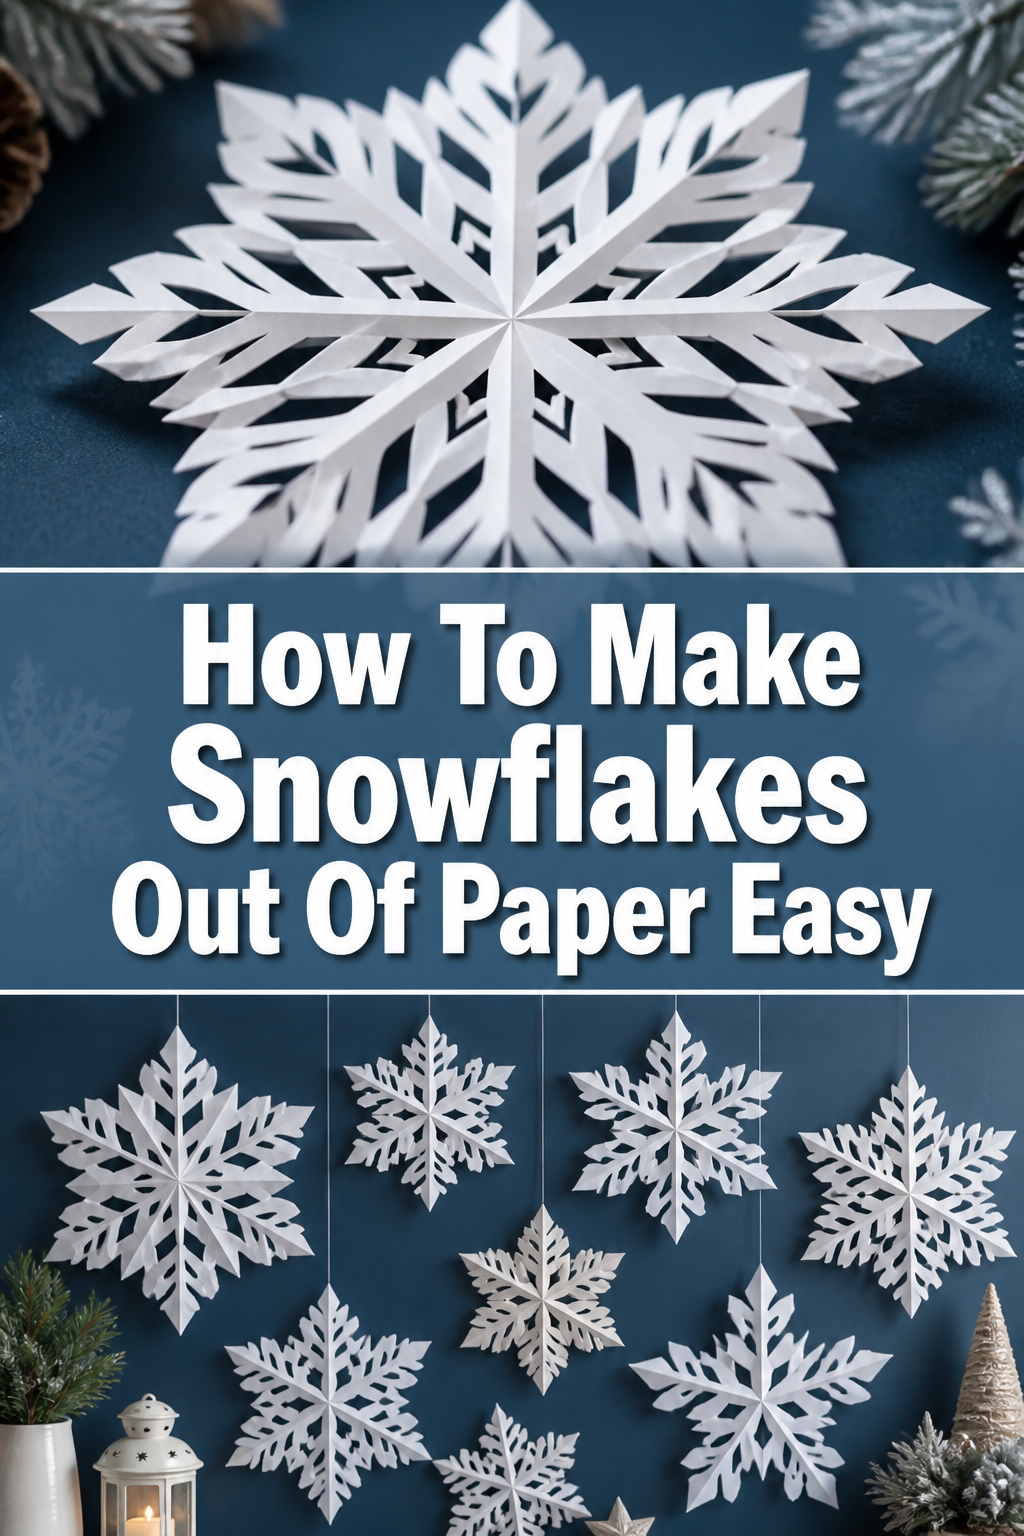
❄️ How To Make Snowflakes Out Of Paper Easy

Beginner-friendly templates, step-by-step guides,
and weekly project ideas in your inbox.
I remember the first time I made a paper snowflake that actually looked like a real one. It felt like magic unfolding a tiny piece of art.
Over the years, I’ve taught countless friends and family members this simple craft. This guide distills all that hands-on experience, making it incredibly easy for you to create beautiful paper snowflakes too.
You’ll soon be crafting intricate designs that bring a touch of winter wonder indoors, no matter the season.
Quick Overview
Get ready to transform a simple sheet of paper into a delicate, unique snowflake. This project is perfect for adding festive decor or just enjoying a relaxing craft session.
- Time needed: 10-20 minutes per snowflake (depending on design complexity)
- Difficulty: Beginner
- What you’ll need: Paper, scissors, a flat surface
Step-by-Step Instructions
Step 1: Gather Your Materials
Before you begin, ensure you have everything within reach. A clear workspace makes the process much smoother and more enjoyable.
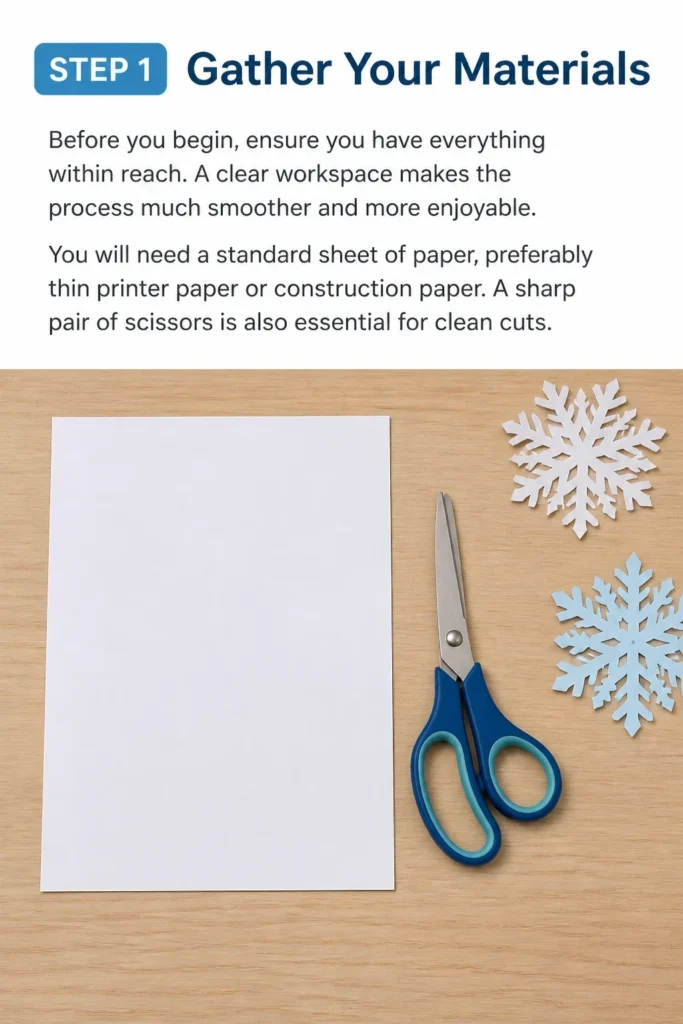
You will need a standard sheet of paper, preferably thin printer paper or construction paper. A sharp pair of scissors is also essential for clean cuts.
Step 2: Prepare Your Square Paper
Most snowflakes start from a perfect square. If you have letter-sized paper, you’ll need to make it square.
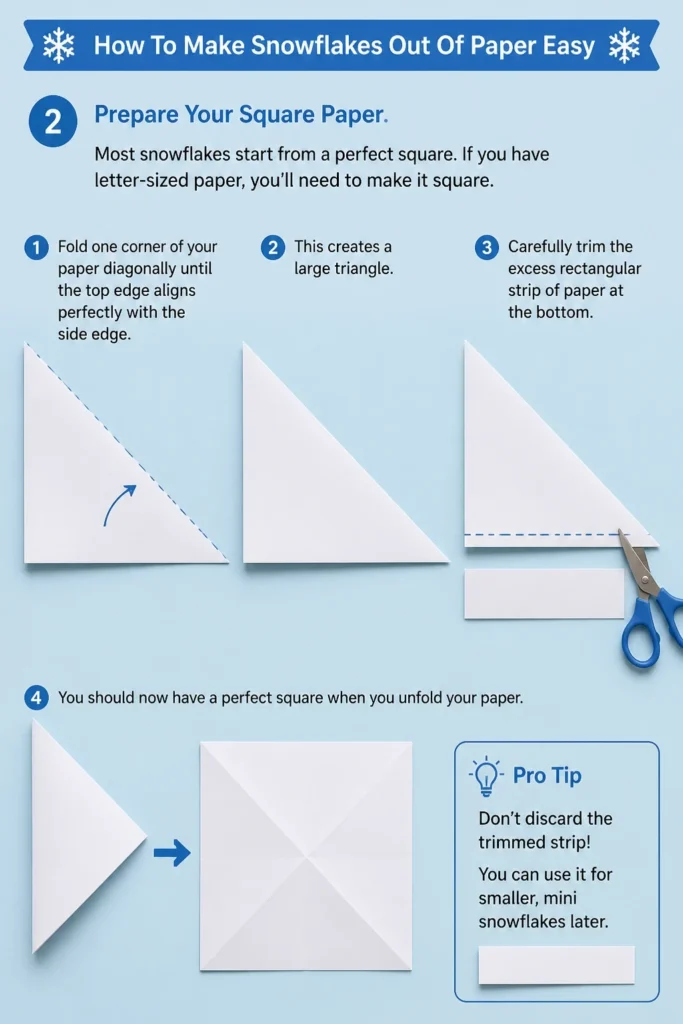
Fold one corner of your paper diagonally until the top edge aligns perfectly with the side edge. This creates a large triangle.
Carefully trim the excess rectangular strip of paper at the bottom. You should now have a perfect square when you unfold your paper.
Pro Tip: Don’t discard the trimmed strip! You can use it for smaller, mini snowflakes later.
Step 3: Create the Initial Triangle Fold
With your square paper, fold it in half diagonally. This means bringing one corner directly to its opposite corner.
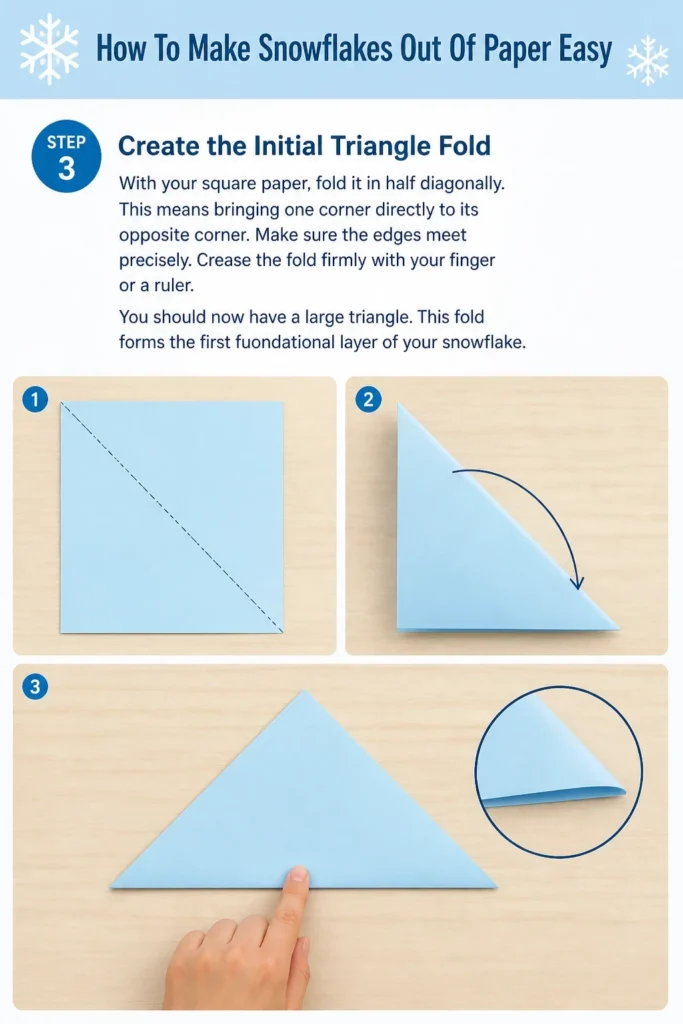
Make sure the edges meet precisely. Crease the fold firmly with your finger or a ruler.
You should now have a large triangle. This fold forms the first foundational layer of your snowflake.
Step 4: Fold Into a Smaller Triangle
Take your large triangle and fold it in half again. Bring the two acute angles together.
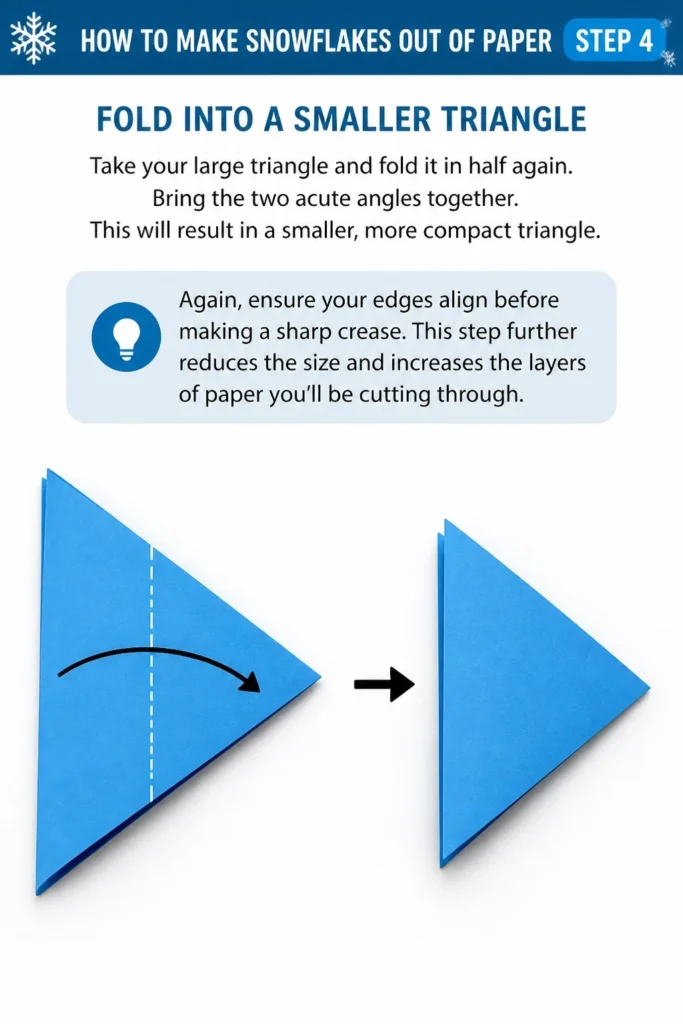
This will result in a smaller, more compact triangle. Again, ensure your edges align before making a sharp crease.
This step further reduces the size and increases the layers of paper you’ll be cutting through.
Step 5: The “Ice Cream Cone” Fold
This is often the trickiest but most crucial fold for a symmetrical snowflake. Position your small triangle so the longest edge (the hypotenuse) is at the bottom.
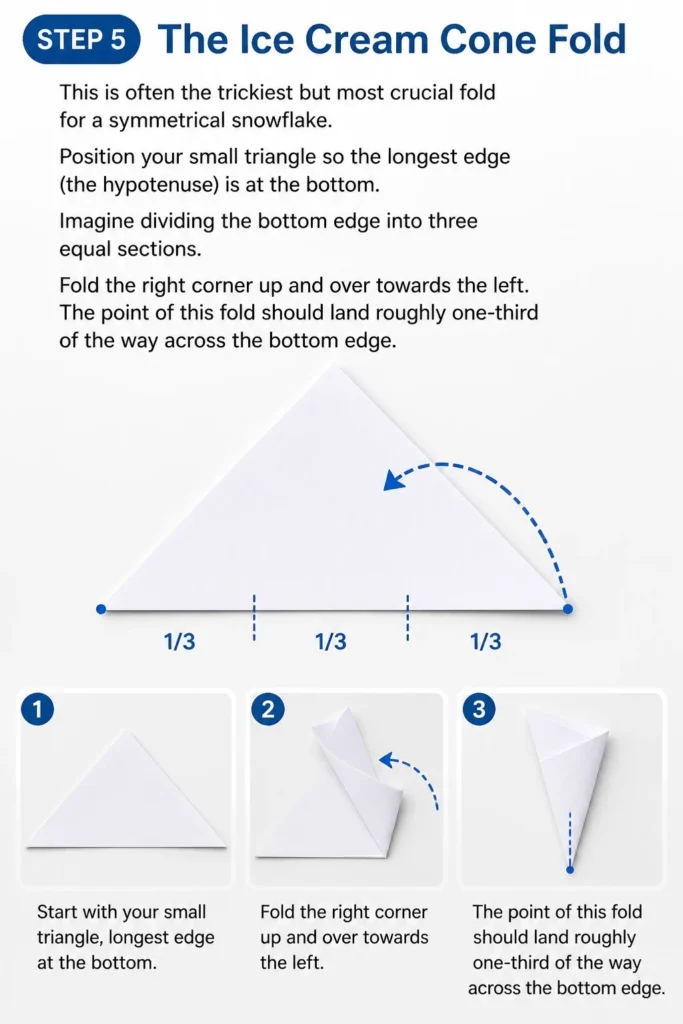
Imagine dividing the bottom edge into three equal sections. Fold the right corner up and over towards the left.
The point of this fold should land roughly one-third of the way across the bottom edge.
Step 6: Complete the Cone Shape
Now, take the left corner of your folded paper. Fold it up and over the previous fold.
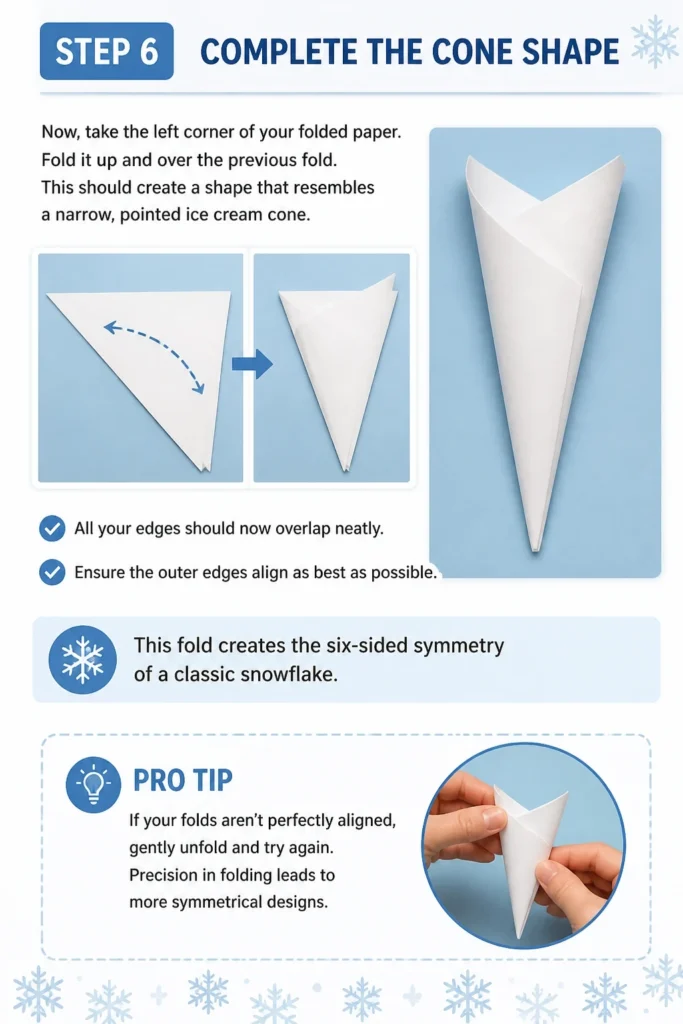
This should create a shape that resembles a narrow, pointed ice cream cone. All your edges should now overlap neatly.
Ensure the outer edges align as best as possible. This fold creates the six-sided symmetry of a classic snowflake.
Pro Tip: If your folds aren’t perfectly aligned, gently unfold and try again. Precision in folding leads to more symmetrical designs.
Step 7: Trim the Top Edge
With your “ice cream cone” shape, you’ll notice an uneven top edge. This needs to be leveled.
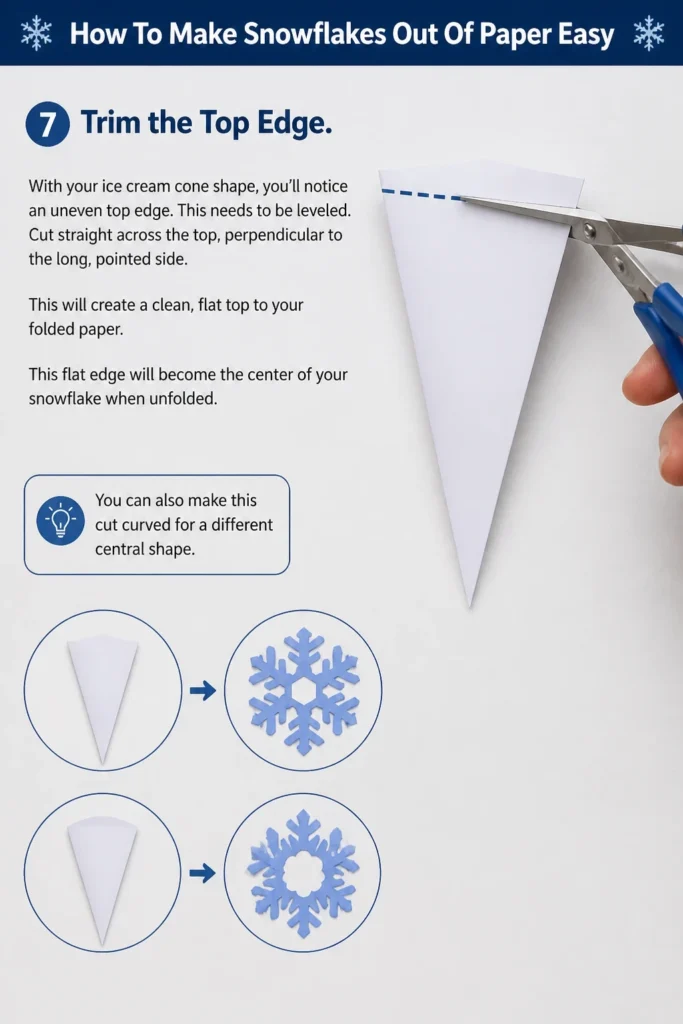
Cut straight across the top, perpendicular to the long, pointed side. This will create a clean, flat top to your folded paper.
This flat edge will become the center of your snowflake when unfolded. You can also make this cut curved for a different central shape.
Step 8: Start Cutting Your Design
Now for the fun part: cutting! Remember, you are only cutting away paper from the folded edges.
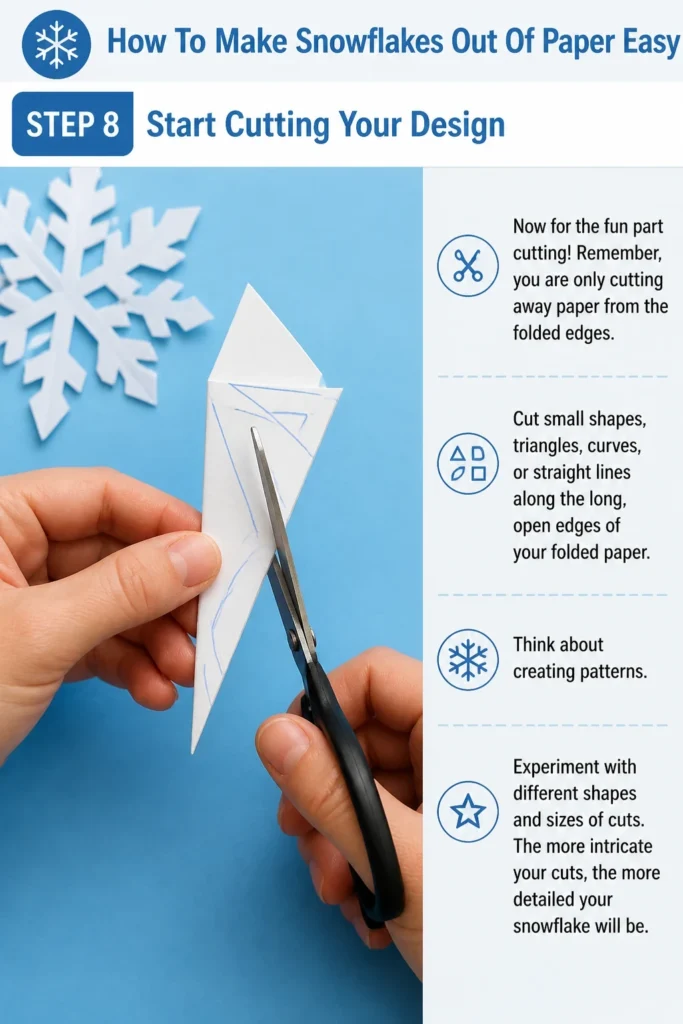
Cut small shapes, triangles, curves, or straight lines along the long, open edges of your folded paper. Think about creating patterns.
Experiment with different shapes and sizes of cuts. The more intricate your cuts, the more detailed your snowflake will be.
Step 9: Cut the Point
The very tip of your “ice cream cone” will form the center of your snowflake. You can shape this point.
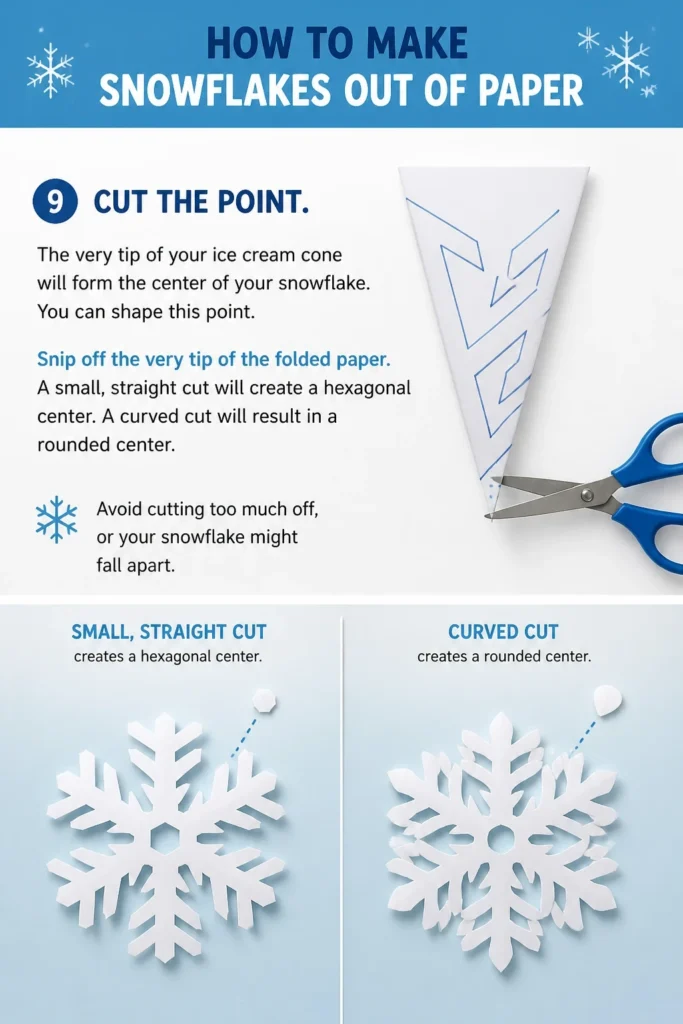
Snip off the very tip of the folded paper. A small, straight cut will create a hexagonal center.
A curved cut will result in a rounded center. Avoid cutting too much off, or your snowflake might fall apart.
Step 10: Unfold Your Masterpiece
Carefully and slowly unfold your paper. Take your time to gently open each crease.
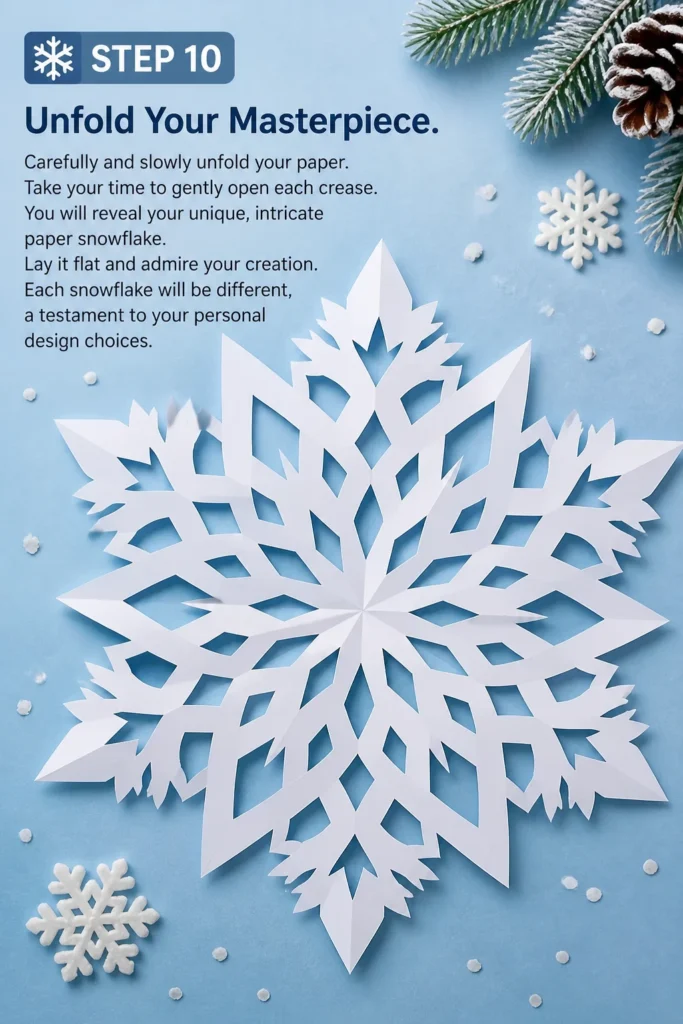
You will reveal your unique, intricate paper snowflake. Lay it flat and admire your creation.
Each snowflake will be different, a testament to your personal design choices.
Common Mistakes to Avoid
Cutting Too Much Off
A common pitfall is getting overzealous with the scissors. If you cut too deeply into the folded paper, especially near the center or along the main folds, your snowflake might separate into pieces.
Always aim for small, controlled snips. Think about removing just a bit of paper at a time. It’s easier to cut more off than to add paper back.
Uneven Folds
Precision in folding is key to a symmetrical snowflake. If your initial square isn’t perfect, or your diagonal folds are misaligned, your snowflake will appear lopsided.
Take an extra moment to align edges perfectly before creasing. A sharp, crisp crease also helps maintain the structure.
Dull Scissors
Trying to cut through multiple layers of paper with dull scissors can be frustrating. It leads to ragged edges and makes intricate cuts difficult.
Always use sharp scissors for this project. They will glide through the paper, giving you clean, precise lines.
Not Varying Cuts
Some beginners tend to make the same type of cuts repeatedly. This can result in a less interesting or repetitive design.
Experiment with different shapes – small triangles, long slits, delicate curves, and jagged edges. Mix up your cutting techniques to create a truly unique pattern.
Troubleshooting
My Snowflake Isn’t Symmetrical
If your snowflake looks uneven, it’s usually due to misaligned folds in the initial steps. The “ice cream cone” fold (Steps 5 and 6) is particularly crucial for symmetry.
Carefully re-check your folds, ensuring all edges meet perfectly before creasing firmly. Practice will improve your folding precision.
My Snowflake Fell Apart When Unfolding
This happens when too much paper is cut away, especially near the central point or along the main folded edges that hold the snowflake together. You might have cut through a critical support area.
Next time, try making smaller cuts, leaving more paper intact between your designs. Ensure the very tip (the center) has enough paper to hold it all together.
The Edges Are Ragged
Ragged edges are a sign that your scissors might be dull or you’re trying to force a cut. Dull blades tear the paper instead of cutting cleanly.
Try using a sharper pair of scissors. Also, make sure you’re cutting with confidence and not sawing back and forth, which can also fray the paper.
Key Takeaways
- Always start with a perfectly square piece of paper for the best results.
- Precision in folding is crucial for creating a symmetrical and beautiful snowflake.
- Use sharp scissors to ensure clean, crisp cuts and intricate designs.
- Experiment with a variety of cuts – triangles, curves, and straight lines – to create unique patterns.
- Don’t cut too much paper, especially near the center or along the main folds, to prevent your snowflake from falling apart.
- Unfold your finished snowflake slowly and gently to avoid tearing.
Frequently Asked Questions
What kind of paper is best for making snowflakes?
Thin paper, like standard printer paper (20 lb bond) or even tissue paper, works best. It’s easier to fold multiple layers and cut through them. Thicker paper, like cardstock, can be very difficult to cut.
Can children make paper snowflakes?
Absolutely! This is a fantastic craft for children. Younger children might need help with the initial folds and closer supervision with scissors. Older children can often follow the steps independently and enjoy designing their own patterns.
How can I make my snowflakes unique?
The key to unique snowflakes lies in experimenting with your cuts. Try different shapes, sizes, and placements of your snips. Vary the depth of your cuts and how much you remove from the edges versus the center. Each cut contributes to a distinct pattern.
How do I store paper snowflakes?
Paper snowflakes are delicate. To store them, gently flatten them and place them between sheets of tissue paper or wax paper. Then, store them in a flat box or a large envelope to prevent creasing and tearing.
Our Top Recommended Finds
- Standard White Printer Paper: Inexpensive and perfect for practice and final designs.
- Craft Scissors with Sharp Blades: A good quality pair makes all the difference for clean cuts.
- Cutting Mat: Protects your surfaces and provides a non-slip base if you’re using a craft knife for very intricate details (though not strictly necessary for beginners).
Unfold Your Creative Potential
Making paper snowflakes is more than just a craft; it’s a delightful way to practice mindfulness and create something beautiful from simple materials. Each unfolding reveals a unique design, a tiny piece of winter magic made by your own hands.
So, grab some paper and scissors today. Follow these easy steps, and soon you’ll have a flurry of delicate snowflakes adorning your windows, walls, or gifts. This simple activity is a wonderful way to brighten any day, bringing a touch of intricate beauty to your surroundings.
Beginner-friendly templates, step-by-step guides,
and weekly project ideas in your inbox.